You’ll diagnose flickering dash lights, erratic speedo, P0500 codes, or high voltages near 16.6 V as likely alternator/regulator issues, then decide if you’ll DIY. Gather 12/14/10 mm sockets, flex‑head wrench, breaker bar, torque wrench, jack stands, gloves and glasses. Disconnect the negative battery, remove the splash shield, relieve serpentine tension, and unbolt the power‑steering pump to clear access. Extract the alternator by aligning dowel pins, install the new unit to torque specs, verify ~14 V output, and continue for full procedural steps.
Quick Diagnosis and DIY Feasibility (Symptoms and Overvoltage Signs)
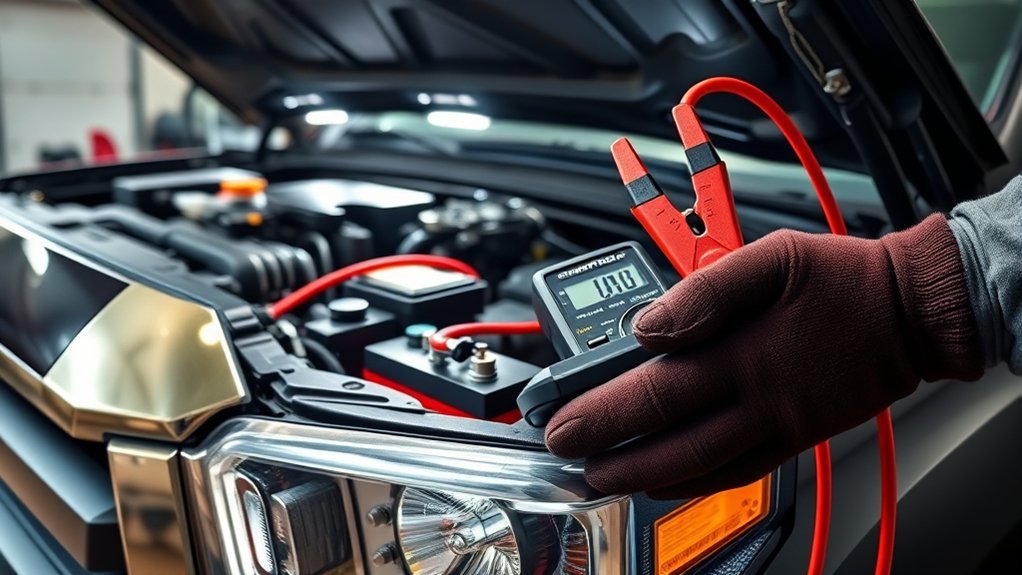
If your 2011 Tundra shows flickering dash lights, an erratic speedometer and a persistent P0500 code, suspect the alternator and act quickly to avoid electrical damage. You’ll prioritize diagnostic techniques that isolate source and severity: visual inspection, load checks, and systematic voltage testing with a quality voltmeter. At idle, a nominal ~14 V suggests charging, but peak readings near 16.59 V reveal an overvoltage fault that can cook the battery and electronics. Non-functioning headlights and erratic gauges combined with high readings confirm an alternator regulator or internal diode failure. You’ll evaluate DIY feasibility soberly—access is constrained by the alternator’s deep location and the likely need to remove ancillary components like the power steering pump. If you proceed, plan detailed steps, fasteners, and torque specs, then verify output after installation; a stable ~14 V under normal load restores system health. This methodical approach frees you from uncertainty and prevents cascading electrical loss.
Tools, Parts, and Safety Gear for a Tundra Alternator Swap
Preparation starts with a compact kit of precise tools, parts, and safety gear so you can remove and install the alternator efficiently and safely. In your tools overview, gather a 12 mm and 14 mm socket, a flex-head ratcheting wrench, breaker bar, and torque wrench to tighten mounting bolts to spec. Include a jack and jack stands to secure the truck while you access the alternator deep in the engine bay. Wear gloves and safety glasses as basic safety protocols against debris and electrical exposure.
- Tools: 12 mm, 14 mm, flex-head ratcheting wrench, breaker bar, torque wrench.
- Parts: compatible alternator (100/130/150 A), new mounting hardware, serpentine belt routing diagram.
- Safety: gloves, safety glasses, jack and jack stands.
You’ll work methodically: verify alternator amperage choice, replace mounting hardware, and follow safety protocols. This compact, precise setup lets you reclaim control and finish the swap with confidence.
Prepare the Truck: Disconnect Battery, Lift Points, Splash Shield
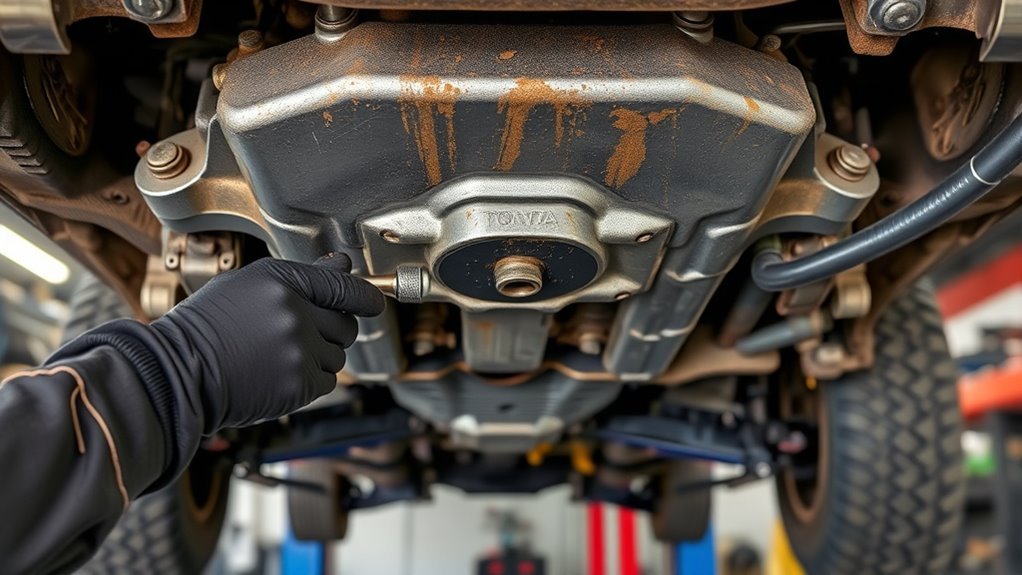
Before you start, disconnect the negative battery terminal to remove power from the electrical system. Then raise the Tundra on jack stands at the manufacturer-specified lift points on a level surface to gain safe access underneath. Finally, unbolt and remove the splash shield with a 12 mm socket to expose the serpentine belt and alternator area.
Disconnect The Battery
Start by disconnecting the negative battery terminal and securing the vehicle for underbody access: park on a flat surface, set the parking brake, jack up the front, and place jack stands at the manufacturer’s lift points. For battery safety and clear electrical precautions, remove the negative cable first, tuck it away to avoid contact, then remove the positive if needed. Gather tools and keep them organized.
- Unscrew negative terminal, isolate cable to prevent accidental contact.
- Confirm parking brake, wheels chocked, jack stands solid before crawling under.
- Remove splash shield by undoing 12 mm bolts to expose belt and alternator.
You’ll reduce shock risk and free the workspace. Work deliberately; each secured step increases your freedom to proceed without hazard.
Proper Lift Points
With the negative battery cable removed and the splash shield loosened, position the floor jack under the frame behind each front wheel at the Tundra’s factory lift points and raise the truck until there’s room to place jack stands under the same frame rails; the 2011 Tundra’s recommended lift points sit on the frame just rearward of the front wheel openings. Work methodically: lift one side, set a rated jack stand, then repeat. Verify contact on the solid frame, not on suspension arms or pinch welds. Lower the jack until the stand bears the load, then tug the vehicle to confirm vehicle stability. Maintain lift safety by using matched stands on level ground and chock rear wheels. Only proceed when the truck is secure and stable for alternator access.
Remove Splash Shield
1.
Before you remove the splash shield, disconnect the battery and lift the truck on jack stands at the proper lift points. You’ll work methodically to free the shield and open clear access points to the serpentine belt and alternator.
- Use a 12 mm socket to remove bolts securing the splash shield or skid plate.
- Support the shield as you unfasten hardware to prevent drops and damage.
- Organize removed bolts and tools in trays so parts are reachable and reinstallation is swift.
Carefully detach the splash shield to expose the alternator and belt. Keep components organized, maintain clear access points, and proceed with confidence—this controlled, deliberate step gives you the freedom to complete the alternator replacement safely and efficiently.
Release and Route the Serpentine Belt: Tensioner Access Steps
Raise the Tundra and secure it on jack stands so you can work safely underneath; you’ll use a 14 mm breaker bar to relieve tension on the serpentine belt from below. With the vehicle supported, remove the splash shield or skid plate by extracting the 12 mm bolts to expose the tensioner. Insert the 14 mm breaker bar into the tensioner square and apply steady force to rotate it, performing the tensioner adjustment from below so the belt loosens. Hold the tensioner away and slip the belt off the desired pulley.
Reference the manufacturer’s diagram for exact belt routing and methodically guide the belt around each pulley, verifying the serpentine sits in all grooves. Once routed correctly, release the breaker bar slowly to allow the tensioner to seat the belt. Inspect each pulley for proper seating and alignment. You’ll now have clear access for alternator work while maintaining a liberated, controlled workflow.
Remove Power Steering Pump for Alternator Access
You’ll start by removing the pump’s top bolt and the two electrical connectors to free the assembly. Use a pry bar through the pulley access to ease the pump out, then secure it with a bungee cord to hold it clear of the alternator path. Reposition the restrained pump as needed to provide unobstructed access for alternator removal, ensuring the truck is lifted and supported on jack stands.
Pump Bolt Removal
Loosen and remove the pump’s top bolt and the two electrical connectors to begin freeing the power steering pump for alternator access; you’ll need to view the mounting bolt through the pulley opening and use a pry bar to lever the pump free from its bracket. Work methodically: lift and secure the truck on jack stands, wear eye protection, and follow pump maintenance best practices to avoid contaminating the power steering system. After unbolting, don’t yank—pry incrementally until the pump clears its mount.
- Confirm vehicle stability and disconnect battery negative.
- Remove top bolt, unplug two connectors, access bolt via pulley, use pry bar.
- Maneuver pump out enough to create alternator clearance; keep parts organized.
Securing Pump Out
With the top bolt removed and the connectors unplugged, secure the pump out of the way by prying it gently from its bracket and supporting it with a bungee cord so it won’t flop back into the work area. You’ll use a pry bar to achieve controlled movement; don’t lever abruptly. Maintain pump stability as you free the unit from its mount and route the bungee cord to a solid anchor point on the engine bay. Keep the pump suspended high enough to clear the alternator access path but low enough to avoid stressing hoses. Confirm vehicle is safely lifted and on jack stands before applying force. With the pump restrained, you’ll have clear access to the 12 mm socket location for detaching the alternator bracket.
Repositioning For Alternator
Before you remove the alternator, free up working space by taking out the power steering pump; disconnect the battery, remove the splash shield, and relieve belt tension with a 14 mm breaker bar so you can slip the serpentine belt off. You’ll gain access and improve alternator efficiency during removal.
- Remove top bolt and unplug two electrical connectors from the power steering pump.
- Rotate the pulley to expose and remove the hidden bolt; extract the pump body carefully.
- Secure the pump with a bungee cord out of the work area to keep lines undisturbed.
Work methodically: confirm battery isolation, keep fasteners organized, and avoid hose strain. This repositioning liberates space, reduces interference, and lets you extract the alternator cleanly and safely.
Disconnect Alternator Wiring and Remove Mounting Bolts Safely
Disconnect the negative battery terminal to eliminate any risk of shorts or shocks, then remove the alternator’s electrical connections using a 10 mm socket—squeeze the connector tabs and pull the main wire free. Maintain wiring safety by identifying connector types (ring terminal, snap plug) before handling; label or photograph them to preserve routing and prevent reassembly delay. With electricals clear, use a 12 mm ratcheting wrench to unbolt the accessory bracket securing the alternator. Reach top bolts using a 14 mm socket on a long extension; this gives straight access without forcing alignment. For constrained lower fasteners, employ a flex-head ratcheting wrench to remove them cleanly. Work methodically: loosen bolts incrementally to avoid binding, then back them out fully once the unit is free. Confirm the alternator is loose and free from the mount before any extraction attempt. This approach keeps you in control, reduces risk, and preserves parts for a confident, liberated reinstall.
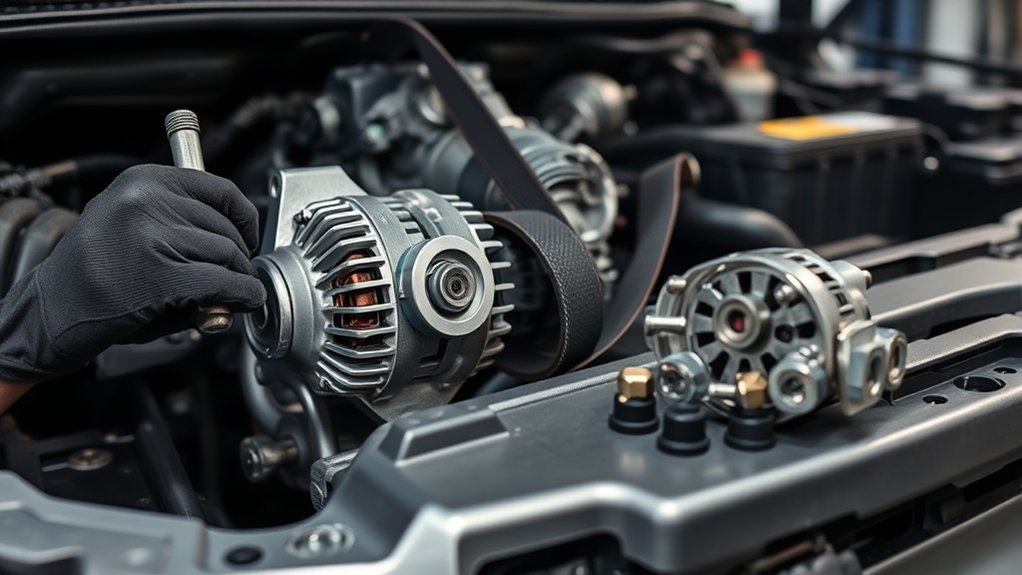
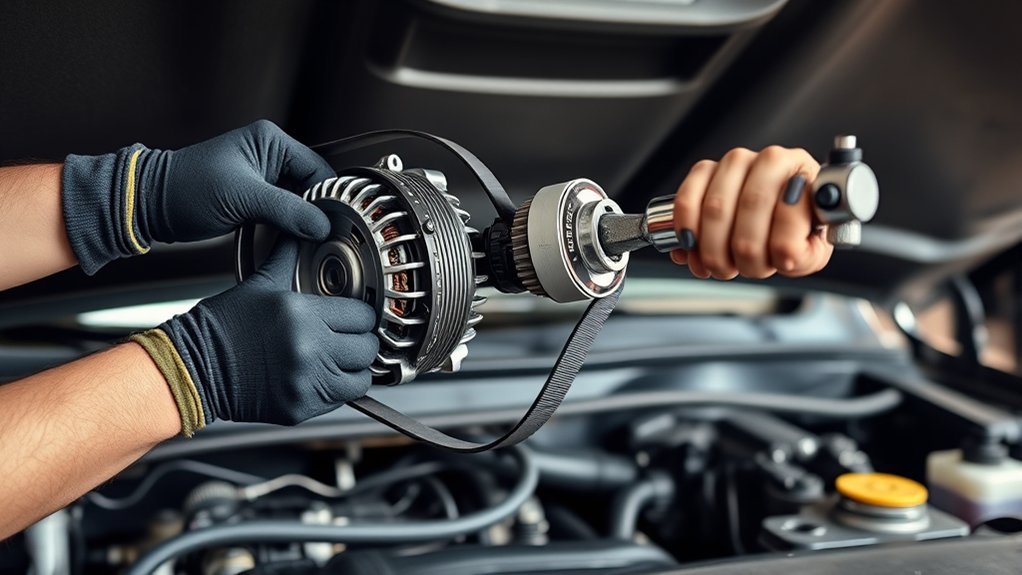
Extract Alternator: Dowel Alignment, Removal Angles, Tips
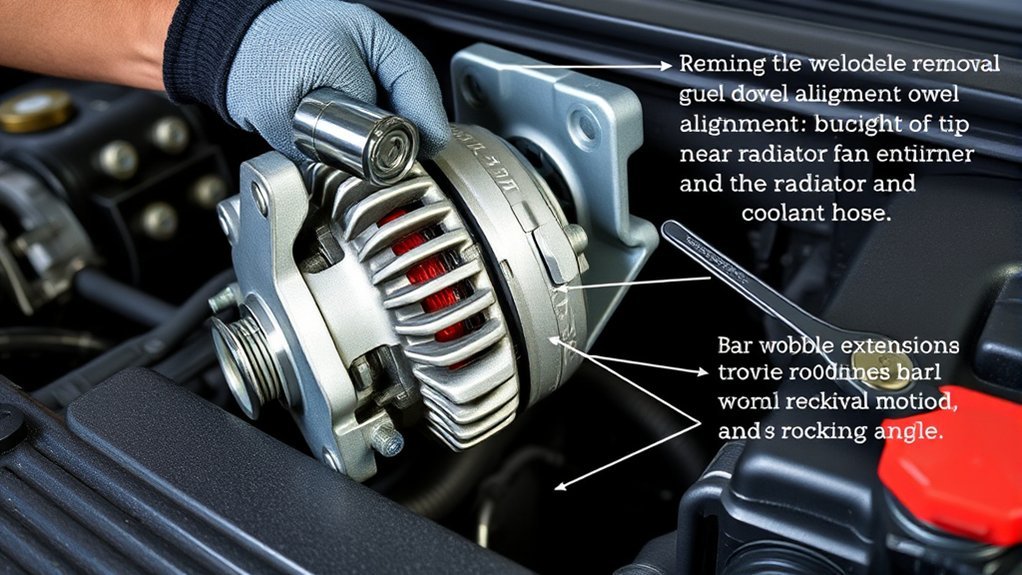
Loosen the last mounting bolt while keeping the alternator supported so you can pivot it around the dowel pins without dropping the sway bar; align the alternator’s locating dowels with their engine-block recesses and tilt the body at shallow angles to clear wiring, hoses, and the sway-bar link as you ease it out. You’ll maintain control by keeping the unit loose until the final bolt is removed, giving you freedom to rotate and extract without stressing lines or the sway bar. Use a flex-head ratcheting wrench for low, tight bolts; it’s essential in confined spaces.
- Inspect dowel alignment visually, confirm pins seat in recesses before moving.
- Employ shallow removal angles, pivoting around dowel alignment to avoid snagging hoses.
- Use flex-head ratchet for stubborn lower bolts; keep alternator supported until the last fastener is free.
These removal techniques are deliberate, mechanical acts of liberation—freeing the alternator cleanly while protecting surrounding components and preserving installation alignment.
Install New Alternator: Orientation, Start Bolts, Torque Specs
Orient the new alternator the same way as the old unit so the dowel pins and mounting faces line up accurately. Start the lower-left bolt first by spinning the alternator into position to engage threads, then install and snug the remaining mounting bolts. Use a torque wrench to tighten the mounting bolts to 32 ft·lb and the alternator nut to 7 ft·lb, then secure all electrical connectors and verify about 14 V output with a voltmeter.
Alternator Alignment Tips
When you fit the new alternator, position it exactly as the old unit so mounting holes and electrical connections line up, then seat it on the dowel pins before inserting the bottom-left bolt to hold it steady. You’ll want a disciplined approach: use hand tools to start bolts, reach through the frame for tight access, and keep control while you work.
- Align: confirm orientation matches old unit; verify alternator troubleshooting basics—no binding, correct pulley alignment.
- Secure: hand-start remaining bolts to maintain alignment; don’t force threads, back off if resistance appears.
- Verify: confirm all electrical connections click and feel snug; inspect harness and terminals for clean contact.
This methodical process frees you from repeat adjustments and supports reliable, empowered repair.
Bolt Tightening Torque
Start by positioning the alternator in the exact same orientation as the old unit so its dowel pins seat cleanly, then hand-start all mounting bolts to hold alignment before applying torque. You’ll finger-tighten bolt types to avoid cross-threading, then use a torque wrench. Tighten mounting bolts to 32 ft-lb in a star or sequential pattern to distribute load evenly. After mounting, torque the alternator nut to 7 ft-lb for precise belt loading. Confirm all electrical connections are snug and test output—around 14 volts indicates success. These installation tips free you from doubt, letting you finish with confidence and control.
| Action | Value | Reason |
|---|---|---|
| Mount bolts | 32 ft-lb | Secure fit |
| Alternator nut | 7 ft-lb | Precise belt tension |
| Output target | ~14 V | Charging check |
Reassembly Checks: Wiring, Belt Seating, Torque Verification
Before you finish reassembly, verify the alternator wiring, belt seating, and mounting torque to prevent immediate failures or false diagnostics. Check wiring integrity: confirm all connectors click, wires aren’t pinched, and routing is clear so you won’t chase phantom faults. Confirm belt alignment and seating: follow the serpentine diagram, seat the belt on each pulley, then release the tensioner and remove any holding tools.
Before finishing reassembly, verify alternator wiring, belt seating, and mounting torque to avoid immediate failures.
- Torque sequence — use a torque wrench: alternator mounting bolts to 32 ft·lb, new alternator nut to 7 ft·lb; tighten methodically to avoid distortion.
- Visual inspection — recheck connector engagement, harness clips, and belt alignment; free movement of the tensioner is critical.
- Pre-start checklist — verify no tools remain, wiring is secured, and belt sits fully in grooves.
You’ll act deliberately, freeing yourself from recurring failures through precise checks. These steps reduce risk and let you proceed confidently to verification and road-ready operation.
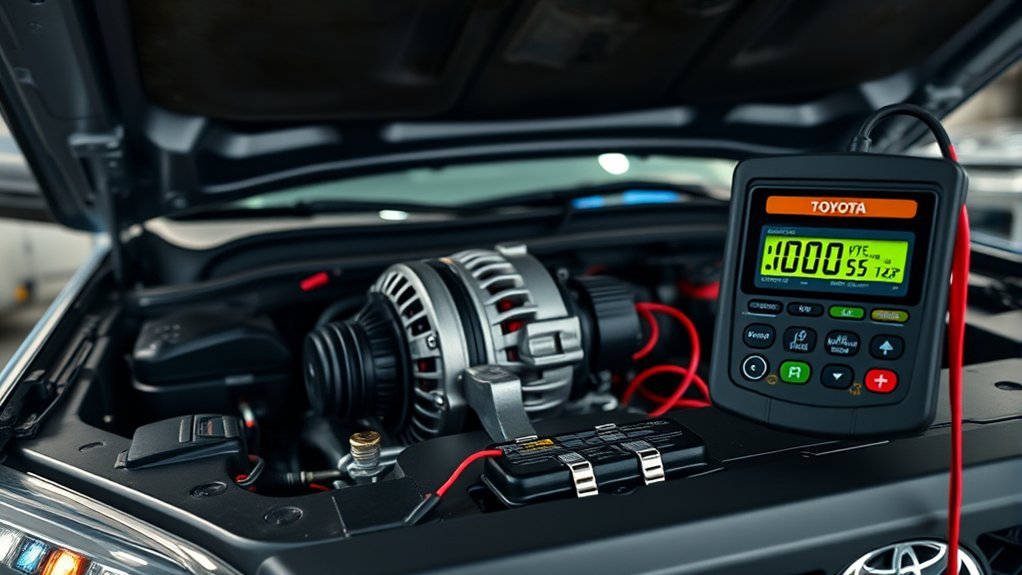
Test and Troubleshoot: Target Voltages, Scan Tool Checks (P0500), Warning Lights
Although you’ve completed mechanical reassembly, you still need to verify electrical performance: connect a voltmeter to the battery with the engine running and expect roughly 14.0 V (anything above 16 V is a fault), monitor the dash for flickering or warning lights, and run a scan tool to check for codes—pay special attention to P0500 (speedometer/signal issues) which can indicate alternator-related voltage instability. You’ll confirm charging by measuring steady output near 14 V under idle and light load. If you see voltage fluctuations, stop and inspect connections, grounds, and harness routing for pinched wires or corrosion. Use the scan tool to clear and then re-scan for error codes; persistent P0500 or other error codes after stabilization points to intermittent supply or regulator faults. Watch the dash: any recurring warning lights during operation mean you haven’t liberated the system from fault conditions. Repair or replace faulty components, re-test, and only return the vehicle when voltage and codes are clean.
Frequently Asked Questions
How Much Does It Cost to Replace the Alternator on a Toyota Tundra?
You’ll pay about $500–$800 total to replace the alternator on a Tundra; parts run $150–$300, labor $100–$200, diagnostics/additional repairs may raise cost — watch alternator symptoms and have replacement tools ready.
How Long Do Tundra Alternators Last?
You’ll typically see 80,000–150,000 miles; alternator lifespan factors include temperature, electrical load, battery health, and inspections. Watch voltage spikes, dimming lights, or charging faults as signs failure so you can act and stay free.
How Long Does It Take to Replace an Alternator in a Toyota?
You’ll typically spend 2–4 hours replacing an alternator, diagnosing alternator symptoms first; use proper replacement tools, remove obstructing components methodically, torque bolts correctly, and test output to confirm electrical liberation and reliable operation.
When Replacing an Alternator, What Else Should Be Replaced?
Replace the serpentine belt, tensioner, idler pulley, and mounting hardware; check battery health and perform wiring inspection; swap corroded connectors and suspect batteries, so your vehicle’s electrical system stays reliable and you stay free from breakdowns.
Conclusion
You’ll finish like a mechanic closing a hatchback at dusk: systematic, hands oily but sure. Check wiring, torque, and belt seating as if aligning stars; secure dowels and bolts to factory specs and reconnect the battery last. Verify charging volts (13.8–14.6V), clear codes with a scan tool, and watch warning lights. If numbers’re off, recheck harness grounds and alternator mount. Reassemble shields and pumps, then road-test to confirm the job’s truly done.