You’ll start by disconnecting the negative battery terminal and securing the truck on jack stands, then remove the passenger wheel for access. Crimp and drain coolant hoses, unbolt the dipstick tube, and remove the heat shield to expose the starter. Support the starter, unfasten mounting bolts, disconnect wiring while noting terminal order, and install the new unit aligned with the transmission. Torque fasteners to spec, reconnect fluids and battery, then run diagnostic checks to confirm operation—more procedural detail follows.
Quick Overview: Tundra 5.7 Starter Replacement Steps
Start by disconnecting the negative battery terminal, then remove the dipstick tube to improve access to the starter area. You’ll observe starter symptoms—clicking, no-crank, or intermittent engagement—that guide troubleshooting techniques. Begin by isolating power and securing the engine bay; then restrict coolant flow with hose crimpers and a collection bucket before detaching coolant hoses if needed for clearance. For 4WD, pop the upper ball joint free and keep slack on the ABS wire so you can lower the knuckle safely to reach the starter. Unbolt the heat shield, then remove the two starter mounting bolts and carefully separate the starter from the transmission housing. Install the replacement, torque hardware to factory spec, and reattach the heat shield. Restore coolant hoses, reposition the dipstick tube, and reconnect the battery. Finally, torque wheel lug nuts to 97 ft·lb on aluminum or 154 ft·lb on steel. Use methodical checks to confirm the symptom is resolved.
Safety Checklist: Tools, PPE, Battery and Coolant Precautions
Gather the required tools and PPE before you start: safety goggles, chemical-resistant gloves, jack stands, socket set, and a collection bucket for coolant. Always disconnect the negative battery terminal and secure the truck on jack stands to prevent electrical shorts and crush injuries. When you open coolant lines, catch fluid with the bucket, keep acids off skin and eyes, and have a neutralizer ready for spills.
Required Tools & PPE
Before you remove the starter, make certain you have the right tools and PPE: a matched socket and wrench set with an extension and swivel, hose crimpers, and a torque wrench for final mounting bolts, plus safety goggles, gloves, and steel-toed boots. You’ll disconnect the negative battery terminal before work to eliminate shock risk. Assemble a collection bucket for any coolant released when hoses are loosened; keep replacement coolant that matches 2007 Tundra specs nearby. Use hose crimpers to limit spills during partial disassembly. Wear goggles and gloves during starter troubleshooting and wiring checks to prevent eye or skin exposure. Torque the mounting bolts to spec on reinstallation. These steps protect you, your workspace, and promote a resilient, liberated repair process.
Battery And Coolant Safety
With your tools and PPE staged and the negative battery terminal already disconnected, focus next on battery and coolant precautions to prevent electrical shorts and toxic spills. You’ll protect yourself and the vehicle by controlling fluids and contaminants: check for battery corrosion and clean terminals with a brush if needed; keep goggles and gloves on; prepare a bucket for coolant; and crimp hoses before loosening clamps to limit flow. After work, refill with the correct coolant types and bleed the system to avoid overheating.
- Inspect battery posts for battery corrosion; neutralize and rinse only with minimal water.
- Wear chemical-resistant gloves and splash goggles.
- Use hose crimpers to isolate coolant hoses before removal.
- Catch drained coolant in a sealed container.
- Refill and bleed the cooling system with specified coolant types.
Lift Truck, Remove Wheel, and Access Dipstick & Coolant Hoses
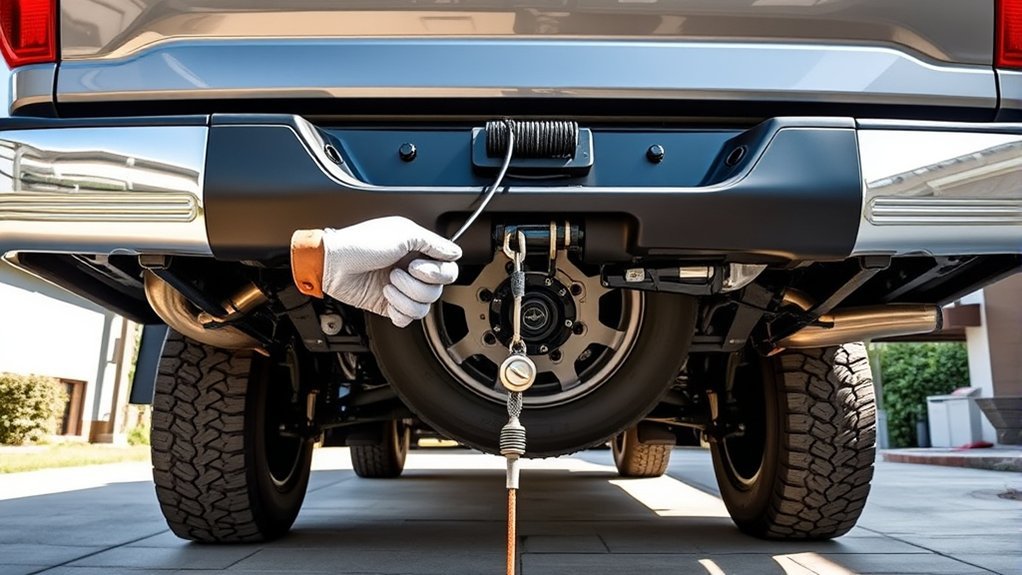
Raise and securely support the front of the Tundra and remove the passenger-side wheel to expose the dipstick tube and coolant hoses for starter access. With the truck lifted and wheel removed, you’ll maintain wheel alignment by noting camber/toe marks and storing fasteners separately. Disconnect the negative battery terminal to eliminate electrical hazard; loosen the wing nut or terminal clamp and set the cable clear. Pull the dipstick, then use an extension and swivel socket to remove the dipstick tube bolt for unobstructed access to the starter area. For coolant management, loosen hose clamps and apply hose crimpers upstream to restrict flow; place a collection bucket under the junction to catch seepage. Verify both coolant lines are loose but not yet fully removed—this positions you to control fluid loss during starter removal. Work decisively and reclaim control: each restraint you remove brings you closer to mechanical freedom.
Drain and Secure Coolant Lines for Starter Access
Now that the wheel and dipstick tube are out of the way and the battery is disconnected, you’ll contain coolant before removing the starter. You’ll use disciplined coolant management and precise hose handling to minimize mess and speed access. Crimp hoses upstream, position a collection bucket, and work deliberately so freedom from spills is guaranteed.
- Use hose crimpers to restrict flow and reduce spill risk.
- Slide off each coolant hose carefully while catching fluid in the bucket.
- Verify both upper and lower coolant lines are fully loose for starter access.
- Keep clamps or replacement clamps ready for reattachment after installation.
- Dispose or recycle captured coolant per local regulations.
Stay focused on procedure: crimp, drain, detach, confirm looseness, secure. You’re liberating access to the starter while protecting the system from contamination and loss. After the new starter’s in, reattach upper and lower hoses securely with clamps to prevent leaks.
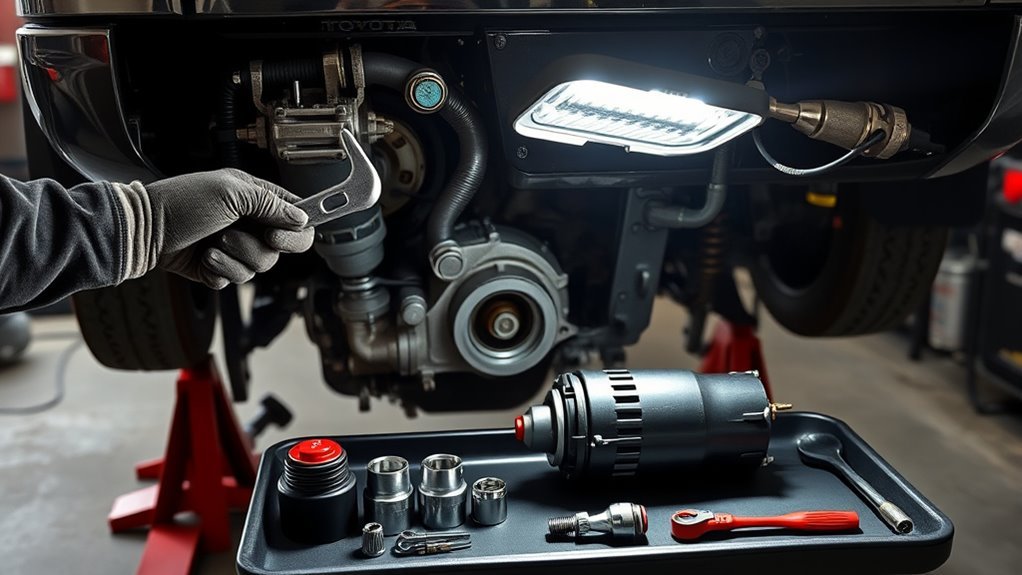
Remove Starter Heat Shield and Mounting Bolts
Locate the three heat shield bolts—two on the bellhousing face and one on the starter flange—and verify their positions before you start. Use a socket wrench with the correct-size socket to break and remove each bolt, keeping torque control to avoid rounding heads. Set the shield and bolts aside in a clean tray, inspect the shield for damage, and note torque specs for reinstallation.
Heat Shield Bolt Locations
Before you unbolt the starter, identify and remove the three heat-shield bolts that secure the shield over the starter; doing this first prevents damage to adjacent components and gives clear access to the starter mounting bolts. You’ll locate three evenly spaced fasteners holding the curved shield. Practice heat shield maintenance and bolt stripping prevention by using the correct socket and a steady ratchet motion.
- Verify bolt positions visually before applying force.
- Use the correct socket size to avoid rounding heads.
- Support the shield as you loosen the final bolt.
- Inspect shield for corrosion or dents once removed.
- Store the shield and bolts together for easy reinstallation.
These steps free you to remove the starter without harming surrounding parts and keep you independent.
Proper Bolt Removal
With the heat shield removed, you’ll expose the starter and its two mounting bolts—mark those bolts with a yellow crayon or similar so you can restore alignment later. Remove the three heat shield fasteners, then lift the shield clear, protecting it from bending; heat shield importance is about protecting wiring and starter from exhaust heat. Back out the starter mounting bolts evenly, supporting the starter as you go to prevent sudden drops that strain wiring. Detach the engine-side mounting bolt last to give wiring slack and control during separation. As you withdraw the starter, perform starter troubleshooting basics: inspect terminal ends and smaller wires for corrosion and intact insulation. Keep components organized so reinstallation restores original alignment and freedom from future failures.
Shield Removal Tips
Start by letting the engine cool until the exhaust area is safe to touch, then use a proper socket set to remove the three heat-shield bolts holding the starter shield to the exhaust housing. You’ll free the shield without stressing adjacent components, take care—metal stays hot. Handle the shield gently, inspect for cracks, corrosion, or deformation that can compromise heat shield maintenance and reduce starter performance. If damaged, replace it.
- Wear gloves and eye protection; avoid burns.
- Use the correct socket size and extensions for access.
- Support the shield as you remove the last bolt to prevent drops.
- Inspect bolt threads and replace stripped fasteners.
- On reinstall, align the shield precisely and torque bolts to spec to prevent rattling and preserve starter performance.
Disconnect Starter Wiring and Clean Corroded Terminals
1. Begin by disconnecting the last wire from the starter using the push tab; this isolates power and follows starter maintenance tips for safe servicing. Carefully detach the wiring cover toward the starter to expose terminals without stressing harnesses. You want clear access to perform electrical connection care properly.
With cover removed, inspect terminal ends and smaller wires. Use a wire brush or contact cleaner to remove corrosion; work methodically so you don’t nick insulation. Clean until metal shows bright, conductive surfaces. While you’re there, check the O-ring gasket on the dipstick tube—replace it if it’s torn or displaced during access.
Reassemble in reverse: reconnect the small signal wire to the starter first, then the larger battery feed. Tighten and seat connectors fully, then perform a gentle tug test to confirm secure attachment. By following these steps you reclaim control over reliability and prevent future electrical issues.
Tundra 4WD: Free Upper Ball Joint and Handle Axle Removal
Now free the upper ball joint by removing the nut and using a ball-joint separator or a controlled hammer strike to pop the joint loose. Before lowering the knuckle, check that the ABS wire and brake hose have enough slack to avoid strain. When driving the axle out, bonk it carefully into the front differential while catching any escaping gear oil in a bucket, then note alignment for reinstallation and torque the upper ball joint nut to 81 ft·lb after sliding the axle back in.
Freeing Upper Ball Joint
Before loosening anything, raise and securely support the Tundra to gain safe access to the front suspension; you’ll loosen the upper ball joint nut first, then use a ball joint separator or a controlled hammer strike to pop the joint from the knuckle. You want clean ball joint maintenance practice: loosen the nut, protect ABS wiring and brake hose, then separate the joint. Lower the knuckle just enough to clear the stud without stressing lines. Confirm knuckle alignment and ball joint orientation before reassembly. After freeing the U-joint, the axle should slide with a gentle tap from the differential.
- Loosen upper ball joint nut first
- Use separator or controlled hammer strike
- Protect ABS wire and brake hose
- Lower knuckle carefully for clearance
- Verify knuckle alignment on reassembly
Driving Out Front Axle
With the upper ball joint freed and the knuckle lowered enough to clear the stud, you can prepare to drive the front axle out of the differential; position a collection bucket under the differential to catch any gear oil that will drain when the axle is pulled. Verify ABS wire and brake hose slack to avoid stretching or damage as you manipulate the hub. Use a drift and a steady hammer stroke to drive the axle flange inward, then pull the axle straight out of the differential yoke. Control oil flow and clean seals as you work—this is essential axle maintenance. When reinstalling after starter work, slide the axle fully into the differential, seat the hub, and torque the upper ball joint nut to 81 ft·lb for correct alignment.
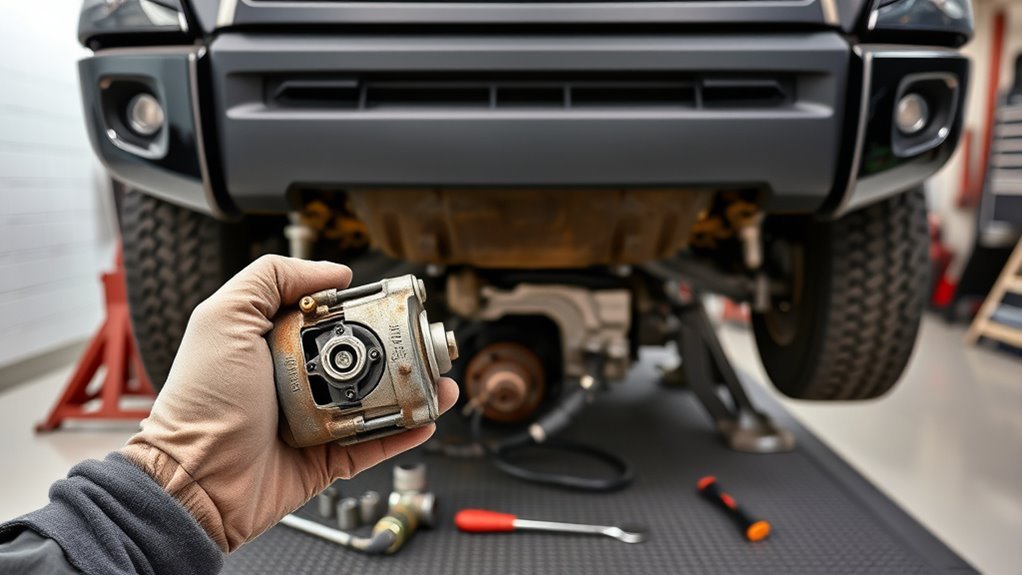
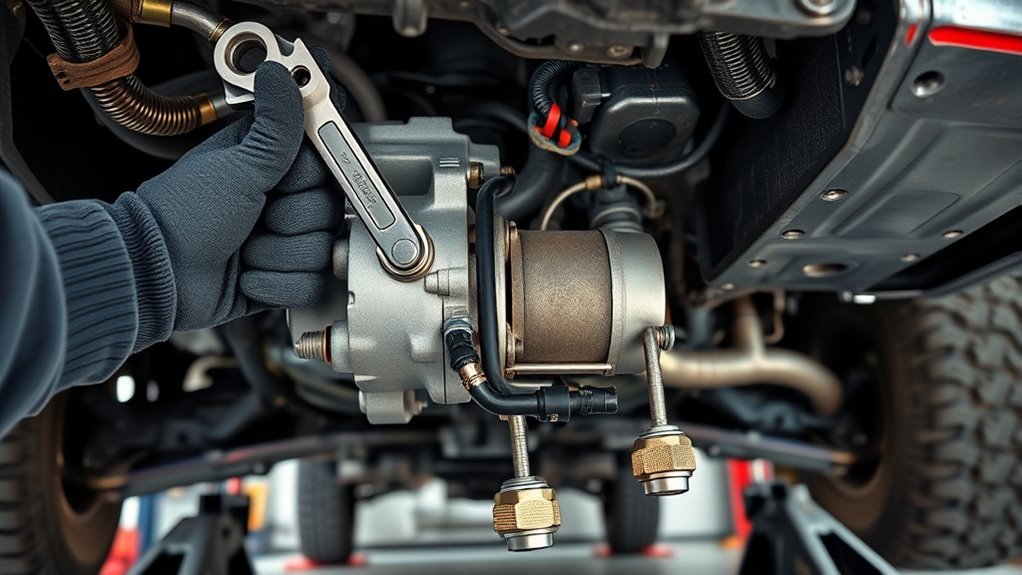
Remove Starter, Install New Unit, Alignment and Torque Specs
Disconnect the negative battery terminal, drain or detach any nearby coolant hoses to prevent spills, then remove the starter’s heat shield and the two mounting bolts so you can carefully separate the unit from the transmission while managing wiring slack. You’ll free the old starter, inspect mounting faces for wear, and note wiring routes to preserve starter functionality and reliable electrical connections.
- Remove heat shield and two mounting bolts; support starter as you extract it.
- Inspect mounting flange and bellhousing for burrs; clean mating surfaces.
- Install new starter: align with transmission, slide flush to mating surface.
- Connect small control wire first, then the larger battery cable; perform a firm tug test.
- Torque mounting bolts to spec in a cross pattern; verify no movement.
You want a solid, repeatable install that empowers you. Proper alignment and torque prevent misengagement and protect starter longevity. After this, leave coolant hose reconnection and dipstick re‑fitting for the next step.
Reconnect Coolant, Re‑Fit Dipstick, Check Differential & Fluids
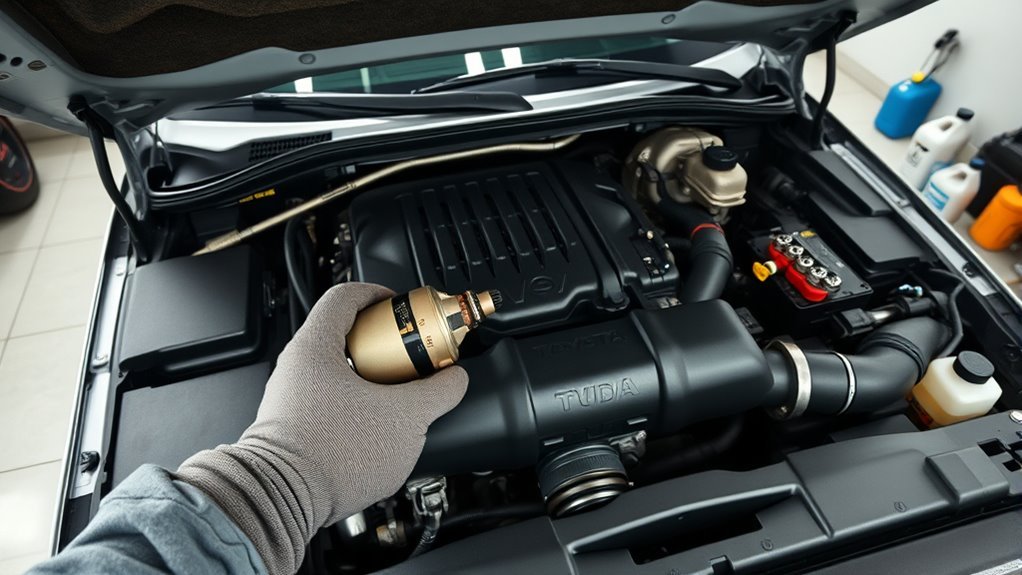
Now that the starter is secured, finish vehicle servicing by reconnecting the upper and lower coolant hoses and reinstalling the oil dipstick, then verify differential and other fluid levels. Reattach both hoses, seat clamps firmly, and inspect for proper fitment; different coolant types demand correct hose and clamp materials to avoid corrosion. Tighten clamps, pressure-test the circuit, then refill and bleed the cooling system to remove air pockets.
For dipstick maintenance, align the dipstick with its tube and insert until it seats snugly; a loose dipstick allows contamination and pressure loss. Wipe and verify oil level per specs after seating.
Locate the differential fill plug, remove it, and add 75W-85 GL5 until fluid trickles out—this confirms full. Check transmission and other reservoirs for correct levels and contamination. Confirm all coolant connections show no leaks. With fluids verified and components sealed, you reclaim control of the vehicle’s reliability and readiness for the next procedural checks.
Final Torques, Tests, and Troubleshooting If Starter Won’t Crank
Finish by torquing all starter and related fasteners to the manufacturer’s specs—verify starter bolts and the ball-joint nut (typically ~81 ft·lb) with a calibrated torque wrench—then perform a tug test on wiring to confirm secure, corrosion-free connections before attempting to crank. Do final checks: inspect battery voltage (≥12.4 V), confirm negative terminal tightness, and guarantee harnesses are routed clear of heat and moving parts. Use a multimeter and jumper to run basic electrical diagnostics on relay, fuse, and starter solenoid circuits.
- Verify battery voltage and terminal torque.
- Tug-test power and ground leads for security and corrosion.
- Operate ignition and neutral safety switches; observe continuity.
- Bench-test or swap the starter relay; inspect relevant fuses.
- If necessary, bench-test starter under load or replace.
If the starter still won’t crank, you’ll isolate the failed component via stepwise electrical diagnostics, freeing you from guesswork and restoring function with confidence.
Frequently Asked Questions
How Much Does It Cost to Replace a Starter on a Toyota Tundra?
You’ll pay about $300–$600 to replace a starter on a Toyota Tundra; watch starter symptoms, follow replacement tips, gather parts and tools, document steps, and assert control over labor choices to minimize costs and preserve independence.
How Long Does a Toyota Tundra Starter Last?
You’ll typically get 100,000–150,000 miles from a starter; watch for starter symptoms like clicking or intermittent starts. Follow maintenance tips: monitor battery health, secure connections, and avoid frequent short trips to extend starter life and preserve freedom.
How Many Hours Does It Take to Change a Starter?
You’ll typically need 2–4 hours to change a starter. If you’ve noted starter symptoms, follow installation tips: drain fluids, disconnect battery, support components, remove obstructing parts, then install and test to reclaim reliable, sovereign mobility.
Conclusion
You did the grubby work, survived coolant leaks and stubborn bolts, and swapped the starter like a competent weekend mechanic — or at least like one who watches too many DIY videos. Torque every fastener, reconnect hoses and the battery, and don’t let hubris drive you home; test crank, inspect for leaks, and confirm fluid levels. If it still won’t spin, stop pretending and consult a pro — pride is cheaper than towing.