You’ll first confirm your trailer has electric brakes and a locked seven‑pin connector, then select electric or electric‑over‑hydraulic in the Multi‑Information Display. Start gain at 5 for a predictable baseline, use the plus/minus buttons to adjust between 0–10, and nudge the manual slider briefly while driving at low speed to fine‑tune just below wheel lock‑up. Inspect wiring and connector for corrosion or damage, and follow further steps to optimize settings and troubleshoot if needed.
What You’ll Learn: Set Up and Tune the Tundra Trailer Brake Controller
You’ll learn how to set up and tune the Tundra’s integrated trailer brake controller: confirm a secure seven‑pin connection (four‑pin means no trailer brakes), choose the correct brake type (electric or electric‑over‑hydraulic) in the Multi‑Information Display, start with a gain of 5 and adjust from 0–10 with the plus/minus buttons, and use the manual slider while driving to fine‑tune the gain just below wheel lock‑up so the truck and trailer brake consistently. You’ll then select brake type to match your trailer and verify the system responds predictably. Begin at gain 5 and make measured increments, watching trailer behavior under load; use the manual slider in a safe, low‑speed environment to find the threshold just before lock‑up. Regularly revisit gain as cargo or conditions change. These straightforward towing techniques boost trailer safety and give you more control and freedom on the road. You’ll leave confident, knowing the system’s tuned for consistent braking and liberated towing decisions.
Confirm Electric Brakes and a 7‑Pin Connector
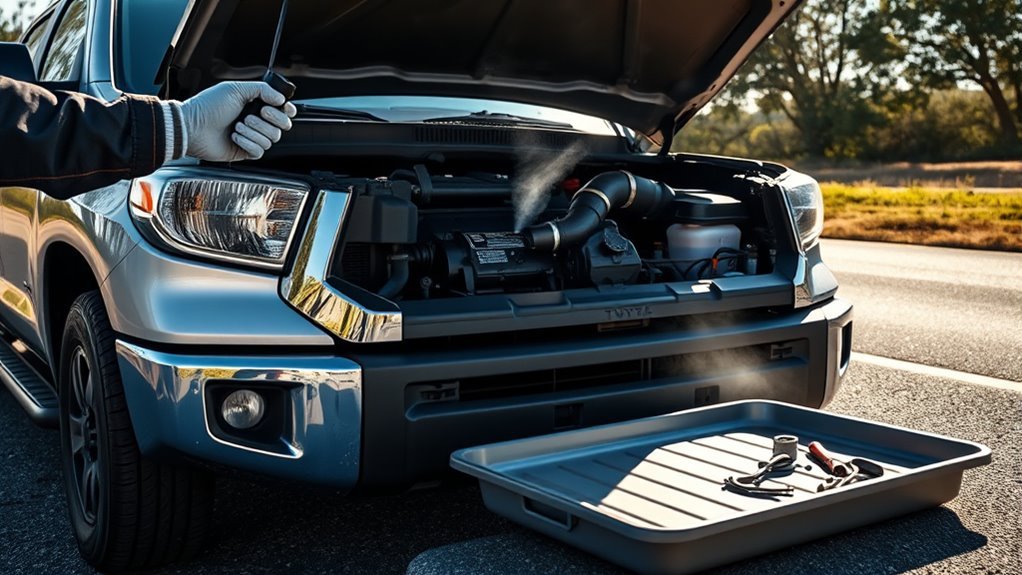
Before you hook up, verify your trailer has electric brakes and not a surge or hydraulic system. Make sure your Tundra has a secure seven‑pin connector—four‑pin plugs won’t run the brakes. Check the trailer wiring and the Multi‑Information Display to select the correct brake type for proper controller integration.
Verify Connector Type
1 simple check will save you trouble later: confirm your trailer uses electric brakes and that the plug is a locked, secure seven-pin connector. You want connector maintenance to be proactive—inspect pins for corrosion, bent contacts, and frayed wires. A seven-pin plug provides the brake signal and lighting circuits; a four-pin plug typically means no electric brakes, so don’t assume compatibility.
Make sure the connector seats fully and locks; an intermittent fit kills control and risks failure. Test continuity with a multimeter or use your vehicle’s lights and brake input while an assistant presses the trailer brake to verify electrical compatibility. Log any damage and repair or replace the socket and wiring before towing so your brake controller performs reliably and you tow free of avoidable constraints.
Confirm Electric Brakes
Since the Tundra’s integrated controller only works with electric brakes, confirm your trailer actually has them and that you’re using a locked, fully seated seven‑pin connector; a four‑pin plug means no brake circuit and won’t work. You’ll check brake presence, test functionality, and secure the connector before hitching. This protects others, respects towing regulations, and frees you from avoidable risk. Inspect wiring, test brake activation from the cab, and verify the controller can modulate braking. Regular trailer maintenance preserves control and liberation on the road.
| Item | Action | Purpose |
|---|---|---|
| Brake type | Verify electric brakes | Compatibility |
| Connector | Use 7‑pin, locked | Power/brake circuit |
| Test | Activate from cab | Function check |
| Wiring | Inspect for damage | Reliability |
| Regs | Confirm local towing regulations | Legal safety |
How to Select the Correct Trailer Brake Type in the Display
To set the correct trailer brake type on your Tundra’s Multi-Information Display, access the trailer brake menu and choose either “Electric” or “Electric Over Hydraulic” to match your trailer’s braking system; this selection guarantees the truck’s controller communicates properly with the trailer and prevents braking conflicts. Once you’ve selected the option, confirm your vehicle uses a secure seven-pin connector so brake signals and lights integrate reliably. Match the display choice to your trailer’s specifications—electric for direct electric-actuated brakes, electric over hydraulic for actuators that modulate hydraulic systems. Check this setting whenever you switch trailers; different trailer weight and brake sensitivity demands mean one configuration won’t fit all. Adjusting the selection is straightforward and keeps you free from unexpected brake behavior. Stay deliberate: verify wiring, consult your trailer manual, and confirm the display reading before towing. This keeps control with you, reduces risk, and aligns the Tundra’s controller with the trailer for safe, liberated towing.
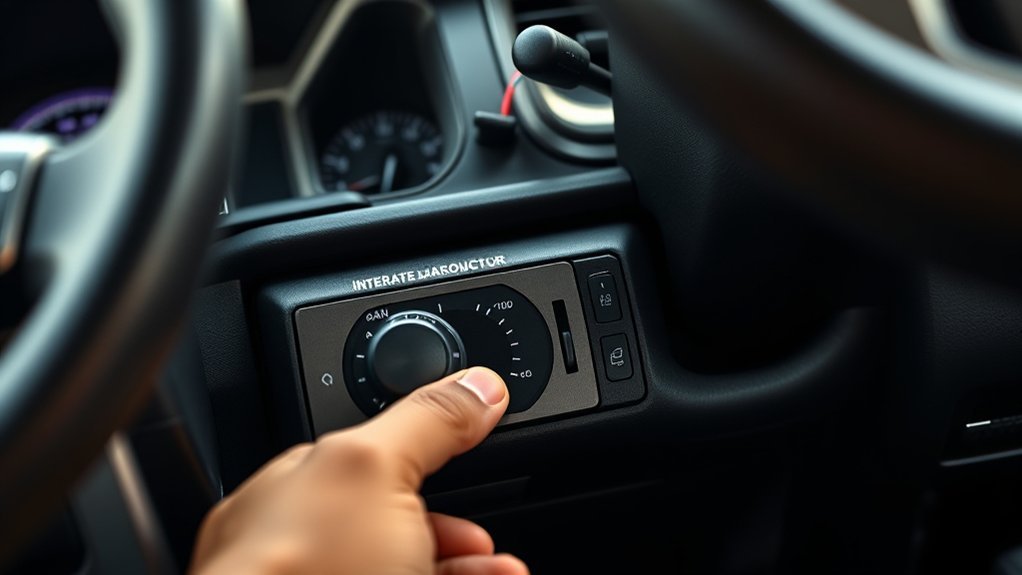
How to Set a Safe Baseline Gain (Start at 5) on the Tundra Controller
Now that you’ve matched the trailer brake type in the Multi-Information Display, set a safe baseline gain to five on the Tundra’s controller before you tow. Start at 5 to give you a predictable, conservative starting point for towing safety and brake calibration. This baseline helps you avoid abrupt stops and maintains control while you fine-tune.
| Step | Action | Purpose |
|---|---|---|
| 1 | Set gain to 5 | Safe baseline |
| 2 | Prepare to drive | Controlled environment |
| 3 | Use manual slider briefly | Assess response |
| 4 | Adjust +/- incrementally | Prevent lock-up |
| 5 | Match feel to truck | Consistent braking |
After confirming initial feel, adjust the gain in small steps with the plus/minus buttons until the trailer brakes engage just before wheel lock-up. Keep adjustments minimal; seek balance between truck and trailer braking. This method centers your control, enhances towing safety, and completes essential brake calibration for liberated, confident towing.
How to Use the Manual Brake Slider to Test Trailer Brakes While Driving
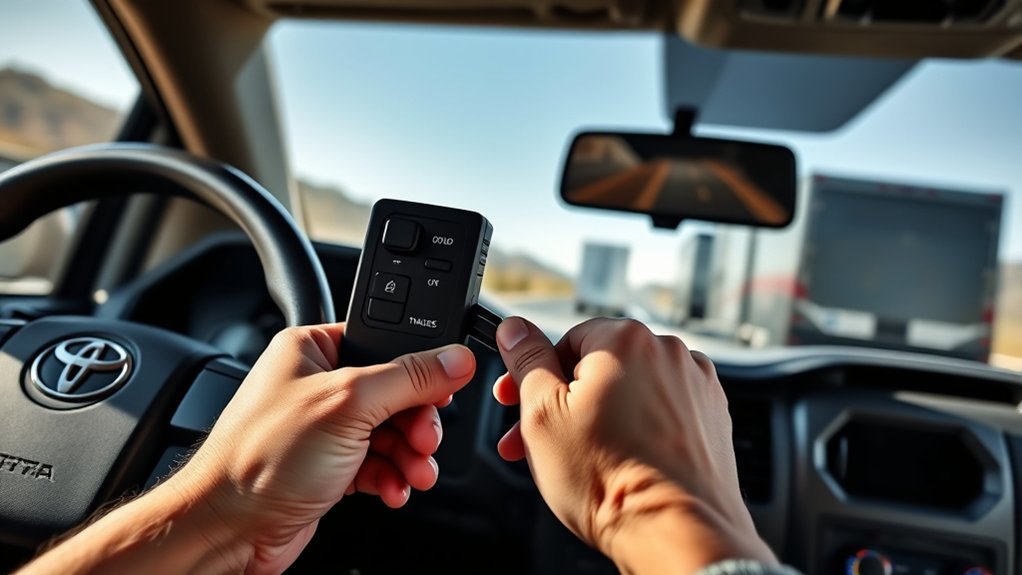
Before testing, make sure you’re at a safe speed on a quiet, level road with room to slow. Gradually pull the manual brake slider to apply the trailer brakes while watching how the trailer and vehicle respond. If the trailer pulls or wheels lock, stop and adjust the gain down; increase it slightly if the response is weak until braking feels consistent.
Safe Speed And Environment
If you’re driving to test the trailer brakes, pick a low, steady speed in an open, hazard-free area and engage the manual brake slider to apply the trailer brakes independently of the truck. Use basic safety measures: seatbelt on, mirrors checked, and a companion watching for hazards if possible. Keep driving conditions calm — light traffic, dry pavement, and good visibility — so you can focus on brake feel. Start with gain at the baseline of five and watch the trailer’s response as you nudge the plus/minus controls. Adjust only enough to approach but not reach wheel lock-up, ensuring trailer braking matches truck braking for predictable control. Stop and reassess in safe spots as needed; never rush testing.
Gradual Manual Slider Application
When you want to check the trailer brakes while driving, use the Tundra’s manual brake slider to apply trailer braking gradually without engaging the truck’s brakes. Start with the gain at the baseline of five, then use deliberate manual control techniques: push the slider slowly, feel the trailer’s tug, and avoid abrupt moves that might lock wheels. You’ll monitor brake response calibration as you adjust—seek a steady, proportional feel between truck and trailer. Use the slider to simulate varied braking so you can fine-tune gain for different loads and road conditions. Practice in safe, open areas until the motion becomes instinctive; confident, liberated control comes from repeated, measured testing and precise adjustments.
Monitor Trailer And Vehicle
Having practiced gradual slider applications, you can now use the manual brake slider to test trailer brakes while driving by applying it slowly and observing how the trailer and Tundra respond independently. Use steady, controlled slider pressure to engage the trailer brakes without touching the truck brakes. Watch the trailer’s deceleration, tracking, and wheel behavior relative to the Tundra. If the trailer pulls or wheels lock, reduce gain to lower brake sensitivity; if the trailer lags, increase gain cautiously. Factor in trailer weight—heavier loads need more controlled input. Aim for a consistent braking feel between vehicle and trailer so you maintain authority and freedom on the road. Regular practice with these checks builds confidence and guarantees safe, effective towing performance.
How to Fine‑Tune Gain to Avoid Trailer Wheel Lockup and Get Smooth Stops
Start by setting the controller to a baseline gain of five, then drive at a moderate speed and use the manual brake slider to apply the trailer brakes so you can evaluate the initial response. Use controlled braking techniques and conscious load management as you test: apply the slider gradually, note trailer deceleration, and listen for tire chirp that signals impending lockup. If wheels begin to skid, reduce gain slightly; if stopping feels weak or inconsistent with the tow vehicle, raise gain in small increments.
Aim to set gain just below the lockup threshold so the trailer follows the vehicle smoothly. Check that braking feel matches front and rear inputs for predictable, liberated control. Reassess whenever load weight or road conditions change, adjusting gain to preserve stability without overbraking. Regular, deliberate fine‑tuning keeps stops smooth, prevents trailer lockup, and empowers you to tow confidently and freely.
How PCS Works With the Trailer Brake Controller for Safer Towing
Fine‑tuning your gain to prevent trailer wheel lockup sets the stage for how the vehicle’s safety systems will respond under sudden braking, and the Pre‑Collision System (PCS) teams up with the trailer brake controller to manage those responses. You get collision detection that watches the road and signals you first; those timely alerts give you a chance to act and keep control. If you don’t respond, PCS engages brake assist to amplify stopping power without destabilizing the trailer. In a truly critical moment, PCS triggers automatic emergency braking and coordinates with the trailer brake controller to slow both truck and trailer smoothly, reducing jerk and sway. That coordination preserves momentum control and limits risk to others, letting you tow with more confidence and freedom. Relying on PCS doesn’t replace your judgment; it extends your capacity to avoid harm by integrating sensing, alerts, and controlled braking when you need it most.
Controller Settings for Common Towing Scenarios

Match your controller gain to the trailer weight, the terrain, and your speed to keep braking predictable. Start at a gain of 5, use the manual slider for immediate feedback, and adjust down (3–5) for light loads or up (8–10) for heavy loads and steep grades. Re-test settings whenever load, road, or speed changes to prevent wheel lock-up and maintain control.
Matching Gain To Load
Adjust the controller’s gain to suit the trailer’s weight so braking stays predictable and safe. You’ll begin at a baseline gain of five to establish consistent performance. For lighter load types, lower the gain to around three to avoid excessive braking force. For medium loads, set the gain near six or seven to balance stopping power and wheel control. Heavier trailers call for gains between eight and ten to provide adequate stopping authority. While driving, use the manual brake slider to test braking techniques and fine-tune the gain just below the wheel lock-up point for maximum control. You’ll repeat this quick check whenever load or hitching changes, keeping braking responsive and freeing you to tow with confidence.
Terrain And Speed Adjustments
When you’re towing, change the controller’s gain to fit the terrain and speed so braking stays predictable—lower the gain on hilly or downhill routes to prevent lock‑up, and use higher settings on flat roads or steady highway speeds to guarantee effective stopping. You’ll assess terrain impact and perform speed calibration by using the manual slider at varied speeds, testing deceleration with your actual load. Count weight distribution: heavier trailers need more gain for safe highway braking and to control downhill momentum. Recheck gain when conditions shift—city to highway, or flat to steep. Stay empowered: adjust confidently and liberate your drive from fear of runaway trailers.
| Scenario | Terrain | Recommended Action |
|---|---|---|
| City | Flat | Moderate gain, test slider |
| Highway | Steady | Higher gain, smooth decel |
| Hills | Rolling | Lower gain, avoid lock |
| Downhill | Steep | Reduce gain, control fade |
| Heavy Load | Variable | Increase gain, balance |
Troubleshooting the Controller, Wiring, and Brake Performance
Start by checking the basics: make sure the seven-pin connector is firmly seated and corrosion-free, confirm the Multi-Information Display is set to the correct trailer brake type (electric or electric over hydraulic), and inspect all trailer wiring for visible wear or damage that could cause intermittent faults. For wiring inspection, follow the harness from vehicle to trailer, looking for chafing, exposed conductors, or loose terminals; repair or replace compromised sections to restore reliable signals.
If braking feels uneven or the trailer sways, adjust gain from the baseline of five and perform brake calibration by applying progressive stops until you find the force just below wheel lock-up. Repeat until stops feel consistent and controllable.
Also verify the Pre-Collision System is operational, since it supplements towing braking. These steps free you from uncertainty: secure connections, clean wiring, precise gain tuning, and PCS confirmation will resolve most controller and brake-performance issues without delay.
Maintenance Tips and When to Get a Professional Inspection
Because regular checks keep your trailer brake system reliable, make inspecting wiring, connectors, and the controller part of your routine maintenance, and recheck the controller gain whenever you change load or trailer type. You should look for frayed wires, corroded terminals, and loose connectors during routine checks; repairing or replacing damaged components prevents failures and keeps you free to go where you choose. Test the gain periodically and after significant load or trailer changes so braking stays balanced and predictable.
Keep an eye on controller firmware updates or recalls—installing fixes preserves performance and your control. Confirm trailer brakes work during routine maintenance; inconsistent braking or dashboard warnings mean you shouldn’t delay. When you notice uneven stopping, warning lights, persistent noise, or a sudden change in feel, schedule a professional inspection. A technician will verify electrical integrity, mechanical brake condition, and controller calibration. These safety reminders help you maintain independence and confidence whenever you tow.
Frequently Asked Questions
Does the Toyota Tundra Have a Trailer Brake Controller?
Yes — your Toyota Tundra has an integrated trailer brake controller that boosts brake performance and helps manage towing capacity safely, so you can tow confidently, adjust gain precisely, and avoid trailer brake lockup.
How to Use Tow Haul Mode in Toyota Tundra?
Press Tow Haul and feel gears hold, towing performance sharpen; you’ll get stronger engine braking and quicker throttle. Use it whenever towing, and combine with proper brake adjustment on your trailer for safer, liberated control.
Conclusion
You’ve now got the basics to set up, test, and fine‑tune your Tundra’s integrated trailer brake controller so towing feels controlled and predictable. Start with a conservative gain, confirm electric brakes and a 7‑pin connection, and use the manual slider to verify response. Think of the controller as your trailer’s nervous system—small adjustments keep the whole rig coordinated. Keep an eye on wiring and brakes, and get a pro if anything feels off.