You’ll perform a concise, regulatory-style pre-trip inspection on your Toyota Tundra: confirm washer, oil and coolant levels and check for leaks; verify tire pressures, tread depth and sidewalls; inspect suspension, lug nuts and brakes for wear or leaks; guarantee hitch, recovery points and trailer controller are secure and torqued; examine underbody, skid plates and ID plate for damage, rust and clearance; test all lights, wiring and cabin systems. Continue to follow the checklist for detailed procedures and torque specs.
5‑Minute Safety Triage: What To Check Before You Drive

How do you perform a quick, systematic safety triage before driving your Tundra? You start with a checklist mindset: confirm windshield washer fluid and visually verify oil and coolant levels without delving into detailed engine work. Verify tire pressure and tread depth—target at least 4/32″—to maintain traction and stability. Scan all exterior lights: headlights, brake lights, and turn signals must function for clear communication. Inspect brake pads, rotors, and visible brake lines for wear or damage; any compromise grounds the trip until corrected. Ascertain recovery items classified as road trip essentials and safety gear—tow straps, hitch, and jack—are present, secured, and serviceable. Make decisions by rule: if any item fails a basic standard, fix it or delay departure. You’ll preserve freedom on the road by enforcing these concise, regulatory checks; they keep you mobile and accountable without sacrificing safety or autonomy.
Engine & Fluids: Leak, Oil, Coolant And Battery Checks
Before you start, check beneath and around the engine for any fluid leaks and inspect hoses and connections for signs of seepage. Verify the engine oil level matches the manufacturer’s specified range and top off only with the recommended grade if needed. Inspect the battery terminals for corrosion and confirm the battery is securely mounted and operational to prevent starting failures.
Check For Fluid Leaks
Although routine, checking for fluid leaks is critical to safe, compliant operation, so you should inspect the engine bay, undercarriage, and battery area for any signs of leakage or corrosion before driving. Use systematic leak detection: visually scan seals and gaskets for oil seepage, observe the coolant reservoir for cracks or low level, and note any fluid pooling beneath the vehicle that could indicate transmission or power steering failure. Check battery terminals for corrosion and confirm connections are tight to prevent electrical faults. Record findings and address any anomaly immediately through authorized service to maintain compliance. Consistent fluid maintenance—monitoring oil, coolant, transmission, and brake fluids—preserves performance and protects your freedom to travel safely.
Verify Oil Level
Check the engine oil with the dipstick and confirm the level sits within the manufacturer’s recommended range; low or overfilled oil can cause engine damage or noncompliance with safety standards. You’ll confirm oil viscosity matches specs, inspect for leaks at the pan and gaskets, and note contamination or metal particles. If level is low or viscosity is off, schedule an oil change per interval and free yourself from preventable failure. Verify coolant reservoir level and top to spec; monitor transmission and power steering fluids. Document findings and corrective actions for compliance and accountability.
| Item inspected | Acceptable condition | Action if noncompliant |
|---|---|---|
| Engine oil level | Within dipstick marks | Oil change / top-up |
| Oil viscosity | Manufacturer spec | Replace oil |
| Oil leaks | None | Repair seals |
| Coolant | At spec | Top up |
Inspect Battery Condition
When inspecting the battery, start by confirming the terminals are clean and tightly connected. You’ll follow a systematic checklist: check for corrosion and secure clamps, inspect the case for cracks, verify charge with a voltmeter (12.6 V+ ideally), and confirm fluid levels if applicable. Apply battery maintenance tips to sustain reliability and use corrosion prevention methods at each service.
- Examine terminals and cables for white/green buildup; clean and tighten.
- Inspect case for cracks, swelling, bulging or electrolyte leaks.
- Measure open-circuit voltage; replace if under 12.4 V or unstable.
- Check and top fluid cells to manufacturer specs; seal maintenance-free batteries.
You’ll document findings and act immediately on hazards to preserve safety and vehicle freedom.
Tundra: Tires, Wheels & Suspension Pre‑Trip Check
Before you start, verify tire pressures meet Toyota specifications—35 PSI front, 30 PSI rear—adjusting for load as required. Measure tread depth with a gauge and replace any tire below 2/32″ or showing uneven wear or visible damage. Inspect suspension and steering components (control arms, shocks, sway bar links and bushings) for wear, leakage, cracks, or loose lug nuts torqued to 80–100 ft‑lbs.
Tires & Tread Depth
Although tire condition often goes unnoticed, you should verify pressure, tread depth, sidewall integrity, and lug-nut torque as part of every Tundra pre-trip inspection to guarantee safe handling and compliance. Check tire pressure with a calibrated gauge: front 120 PSI, rear 110 PSI. Measure tread wear; replace tires at or below 2/32″. Scan sidewalls for cuts, bulges, or irregular wear patterns that suggest alignment or load issues. Confirm lug nuts are torqued to manufacturer specs to prevent wheel loss. Rotate tires per Toyota’s schedule to equalize wear and extend service life.
- Use a certified gauge for tire pressure checks.
- Record tread depth readings for each wheel.
- Inspect sidewalls under bright light.
- Log lug-nut torque values after tightening.
Suspension & Steering Components
Because steering and suspension directly affect control and safety, inspect these systems methodically on every Tundra pre‑trip. Check upper and lower control arms for wear, damage, secure mounting, and rust; document any deviation. Test ball joints and tie rod ends for play or excessive wear—these govern steering precision. Examine shock mounts, hardware, and shocks for leaks and proper function to preserve ride quality. Inspect sway bar links and bushings for deterioration or looseness that increases body roll. Note clunking noises, vague steering, or uneven tire wear immediately; these symptoms often signal alignment issues or failing components. If you’ve fitted suspension upgrades, verify compatibility and torque specs. Repair or replace defective parts before departure to retain control and freedom on the road.
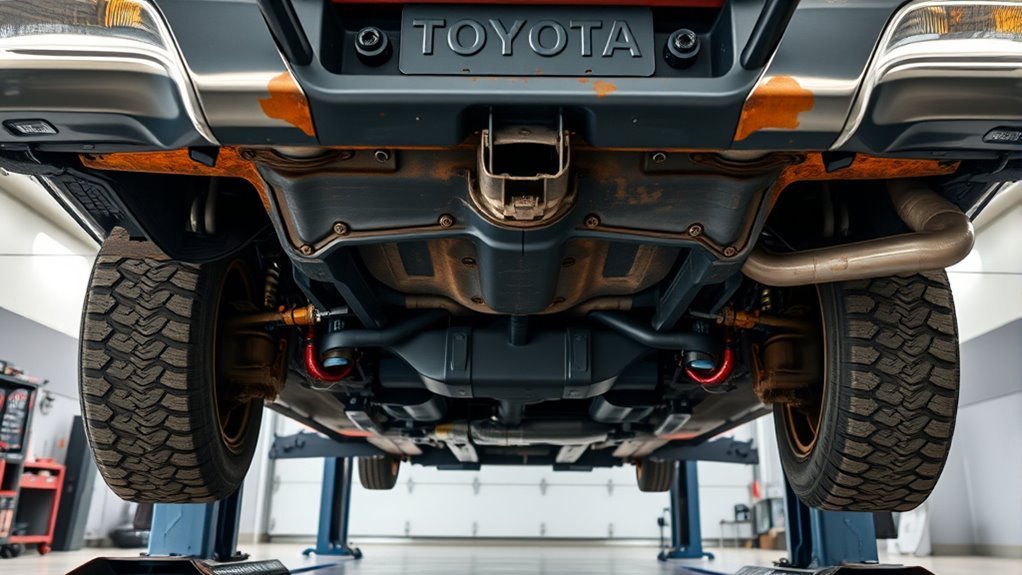
Check Brakes, Hitch And Recovery Points For Towing
When you prepare to tow, inspect the Tundra’s braking system, hitch assembly, and recovery points methodically to guarantee each component meets load and safety specifications. You’ll confirm brake maintenance is current: check pads, rotors, lines and hydraulic integrity so braking response won’t fail under load. Test the trailer brake controller and calibrate it to match trailer weight for consistent stopping power. Verify the hitch is securely mounted, bolts torqued to manufacturer specs, and free of cracks or deformation. Inspect front and rear recovery points for wear, correct rating, and secure attachment; they’re your last-resort lifeline.
- Confirm brake pads, rotors and lines show acceptable wear and no leaks.
- Torque hitch bolts to spec, ascertain hitch pin and hardware are present and locked.
- Test and adjust the trailer brake controller for proper modulation.
- Verify recovery points’ load ratings and inspect for corrosion or distortion.
Follow these systematic checks to guarantee towing safety while preserving your freedom to travel with confidence.
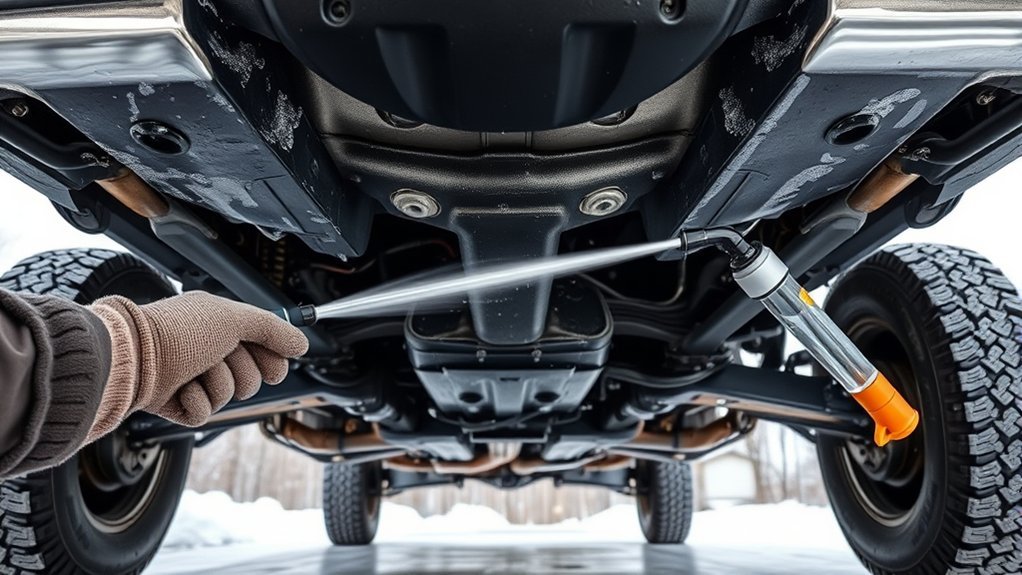
Underbody & Skid Plates: Damage, Rust And Clearance
Inspect the Tundra’s underbody and skid plates methodically for dents, cracks, loose hardware, and rust, since compromised protection or corroded mounting points can expose the oil pan, transmission, and transfer case to impact and structural failure. You’ll follow a checklist: confirm clearance from ground hazards, assess corrosion-prone zones, and verify fasteners are present and torqued. Prioritize skid plate durability and underbody maintenance to preserve mobility and freedom on remote routes. Replace or reinforce damaged plates; consider higher-grade materials where trails demand it.
| Visual cue | Action |
|---|---|
| Dents/Cracks | Repair or replace to maintain protection |
| Rust on mounting points | Clean, treat, or replace to prevent failure |
| Low clearance | Measure and adjust or upgrade protection |
Document findings, schedule repairs, and retest clearance before departure. This systematic, regulatory-minded approach reduces failure risk and keeps your Tundra ready for liberated travel.
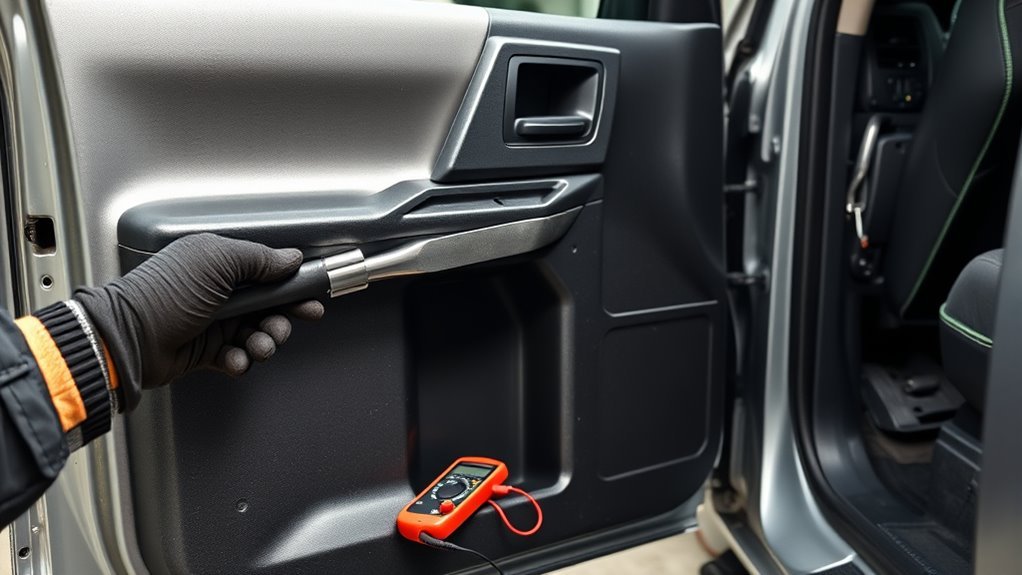
Lights, Electrical Accessories & Cabin Systems Test
Although often overlooked, testing lights, electrical accessories, and cabin systems is a critical step that guarantees regulatory compliance and operational reliability before any trip. You’ll systematically verify headlights, taillights, brake lights, and turn signals meet safety standards and respond correctly; perform electrical troubleshooting on wiring, switches, and relays to detect abrasion, loose connections, or shorts; and confirm dashboard warning lights and gauges (fuel, temperature) are accurate to avoid breakdowns. Check cabin comfort systems—air conditioning, heating, infotainment—for full functionality so you control the environment and remain free to operate without constraint.
- Inspect all exterior lighting and note any deviations from regulatory specs.
- Trace wiring harnesses for wear; secure or replace compromised sections.
- Test switches, relays, and accessory enhancements for reliable engagement.
- Run cabin comfort diagnostics and log any faults before departure.
You’ll document findings, remediate issues, and prioritize safety while pursuing informed, liberated mobility.
Frequently Asked Questions
What Should Be Included in a Pre-Trip Inspection?
You should inspect tire pressure, fluid levels, brakes, lights, battery and electricals, tire tread and sidewalls, and secure loads; you’ll document findings, correct hazards, and follow regulatory procedures to protect yourself and preserve your freedom on the road.
What Are the Legal Requirements for Pre-Trip Inspections?
You must follow legal regulations: perform and document pre-trip inspections each shift, before new trailers, or after breaks; inspect brakes, lights, tires, steering; retain reports three months to guarantee safety compliance and avoid fines.
What Are the Toyota Inspection Standards?
You must follow Toyota inspection standards: inspect engine, brakes, lights, suspension, fluids, tires, battery, and safety features to guarantee Toyota reliability, use approved parts, document findings, and perform scheduled maintenance to protect safety and freedom.
Conclusion
You’ve run the quick triage, checked fluids, tires, brakes, underbody and lights — but don’t relax yet. Pause, scan once more: a slow, methodical sweep that catches the almost‑invisible. If a bolt’s loose, a leak’s starting, or a lamp’s dim, address it now. You’ll leave confident rather than complacent. Follow the checklist every time, and you’ll avoid the costly, dangerous surprise that waits when checks become optional.