How to Adjust Toyota Camry Headlights for Safety and Visibility
What’s in This Article
- Why Proper Headlight Aim Matters for Safety
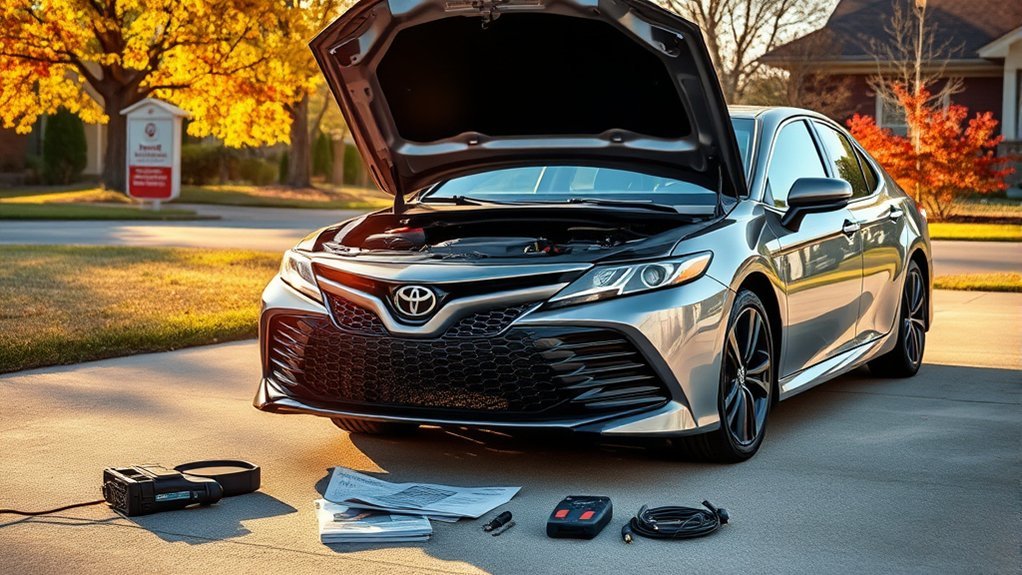
- What You’ll Need Before You Adjust Your Headlights
- Step-by-Step Guide to Adjusting Your Headlights
- 5 Common Mistakes to Avoid When Adjusting Headlights
- How to Check Your Headlight Alignment
- How to Keep Your Headlights in Top Shape
- When to Seek Professional Help for Headlight Issues
- Frequently Asked Questions
A small headlight aim problem can make night driving harder and send glare into other drivers’ eyes. You can check your Toyota Camry headlights at home with a flat wall, tape, a measuring tape, and the right screwdriver or socket. This guide shows you how to prepare the car, mark the beam height, adjust the aim, avoid common mistakes, and know when a mechanic should inspect the system.
Quick Answer
To adjust Toyota Camry headlights, park the car on a level surface 25 feet from a wall. Mark the center height of each headlight on the wall, turn on the low beams, and use the adjustment screws to place the beam cutoff at or slightly below the marks. Test the lights at night and ask a mechanic for help if the beams still look uneven, flicker, or point in different directions.
Key Takeaways
- Use a flat, level surface and place the headlights 25 feet from a wall.
- Mark each headlight center before you turn the adjustment screws.
- Use low beams for the aiming check, not high beams.
- Aim the beam cutoff at or slightly below the wall marks to reduce glare.
- Get professional help if adjustment does not fix uneven beams, flickering, or moisture inside the housing.
Estimated total time: 20 to 30 minutes.
Why Proper Headlight Aim Matters for Safety

Proper headlight aim helps you see the road without sending harsh glare toward oncoming drivers. The Insurance Institute for Highway Safety says good low beams should light the road ahead without temporarily blinding other drivers.
You should check alignment after you replace bulbs, install a new headlight assembly, repair front-end damage, or notice uneven light on the road. If your beams sit too high, they can bother other drivers. If they sit too low, you may not see far enough ahead at night.
Most Camry owners can do a basic beam check at home. You still need to follow your owner’s manual and avoid forcing any adjustment screw. If the light pattern looks wrong after several small changes, stop and have a repair shop inspect the car.
What You’ll Need Before You Adjust Your Headlights
You do not need many tools to check Toyota Camry headlight alignment. Gather everything first so you can work slowly and make small, controlled changes.
Required Tools List
Use tools that fit your Camry’s headlight assembly. Some model years use a screwdriver slot, while others may need a socket or small wrench.
| Tool | Purpose | Optional |
|---|---|---|
| Flathead screwdriver | Turns some headlight adjustment screws | |
| Tape measure | Measures headlight height and wall distance | |
| Level surface | Keeps the vehicle in the correct position | |
| Marking tape | Marks the beam center and reference lines | |
| Flashlight | Helps you inspect the headlight assembly | Optional |
Safety Equipment Needed
Wear safety goggles when you work near the headlight housing. Gloves can also protect your hands from sharp plastic edges, hot parts, and dirt around the engine bay.
Keep the engine off while you locate the adjustment screws. Turn the lights on only when you need to check the beam pattern on the wall.
Prepare the Car Before You Measure
Set the car close to normal driving weight before you mark the wall. Remove heavy cargo from the trunk, check tire pressure, and park on a flat surface.
Use low beams for the wall test. High beams use a different pattern and can give you a false reading for normal night driving.
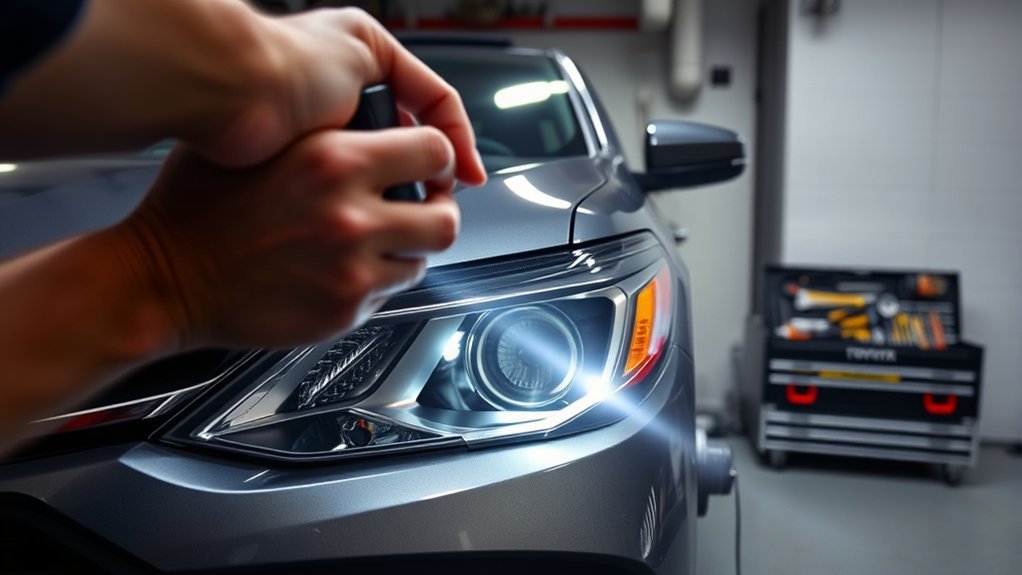
Step-by-Step Guide to Adjusting Your Headlights
Use slow turns and check the wall after each change. Small movements at the screw can move the beam more than you expect.
Step 1: Set Up the Vehicle
Park your Toyota Camry on a flat, level surface facing a plain wall or garage door. Place the front of the headlights 25 feet from the wall for the main aiming check.
Make sure the car faces the wall straight. A crooked parking angle can make the beam pattern look wrong even when the headlights aim correctly.
Step 2: Mark and Adjust the Beams
Follow these steps in order for a safe basic adjustment:
- Measure the headlight centers: Measure from the ground to the center of each headlight lens.
- Mark the wall: Place horizontal tape on the wall at the same height as each headlight center.
- Add vertical marks: Mark the centerline of each headlight beam so you can check side-to-side aim.
- Back up to 25 feet: Move the car straight back until the headlights sit 25 feet from the wall.
- Turn on low beams: Use low beams and let the beam pattern settle on the wall.
- Find the adjustment screws: Open the hood and locate the vertical adjustment point behind or near each headlight assembly.
- Turn the screw slowly: Turn a quarter turn at a time until the top of the beam sits at or slightly below the horizontal tape line.
- Check side-to-side aim: Adjust horizontal aim only if your Camry assembly supports it and your manual shows how.
- Road-test carefully: Drive on a dark, safe road and confirm that the beams light the lane without bothering oncoming traffic.
Warning: Do not aim the beams above the wall marks, because high low-beam aim can create glare for other drivers.
5 Common Mistakes to Avoid When Adjusting Headlights
Small setup errors can lead to poor headlight aim. Avoid these common problems before you turn any screw:
- Parking on a slope: A sloped driveway can make the beam look too high or too low.
- Using the wrong distance: Use 25 feet for the main wall test instead of guessing the distance.
- Skipping the wall marks: Tape marks give you a clear reference for height and centerline.
- Using high beams: Low beams provide the correct pattern for normal night driving.
- Over-tightening screws: Too much force can damage the adjustment mechanism or headlight housing.
Do not chase a perfect-looking pattern if the beam shape looks broken or scattered. A cloudy lens, bad bulb seating, damaged housing, or front-end damage can cause problems that adjustment alone cannot fix.
How to Check Your Headlight Alignment
You can check headlight alignment in a few minutes after you set the car 25 feet from the wall. The top of the brightest low-beam area should sit at or slightly below your horizontal wall mark.
- Park on level ground: Face the wall straight and keep the car centered.
- Measure headlight height: Mark the center height of each headlight on the wall with tape.
- Turn on low beams: Look at where each beam falls compared with the tape marks.
- Make small changes: Turn the adjustment screw slowly until both beams sit in the correct area.
If one beam points much higher, lower, or farther sideways than the other, recheck your setup before adjusting more. If the problem stays, the headlight assembly, bulb seat, suspension, or body structure may need inspection.
How to Keep Your Headlights in Top Shape

Clean, clear lenses help your Toyota Camry headlights perform as intended. Wash the lenses with car-safe soap, and use a headlight restoration kit if oxidation makes the plastic look cloudy.
Check the lens for cracks, moisture, and loose mounting points. Even a small housing problem can change the beam pattern or scatter light.
Replace burned-out bulbs as soon as you notice them. If a bulb flickers, dims, or fails again after replacement, check the connector, wiring, fuse, or charging system instead of adjusting the headlight aim.
When to Seek Professional Help for Headlight Issues
Stop the do-it-yourself adjustment if the beam still looks wrong after careful setup. A professional can inspect the headlight assembly, mounting points, suspension height, and electrical system.
Ask a mechanic for help if you notice any of these signs:
- Persistent misalignment: The beam stays uneven after careful adjustment.
- Flickering or repeated bulb failure: The car may have an electrical problem.
- Moisture inside the housing: Water can damage bulbs, wiring, and reflective surfaces.
- Cloudy or broken lenses: Damaged lenses can scatter light and reduce visibility.
- Recent collision or front-end repair: Body or suspension changes can affect headlight aim.
If you cannot identify the adjustment screw or the screw feels stuck, do not force it. Check the Toyota owner’s manual, a repair manual, or a trusted repair shop before you continue.
Frequently Asked Questions
Can I adjust my Toyota Camry headlights without special tools?
Yes, you can do a basic headlight aim check with simple tools. You need a tape measure, masking tape, a flat wall, and the correct screwdriver or socket for your Camry’s adjustment screw.
How often should I check my headlight alignment?
Check alignment during regular maintenance and any time you replace bulbs, install a headlight assembly, or repair front-end damage. You should also check it if other drivers flash their lights at you or your road view looks uneven.
Does headlight adjustment affect night driving performance?
Yes, headlight aim can affect how far you see at night and how much glare other drivers face. Proper low-beam aim helps light your lane while keeping the beam out of oncoming drivers’ eyes.
What are signs my headlights need adjustment?
Your headlights may need adjustment if one beam points higher than the other, the road looks poorly lit, or the beam points into trees, signs, or oncoming traffic. Uneven tire pressure, heavy cargo, or damaged mounting points can also affect aim.
Can weather conditions impact headlight alignment?
Weather alone usually does not change headlight aim. Road impacts, suspension changes, moisture in the housing, and loose parts cause more alignment trouble than rain or temperature by itself.
Vehicle Safety Disclaimer: This article is for informational purposes only and does not replace professional vehicle inspection or repair advice. Always consult a qualified mechanic if headlight aim, wiring, lens damage, or front-end damage may affect safe driving.
Conclusion
Correct headlight aim helps you see the road while reducing glare for other drivers. Start with a level surface, a 25-foot wall test, clear tape marks, and small screw turns.
After adjustment, test the lights at night in a safe area and watch for uneven beams, flickering, or moisture. If the beam still looks wrong, let a qualified mechanic inspect the headlight assembly and related parts. Clear, well-aimed headlights make every night drive safer and less stressful.
References
- Headlamp Aiming Chart – Utah Highway Patrol, accessed 2026
- Wall Chart Aiming Area Requirements – North Carolina Department of Transportation, 2023
- Headlights – Insurance Institute for Highway Safety, accessed 2026
- Car Headlight Safety: Tips for High Beams, Visibility & Maintenance – AAA, accessed 2026
- 2009 Camry Owner’s Manual – Toyota, accessed 2026