If your Toyota Camry seat belt is slow to retract, sticky, or hanging loose after you unbuckle, treat it as a safety issue first and a cleaning job second. Dirt, body oils, sunscreen, spilled drinks, pet hair, and lint can make the webbing drag through the upper guide or retractor slot. In many cases, careful cleaning with mild soap and lukewarm water restores smooth movement—but damaged webbing, locking problems, or a belt that still will not retract should be inspected by a qualified technician.
Quick Answer
To clean a slow or sticky Camry seat belt, fully extend the belt, clamp it so it cannot retract, wipe the webbing with mild soap and lukewarm water, gently brush grime from the fabric, remove all soap with a damp microfiber cloth, and let the belt air-dry completely before releasing it.
Key Takeaways
- Use mild soap and lukewarm water only; Toyota’s owner guidance recommends cleaning seat belts with a cloth or sponge and checking them for wear, fraying, or cuts.
- Keep liquid away from the retractor and buckle. Moisture inside the mechanism can cause odor, corrosion, or sluggish movement.
- Do not use bleach, solvents, harsh degreasers, abrasive pads, direct heat, or fabric softeners on seat belt webbing.
- Replace or professionally inspect any belt with cuts, frays, melted fibers, severe stiffness, crash involvement, or retraction problems that remain after cleaning.
At a Glance
| Time Required | 30–60 minutes of cleaning time, plus several hours of air-drying |
| Difficulty | Easy for surface cleaning; professional help recommended for retractor or pretensioner issues |
| Tools Needed | Microfiber cloths, soft-bristle brush, mild soap, lukewarm water, towel, spring clamp or binder clip |
| Cost | Usually under $10 if you already have basic cleaning supplies |
What’s Wrong: Slow or Sticky Camry Seat Belts
A Camry seat belt that pulls back slowly usually has drag somewhere in the belt path. The most common causes are dirty webbing, grime at the shoulder guide, a twisted belt, lint near the retractor slot, or a sticky spill that dried into the fabric. Less common but more serious causes include worn webbing, a weak retractor spring, a damaged buckle, or a problem with the seat belt pretensioner assembly.
Start with the simple checks before taking anything apart. Pull the belt out slowly, look along the full length of the webbing, and let it retract while you guide it with your hand. If the belt moves smoothly after cleaning, the problem was likely surface contamination. If it still hangs, locks at random, makes grinding noises, or will not retract without help, stop using that seating position until the belt is inspected.
Warning: Do not disassemble the retractor, pretensioner, buckle wiring, or SRS-related connectors as a cleaning shortcut. Modern Camry seat belts are part of the vehicle’s restraint system, and incorrect service can create a serious safety risk.
Quick Safety Check Before Cleaning
Before you clean, check whether the belt is safe enough to keep using. Cleaning can remove dirt, but it cannot repair weakened fibers, damaged stitching, or a failing retractor.
Visual Belt Inspection
Pull the belt out as far as it will go and inspect both sides of the webbing. Look for fraying, cuts, melted spots, chemical stains, hard or crunchy sections, heavy discoloration, stretched areas, or embedded debris. Also check the stitching near the latch plate and anchor points.
Inspect the buckle and latch plate for cracks, corrosion, sticky residue, or objects inside the buckle slot. The tongue should click securely into the buckle and release normally when you press the button. If the latch feels inconsistent, do not spray cleaner into the buckle; have it inspected.
Retraction Function Test
After the visual check, test movement. Pull the belt out fully, confirm it is not twisted, then let it retract under light guidance. It should return smoothly without hanging at the shoulder guide or bunching near the pillar trim.
- Pull the belt to full extension and listen for scraping, grinding, or uneven movement.
- Check whether the belt is folded or twisted near the upper guide.
- Give the belt a sharp tug to confirm it locks as expected.
- Clean and retest if the belt is dirty but otherwise undamaged.
- Get professional service if the belt stays slow, jams, or fails to lock correctly.
A seat belt is safety equipment, not ordinary upholstery. Clean it gently, dry it completely, and replace it if the webbing or mechanism is damaged.
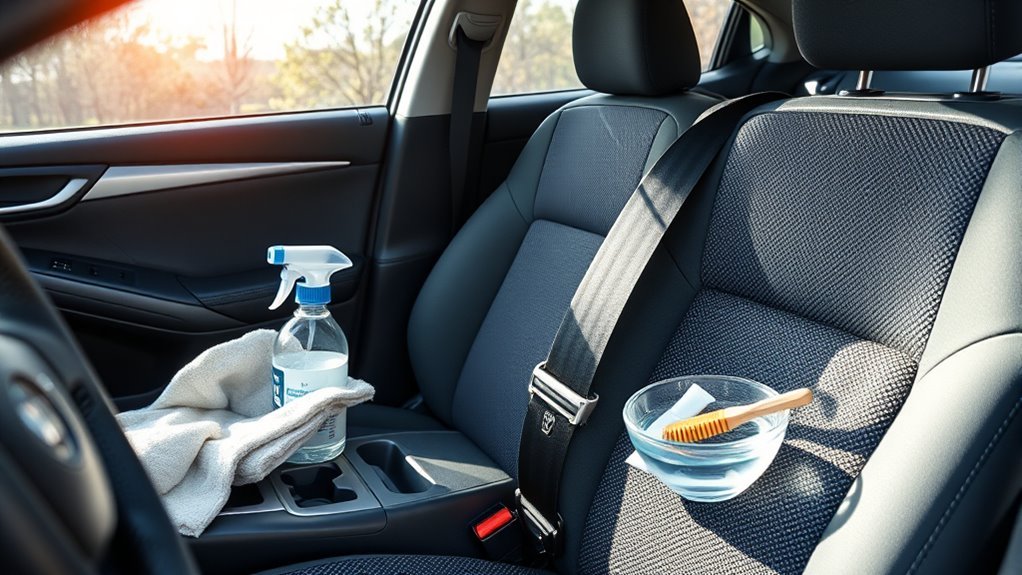
Tools and Safe Cleaners for Camry Seat Belts
Use a mild, low-residue cleaning method. Toyota’s owner information for Camry seat belts recommends mild soap and lukewarm water applied with a cloth or sponge. That is the safest starting point because it removes grime without exposing the webbing to aggressive chemicals.
- Clean microfiber cloths
- Soft-bristle detailing brush or clean toothbrush
- Small bowl of lukewarm water
- A few drops of mild soap or gentle automotive interior fabric cleaner
- Dry towel to protect the seat
- Spring clamp, binder clip, or clothespin to keep the belt extended
- Optional: vacuum with a soft brush attachment for dust around the belt guide
Note: Avoid silicone spray, oil, grease, fabric softener, dressing, or “shine” products on the webbing. They can leave the belt slippery, attract more dirt, or contaminate the restraint material.
[Products Worth Considering]

10x GRIP-ROOT WEAVE - TRAP MORE, WORK LESS: Ultra-absorbent microfiber towels for car Grip Root weave works like PLANT ROOT FOLLICLES, sucking up & LOCKING AWAY 8x to 10x its weight in liquid, particulates, moisture, grime and dirt in far LESS TIME than traditional ‘Heavy Duty’ Cleaning Rags. Each towel features a 2.5mm thick design, providing enhanced durability and better grip during use.

THE ONLY LEATHER HONEY: For over 50 years, we have been making the best leather care products, including the beloved Leather Honey Leather Conditioner. Clean leather furniture, boots, jackets & more. Packaging may vary.

Excellent Cleaning Performance: Our cloths are made of microfiber material, which has outstanding water absorption and oil absorption abilities; whether it's for household cleaning or car care, our towels can easily remove dirt, dust, and stains
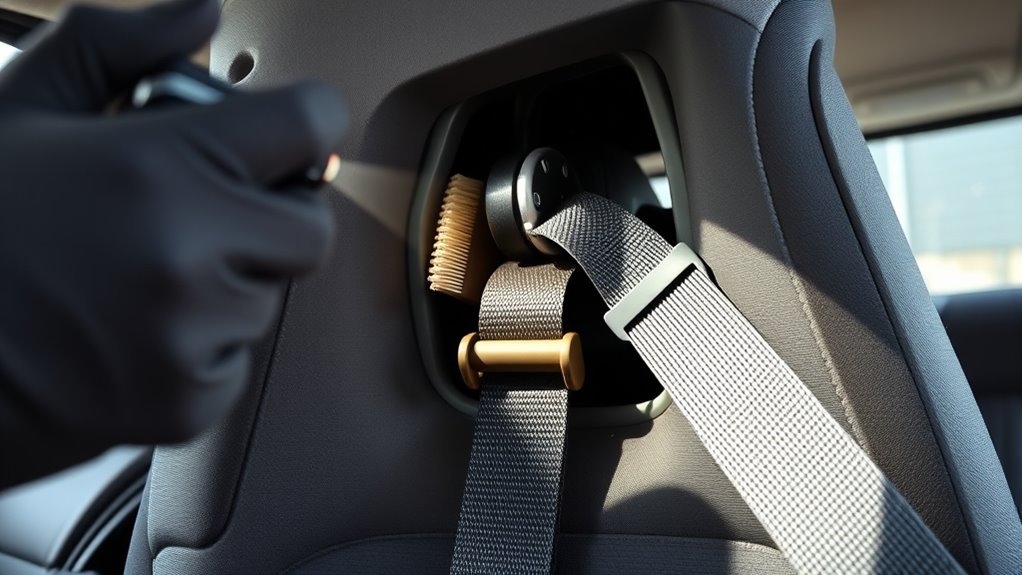
Prepare, Extend, and Secure the Belt for Cleaning
Park the Camry in a dry, shaded, well-ventilated place. Open the doors if weather allows so the belt can dry thoroughly. Place a towel over the seat and trim below the belt path to catch drips and protect the interior.
- Pull the seat belt out slowly until it is fully extended.
- Clamp the belt near the upper guide or retractor opening so it cannot roll back in while wet.
- Check that the belt is flat, not twisted, and fully accessible.
- Vacuum loose dust, hair, and lint from the shoulder guide and the exposed belt surface.
- Mix mild soap with lukewarm water in a small bowl. The solution should feel lightly soapy, not sudsy or slick.
If you drive a Camry Hybrid, be especially careful with water around interior vents and battery-related air intake areas. Keep cleaning controlled and localized to the belt webbing.
[Products Worth Considering]

EFFECTIVE SEAT BELT CLEANER: Removes dirt, stains, and grime from seat belts with a powerful formula designed to break down embedded contaminants for a refreshed, like-new appearance.

Superior Material :Crafted from premium 600D Oxford cloth and waterproof TPU, our dog rear car seat for medium dogs boasts exceptional waterproof and scratch-resistant properties. No liquid or pesky scratches will penetrate this top-notch cover, ensuring your car seat remains pristine.

[Superior Material ] :Crafted from premium 600D Oxford cloth and waterproof TPU, our dog rear car seat for medium dogs boasts exceptional waterproof and scratch-resistant properties. No liquid or pesky scratches will penetrate this top-notch cover, ensuring your car seat remains pristine
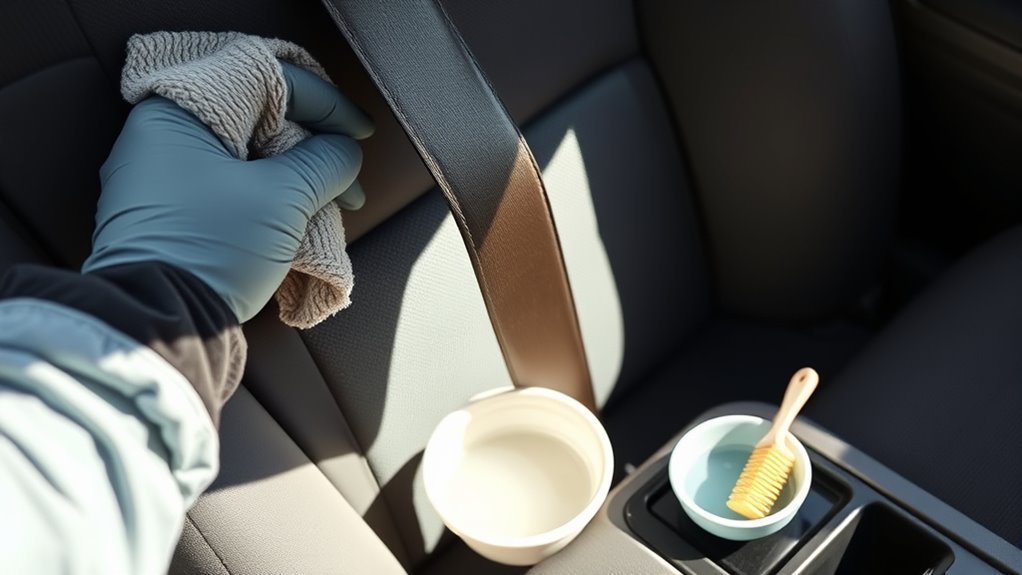
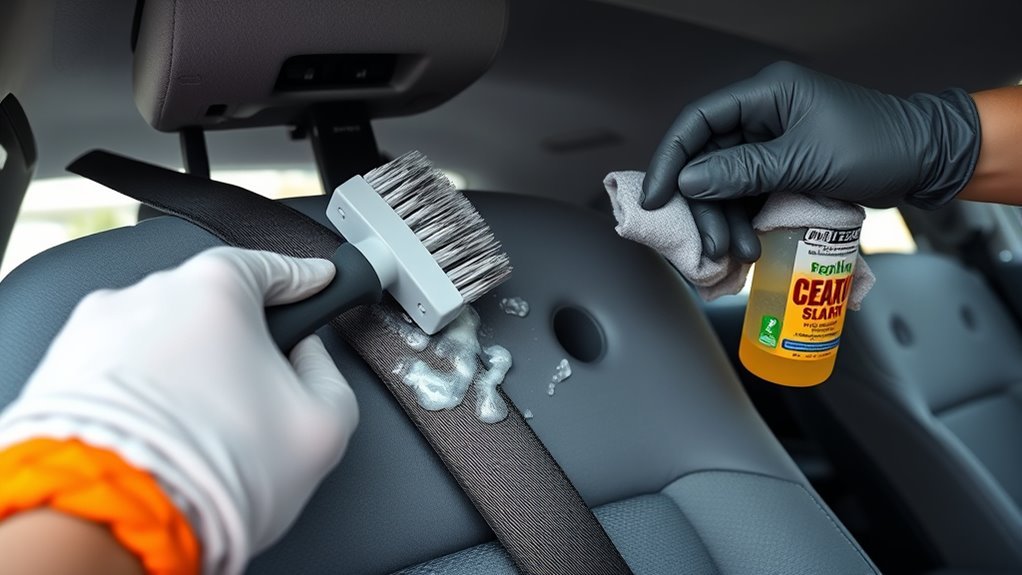
Hand-Cleaning Method: Soap, Brush, and Spot Treatments
For most slow or sticky Camry seat belts, hand cleaning is the best method. It gives you control, keeps moisture away from the mechanism, and avoids soaking the restraint system.
- Dampen a microfiber cloth with the mild soap solution. The cloth should be wet enough to clean, not dripping.
- Wipe the belt from top to bottom, following the length of the webbing.
- Use a soft-bristle brush for dirty areas, brushing gently with the weave rather than scrubbing across it.
- For sticky residue, hold the damp cloth on the spot for a minute, then wipe again. Do not scrape the fibers.
- Rinse your cloth in clean water, wring it out well, and wipe the belt until no soap residue remains.
- Blot the belt with a dry microfiber towel.
- Keep the belt fully extended and clamped until it is completely dry.
Pro Tip: If the belt retracts slowly only at the last few inches, clean the upper shoulder guide and the belt section that normally sits near your shoulder. Body oils and sunscreen often build up there first.
Deep Cleaning Heavy Grime Without Soaking the Retractor
If the belt is heavily soiled, you can clean more thoroughly without submerging the retractor or soaking the belt assembly. The goal is to loosen grime from the webbing while keeping water out of the mechanism.
- Fully extend and clamp the belt.
- Place a towel or shallow plastic tray under the exposed webbing.
- Apply mild soap solution with a damp cloth or sponge.
- Gently brush dirty areas in straight strokes along the belt.
- Wipe repeatedly with a clean damp cloth until the belt no longer feels soapy.
- Blot with a dry towel to remove as much moisture as possible.
- Leave the belt extended until dry all the way through.
Avoid dunking the belt into a bucket unless you can keep the retractor, buckle, wiring, and anchor hardware completely dry. For most owners, controlled hand cleaning is safer and cleaner than soaking.
[Products Worth Considering]

Dual-Sided Cleaning: The brush can open and close, featuring double-sided bristles that adapt to the surface being cleaned. This design ensures that every inch of the seat belts is thoroughly scrubbed, making the cleaning process more efficient and comprehensive

Dual-Sided Cleaning: The brush can open and close, featuring double-sided bristles that adapt to the surface being cleaned. This design ensures that every inch of the seat belts is thoroughly scrubbed, making the cleaning process more efficient and comprehensive

Durable Material: This car seat belt cleaning brush is made of PP material. The PP material allows you to control the softness of the bristles, so that they can penetrate deep into the crevices of the seatbelt fabric to remove dirt without damaging the fiber structure or scratching the leather surface. The PP material has a good resistance, which ensures a stable cleaning effect.
Drying and Retraction Testing: Avoid Mildew and Sluggish Return
Drying is not optional. If you release a damp belt into the retractor, moisture can sit inside the pillar area and create odor, mildew, or corrosion. Keep the belt fully extended until it feels dry on both sides and along the edges.
Use normal airflow only. Do not use a hair dryer, heat gun, space heater, or direct high heat because heat can damage synthetic fibers. If possible, let the car sit in a shaded, ventilated area with the belt clamped out for several hours.
Once dry, remove the clamp and guide the belt back slowly. Then test it again:
- The belt should retract without needing to be pushed into the slot.
- The webbing should feel clean, flexible, and residue-free.
- The belt should lock when tugged sharply.
- The latch should buckle and release normally.
If the belt retracts better but still feels slow, clean the webbing one more time and check for twisting at the shoulder guide. If there is no improvement, the issue is probably mechanical rather than dirt-related.
If Cleaning Fails: Troubleshooting and Safe Next Steps
When cleaning does not fix slow retraction, look for simple external causes before considering service work. A folded belt, loose interior trim, a dirty shoulder guide, or debris near the belt slot can all create drag.
- Make sure the belt is routed flat through the shoulder guide.
- Clean visible lint and dust around the guide with a dry brush or vacuum.
- Check whether pillar trim is pinching the belt.
- Look for sticky residue on the latch plate that may drag along the webbing.
- Confirm the belt is not rubbing against a seat cover, child seat, or cargo item.
If trim removal is needed to inspect the retractor area, follow the correct Toyota service information for your exact Camry year or have a professional do it. Do not force trim panels, spray liquid into the pillar, lubricate the retractor, or disconnect yellow SRS connectors.
What to Avoid: Harmful Chemicals and Common Mistakes
Strong cleaners can make a seat belt look cleaner while weakening the material that protects you in a crash. Avoid any product that leaves the webbing slick, stiff, oily, heavily scented, or discolored.
- Bleach or chlorine cleaners: These can weaken fibers and damage color.
- Harsh degreasers and solvents: Products such as acetone, lacquer thinner, gasoline, and brake cleaner are not safe for belt webbing.
- Alcohol-heavy cleaning: Occasional spot testing may not visibly harm every fabric, but routine alcohol use can dry or affect materials. Mild soap and water is safer.
- Abrasive pads: Scrubbing pads can fray fibers and create weak spots.
- Pressure washers or steam blasting: High force and excess moisture can push water into the retractor or damage the weave.
- Lubricants on the belt: Silicone, oil, or grease can contaminate the webbing and attract more dirt.
- Retracting the belt while damp: This traps moisture where you cannot easily dry it.
When to Replace the Belt or Get Professional Help
Cleaning is only appropriate for dirt, mild stains, and sticky surface grime. Replace the belt assembly or have it professionally inspected if you see damage or if the belt has been stressed in a crash.
- Visible cuts, tears, fraying, melted fibers, or missing stitching
- Severe stiffness, hard spots, chemical staining, or webbing that feels brittle
- A belt that will not lock when tugged sharply
- A belt that locks randomly, jams, or will not retract after cleaning and drying
- A buckle that does not latch or release consistently
- Warning lights or stored SRS codes related to the restraint system
- Any seat belt that was in use during a moderate or severe collision
Federal safety rules treat seat belt assemblies as engineered restraint components, including webbing, buckles, hardware, and retractors. That is why cutting, sewing, gluing, or “repairing” damaged webbing at home is not a safe fix. When damage is present, replacement with the correct part is the safer path.
How Often Should You Clean Camry Seat Belts?
For normal daily driving, inspect the belts monthly and clean them as needed. A deep surface cleaning every few months is reasonable if the car carries kids, pets, rideshare passengers, dusty work gear, or food and drinks. Clean spills quickly before they dry into the weave.
To prevent slow retraction from coming back, keep the belt flat, avoid letting it drag through food or lotion, vacuum the shoulder guide area during interior cleaning, and never clip heavy accessories to the webbing. If you use seat covers, confirm they do not rub against the belt path.
Frequently Asked Questions
Can I use Dawn dish soap on Camry seat belts?
Yes, a few drops of mild dish soap in lukewarm water can be used for surface cleaning. Keep the solution light, apply it with a damp cloth or sponge, remove all residue with clean water on a cloth, and air-dry the belt fully before retracting it.
Can I spray lubricant into a slow seat belt retractor?
No. Do not spray silicone, oil, grease, or penetrating lubricant into the retractor or onto the belt webbing. Lubricants can contaminate the belt, collect dirt, or interfere with proper operation. If cleaning the webbing and guide does not fix the issue, get the retractor inspected.
How do I remove a Toyota Camry seat belt buckle?
Do not remove the buckle just to clean the belt. Camry buckle and pretensioner parts may be connected to the restraint system, and the correct procedure varies by model year. If the buckle is damaged, sticky inside, or not latching correctly, use Toyota service information for your exact vehicle or have a qualified technician handle it.
Is it safe to soak a seat belt in a bucket?
It is safer to avoid soaking unless you can keep the retractor, buckle, wiring, and anchor hardware completely dry. For most Camry owners, controlled hand cleaning with a damp cloth, mild soap, and a soft brush is the better method.
Why is my Camry seat belt still slow after cleaning?
The belt may still be twisted, pinched by trim, dirty at the shoulder guide, damp inside the webbing, or affected by a weak or damaged retractor. Let it dry longer, check the belt path, and retest. If it still retracts poorly, have the seat belt assembly inspected.
Conclusion
A slow or sticky Camry seat belt is often caused by dirty webbing, grime at the shoulder guide, or a belt that is twisted in the retractor path. Start with a visual safety check, then clean the fully extended belt with mild soap, lukewarm water, a microfiber cloth, and a soft brush. Remove all soap, air-dry the belt completely, and retest the retraction and locking action before normal use.
If the belt is frayed, cut, stiff, chemically stained, crash-stressed, jammed, or still slow after careful cleaning, do not keep forcing it. Seat belts are engineered restraint assemblies, and damaged parts should be inspected or replaced by a qualified professional.
Sources
- Toyota Owner’s Manual: Cleaning and protecting the vehicle interior — backs up mild soap, lukewarm water, cloth/sponge cleaning, and periodic belt inspection.
- Toyota Owner’s Manual: Seat belts — backs up Camry seat belt and pretensioner safety context.
- National Highway Traffic Safety Administration: Seat Belt Safety — backs up the importance of properly functioning seat belts.
- 49 CFR § 571.209: Federal Motor Vehicle Safety Standard No. 209 — backs up that seat belt assemblies are regulated safety components with webbing, buckles, fasteners, and hardware.