You can restore cloudy Toyota Camry headlights by sanding off the oxidized layer, cleaning, and applying a UV‑protective clear coat. Mask surrounding paint, wear gloves and eye protection, then wet‑sand evenly with 1000 grit until the lens has a uniform matte finish. Rinse, dry, and spray two light coats of plastic clear coat, waiting a few minutes between coats; let cure for at least a week before washing. Follow detailed steps below to guarantee a durable, clear finish.
Quick Check: Will Sanding + Clear Coat Fix Your Headlights?
Wondering whether sanding and a clear coat will bring your cloudy headlights back? You can often reclaim clarity by using targeted sanding techniques first: 1000 grit sandpaper removes the yellowed layer and reveals a uniform haze when you’ve prepped the surface properly. If you still see shiny spots, keep sanding until the haze is even — those spots mean adhesion will fail.
Once the surface’s uniformly dull, move to clear coat application. Apply two light layers, waiting about three minutes between coats and watching for the first coat to become tacky before the second; that tackiness guarantees better adhesion. After the second coat, let the headlight dry for roughly five minutes and don’t touch it for at least a week so the finish cures fully. Follow these steps and you’ll free your Camry’s headlights from haze, improving safety and letting your car shine with renewed confidence.
Tools & Materials for Restoring Headlights
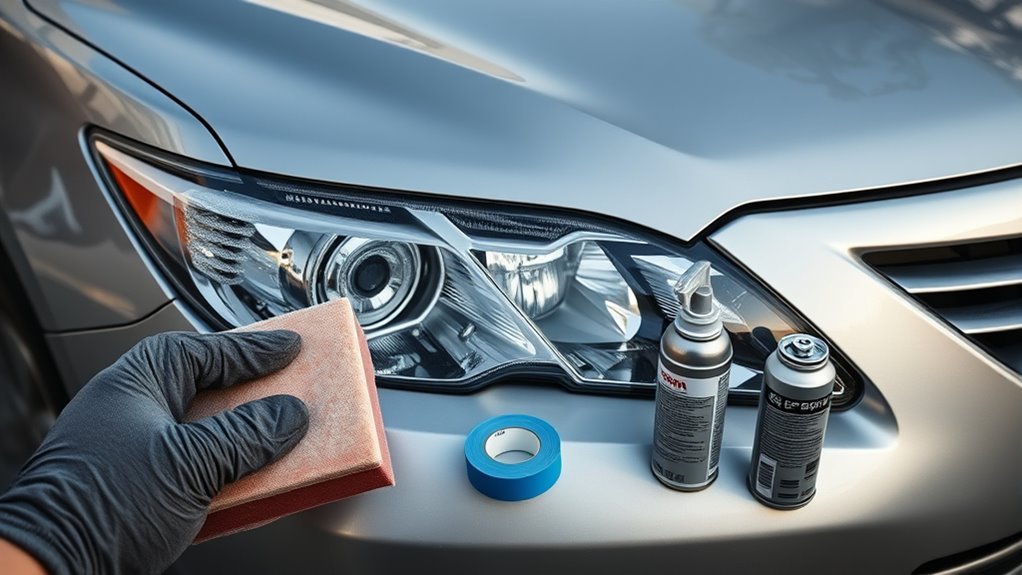
You’ll need 1000‑grit sandpaper, painter’s tape, and a clean microfiber cloth for sanding and polishing, plus a choice of clear coat sprays for protection. Tape off surrounding paint before you sand, and make sure the headlight is completely clean and dry so the clear coat bonds properly. Work in a garage or sheltered spot, wear eye and respiratory protection, and apply multiple light clear‑coat passes with about three minutes between coats to avoid runs.
Essential Sanding Supplies
A handful of specific supplies makes sanding cloudy headlights safe and effective: include sanding techniques-focused essential tools like 1000 grit sandpaper and a spray bottle with water to keep the paper wet and reduce friction. You’ll also want a roll of painter’s tape to protect surrounding paint while you work. Use a microfiber cloth to wipe away sanding residue and inspect progress—clean surfaces free you to finish confidently. These items let you control the process, avoid damage, and reclaim clarity on your terms. Don’t skip the wet-sanding approach; it’s kinder to the plastic and delivers smoother results. Note: choose a plastic-specific clear coat later—this section sticks to prepping and safe sanding supplies only.
Clear Coat Options
Now that the lens is sanded smooth and masked off, pick a high-quality clear coat designed for plastics—many pros favor a 1K primer clear coat because it restores clarity and resists UV degradation. Choose between clear coat types: 1K for ease and UV resistance, or multi-component systems if you want extra hardness. You’ll want a product labeled for automotive plastics. Follow application tips: spray slow and steady, lay down light, even layers, wait about three minutes between coats to avoid runs, and apply two coats total for best durability. After the final coat, let it dry about five minutes before moving, then don’t touch or wash the lens for at least a week to allow full curing and preserve your restored clarity.
Safety And Prep
Someone restoring headlights should gather the right tools and set up a safe, clean workspace before touching the lens. You’ll need 1000 grit sandpaper, tape, clear coat spray, and a clean cloth. As a liberating act of self-reliance, follow basic safety precautions: work in gloves, eye protection, and a well-ventilated area or garage to control dust and fumes. Use preparation techniques like cleaning and fully drying the lens, and taping paint edges to protect the body—critical for newer Camrys. Sand with light, even pressure until a uniform haze appears, then wipe with a clean cloth. Finally, stage your clear coat application in a wind-free space to guarantee even drying and preserve the effort you just invested.
Assess Condition: Damage, Yellowing, and Clear Coat Loss
Start by closely inspecting each headlight for yellowing, cloudiness, and clear-coat damage so you can plan the correct restoration steps and avoid wasting time on unnecessary sanding. Note damage indicators: peeling clear coat, deep pitting, or localized bubbling. Those mean the protective layer failed and full sanding plus recoat will be required. Identify yellowing causes—UV exposure and age are typical, especially on high-mileage Camrys—then estimate how deep the stain runs. Check for a uniform haze versus shiny patches; uniform haze suggests previous sanding or superficial oxidation, while shiny spots reveal stubborn areas that need additional abrasion. Compare both lenses side by side: a restored headlight should look markedly clearer than the unrestored one. Based on discoloration extent, plan grit progression—start with 1000 grit where heavy yellowing exists—and prepare to escalate if deeper damage shows. This focused assessment saves time and protects your paint and budget.
Prep: Mask, Protect Paint, and Clean Headlights
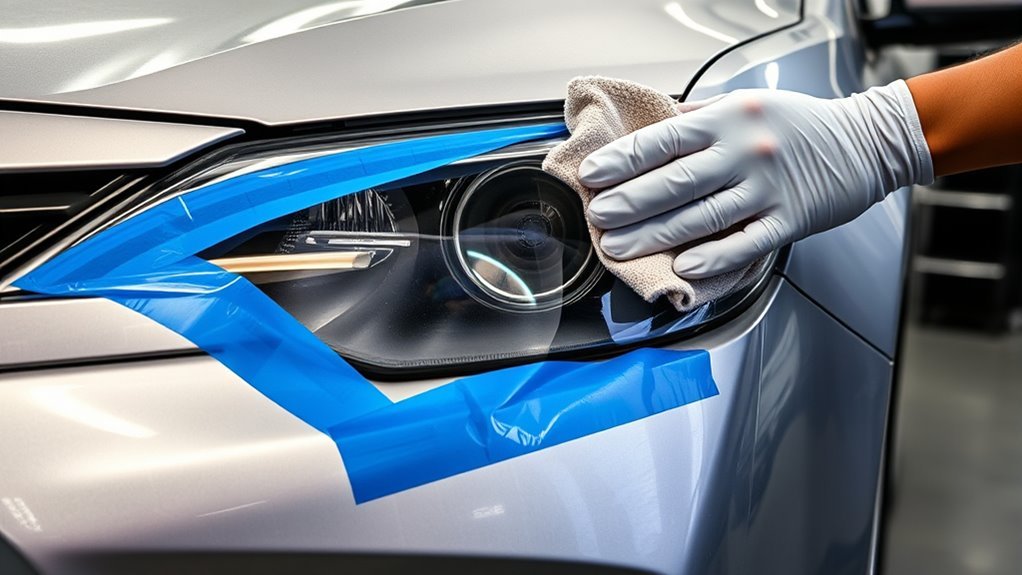
Having identified whether the lenses need light polishing or full sanding and recoating, prepare the car so you won’t damage the surrounding paint or leave grit where it shouldn’t. First, park in a shaded, well‑ventilated area and turn off the lights. Use masking techniques: apply automotive painter’s tape around the headlight perimeter, cover adjacent panels with plastic or paper, and press edges firmly to seal. Next, apply cleaning methods: wash lenses with mild soap and water, agitate with a soft cloth or brush to lift grime, then rinse thoroughly. Dry completely with microfiber towels to prevent trapped moisture during sanding or coating. Keep a trash bag or tray nearby to collect used towels and tape.
Prepare the car: tape and cover paint, wash and dry headlights thoroughly before sanding or polishing to avoid damage.
- Taped edges neat and flush against paint, nothing exposed.
- Plastic sheet draped over fender, bumper, secured with tape.
- Sudsy water and soft brush removing road film and bugs.
- Microfiber towel drying until no visible beads remain.
You’re protecting paint and freeing the lens for effective restoration.
Sanding Step-by-Step With 1000 Grit (Technique & Finish Signs)
Grab your 1000‑grit sandpaper and keep the headlight wet as you work, applying even pressure in small circular motions so the yellowed top layer is removed uniformly and a consistent hazy finish appears. Use steady, confident sanding techniques, moving methodically across the lens to avoid low spots. Keep the area wet—water carries away debris and reduces heat that can warp plastic.
Pause regularly to inspect finish indicators: the lens should show an even, matte haze without isolated shiny patches. If you see glossy spots, return to those areas with light, focused circular strokes until they match the surrounding haze. Maintain even pressure; heavy gouging defeats the purpose and weakens the lens.
Rinse the headlight periodically to confirm visibility of finish indicators and remove abrasive residue. Work with gloves and eye protection, and mask surrounding paint. This step liberates the lens from cloudiness, preparing it for the next stage with a uniform, controlled surface ready for finishing.
Clean & Dry Before Applying Clear Coat
Before you sprayed any clear coat, make sure the sanded lens is completely free of dust, sanding slurry, and moisture so the sealer can bond properly; wipe the surface gently with a clean, lint‑free microfiber dampened with water, rinse, then dry thoroughly with a dry microfiber or compressed air. You’ll inspect the lens for shiny spots that mean more sanding is needed; don’t skip this—proper surface preparation is headlight maintenance that determines adhesion and longevity. Use only soft microfiber—no paper towels or abrasive pads—to avoid reintroducing scratches. Wait until the lens is bone dry before you touch the sealer or clear coat.
Clean, dry, and inspect the sanded lens thoroughly—no dust, slurry, or moisture—before applying sealer or clear coat.
- Close-up: a lint‑free cloth pulling away a fine white slurry
- Detail: a dry microfiber tracing the curve of the lens
- Warning: a shiny patch revealing missed sanding
- Freedom: a crystal lens reflecting open road light
Be methodical, safety‑minded, and deliberate; clean, dry, and inspect until the surface is ready for coating.
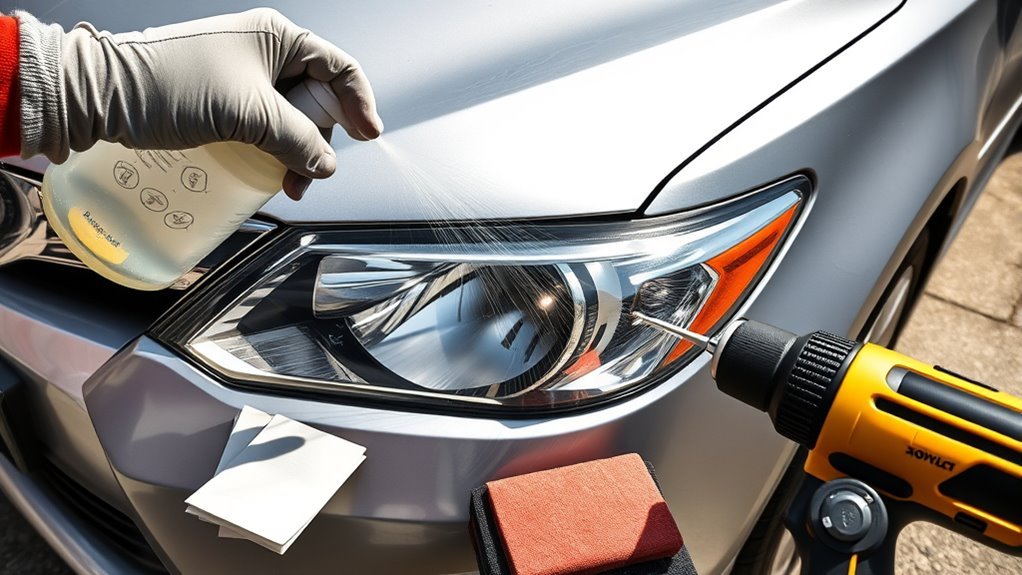
Applying Two Light Clear Coat Layers (Timing & Motion)
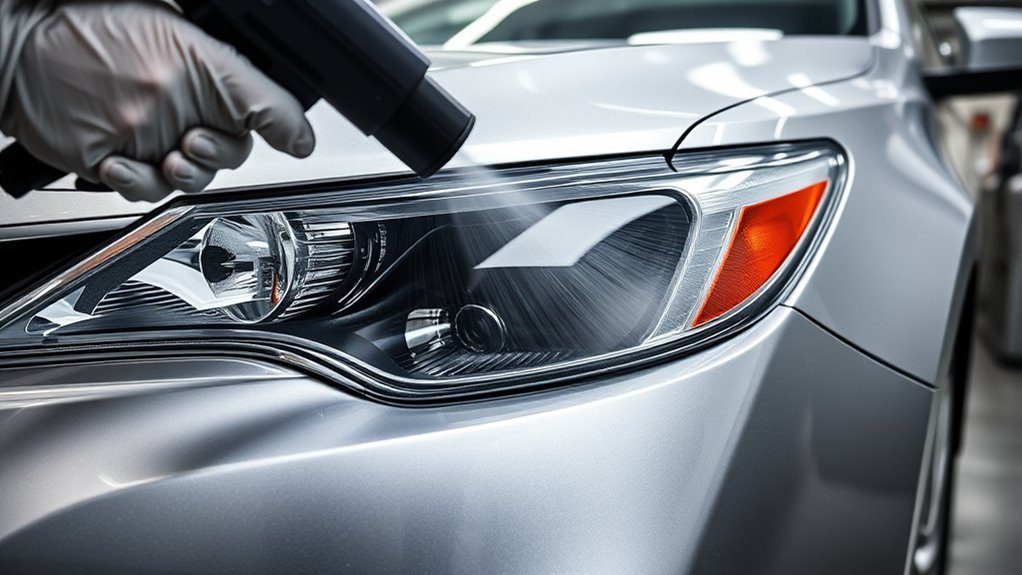
Once the lens is spotless and bone‑dry, apply the first clear coat with light, even strokes—keep the spray head moving parallel to the curve to avoid runs and heavy buildup. You’ll use steady, slow passes so the solvent evaporates uniformly; this is fundamental clear coat techniques that prevent sags and clouding. After that first pass, let the surface become tacky—about three minutes—before the next application. That tack window is your cue; rushing breaks adhesion, waiting too long wastes time.
Apply the second coat in the same measured manner, matching stroke speed and distance to maintain consistent clarity. When you finish, allow roughly five minutes for initial setting so the layer holds without handling. Stay safety‑minded: ventilate, wear a respirator, and avoid skin contact. These precise motions and strict application timing give you control and freedom from future haze, letting your Camry’s headlights reflect light — and your intent — with renewed clarity.
Curing & Aftercare: When You Can Touch or Wash
After the second clear coat goes on and feels tacky, don’t touch or wash the headlights for at least one week to allow full curing. You can wait about five minutes between coats, but without added hardener the coating needs that extended, undisturbed time to reach proper hardness. If possible, coat and cure the lights inside a garage to avoid wind and contaminants that can compromise clarity and longevity.
Handling Timeframe Before Touch
Although the clear coat will feel dry to the touch in about five minutes after the second coat, don’t wash or subject the headlights to moisture for at least one week to allow the 1K primer (which cures slowly without a hardener) to fully set. You’ll resist the urge to polish or rinse; that patience preserves clarity and honors curing importance. Use simple drying techniques: keep the car in a dry, dust-free area and let the primer breathe. Avoid contact that can imprint or mar the film.
- A shaded garage with good airflow, untouched for days.
- A clean tarp loosely draped to block dust without trapping humidity.
- No towels, hands, or tools resting on the lens surface.
- Visual checks only; no scrubbing or water exposure.
Washing And Protection Timeline
Having let the clear coats set undisturbed, you’ll still need to keep hands and water away for about a week so the 1K primer and clear topcoat can fully cure and bond. Wait roughly five minutes after the second clear coat before any brief handling during the job, but don’t wash or rub the lenses for at least seven days. The 1K system cures without hardener and needs time; full clarity and hardness take several days, so exercise patience. During curing, shield the headlights from moisture, dust, and debris—use breathable covers or park in a dry, sheltered spot. For aftercare, follow gentle washing techniques (mild soap, soft microfiber) and apply recommended protection tips like UV-safe sealants only after full cure to lock in results.
Troubleshooting: Haze, Runs, and Yellowing Return
When haze, runs, or yellowing show up after restoration, stop and assess the surface before doing anything else: you’ll want to identify whether the problem’s sanding, application, or curing. For haze removal, keep sanding with 1000 grit until the lens is uniformly dull; shiny spots mean you haven’t gone far enough. Prevent runs during clear coat application by spraying light, even passes and letting each coat get tacky before the next. After the second coat, wait about five minutes—this pause prevents premature contact that can mar the finish. If yellowing returns, sand deeper to remove embedded discoloration and use a clear coat with UV protectant. Finally, let the newly coated headlight cure fully: don’t wash or touch it for at least a week.
Stop, assess, and correct: sand to an even dull, spray light coats, wait between layers, and fully cure for UV protection.
- Dull, even matte surface after sanding, no shiny patches.
- Fine, feathered clear coat edges with no drip lines.
- Hands-off warnings taped over headlights.
- Sunblocked UV-protective finish shining uniformly.
Frequently Asked Questions
How to Clean Headlights on a Toyota Camry?
You clean Camry headlights by doing a headlight restoration: tape paint, sand with 1000 grit until uniform haze, dry thoroughly, then apply two light clear‑coat layers with three minutes between; wait a week before washing.
Does Magic Eraser Clean Cloudy Headlights?
Yes — you can use a Magic Eraser for headlight restoration, but it’s a temporary cleaning products fix; you’ll avoid deep scratches, rinse thoroughly, and pair it with proper restoration methods for safer, longer‑lasting clarity and freedom.
Conclusion
You’re ready to restore your Camry’s cloudy headlights safely and effectively. Follow each prep and sanding step precisely, like a surgeon working methodically — rush and you’ll make things worse. Use the right grit, keep surfaces clean and dry, apply two light clear‑coat layers with steady motion, and let them cure fully before washing. If haze, runs, or yellowing return, reassess damage and consider professional refinishing for durable results.