
A worn wheel bearing on a Toyota RAV4 often starts as a low hum, growl, or roar that gets louder with vehicle speed. The tricky part is that tire noise, brake problems, CV joints, loose wheel-end hardware, and suspension wear can sound similar, so the safest repair starts with a careful diagnosis before replacing parts.
Quick Answer
Toyota RAV4 wheel bearing noise is usually a steady humming, rumbling, roaring, or grinding sound that increases with vehicle speed and may change when you turn. Confirm the noisy corner with a safe road test and lifted-wheel inspection before replacing the hub or bearing assembly.
Key Takeaways
- A bad RAV4 wheel bearing usually follows wheel speed, not engine RPM, so the sound often stays present while coasting.
- If the noise gets louder during a gentle turn, the loaded side is often the suspect, but you still need a physical inspection to confirm it.
- Grinding, wheel play, vibration, heat near one hub, or ABS/traction-control warnings mean the vehicle should be inspected promptly.
- Do not guess axle nut, hub bolt, or lug nut torque. Use Toyota service information for your exact year, drivetrain, and wheel position.
At a Glance
| Time Required | Diagnosis: 30–60 minutes. Replacement: often 1–3+ hours per corner, depending on year, front/rear location, rust, and hub design. |
| Difficulty | Moderate to advanced DIY. Brake, axle, ABS, and wheel-end work is safety-critical. |
| Tools Needed | Jack, jack stands, wheel chocks, torque wrench, sockets, breaker bar, mechanic’s stethoscope or chassis ear, dial indicator if checking play/runout, and Toyota service information. |
| Cost | Varies by model year, drivetrain, parts choice, and local labor rate. Get a VIN-specific quote before authorizing repair. |
Warning: Never work under a vehicle supported only by a jack. Use the correct Toyota jack points, set the parking brake, chock the opposite wheels, and support the RAV4 on rated jack stands before touching the wheel, brakes, axle nut, or hub assembly.
Identifying Signs of Wheel Bearing Noise
When diagnosing wheel bearing noise in your Toyota RAV4, listen for a low humming, rumbling, roaring, or grinding sound that gets louder as vehicle speed increases. The sound may be faint at first, then become more obvious at highway speed or during light turns.
A bearing-related noise is usually tied to wheel rotation. That means it often changes with road speed, even if you lift off the throttle and coast. If the noise rises and falls with engine RPM while the vehicle speed stays the same, look at engine, belt, exhaust, or drivetrain causes instead.
| Symptom | What It May Mean | What to Check Next |
|---|---|---|
| Humming, rumbling, or roaring that increases with speed | Possible worn wheel bearing or tire noise | Road-test on different pavement, rotate tires if needed, then inspect the hub |
| Noise gets louder during a gentle left or right turn | Often points to the bearing on the loaded side | Confirm with lifted-wheel spin test and stethoscope/chassis-ear check |
| Grinding while driving | More advanced wheel-end damage, brake contact, or hub problem | Stop unnecessary driving and inspect brakes, rotor, backing plate, and hub |
| Wheel vibration, wobble, or looseness | Possible severe bearing wear, loose lug nuts, tire/wheel damage, or suspension wear | Check wheel play, lug torque, tire condition, ball joints, tie rods, and struts |
| ABS or traction-control warning with hub noise | Possible wheel-speed sensor, encoder, wiring, or hub/bearing issue | Scan for ABS codes before replacing parts |
To narrow the source, test drive the RAV4 on a safe, low-traffic road. Keep the radio and HVAC fan off, note the speed where the noise starts, then gently steer left and right within your lane. A noise that grows louder when the vehicle’s weight shifts to one side often points to the bearing on the loaded side, but tire wear and suspension problems can fool this test.
Note: A left turn usually loads the right-side wheel bearings, while a right turn usually loads the left-side bearings. Treat this as a clue, not a final diagnosis.
Before You Replace the Bearing, Check These First
Many parts can mimic a bad RAV4 wheel bearing. Before ordering a hub or bearing assembly, inspect the simple items that commonly create the same humming, growling, or vibration.
- Tires: Cupped, feathered, uneven, or aggressive tires can roar like a bearing. If the sound changes dramatically on different pavement, suspect tire noise.
- Brake parts: A bent dust shield, worn brake pad, stuck caliper, or rotor contact can create grinding or scraping.
- CV joints and axles: Clicking or popping during sharp turns often points to an outer CV joint rather than a wheel bearing.
- Lug nuts and wheel hardware: Loose, damaged, or improperly torqued lug nuts can cause vibration and unsafe wheel movement.
- Suspension and steering: Worn ball joints, tie rods, struts, control arm bushings, or alignment problems can cause vibration and uneven tire wear.
- ABS wiring: A damaged wheel-speed sensor or wiring harness can trigger warnings that may be mistaken for a hub failure.
The best diagnosis is not “replace the loudest-sounding corner.” Confirm the pattern on the road, then verify the wheel-end condition with the vehicle safely lifted.
How to Know When to Replace Your Wheel Bearing
Determining when to replace your wheel bearing is vital for maintaining your Toyota RAV4’s safety and performance. Replace or professionally inspect the bearing/hub assembly when you find one or more of these signs:
- Speed-related noise: A roaring, humming, or grinding noise gets louder with vehicle speed and does not disappear when you coast.
- Turning-load change: The noise changes during a gentle left or right turn, especially when one side of the vehicle is loaded.
- Rough rotation: With the RAV4 safely supported, the wheel or hub feels rough, notchy, or noisy when rotated by hand.
- Wheel play: The wheel rocks excessively when checked at the 12-and-6 or 3-and-9 positions, after ruling out ball joint and tie rod play.
- Vibration or wobble: The steering wheel, floor, or body vibrates in a way that follows vehicle speed.
- ABS/traction-control warning: The warning appears with wheel-end noise or hub play, especially if scan data points to one wheel-speed sensor.
- Heat or odor: One hub area is much hotter than the others after normal driving, with no brake-drag explanation.
Warning: Do not keep driving normally if the noise has become grinding, the wheel has visible play, the vehicle vibrates heavily, or braking/steering feels abnormal. Have the RAV4 inspected before the wheel-end damage gets worse.
Safe Road Test and Lift Inspection
Use this process to pinpoint the noisy corner before replacing a part:
- Start with tire pressure and tire wear. Check all four tires for cupping, scalloping, exposed cords, uneven tread, or mismatched tires.
- Road-test at steady speed. Drive at the speed where the sound is easiest to hear. A bearing hum usually follows vehicle speed.
- Coast safely. If the sound remains while coasting in gear with light throttle, the issue is more likely wheel/tire/hub related than engine-load related.
- Load the left and right sides gently. Make gentle lane-position steering inputs, not sharp swerves. Note whether the noise grows louder when turning left or right.
- Lift one axle at a time safely. Support the RAV4 with jack stands on a level surface. Never rely on the jack alone.
- Spin and listen. Rotate each wheel by hand. Listen for roughness, scraping, or a dry growl. A mechanic’s stethoscope or chassis ear can help isolate the hub, but keep hands, wires, and clothing away from moving parts.
- Check for play. Rock the tire at 12-and-6 and 3-and-9. If there is movement, determine whether it comes from the hub, ball joint, tie rod, or suspension before condemning the bearing.
- Inspect the brakes and backing plate. A bent backing plate touching the rotor can sound like a bad bearing.
Pro Tip: If the noise changes after rotating tires front-to-rear, tire wear is more likely. If the noise stays at the same vehicle corner, the hub/bearing becomes a stronger suspect.
Check for RAV4 Recalls and Service Information
Before replacing a wheel bearing, check your VIN through the Toyota Safety Recall and Service Campaign lookup. This does not mean every RAV4 has a wheel bearing recall, but it helps you avoid paying for a repair that may be covered by an open campaign.
This is especially important for some 2024 RAV4 owners. Toyota/NHTSA Recall 24V-911, Toyota Recall 24TA14, covered certain 2024 model year RAV4 vehicles for improperly tightened front brake caliper mounting bracket and front hub bearing bolts, which could cause abnormal noise or vibration and, in severe cases, braking or wheel separation concerns.
For repair steps and torque specifications, use Toyota Technical Information System (TIS) or a Toyota dealer/qualified technician. RAV4 wheel bearing and hub procedures vary by model year, drivetrain, and whether you are working on the front or rear.
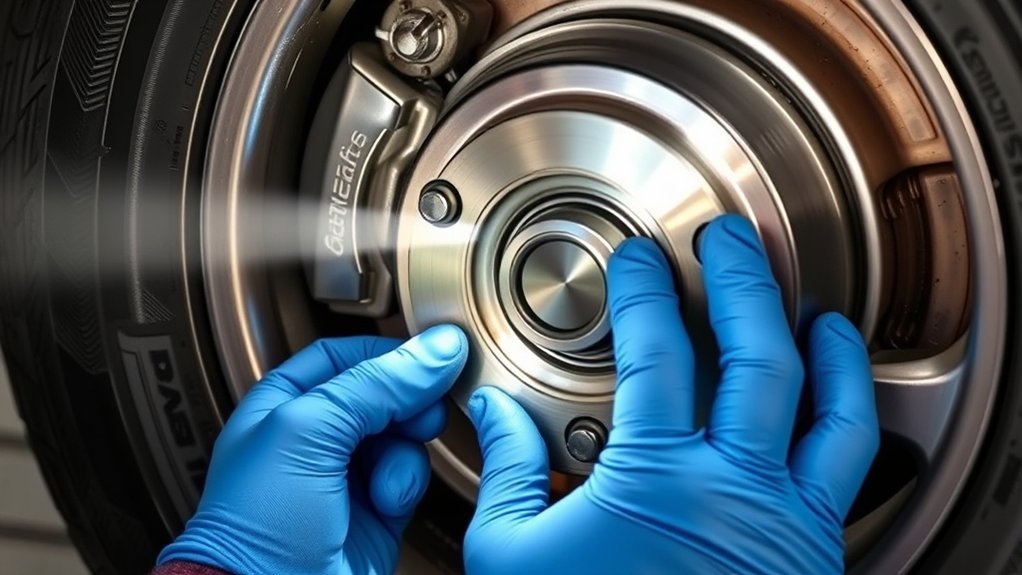
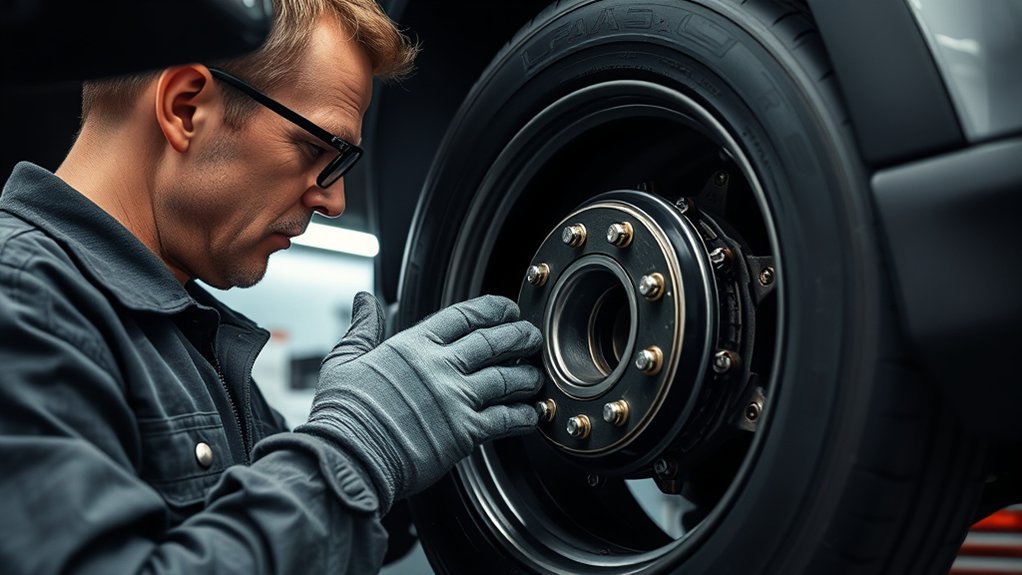
Removing a Wheel Bearing: A Step-by-Step Guide
Removing a wheel bearing or hub assembly from your Toyota RAV4 requires careful attention to detail. The exact procedure depends on the model year and wheel position, so treat the steps below as a general overview, not a substitute for Toyota repair information.
- Confirm the part and position. Verify front or rear, left or right, ABS/encoder style, drivetrain, and whether the replacement is a complete hub assembly or a press-in bearing design.
- Prepare the vehicle safely. Park on a level surface, chock the wheels, loosen the lug nuts before lifting, raise the RAV4 at the correct jack point, and support it on jack stands.
- Remove the wheel and inspect. Check tire wear, rotor condition, backing plate clearance, brake hose routing, and ABS wiring before taking parts apart.
- Remove brake components carefully. Remove the brake caliper and bracket as required. Hang the caliper with a hook or wire; never let it dangle by the brake hose.
- Remove the rotor. If the rotor is stuck, use the service-manual method instead of hammering aggressively near the hub or ABS components.
- Handle the axle nut correctly if equipped. If the hub uses a staked or one-time-use axle nut, unstake it according to Toyota service information and replace it when specified. Avoid cutting near axle threads, the hub, brake hose, or ABS wiring.
- Disconnect or protect ABS wiring. Keep the wheel-speed sensor and harness out of the work area. Do not pull on the harness.
- Remove hub mounting bolts or press components as designed. Many modern hub assemblies bolt to the knuckle, while some bearing designs require a press and special adapters.
- Clean the mounting surface. Clean the knuckle/backing plate contact area with suitable abrasive material such as 80-grit sandpaper or a surface-conditioning pad. Remove rust and debris without gouging the mounting face.
Note: If the bearing is pressed into the knuckle, improper press force can damage the new bearing before the RAV4 ever leaves the garage. Use the correct adapters or have a shop press it.
Install Your New Wheel Bearing Correctly
After successfully removing the old wheel bearing or hub assembly, compare the new part with the old one before installation. Check the bolt pattern, ABS encoder side, sensor provision, flange offset, connector style, and part number.
- Clean the backing plate and knuckle. The mounting face must be clean and flat so the new bearing seats squarely.
- Protect the encoder side. If the bearing or hub has a magnetic encoder for ABS, keep it clean and away from metal debris.
- Start bolts by hand. Start all hub or bracket bolts by hand before tightening. This prevents cross-threading and helps the hub seat evenly.
- Torque in stages. Use a calibrated torque wrench and the Toyota specification for your exact RAV4. Do not rely on “tight enough.”
- Use a new axle nut when specified. Some self-staking axle nuts are one-time-use. If the new hub includes a nut or Toyota specifies replacement, do not reuse the old one.
- Stake or lock the axle nut correctly. If the design uses a staked nut, stake it only after final torque is applied.
- Check rotor and backing plate clearance. Spin the rotor by hand and make sure nothing rubs before reinstalling the wheel.
- Torque the lug nuts correctly. Tighten in a star pattern to the Toyota wheel-nut specification for your model year and wheel type.
Proper torque matters. SKF warns that improper axle nut, hub mounting bolt, or lug nut torque can contribute to premature hub failure, hub movement, rotor problems, damaged components, or wheel-stud issues.
Top Mistakes to Avoid When Replacing Your Wheel Bearing
When replacing your wheel bearing, avoid these common mistakes that can lead to noise returning, ABS faults, premature failure, or unsafe driving:
- Replacing the wrong side: Always confirm the noisy corner before buying parts.
- Ignoring tire noise: Cupped or uneven tires can mimic a bad bearing and remain noisy after a new hub is installed.
- Forgetting the ABS sensor or encoder: Damaged wiring, a dirty encoder, or wrong-side installation can trigger ABS/traction-control warnings.
- Reusing a one-time-use axle nut: If Toyota or the hub manufacturer specifies replacement, install a new nut.
- Using an impact instead of proper torque: Over-tightening or under-tightening axle nuts, hub bolts, or lug nuts can damage parts and create unsafe wheel-end movement.
- Skipping mounting-surface cleaning: Rust or debris behind the hub can cause runout, brake pulsation, or misalignment.
- Letting the brake caliper hang by the hose: This can damage the hose and create a braking hazard.
- Skipping the post-repair test drive: Always verify that the noise is gone, the ABS light stays off, and braking feels normal.
Post-Repair Test Drive Checklist
After the RAV4 is fully reassembled, use this checklist before calling the job finished:
- Confirm the brake pedal feels firm before moving the vehicle.
- Check that the ABS, brake, and traction-control lights turn off normally.
- Drive slowly first and listen for scraping, rubbing, clicking, or grinding.
- Make a gentle stop and confirm the vehicle does not pull abnormally.
- Repeat the original speed range where the noise was heard.
- After the test drive, recheck for heat, leaks, loose hardware, or unusual smells near the repaired corner.
- Recheck lug nut torque after the wheel has been removed and reinstalled, following Toyota guidance for your model.
Frequently Asked Questions
What is the most common issue with the Toyota RAV4?
There is no single “most common” issue for every Toyota RAV4 because problems vary by model year, mileage, maintenance, climate, and drivetrain. For wheel-end complaints, the most useful first step is to separate wheel bearing noise from tire wear, brake noise, CV joint clicking, suspension looseness, or recall-related hardware concerns.
Can I drive my RAV4 with wheel bearing noise?
Drive as little as possible until the noise is diagnosed. A faint hum may allow a careful trip to a repair shop, but grinding, wheel play, heavy vibration, hub heat, brake changes, or warning lights mean you should stop unnecessary driving and arrange inspection.
How do I tell which RAV4 wheel bearing is bad?
Use the road-test noise pattern as a clue, then confirm with the vehicle safely lifted. A noise that gets louder during a left turn often points to the right side, and a noise that gets louder during a right turn often points to the left side. Always confirm with physical inspection because tires, brakes, and suspension parts can mislead you.
Can a bad wheel bearing turn on the ABS light?
Yes. Excessive wheel bearing play, hub damage, encoder damage, or sensor wiring problems can affect wheel-speed readings and trigger ABS or traction-control warnings. Scan the ABS system before replacing parts so you know which corner or circuit is causing the fault.
Should I replace both wheel bearings on the same axle?
Not automatically. Replace the confirmed failed bearing or hub assembly unless inspection shows the opposite side is also noisy, loose, rough, overheated, or damaged. Replacing both sides may make sense on a high-mileage vehicle if labor overlap, rust, or preventive maintenance justifies it.
Do I need an alignment after replacing a RAV4 wheel bearing?
A simple bolt-on hub replacement may not require an alignment if suspension geometry was not disturbed. However, get an alignment if the knuckle, strut, tie rod, control arm, or other alignment-related parts were loosened, or if the vehicle already had uneven tire wear or pulling.
Conclusion
Addressing wheel bearing noise in your Toyota RAV4 is essential for safe steering, braking, and tire control. Start with a careful diagnosis, rule out tire and brake noise, check for wheel play or roughness, and verify whether your VIN has any open Toyota recall or service campaign.
If replacement is needed, use the correct RAV4 part, protect the ABS sensor, clean the mounting surface, replace one-time-use hardware when specified, and torque every fastener to Toyota service information. A quiet test drive, normal braking feel, and no warning lights are the signs that the repair was done correctly.
Sources
- Timken TechTips: Symptoms of a Worn Wheel Hub Bearing — supports humming, rumbling, growling, grinding, turning-load clues, vibration, tire wear, and ABS-related symptoms.
- SKF Tech Tip TT 08-018: Hub Installation and Torquing — supports axle nut, hub mounting bolt, lug nut torque, clean knuckle surfaces, and one-time-use self-staking axle nut cautions.
- Toyota Technical Information System (TIS) — official Toyota repair information source for model-year-specific procedures, torque specs, wiring diagrams, and service publications.
- Toyota Support: Repair Information and Publications Online — confirms Toyota TIS access to repair manuals, owner’s manuals, TSBs, and other service publications.
- Toyota Safety Recall and Service Campaign Lookup — supports VIN-specific recall and campaign checks before repair.
- NHTSA/Toyota Recall 24V-911 / Toyota 24TA14 Notice — supports the limited 2024 RAV4 front brake caliper mounting bracket and hub bearing bolt recall context.