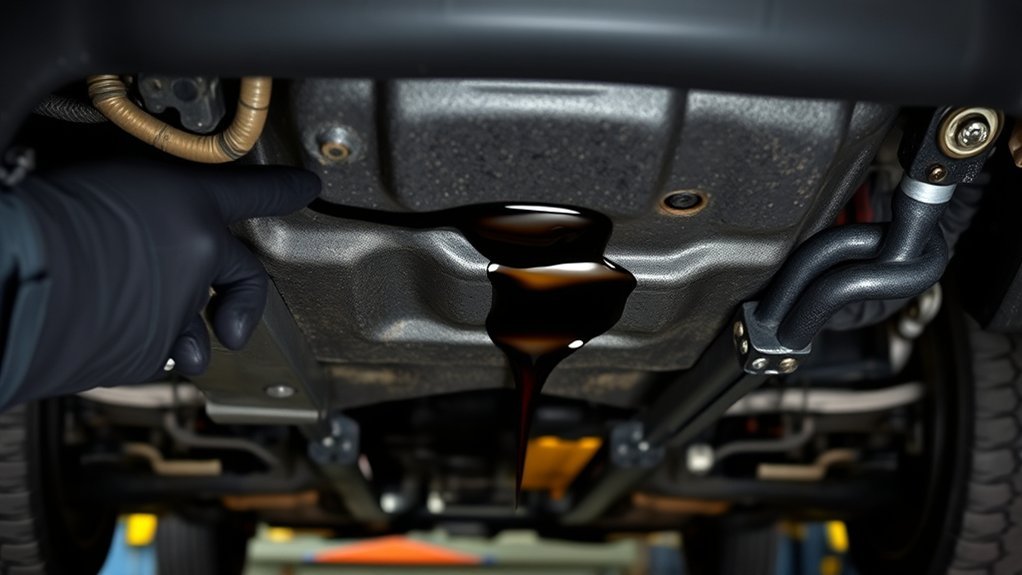
Diagnosing oil leaks in your Toyota RAV4 starts with checking common leak points like the valve cover gasket, oil pan, and seals. Look for visible droplets or pooling fluid, and consider using UV dye for tracking. Regular maintenance, including cleaning and inspecting gaskets, can prevent leaks. If leaks persist, consult a professional. Repair costs vary, so knowing your options helps. Maintain your engine’s integrity, and you’ll guarantee lasting performance. There’s more to explore about preventing future issues.
Common Causes of Oil Leaks in Toyota RAV4
When diagnosing oil leaks in your Toyota RAV4, it’s vital to contemplate various common causes that can lead to this issue. Worn or damaged gaskets, particularly valve cover gaskets, are frequent culprits, especially in older models. Regular gasket maintenance is important to mitigate these risks. The front oil seal area, especially in the 1998 RAV4, often becomes a leak source, necessitating timely replacement to prevent significant oil loss.
Excessive oil levels, often due to overfilling during oil changes, can also exacerbate leaks and create engine performance problems. Additionally, the VVT-i oil line is prone to bursting, which can result in massive oil leaks and trigger low oil pressure warnings. To maintain oil leak prevention, conduct regular inspections of common leak points like the oil pan and engine gaskets. Early detection is key to avoiding more severe engine damage and maintaining your vehicle’s performance.
Oil Leaks vs. Seepage: Key Differences?
Understanding the distinction between oil leaks and seepage is vital for effective vehicle maintenance. An oil leak is marked by visible droplets and pooling fluid, indicating a significant loss of oil that can lead to severe engine issues if not addressed. In contrast, seepage manifests as a thin film or accumulation of oil, suggesting minimal leakage but potentially signaling future problems.
Common sources of leaks include worn gaskets and seals, while seepage often occurs at junctions between components. For oil leak prevention, you’ll want to conduct regular inspections to catch leaks early. Diagnosing leaks involves checking for fresh oil pools, whereas seepage detection requires a close visual examination for oil films or discoloration. Understanding these differences is essential for determining the appropriate maintenance and repair strategies for your Toyota RAV4, ensuring peak performance and longevity.
Step-by-Step Troubleshooting for Oil Leaks
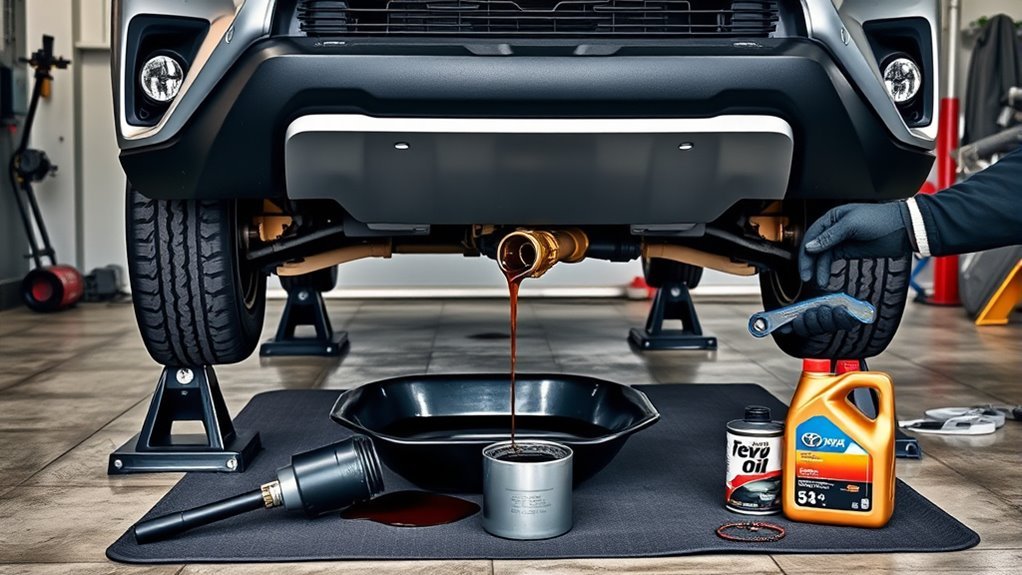
When troubleshooting oil leaks in your Toyota RAV4, start by inspecting common leak locations like the oil pan, valve cover gaskets, and oil filter. Cleaning these areas helps you identify the source more accurately by revealing fresh oil or pooling fluid. If needed, use UV oil dye to track the leak with a blacklight for precise diagnostics.
Common Leak Locations
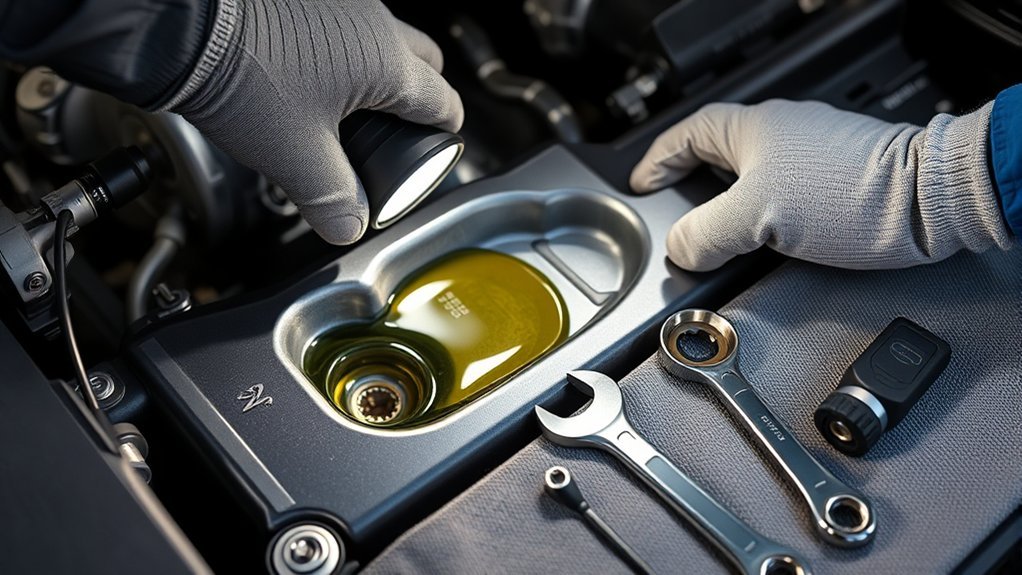
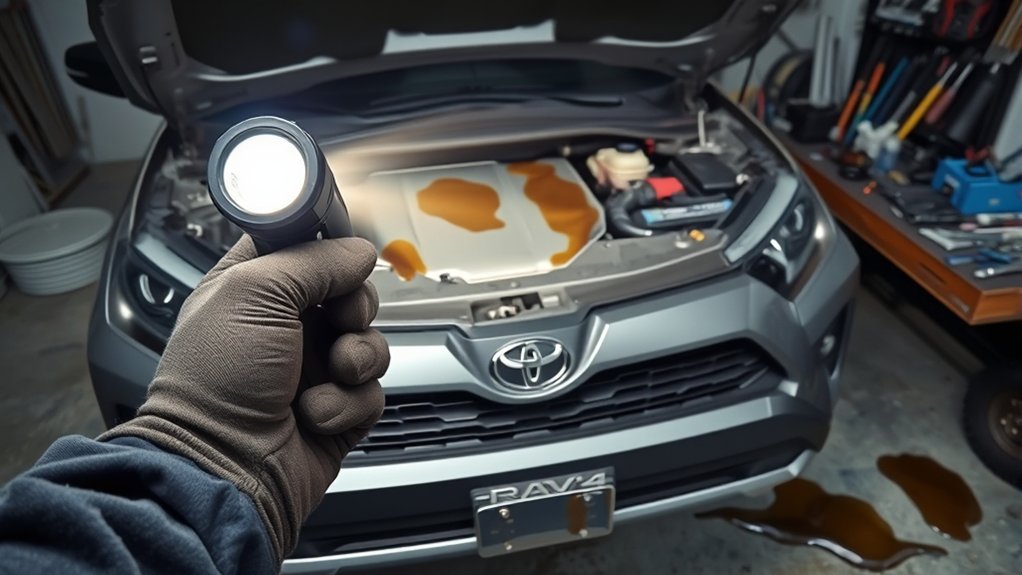
Identifying common oil leak locations in your Toyota RAV4 is essential for maintaining engine health and performance. Start by inspecting the engine compartment for fresh oil spots, particularly around the oil filter and drain plug, as these are frequent culprits. Other common leak areas include the oil pan, valve cover gaskets, and the front crankshaft oil seal, which might require timing case removal for a thorough inspection. To confirm a leak, clean the suspected area, run the engine, and watch for new oil accumulation. Regularly check your oil level; drops may signal a leak or other engine issues. If leaks persist after your checks, consider seeking professional help from a certified mechanic for accurate diagnosis and resolution.
Diagnostic Inspection Techniques
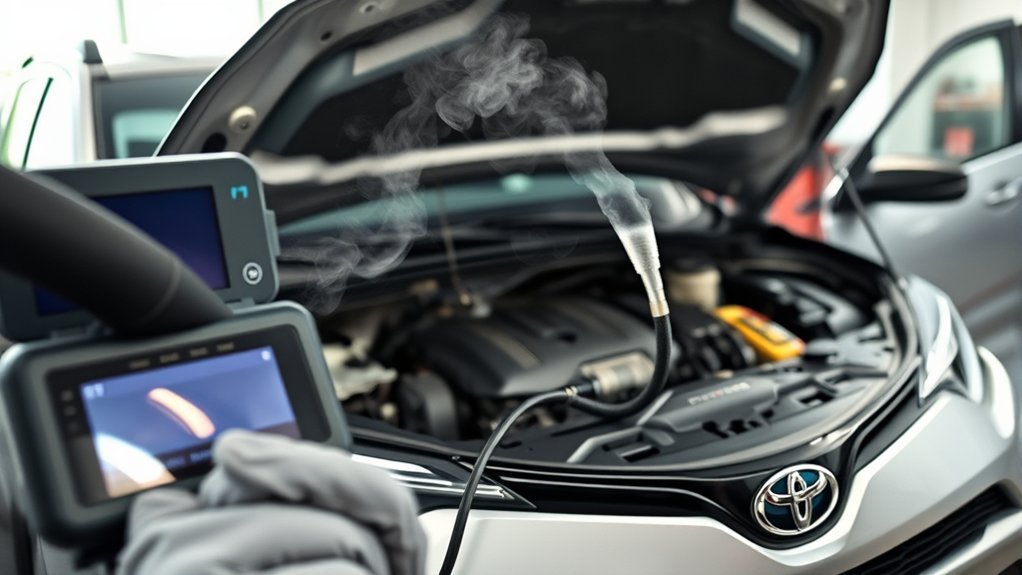
A thorough diagnostic inspection is essential for pinpointing oil leaks in your Toyota RAV4. Start by checking common leak points like the oil pan and valve cover gaskets for fresh oil pooling or droplets. Clean these areas to enhance visibility, as grime can obscure leaks. After cleaning, run the vehicle and watch for new oil accumulation to confirm the source. If you still can’t identify the leak, consider adding UV oil dye to the engine oil; it’ll help track the leak under a blacklight. Don’t hesitate to seek professional assistance if needed, as expert diagnostics can prevent further engine damage. Prioritizing leak prevention and oil maintenance now can save you headaches later.
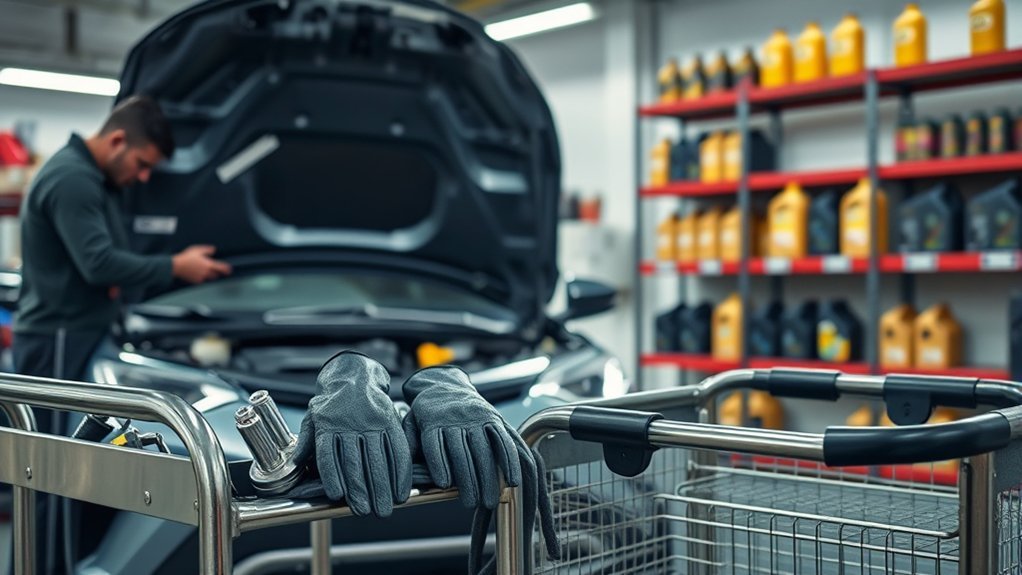
Why Engine Cleaning Matters Before Repairs
Cleaning your engine before repairs is essential for effective leak detection. By removing old oil and grime, you gain clearer visibility of any fresh leaks, which enhances diagnostic accuracy. Furthermore, a clean surface guarantees better contact for gaskets and seals, minimizing the risk of future leaks.
Enhanced Leak Detection
Before diving into repairs, ensuring your engine is clean can greatly enhance leak detection. A clean engine surface allows you to spot fresh oil leaks quickly, reducing diagnostic time and potential repair costs. Professional engine cleaning, which typically takes 4-8 hours, is a worthwhile investment. You can also use UV oil dye post-cleaning for better tracking of leaks under a blacklight. Regular cleaning is especially important after major repairs to maintain engine health.
| Benefit | Description |
|---|---|
| Improved Visibility | Removes old oil, dirt, and debris |
| Accurate Leak Detection | Helps identify the source of leaks quickly |
| Cost-Effective | Reduces diagnostic time and repair costs |
| Enhanced Tracking | UV dye reveals fresh oil under blacklight |
Improved Repair Accuracy
Proper engine cleaning greatly enhances repair accuracy by eliminating old oil residue and debris that can obscure essential inspections. A clean engine allows you to identify oil leak sources more effectively, leading to quicker, more precise diagnoses. By thoroughly cleaning mating surfaces, you guarantee proper sealing, which is crucial for preventing future leaks and improving repair longevity. Although professional cleaning may take 4-8 hours, it ultimately saves time and money by addressing the leak correctly on the first attempt. Additionally, using UV oil dye during the cleaning process can help you trace leaks more easily, further enhancing the accuracy of repairs. This meticulous approach not only boosts engine performance but also contributes to a hassle-free experience in the long run.
What to Expect: Repair Costs for Oil Leak Fixes
When addressing oil leaks in your Toyota RAV4, you can expect repair costs to vary considerably based on the issue at hand. Here’s a quick diagnostics overview of potential expenses:
- Oil level sensor replacement: around $171
- Oil pan gasket replacement: typically between $366 and $537
- Engine oil pan replacement: could go up to $539
Ignoring oil leaks can lead to significant engine damage, which will only escalate repair costs. A professional diagnosis is vital; it helps pinpoint the exact source of the leak, saving you from unnecessary repairs. Regular oil level checks and prompt action on leaks are essential for effective oil leak prevention. By staying proactive, you can maintain your vehicle’s health and avoid more expensive repairs down the line.
Recognizing Warning Signs: When to Consult a Mechanic?
How can you tell if your Toyota RAV4 needs professional help with an oil leak? Start by checking for fresh oil pooling under your vehicle, particularly near the oil pan and valve cover gaskets. These are common leak points that signal a significant issue. Regularly monitor your oil level; if you notice a sudden drop or find yourself frequently adding oil, it’s time to consult a mechanic. Pay attention to dashboard warning lights, especially low oil pressure indicators, as these can point to serious engine problems resulting from leaks. Additionally, if you spot white or gray smoke from the exhaust—especially post-oil change—this could signal overfilled oil or other related engine issues. Finally, if you experience low engine power or performance issues, don’t hesitate to engage a mechanic. Ignoring these warning signs can jeopardize your RAV4’s health and performance.
How to Prevent Future Oil Leaks in Your RAV4
Preventing future oil leaks in your Toyota RAV4 starts with regular maintenance and attention to key components. By staying proactive, you can greatly reduce the risk of leaks. Here are three essential steps:
- Regular Gasket Maintenance: Inspect and replace engine gaskets and seals, especially in older models, to prevent deterioration.
- Tighten Drain Plugs: During oil changes, confirm drain plugs are properly tightened to avoid leaks from loose fittings.
- Monitor Oil Levels: Keep an eye on oil levels and avoid overfilling, as excessive oil can strain seals and worsen leaks.
Additionally, using high-quality OEM parts during repairs will enhance durability. Schedule routine maintenance checks to clean your engine and inspect common leak points, catching potential issues early before they escalate. By following these practices, you’ll help confirm your RAV4 runs smoothly, free of oil leaks.
Gaskets and Seals: Their Impact on RAV4 Oil Leaks
Maintaining your Toyota RAV4’s performance hinges greatly on the condition of its gaskets and seals. These components are crucial for preventing oil and coolant leaks, particularly at common failure points like valve cover gaskets and oil pan gaskets. If gaskets wear out or aren’t installed correctly, you can face significant oil leaks at the head/block junction, potentially damaging your engine.
Regular inspection is important, especially for older models like the 2004 RAV4, as deterioration can occur over time. When replacing gaskets, make certain to thoroughly clean mating surfaces and adhere to torque specifications to achieve a reliable seal. Using high-quality OEM gasket types and seal materials enhances longevity, reducing the risk of future leaks. By prioritizing the condition of these components, you not only preserve your RAV4’s integrity but also empower yourself to avoid costly repairs down the line.
Essential Post-Repair Practices to Prevent Future Oil Leaks
To guarantee your Toyota RAV4 remains leak-free after repairs, it’s crucial to adopt essential post-repair practices. Implementing these strategies not only aids in oil maintenance but also enhances leak prevention:
- Monitor Oil Levels: Regularly check oil levels and inspect for signs of leaks, like pooling fluid or oil spots under your vehicle.
- Use Quality Parts: Always opt for high-quality OEM parts, especially for gaskets and seals, to guarantee a proper fit and longevity.
- Clean Mating Surfaces: Meticulously clean all mating surfaces during reassembly to create a reliable seal and minimize future leaks.
Additionally, follow the manufacturer’s torque specifications when tightening components and avoid overfilling oil. Excessive oil can increase pressure in the engine, worsening leaks. By adhering to these practices, you can safeguard your RAV4 against future oil leaks and maintain its performance.
Frequently Asked Questions
Why Is My RAV4 Leaking Oil?
Your RAV4’s leaking oil could stem from seal failure or various oil leak causes, like worn gaskets or damaged oil lines. Addressing these issues quickly prevents further damage and costly repairs down the road.
Conclusion
In conclusion, spotting and solving oil leaks in your Toyota RAV4 requires a systematic approach. Stay vigilant for signs of seepage, guarantee engine cleanliness, and prioritize prompt repairs. By understanding gaskets and seals, you can safeguard your engine’s integrity. Don’t forget to adopt proactive practices to prevent future leaks. With diligence and dedication, you’ll drive a dependable, leak-free vehicle, ensuring your RAV4 runs smoothly and efficiently for years to come.