You can replace your RAV4 cabin air filter in under 10 minutes with basic tools and little experience. Open the glovebox, pinch the dampener and release the stops to lower it, clear the hump to access the housing, pull out the old filter noting its orientation, and slide in the new filter with the airflow arrows pointing up. Resecure the cover and glovebox, test the HVAC airflow, and follow the guide below for tools, part choices, and troubleshooting.
Quick Answer : Under 10 Minutes, Skill Level, and Result
In under 10 minutes you can replace the RAV4’s cabin air filter with basic tools and minimal experience: you’ll reclaim control of your cabin air quickly. You’ll work methodically—locate the glovebox, release the stops, access the filter housing, slide out the old filter, note the airflow arrow, and insert the new one with arrows pointing up. You don’t need advanced skills; follow steps, keep parts organized, and use simple tools. Time saving tips: work on a clean, flat surface, keep a small tray for screws, and practice the sequence once to shave seconds. The result is immediate: improved air quality as the filter traps dust, pollen, and pollutants. Maintenance benefits extend beyond cleanliness—you’ll preserve HVAC efficiency, reduce strain on the blower motor, and avoid costly repairs. You’ll feel liberated by self-reliance, confident that routine upkeep is fast, repeatable, and firmly under your control.
Parts and Tools: Toyota 871-390R031 vs K&M Replacement
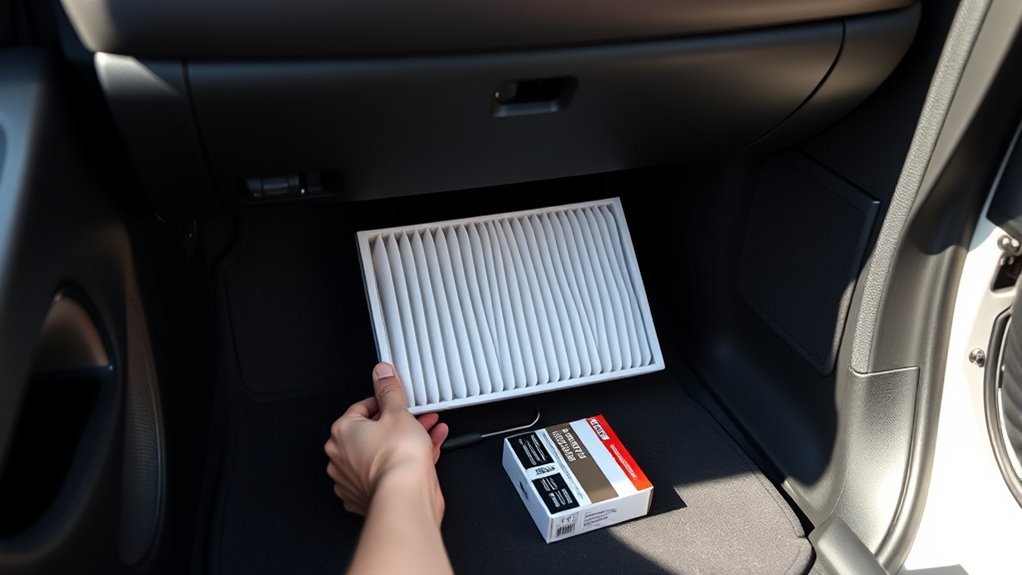
You’ll choose between the OEM Toyota 871-390R031 and a K&M aftermarket filter based on fit and cost. The Toyota part guarantees factory fit and specified performance for compatible RAV4 model years, while K&M offers similar filtration at a lower price point for many of the same applications. Confirm model-year compatibility, install with the airflow arrows pointing upward, and secure the housing to guarantee proper performance.
OEM Part: Toyota 871-390R031
While choosing between the OEM Toyota 871-390R031 and a K&M replacement, consider fit, filtration performance, and cost to match your priorities. The 871-390R031 is engineered for exact fit behind the glove box, so you’ll avoid trim modification and installation errors; install with the arrows facing up. Its media targets dust, pollen, and pollutants with predictable filter lifespan and maintenance frequency, so you can schedule service confidently. You’ll pay more for OEM brand reliability and guaranteed compatibility with RAV4 climate controls. If you value factory-spec parts to preserve performance and minimize variables, choose the 871-390R031. Keep the original orientation and replace on the interval dictated by your driving environment to maintain liberated control over cabin air quality.
Aftermarket Option: K&M Filter
If you prefer a lower-cost replacement that still meets filtration needs, consider the K&M cabin air filter as an aftermarket alternative to Toyota 871-390R031. You’ll get K&M advantages: cost savings, ready fit as a direct replacement, and comparable removal of dust, pollen, and pollutants. In filter comparisons, evaluate media density and certified particulate capture rates listed by the manufacturer. Inspect physical dimensions and confirm arrow orientation — arrows must point upward for correct airflow. Replace in a controlled sequence: remove glove box, extract old filter, verify housing cleanliness, insert K&M filter with arrows up, reassemble. This approach lets you reclaim control over maintenance costs while maintaining in-cabin air quality. Keep records of part numbers and install dates for future service.
Fitment And Performance Differences
Although both filters are designed to fit the RAV4’s housing, you should expect subtle differences in material density, pleat count, and edge sealing that affect fitment and filtration performance. For a fitment comparison, measure dimensions and inspect edge seals; the Toyota 871-390R031 is engineered to OEM tolerances, reducing gaps and alignment adjustments. K&M replacements often match external size but can vary in pleat geometry and media density, requiring careful orientation during installation. In a performance evaluation, OEM media typically yields predictable dust and pollutant capture and preserves HVAC flow characteristics, maintaining warranty conformity. Aftermarket choices may save cost but can alter cabin air quality and system efficiency. Choose based on desired protection level, budget, and driving conditions.
Access the Filter Housing Behind the Glove Box
1. You’ll start by improving filter accessibility: fully open the glove box to create room for glove box removal. Pinch the dampener pin on the right side and release it so the glove box can drop down. This single motion clears vertical space and reduces obstruction.
Next, compress the glove box sides inward. Push them gently to clear the raised hump that limits access; you’re creating a straight path to the housing rather than forcing components. Once the hump is cleared, let the glove box rest lowered but supported so it won’t fall or snag wiring.
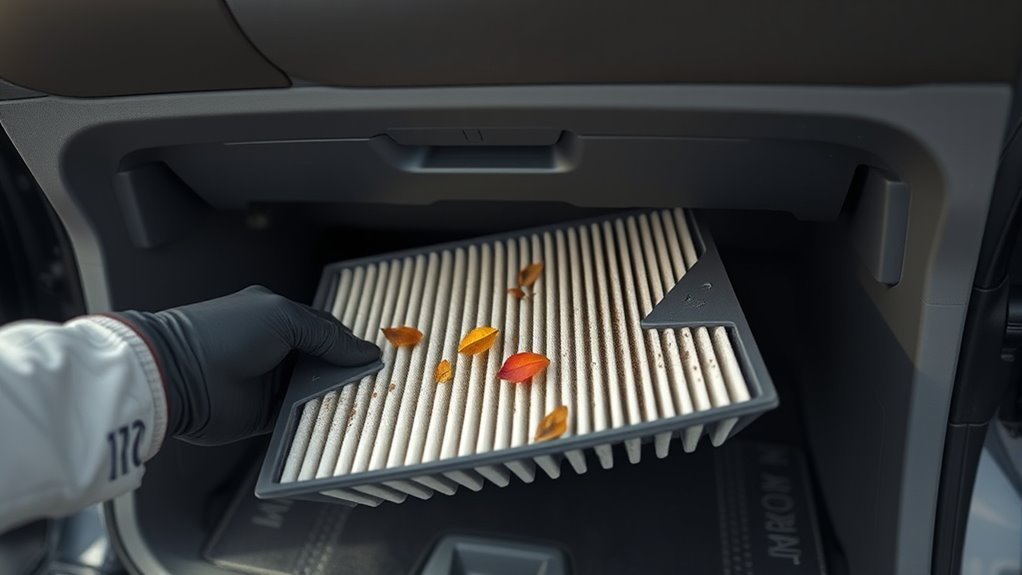
Visually locate the cabin air filter housing behind the lowered glove box. It’s a rectangular compartment secured by clips or a cover — identify its edges and release points before touching the filter area. Confirm the workspace is clear of tools, debris, or loose items that could fall into vents. These steps free you to proceed confidently to the filter service while maintaining control and safety.
Remove the Old Filter Safely (Orientation and Tips)
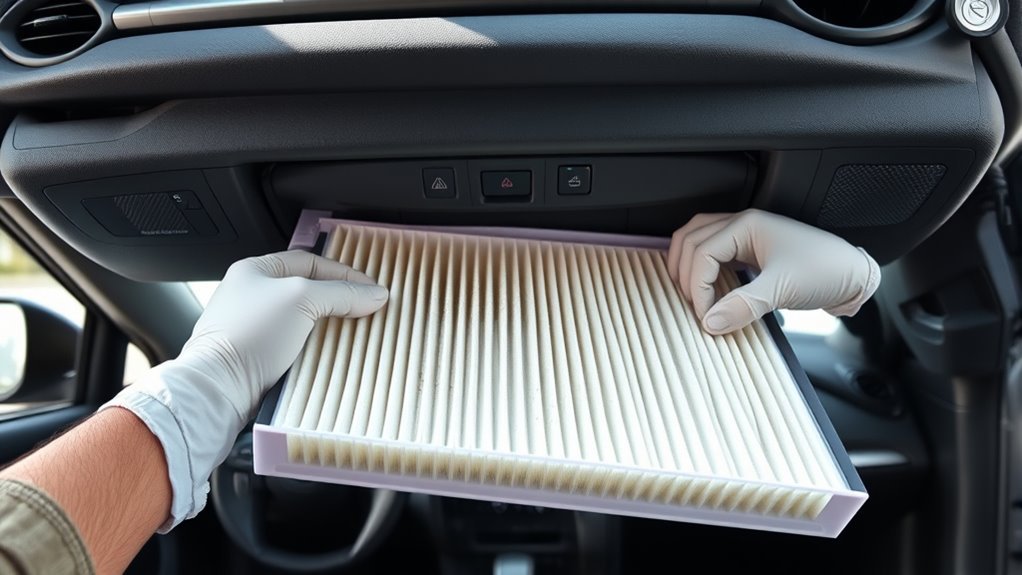
Pinch the sides of the filter housing to disengage the clips, then pull the housing out straight while noting the filter’s orientation so you can match the airflow arrows on the new unit. Once exposed, remove the locking tab and slide the old filter out slowly; don’t bend or force the housing. Note the arrow direction and the triangle marker on the housing—confirm the triangle faces the front of the vehicle before reassembly.
Inspect the removed filter for debris and determine whether to clean the housing area now to maximize air quality benefits. Use a soft brush or vacuum on accessible surfaces; avoid harsh tools that could deform the housing. These filter maintenance tips reduce contaminants and restore control over your cabin environment.
Work deliberately: keep clips and the locking tab in a small container so you won’t lose them. Preserve the housing integrity so the new filter seats correctly and your liberated commute breathes cleaner air.
Install the New Filter and Secure the Housing
With the old filter removed and the housing cleaned, position the new cabin air filter so the arrows point up and the housing triangle faces the front of the vehicle. Check filter orientation visually, then slide the filter into the slot with steady pressure until it clicks and seats fully. Confirm the up arrow remains visible and aligned; this guarantees correct airflow and function.
Next verify housing alignment: line the housing edges with the ducting and mating tabs, verifying no gaps or twisted seals. Press the housing into place so tabs engage; you should feel or hear a positive click when correctly aligned. If resistance occurs, withdraw and re-check filter orientation and tab positions rather than forcing components.
Finally, secure the cover using the same up-arrow reference to keep airflow direction intact. Your precise, confident actions free you from future contamination and restore control of cabin air quality.
Reassemble, Test Airflow, and Fix Common Issues
After you secure the filter cover and reattach the glove box dampener to the right side, start the vehicle and run the HVAC on both low and high fan settings to verify unobstructed airflow and proper vent selection. Observe airflow at each vent; confirm consistent pressure and that mode changes redirect flow as expected. If airflow is weak or inconsistent, power down and reopen the housing. Verify the filter orientation arrows point upward and the element seats fully; poor seating compromises performance. Perform airflow troubleshooting by inspecting the housing for debris, vacuuming or wiping dust before reinstalling the filter. Refasten the cover and retest. Maintain a routine filter maintenance schedule—note date and mileage—to prevent recurrence. If problems persist despite correct installation and a clean housing, consult the vehicle manual or a qualified technician to diagnose blower motor, actuator, or ducting faults. You’re reclaiming control of your cabin environment; act deliberately and consult professionals when the system exceeds your diagnostic scope.
Frequently Asked Questions
How Often Should I Change the Cabin Air Filter on My RAV4?
You should change your RAV4 cabin filter every 15,000–30,000 miles, or about 12,000 miles in polluted or high-pollen areas; choose appropriate cabin filter types, follow maintenance tips, and you’ll reclaim cleaner, liberated cabin air.
What Are Three Symptoms of a Clogged Cabin Air Filter?
You’ll notice reduced airflow, worsening air quality, and odor issues; you’ll also hear unusual noises from the vents. Address these symptoms promptly to reclaim clean, efficient ventilation and liberate your cabin’s comfort and control.
How Much Does It Cost to Replace the Cabin Air Filter on a RAV4?
You’ll pay about $30–$70 total; DIY Maintenance with Filter Brands like K&N costs ~$20–$30 for parts, while professional service adds $20–$50 labor. Shop promotions lower prices; replace every 15k–30k miles.
Conclusion
You’re done — the new filter sits like a clean lung behind the glove box, drawing in fresh air. Tighten the clips, close the glove box, and run the fan to confirm steady, dust-free flow. If you hear rattles or reduced airflow, recheck orientation and seating. Keep the old filter for comparison, note date/mileage, and schedule the next swap. In minutes you’ve restored crisp cabin ventilation and reliable HVAC performance.