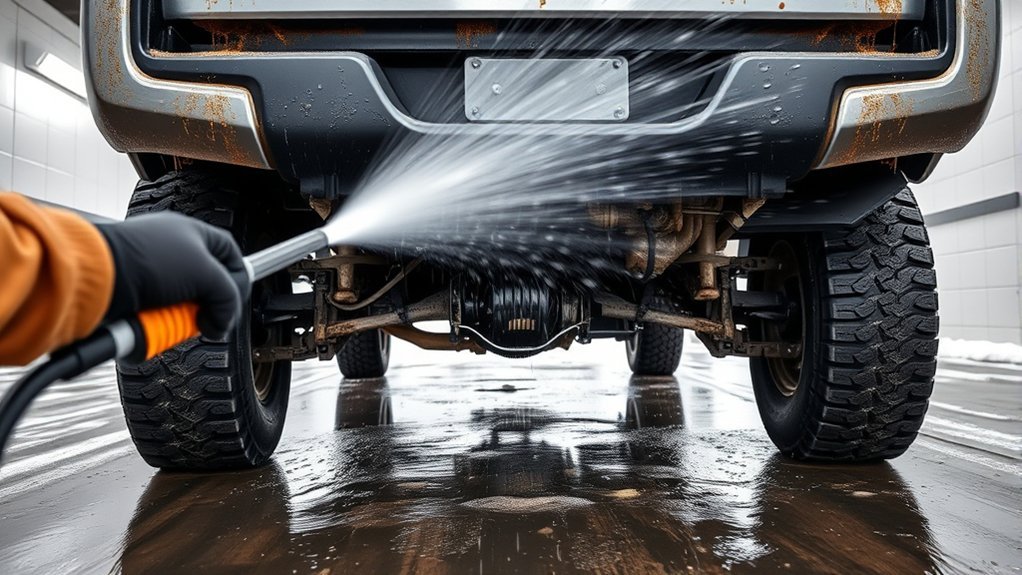
You should wash your Tacoma’s undercarriage frequently in winter to remove road salt, brine, and grit that cause rust and structural damage. Aim for weekly rinses in heavy-salt areas, every 1–2 weeks for brine or mixed conditions, and monthly in dry regions; do full rinses after off‑road trips. Use a high‑pressure underbody sprayer, Simple Green dwell time, and finish with Fluid Film on seams and welds. Continue for detailed steps, tools, and troubleshooting.
Why Tacoma Winter Undercarriage Washes Matter
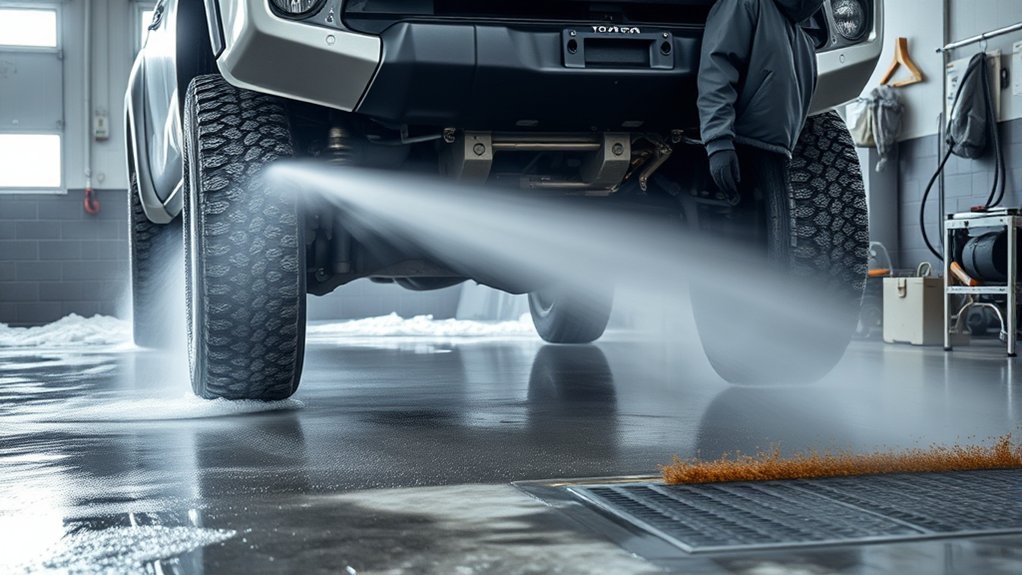
Because road salt and winter grime attack metal quickly, you should wash your Tacoma’s undercarriage regularly to prevent rust and corrosion. You’ll stop abrasive de-icing agents from embedding in seams, brackets, and suspension links by flushing them out. Treat this as a deliberate rust prevention step: aim tools at frame rails, control arms, and wheel wells with a high-pressure sprayer or a DIY undercarriage washer to dislodge salt and grit. In snowy regions where municipalities apply salt and brine, consistent attention preserves structural integrity and avoids costly repairs. You’ll extend component life and retain resale value by making winter maintenance routine, not occasional. Start each season with a checklist, inspect for residue after storms, and document washes so you can track patterns. Community experience shows regular washes keep Tacomas looking and performing like new. You’ll gain freedom from surprise failures and maintain control over your vehicle’s longevity through disciplined, effective cleaning.
When to Wash: Frequency for Salt, Brine, and Dry Areas
Think of the undercarriage schedule as mission-critical: in salt-heavy areas wash weekly through winter, while in dry regions a monthly rinse keeps corrosion at bay. You’ll protect exposed metal, maintain vehicle longevity, and deepen your understanding of corrosion by matching frequency to exposure. After trips through salt or brine-treated roads, do a thorough rinse immediately to strip deposits. If you run heavy off-road routes, wash daily until mud and grit stop accumulating. Do an extensive spring cleaning to remove winter residue and reset your undercarriage care calendar.
- Salt-heavy zones: weekly washes during winter; post-trip full rinse after any salt exposure.
- Brine-treated or mixed conditions: wash every 1–2 weeks; increase after prolonged wet drives.
- Dry, non-salted areas: monthly undercarriage rinses suffice for preservation and vehicle longevity.
- Off-road/high-debris use: daily spot-washes, full rinse after each outing to prevent trapped grit.
Follow this regimen and you’ll liberate your Tacoma from preventable decay.
Tacoma Tools & Supplies for an Undercarriage Wash
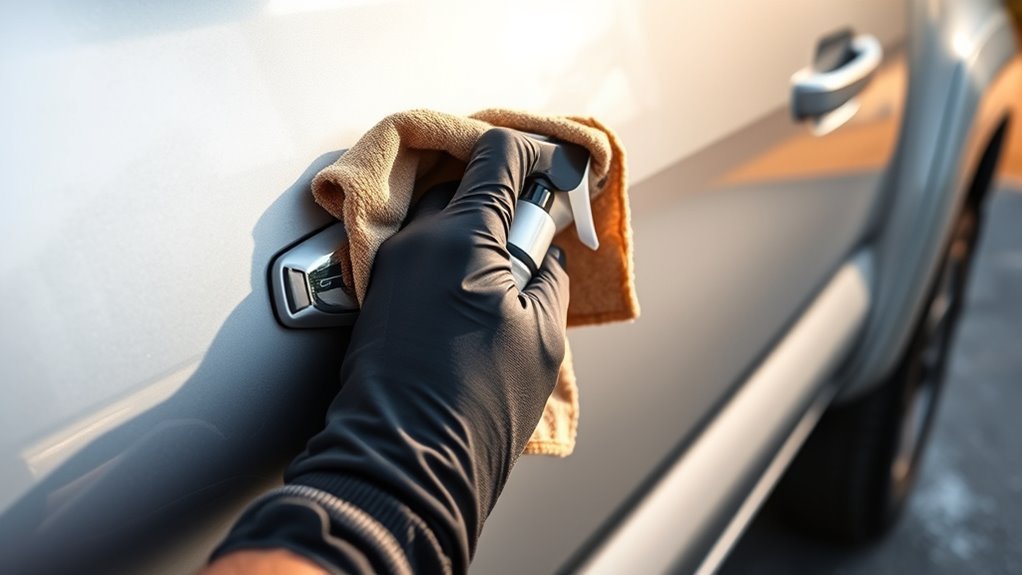
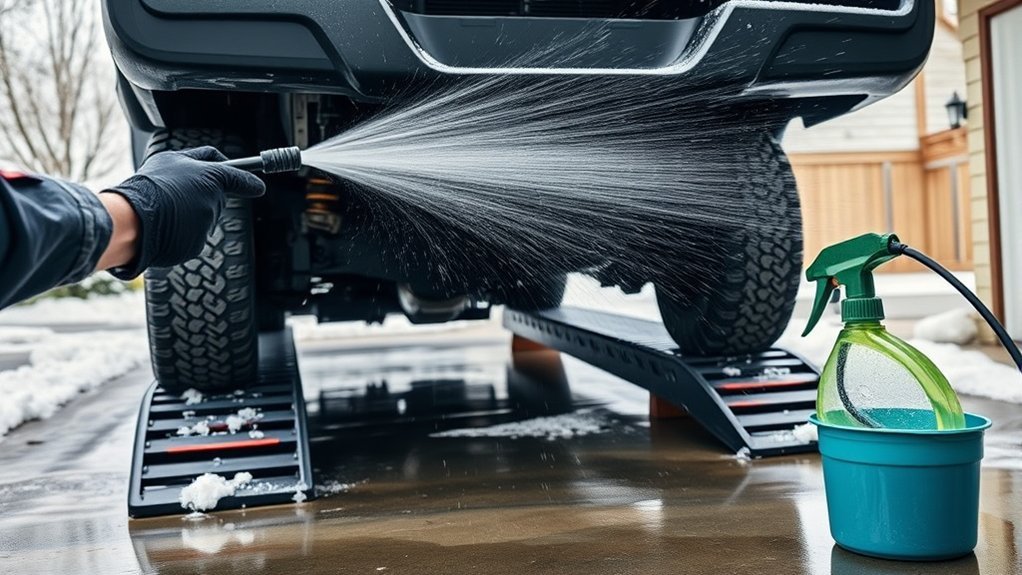
You’ll need the right tools and chemicals to get the Tacoma’s undercarriage clean and protected. Start with a pressure washer and an underbody sprayer attachment, use Simple Green as a pre-treatment, and scrub tight spots with long-handle brushes. Finish by applying Fluid Film to key areas to inhibit rust and corrosion.
Essential Cleaning Tools
Gather the right tools before you jack up your Tacoma: a high-pressure underbody sprayer for blasting away salt and grime, a foam cannon and all-purpose cleaner to break down stubborn residue, long-handle brushes to reach tight nooks, a garden hose for quick interim rinses, and a quality undercarriage protection spray to coat and help prevent rust after cleaning. You’ll follow efficient cleaning techniques: spray heavy salt deposits first, apply cleaner with the foam cannon, agitate with long-handle brushes, then rinse thoroughly with the hose. Maintain freedom from corrosion by following a strict tool maintenance routine so gear performs when you need it. Own the process; consistent, disciplined work keeps your Tacoma reliable all winter.
- Inspect hoses and connectors before use
- Clean and dry brushes after each session
- Flush sprayer lines to prevent clogs
- Store protection spray upright and sealed
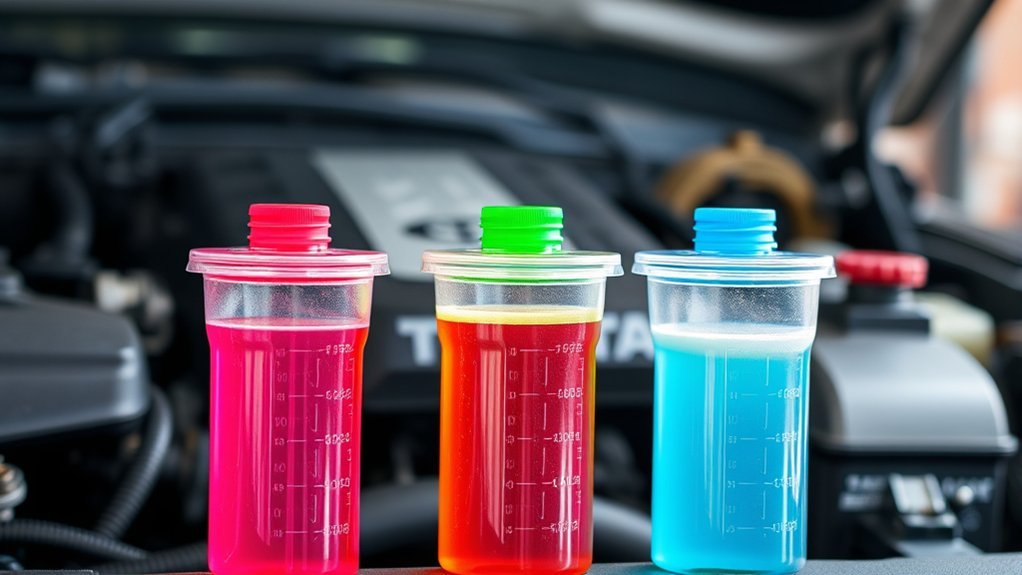
Recommended Chemicals & Accessories
Now that your tools are set and maintained, pick the right chemicals and accessories to get the undercarriage spotless and protected. Use an all-purpose cleaner with a foam cannon for superior chemical effectiveness; it breaks down grime and salt. Follow with a high-pressure underbody sprayer to rinse hidden areas. Scrub tight spots with long-handle brushes, then apply a protective undercarriage spray like Fluid Film to prevent rust. Finish by drying with a leaf blower to reduce moisture damage.
| Item | Purpose | Tip |
|---|---|---|
| Foam cannon + cleaner | Deep clean salt/grime | Mix per label |
| Underbody sprayer | Rinse hard-to-reach | High pressure, controlled |
| Long-handle brush | Agitate deposits | Reach tight areas |
| Protective spray | Corrosion prevention | Apply warm, dry surface |
| Leaf blower | Quick drying | Remove residual moisture |
Prep Your Tacoma: Safety Checks and Pre‑Wash Steps
Before you spray, check your safety gear—gloves, knee guards, and waterproof boots—and make sure your high-pressure washer and brushes are ready. Secure the Tacoma on a level surface and use ramps or jack stands as needed, setting the parking brake and chocking the wheels. Do a quick pre-wash inspection for visible rust, damage, and salt buildup so you can target trouble spots during cleaning.
Safety Gear Check
Put on waterproof boots and knee guards, confirm your ramps are secure, and lay out Simple Green, a pressure washer, and any other supplies so you won’t have to stop once you start. You’ll assert control and move efficiently when your gear importance is clear: select boot types that keep you dry and insulated; stiff soles beat slips on wet ramps. Inspect knee guards for cracks and secure straps. Verify boots’ tread and waterproof seams.
- Check supplies: Simple Green, pressure washer, nozzle set, gloves
- Test knee guard fit and mobility before kneeling
- Walk around ramps to confirm stable placement and no oil spots
- Scan undercarriage visually for heavy dirt, especially near the spare tire
Vehicle Securing Steps
While your Tacoma sits on a flat, stable surface, engage the parking brake and make sure the truck can’t roll; this anchors the vehicle so you can work safely under it. Confirm vehicle stability by choosing a secure parking location away from traffic, hazards, and poor drainage. Position wheel chocks at least on the downhill side or both rear wheels if on slight grade. Close all doors and windows to keep water out of the cabin. Move tools and supplies—pressure washer, cleaner, brushes—within reach but clear of walkways. Work in a well‑ventilated, open area so fumes and spray disperse. Scan the perimeter for loose items that could snag during cleaning. These steps free you to clean efficiently and without unnecessary risk.
Pre‑Wash Inspection
Because salt and grime hide in tight spots, start your pre-wash inspection by surveying the undercarriage for heavy buildup—focus on the spare tire well, frame rails, suspension mounts, and seams. Do a visual inspection to mark trouble zones and plan targeted cleaning. Park on a flat, stable surface, close all windows and doors, and assemble your all-purpose cleaner and pressure washer. Wear waterproof boots and knee guards so you can work confidently beneath the truck.
- Identify areas with salt buildup and stubborn grime for extra attention.
- Verify vehicle is stable and chocked if needed to prevent movement.
- Confirm doors/windows sealed to stop water intrusion.
- Lay out tools and protective gear for an efficient wash.
Proceed only when safety and supplies are confirmed.
Six‑Month Undercarriage Wash: Step‑By‑Step (Simple Green + Pressure Washer)
Start by spraying Simple Green over the entire undercarriage and let it dwell for 10–15 minutes to break down grime and road film before you rinse. Embrace the undercarriage benefits: a thorough wash extends life and frees you from winter corrosion worries. Use the Ryobi pressure washer with a slow, controlled back-and-forth motion, keeping nozzle distance steady to avoid damage while maximizing cleaning techniques.
Feed tubing through frame holes from front to back to flush embedded dirt; watch water clarity to know when you’re done. Rinse all areas methodically, targeting suspension mounts and seams without obsessing over hidden cavities now. After rinsing, let the frame dry for a couple of days—moisture traps corrosion, so patience is liberating. Inspect around the spare-tire area and other visible spots; repeat stubborn areas if needed. Once dry, plan to apply Fluid Film for winter protection. This routine keeps your Tacoma resilient and under your control.
Cleaning Hidden Spots: Frame Tubes, Spare Well, and Exhaust
When you tackle hidden spots like frame tubes, the spare‑tire well, and the exhaust, feed tubing through the frame holes, spray Simple Green and let it dwell 10–15 minutes, then use the pressure washer to flush trapped dirt until the water runs clear; pay special attention to the spare well and exhaust hangers where moisture and salt collect, and recheck seams and connections after rinsing. You’ll free clogged passages, expose corrosion early, and enforce frame maintenance that resists winter’s assault. Start by feeding tubing into each accessible frame tube, agitating debris, then apply cleaner and let it work. Aim the pressure washer into hanger pockets and the spare well, flushing until runoff is clear. Inspect seams, hanger bolts, and welds for salt stains or bubbling paint. Dry and air out the spare well, torque fasteners to spec, and treat any bare metal promptly for rust prevention. Repeat this every wash cycle through winter to preserve freedom from roadside failures.
- Feed tubing through each frame hole systematically
- Dwell cleaner 10–15 minutes before rinsing
- Flush exhaust hangers and spare well until clear
- Inspect and treat exposed metal for rust prevention
Build a DIY Undercarriage Washer (PVC Rig Tips)
After flushing frame tubes and hanger pockets, you’ll want a tool that makes repeating the job fast and thorough—building a DIY undercarriage washer from PVC does that. Use old PVC pipe and standard fittings to create a rigid boom sized to reach wheel wells, frame rails, and exhaust runs. Follow PVC design tips: keep runs short, brace joints, and place a shut-off valve near the hose connection to control flow. Install quick detach fittings where you need to swap nozzles or remove the rig for storage.
Mount wheels or casters to a lightweight base so you can push the rig along the vehicle without crawling under it. Paint the assembled rig after sanding and priming so the finish lasts; that also lets you code parts by purpose. Add a mirror or GoPro mount to inspect blind spots while you operate. Build it to reduce repetition and increase autonomy—simple, durable, and tuned for consistent winter undercarriage care.
Post‑Wash Protection: Applying Fluid Film and Inhibitors
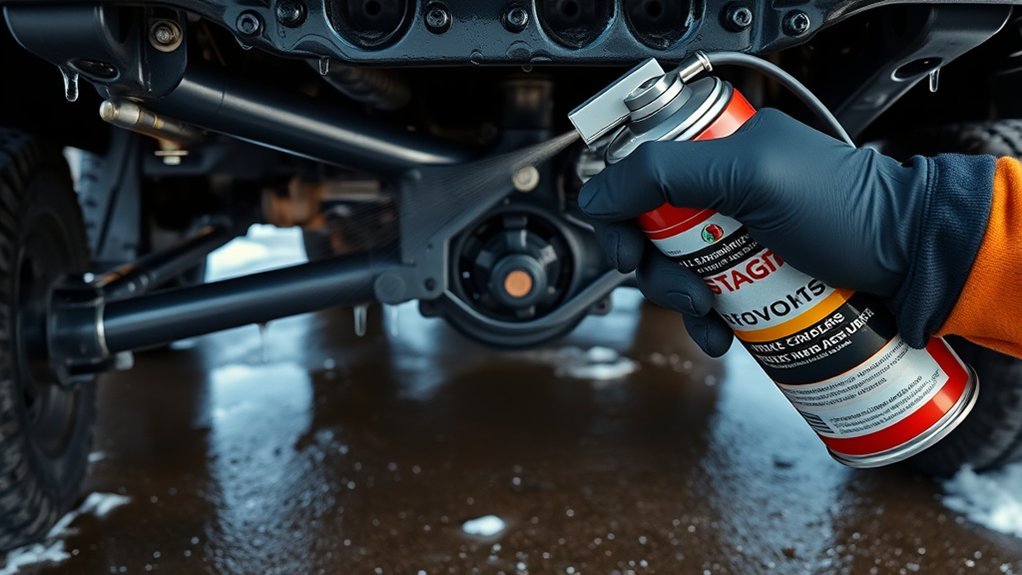
Once the undercarriage is fully dry, apply Fluid Film or a similar lanolin‑based inhibitor to create a long‑lasting moisture barrier that fights winter salt and corrosion. You’ll work methodically: verify all grime is removed, target seams, joints, and exposed metal, and spray an even coat that penetrates crevices. Let it settle; lanolin adheres and provides Rust Prevention for months. Reapply annually or biannually if you drive in harsh conditions.
- Clean all dirt and road film before treating to guarantee adhesion.
- Focus on suspension components, frame rails, and fasteners prone to corrosion.
- Use a controlled spray pattern to avoid oversaturation and drips.
- Schedule touchups before each winter season for continuous protection.
You’re reclaiming control over corrosion; this is maintenance that liberates you from avoidable decay. Apply with intent, keep records of dates, and make Fluid Film a standard step in your winter prep.
Winter Challenges & Workarounds (Freezing, Recycled Water, Garages)
Although winter washes are essential, they introduce unique hazards you need to manage: water can freeze on surfaces in sub‑26°F conditions, recycled wash water at many automatics may leave salt and grime behind, and storing a dirty truck in a heated garage can accelerate corrosion by trapping contaminants against metal. Plan washes for days above 26°F to avoid freezing temperatures on the undercarriage. Use touchless car washes if you need a quick undercarriage rinse without abrasion, but know recycled water often requires follow‑up cleaning. After an automatic, rinse high‑pressure spots at home or book a specialty service that uses fresh water and degreasers to remove residual salt. If you store the Tacoma indoors, clean thoroughly before parking and wipe exposed seams; a heated garage speeds chemical reactions that drive rust when dirt remains. Keep drying time short: park where air circulates or use a leaf blower to remove trapped water. These steps preserve freedom to drive without winter corrosion dragging you down.
Inspection Checklist, Troubleshooting, and Next Steps
You’ve handled the washing and storage steps—now make inspection, troubleshooting, and documentation part of the routine. Use disciplined inspection techniques after every salt exposure: look for corrosion, salt buildup, and trapped debris in frame holes, the spare tire area, and suspension components. Record dates and findings to monitor maintenance frequency and outcomes.
- Check spare tire well, frame holes, suspension mounts, and weld seams for salt and rust.
- Note water clarity during cleaning; cloudy or discolored runoff signals stubborn grime.
- If grime persists, repeat targeted cleaning or use a degreaser before re-rinsing.
- After drying, apply Fluid Film or similar protective coating to prevent re-corrosion.
Troubleshoot by comparing logs: rising corrosion means increase cleaning intervals or switch products. If structural rust appears, schedule professional repair. Keep concise entries in your vehicle maintenance log so you can free yourself from uncertainty and take decisive action when patterns demand change.
Frequently Asked Questions
How Often Should I Wash My Undercarriage in Winter?
You should wash your undercarriage weekly in salt-heavy winter regions and monthly in non-salt areas; after any salt-area trip wash immediately. These frequency recommendations support winter maintenance so you’ll protect, liberate, and preserve your vehicle.
Is an Undercarriage Wash Necessary?
Yes—you should. Studies show salt increases corrosion risk by up to 70%, so you’ll schedule regular washes for rust prevention, avoid salt damage, follow a weekly routine in heavy-salt areas, and reclaim control over vehicle longevity.
How to Wash a Truck When It’s Below Freezing?
You shouldn’t wash a truck below freezing; wait for temps above 26°F. When you can, follow cold weather precautions: use touchless undercarriage wash or rinse, dry thoroughly, apply protective coating—truck maintenance tips that free you from corrosion.
Conclusion
You can’t always avoid winter’s salt, but you can stop it from eating your Tacoma alive. Don’t skip undercarriage washes just because it’s cold — a routine, six‑month blast with Simple Green and a pressure washer, followed by Fluid Film, buys you years of rust‑free driving. Yes, it takes time, but those 30–60 minutes now save expensive repairs later. Be steady, inspect, and treat rust early: your Tacoma will thank you.