You should inspect your Camry’s underbody now if you see surface rust, live in a wet or salted area, or the car is over five years old. Wash and degrease, mechanically remove loose scale, then treat with a rust converter or primer depending on depth. Apply thin, cured coats of PUR15, wax, or asphaltic undercoating as appropriate, focusing seams and mounts. Check twice yearly and spot‑repair. Continue for a step‑by‑step plan and detailed product guidance.
When Does Camry Underbody Rust Need Treatment?
When should you treat underbody rust on a Toyota Camry? You treat it as soon as you observe visible rust spots on the frame, subframes, or suspension components. Inspect systematically: lift the car, remove wheel wells if needed, and scan for flaking paint, surface oxidation, and pitting. If you detect any of these, act immediately—delayed action lets corrosion undermine structural members and control arms.
If your Camry is over five years old or you drive in salty, wet regions, schedule proactive treatment during routine maintenance. Prioritize regular washing to remove salt and debris; this is a core rust prevention tip that reduces exposure. Use a checklist: note location, measure extent, document progression, then decide surface treatment versus component replacement. Early detection saves cost and preserves freedom to drive without fear of catastrophic failure. Follow procedures promptly to maintain safety margins and avoid extensive, expensive repairs.
Tools & Safety Gear for Underbody Rust Work
Because you’ll be working under the car and handling abrasive tools and chemicals, prepare the right tools and PPE before you start: You’ll gather equipment for effective underbody maintenance and rust prevention and don gear that keeps you free to act without harm. Set up protective tarps or cardboard to catch debris and spills. Guarantee strong ventilation or work outdoors to disperse fumes.
- Angle grinder or wire wheel for mechanical rust removal
- Brush or spray gun for applying rust treatment products
- N95 dust mask plus goggles for particle and splash protection
- Nitro gloves and welding mask for chemical and heavy-grind protection
- Tarps/cardboard to protect the workspace and prevent staining
Operate tools with controlled, deliberate movements. Inspect PPE for damage before each session. Keep solvent containers closed when idle and position fans to pull fumes away from your face. These procedural steps let you perform thorough underbody maintenance while minimizing exposure and preserving your ability to continue rust prevention work on your Camry.
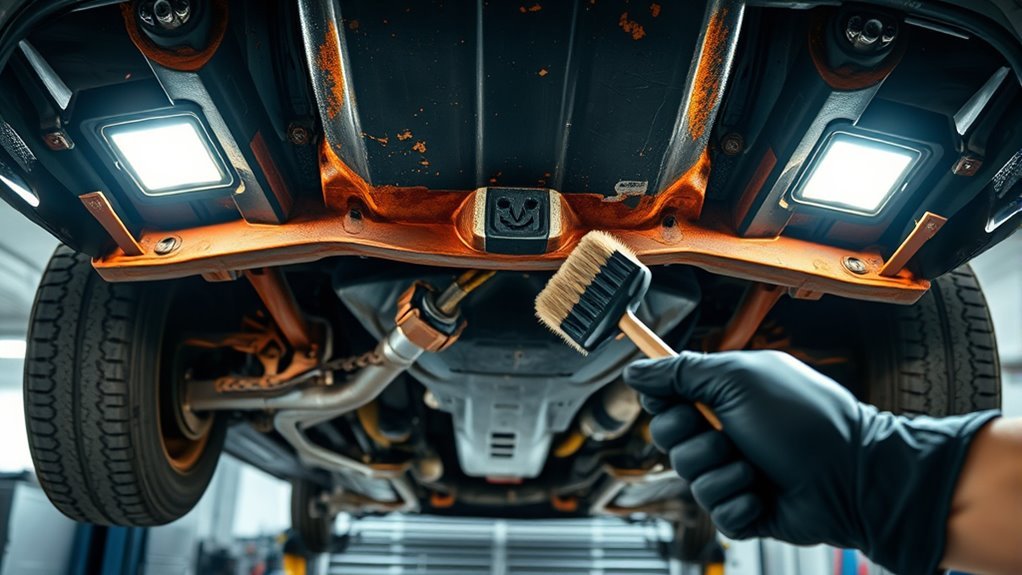
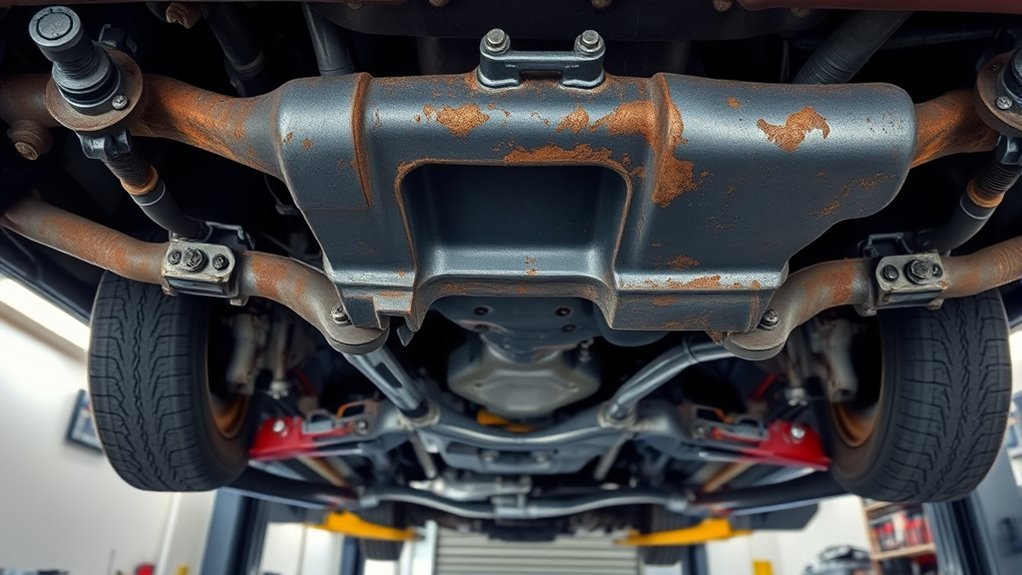
Inspect the Camry Undercarriage and Map Problem Areas
Before you jack the car or crawl underneath, do a systematic visual sweep of the Camry’s undercarriage and mark every suspect spot—frame rails, suspension mounts, exhaust hangers, wheel wells, seams and welds—using photos and brief notes so you have a baseline to compare later. Work methodically: divide the undercarriage into zones (front, mid, rear, both sides) and inspect each for surface rust, bubbling paint, flaking, and trapped debris. Pay extra attention to wheel wells and areas exposed to road salt; seams and welds hold moisture and invite corrosion that undermines structure. Photograph close-ups with a date stamp, note location and severity, then map findings on a simple diagram so you can prioritize interventions. This record empowers timely action and supports DIY liberation—decide on rust prevention techniques or professional repair based on documented progression. Use these undercarriage maintenance tips each season to monitor change and reduce risk before damage escalates.
Prepare Camry Underbody: Clean, Degrease, Remove Loose Rust
Start by power-washing the Camry’s underbody to strip dirt, road salt, and loose contaminants, then degrease all treated areas with a product like Duplicolor grease and wax remover so coatings and rust treatments will bond properly. You’ll follow a direct sequence: clean, degrease, mechanically remove loose rust, inspect, and dry. That sequence supports effective underbody maintenance and long-term rust prevention.
- High-pressure spray blasting wheel wells and frame rails to expose metal
- Solvent wipe-downs to remove oil, road film, and wax residues
- Wire-brush action to knock off flaky corrosion and create a keyed surface
- Visual check of seams, welds, and suspension mounts for remaining scale
- Air- or heat-drying to eliminate moisture before coating
Work methodically, wearing PPE, and keep reclaimed runoff contained. You’re reclaiming control over corrosion — precise prep lets rust-prevention products adhere, extending service life and keeping your Camry free to move.
Rust Converter or Wire‑Brush : Which to Use?
You’ll start by evaluating areas for loose scale and heavy pitting to decide between wire-brushing and a rust converter. Wire-brushing delivers the best mechanical prep for adhesion and removes contaminants, while converters chemically stabilize remaining rust and save time on light-to-moderate corrosion. For most Camry underbodies you’ll get ideal results by wire-brushing loose rust first, then applying a converter and finishing with a waterproof protective coating.
Wire-Brushing Benefits
While a wire brush alone removes loose rust and scale to create a sound surface, pairing it with a rust converter gives you the best long-term protection: you wire-brush to expose and level the metal, then apply the converter to chemically stabilize any remaining oxidation. You’ll use wire brushing techniques to clear flakes, pits, and edges so coatings stick. Follow rust removal tips: work methodically, keep consistent pressure, and avoid gouging the substrate. After brushing, clean debris and degrease before treatment. Regular checks after winter salt keep freedom from corrosion.
- stiff wire brush strokes along panels
- focused brushing in seams and welds
- vacuuming and wiping residues clean
- degreasing before converter or coating
- scheduled inspections and touch-ups
Rust-Converter Pros & Cons
Although both methods tackle corrosion, choosing between a rust converter and a wire brush comes down to rust severity, work conditions, and finish requirements. You’ll assess surfaces: heavy pitting and scale demand mechanical removal; light surface rust suits chemical treatment. Rust converter advantages include reduced labor, stabilization of residual rust, and a paint-ready substrate when applied to dry metal. Rust converter limitations are reduced efficacy on thick rust and sensitivity to moisture during cure. Use a wire brush to expose sound metal and improve adhesion, accepting risk of micro-scratches that must be sealed. For liberation, combine methods: wire-brush to remove bulk corrosion, then apply converter to neutralize remaining iron oxides, dry thoroughly, and paint or undercoat to lock protection.
Choose a Protective Coating: PUR15 vs Wax vs Asphalt
You’ll compare PUR15, wax, and asphalt by focusing on durability and required prep. Assess adhesion needs: PUR15 demands meticulous surface cleaning and rust stability, wax tolerates quicker application but needs frequent recoat, and asphalt needs heavy prep for proper contact. Plan inspections based on use and environment to schedule reapplication or removal for repairs.
Coating Durability Comparison
If you need a durable, long-term defense for a rusted Camry underbody, pick the coating based on adhesion, hardness, and maintenance rather than marketing claims. You’ll evaluate coating effectiveness and application techniques against longevity and serviceability. PUR15 bonds to rust and cures hard; it can last years if you apply it right but some call it a stopgap. Wax is simple, liberating to reapply, but it’s seasonal and adheres poorly to heavy rust. Asphalt resists moisture and impact, lasts long, but adds weight and is tough to strip.
- visual: hard PUR15 shell sealing seams
- tactile: wax slick, removable by hand
- impact: thick asphalt absorbing road chips
- maintenance: periodic wax top-ups
- freedom: choose durability that fits your upkeep limits
Application And Prep
Having picked the coating that matches your durability and maintenance goals, plan the surface prep and application steps to maximize adhesion and longevity. You’ll wire-brush loose rust, degrease with solvent, and dry thoroughly. Choose coating techniques per material: PUR15 in thin, even coats; wax in spray or brushable layers for periodic retreatment; asphalt sprayed or rolled for thick, impact-resistant coverage. Follow these application tips: maintain temperature, apply thin passes, and allow full cure between coats.
| Coating | Prep Needs | Application |
|---|---|---|
| PUR15 | Wire-brush, degrease | Thin coats, brush/spray |
| Wax | Clean, dry | Spray, reapply seasonally |
| Asphalt | Thorough cleaning | Spray/roll, thicker layers |
Execute methodically to free your vehicle from recurring corrosion constraints.
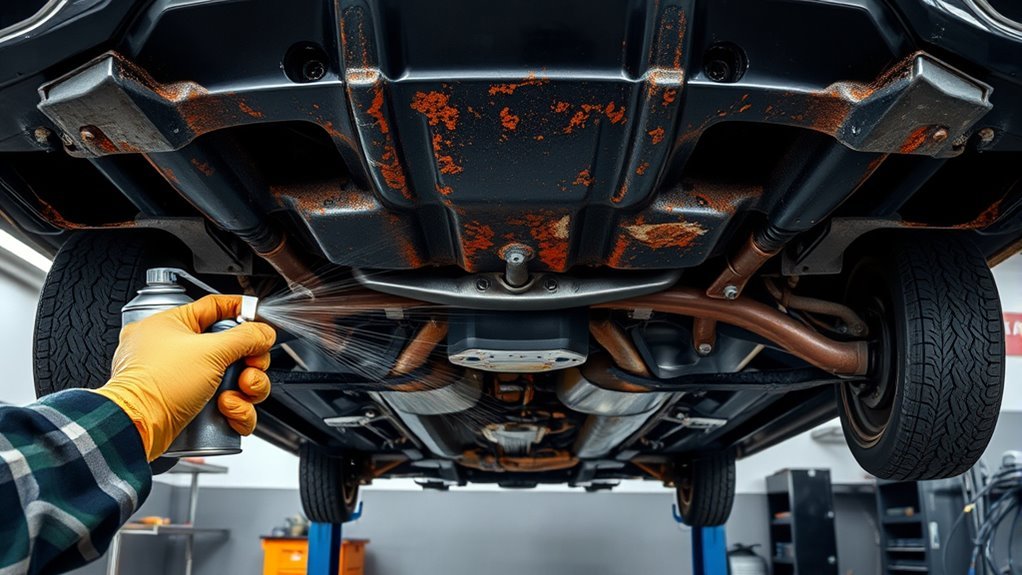
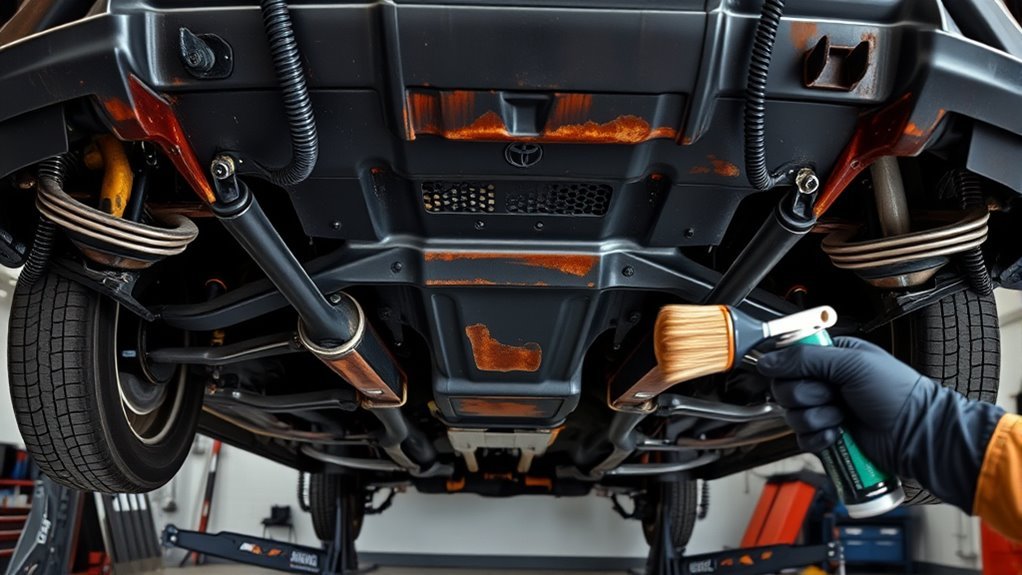
Apply Primers & Coatings: Step‑By‑Step for Durable Coverage
Start by thoroughly degreasing and wire‑brushing the Camry’s underbody to remove dirt, grease, and loose rust so primers and coatings can bond properly. Move methodically: mask areas, ventilate, and wear PPE. For primer application, use an automotive rust‑inhibiting primer applied in thin, even coats to seal metal and block moisture.
- small panel sections cleaned to bare metal
- spray or brush primer forming a uniform film
- light sanding between coats for adhesion
- select polyurethane or epoxy topcoat for durability
- allow full cure before road exposure
Follow coating techniques that specify temperature and humidity limits. Apply high‑quality polyurethane or epoxy in multiple thin layers, letting each layer dry per manufacturer directions. Maintain even coverage; avoid runs and pooling. After final cure, inspect seams, welds, and fastener areas and plan scheduled recoats where salt and winter exposure are severe. These steps free you from reactive repairs and lock in long‑term protection.
Common Mistakes That Shorten Protection and How to Avoid Them
Because small oversights compound quickly, you’ll want to avoid a handful of common mistakes that seriously shorten rust protection: poor surface prep, skimping on multiple thin coats, missing seams and crevices, using incompatible products, and ignoring environmental exposure. Start every job with a pre treatment checklist: degrease, mechanically remove scale, verify bare metal, and dry thoroughly. That checklist stops the rust treatment myths that one-pass coatings or generic paints will suffice.
Work procedurally: apply multiple thin coats, allow specified flash times, and inspect edges after each layer. Use products rated for automotive underbodies and verify chemical compatibility with primers and topcoats. Access seams with flexible applicators and mirror checks; treat welds and hidden joints deliberately. Factor environment: choose salt-resistant formulations if you live where roads are treated, and select humidity-tolerant cures for wet climates. These disciplined steps keep your protection durable, reduce recurring work, and free you from constant repairs.
Monitor and Touch Up Camry Underbody Rust Over Time
You should perform regular visual inspections of the Camry underbody, focusing on seams, brackets, and areas exposed to road salt. When you find surface rust, remove loose corrosion with a wire brush or sandpaper, apply a rust converter if needed, then coat exposed metal with automotive paint or undercoating. Establish a spot-repair routine and schedule annual inspections to catch and treat new rust before it compromises structural components.
Regular Visual Inspections
When you inspect your Camry’s underbody at least twice a year—especially after winter—focus on wheel wells, frame edges, and suspension components where moisture pools and corrosion starts; note any surface rust, flaking paint, or bubbling that suggests deeper issues, apply touch-up paint immediately to exposed metal or minor spots, and record the condition to track rust progression and schedule further treatment if trends appear. Use preventive measures and set inspection frequency in your maintenance calendar. Be systematic, decisive, and free from excuses.
- Visualize wheel wells cleared of debris and salt
- Trace frame edges for paint breaks or rust lines
- Probe suspension mounts for loose corrosion
- Scan seams, drain holes, and welded joints
- Photograph and log locations, dates, and actions
Spot Repair Routine
Start a simple, repeatable spot-repair routine you can execute after each inspection: work methodically from front to rear, prioritizing zones with frequent salt or moisture exposure. Use rust detection to mark affected areas, then remove loose corrosion and flaking paint with a wire brush or sandpaper until you reach solid metal. Degrease the surface, apply an automotive-grade rust converter or primer to neutralize remaining oxidation, and allow proper cure time per product instructions. Feather edges and finish with a rust-inhibiting paint or coating to seal against moisture. Record the repair location and date, then schedule the next annual inspection or sooner if conditions demand. Repeatable, disciplined spot repair preserves structural integrity and frees you from reactive maintenance cycles.
Cost, Time, and When to Hire a Pro
If rust is caught early, you can often treat a Camry’s underbody yourself for as little as $150 and about 4–8 hours of work; however, severe corrosion will push costs toward $1,000 and usually needs a professional shop that can spend a full day or more and use specialized tools and coatings. You’ll perform a cost comparison between DIY and pro based on treatment types, labor, and durability. Inspect, measure affected area, choose method, and schedule.
- Jack vehicle, clear debris, wear PPE
- Grind or wire-brush to bare metal
- Apply rust converter or primer coat
- Seal with underbody coating or wax
- Reinspect and document for warranty
Do it yourself if damage is surface-level, you want control, and you have 4–8 hours. Hire a pro when structural rust, frame holes, or suspension mounts are involved; they use media blasting, weld repairs, and industrial coatings. Regular inspections free you from escalation.
Frequently Asked Questions
How Long Does Toyota Rust Proofing Last?
You’ll get about 3 to 5 years from Toyota rust proofing, depending on rust proofing methods and maintenance; you’ll extend life with inspections, touch-ups, or annual oil-based reapplications while weighing cost effectiveness for long-term protection.
Do Toyota Cars Need Rustproofing?
Yes — you should rustproof Toyota cars; use rust prevention methods like undercoating, sealants, and regular inspections. Follow procedural vehicle maintenance tips, drain moisture, clean salt, and apply treatments periodically to liberate your car from corrosion risks.
What Is the Toyota Rust Lawsuit?
You’re asking what the Toyota rust lawsuit is: it’s litigation alleging design defects causing premature corrosion; you’ll evaluate rust prevention methods, identify common rust issues, and demand remedies, transparency, and stronger corporate accountability.
Conclusion
When you finish treating Camry underbody rust, imagine sealing a slow leak in your car’s skeleton: each brushstroke and coating is a stitch that keeps corrosion from widening the wound. You’ll have inspected, cleaned, neutralized, primed and coated in sequence—mechanical steps that restore structural integrity. Maintain periodic checks, touch up chips, and document repairs so the undercarriage stays a preserved framework, not a spreading fault. If unsure, call a pro.