Editorial Team · Last updated: July 15, 2026
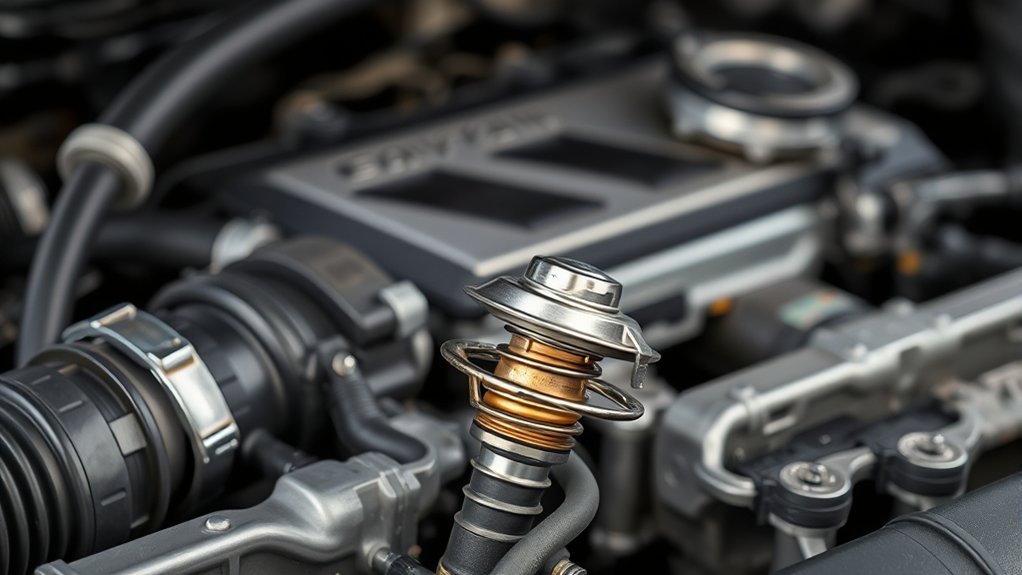
A Toyota Camry thermostat controls when engine coolant enters the radiator circuit. A thermostat stuck closed can restrict radiator flow and cause a rapid temperature rise. One stuck open can cause slow warm-up, weak cabin heat, low coolant-temperature readings, and a P0128 code.
Do not treat one symptom or code as proof that the thermostat has failed. Check the cold coolant level, leaks, stored codes, and live coolant-temperature data first. Stop driving if a high-temperature warning appears, the gauge enters the red zone, or steam comes from the engine bay. Camry cooling layouts vary by model year and engine, so confirm the VIN-based repair procedure before removing parts.
Quick Answer
Your Camry thermostat restricts radiator flow during warm-up, then opens as coolant temperature rises. A stuck-closed thermostat can cause overheating. A stuck-open thermostat can cause slow warm-up, weak heater output, and P0128. Because low coolant, temperature-sensor faults, fan operation, wiring, or an applicable calibration update can cause similar symptoms, diagnose the system before replacing the thermostat.
Key Takeaways
- A Camry thermostat manages radiator flow so the engine can warm up and control operating temperature.
- A stuck-closed thermostat can cause a fast temperature rise and requires immediate attention.
- A stuck-open thermostat can cause slow warm-up, weak cabin heat, and a P0128 code.
- P0128 does not prove the thermostat is faulty, so check coolant level and live temperature data first.
- Replacement parts, orientation, torque, coolant, and bleeding procedures vary by engine and model year.
How Does a Camry Thermostat Work?
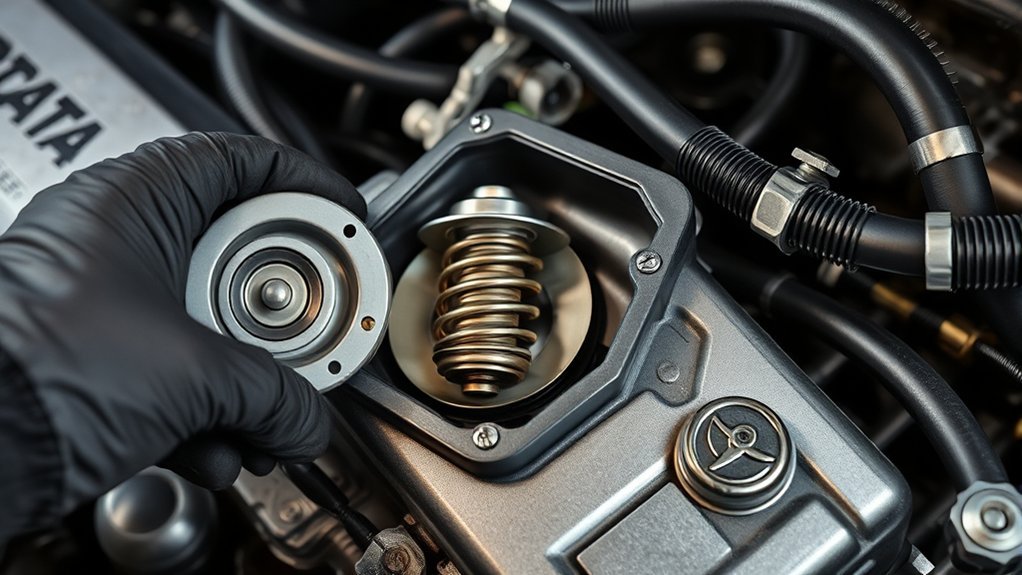
Conventional automotive thermostats use an expanding wax element. When the coolant is cold, the thermostat restricts the radiator circuit so the engine can warm up. As the wax heats and expands, it moves the valve and allows more coolant to pass through the radiator.
The thermostat does not simply switch from fully closed to fully open at one instant. It begins moving at a specified temperature and continues opening as temperature rises. The rated temperature, required valve travel, housing design, and bypass operation depend on the Camry’s engine and cooling layout.
Some newer thermal-management systems also use electronically managed pumps or valves. That means an older hose-based test is not universal. Use Toyota service information for your model year, engine, and hybrid or non-hybrid configuration.
For a broader explanation of the radiator, pressure cap, reservoir, fans, pump, and coolant paths, see the Camry cooling system guide.
Toyota Camry Thermostat Symptoms: Stuck Open vs. Stuck Closed
The failure pattern matters more than one isolated symptom. Use the table as a starting point, then confirm the cause with coolant, leak, scan-data, and temperature checks.
| Condition | Warm-Up Pattern | Common Clues | Urgency |
|---|---|---|---|
| Stuck closed or opening late | Temperature rises unusually fast while radiator heat transfer remains limited | High-temperature warning, gauge climbing hot, steam, coolant pushing out, radiator inlet staying much cooler than the engine | Stop driving if the temperature stays high or steam appears |
| Stuck open or leaking through | Engine warms slowly or loses temperature during light-load or cold-weather driving | Weak cabin heat, low gauge reading where fitted, slow live-temperature rise, possible P0128 | Arrange diagnosis soon, but do not assume the thermostat is the only possible cause |
| Intermittent or restricted movement | Temperature may fluctuate instead of rising smoothly and stabilizing | Changing heater output, uneven hose or radiator temperatures, recurring high or low temperature readings | Diagnose the full cooling system before further driving if readings approach the hot range |
A cooling fan that runs frequently does not prove the thermostat is stuck. The engine control module may command the fan because of coolant-temperature data, air-conditioning demand, a sensor fault, or another cooling-system problem.
P0128 means the engine remained cooler than expected or warmed too slowly. A stuck-open thermostat is a common cause, but low coolant, trapped air, an inaccurate engine coolant temperature sensor, wiring, abnormal fan operation, or calibration can also be involved.
Warning: Stop driving if the temperature warning stays on, the gauge enters the red zone, power drops while the engine is hot, or steam comes from under the hood. Do not loosen a radiator or coolant-reservoir pressure cap while the system is hot.
Camry-specific note: Toyota T-SB-0045-13 covers P0128 on certain 2010–2011 Camrys with the 2AR-FE engine and automatic transmission. The bulletin addresses ECM calibration for the listed vehicles. Check the VIN, engine, other stored codes, and applicable Toyota information before replacing a thermostat solely because P0128 is present.
How Do You Test a Camry Thermostat?
Start with checks that do not open the cooling system. Keep hands, tools, and clothing away from belts and electric fans. An electric fan can start without warning when the ignition is on or the engine is running.
- Check the system while fully cold. Confirm the reservoir level, look for wet coolant or dried residue, and inspect accessible hoses and the thermostat housing. A low level or active leak can distort every later test.
- Read stored codes and live data. Before the first start after the engine has cooled for several hours, confirm that the reported coolant temperature is plausible for the surrounding conditions. An implausible cold reading can point toward the sensor, connector, wiring, or scan data rather than the thermostat.
- Watch the warm-up trend. Start the engine and monitor coolant temperature with a scan tool. A slow rise can support a stuck-open diagnosis, while a rapid climb toward an unsafe range requires an immediate shutdown. Compare the behavior with Toyota’s diagnostic procedure for that engine.
- Use an infrared thermometer. On many conventional layouts, the radiator inlet remains relatively cool during early warm-up, then rises more quickly as the thermostat opens. Early gradual warming may suggest leakage through the thermostat. A hot engine with a much cooler radiator inlet may suggest restricted radiator flow. Bypass circuits and modern controls can change this pattern, so do not use it as proof by itself.
- Bench-test only after removal. Suspend the thermostat in a container of water without letting it touch the bottom. Heat the water gradually and monitor it with a thermometer. Compare the beginning-opening temperature and valve travel with the thermostat’s rating and Toyota’s engine-specific specification. Do not use one generic Camry temperature range.
Note: Low coolant, trapped air, an inaccurate coolant-temperature sensor, a weak pump, a restricted radiator, combustion-gas leakage, or cooling-fan faults can imitate thermostat symptoms.
[Products Worth Considering]

This engine coolant thermostat with seal is designed to help maintain proper engine temperature and support efficient cooling system performance. It is compatible with a wide range of Toyota, Lexus, Ford, Chevrolet, Mitsubishi, Scion, and Pontiac models, making it a versatile replacement choice for many vehicles. With included seal and durable metal-and-rubber construction, it offers a convenient fitment solution for cooling system repairs and maintenance.

This wheel lock lug nut set adds an extra layer of theft protection for compatible Toyota and Lexus vehicles by securing wheels with a unique key pattern that resists common removal tools. Built to OEM-standard fitment with corrosion-resistant, triple-chrome finished construction, it is designed for direct replacement and long-lasting performance. The set includes locking nuts and a matching key for easy installation on compatible vehicles with the correct thread and cone seat specifications.

This custom-fit steering wheel cover is designed for select Toyota models and sized for standard steering wheels to help improve grip and comfort while driving. Made with soft microfiber leather and a non-slip rubber inner ring, it adds control, protects your wheel, and brings a stylish diamond-quilted look to your car interior. Installation is simple and tool-free, making it an easy upgrade for everyday driving.
Before You Begin: Tools, Parts, and Safety
Confirm the model year, engine, drivetrain, and hybrid status before buying parts. A thermostat or housing listed for one Camry engine may not fit another engine from the same model year.
- VIN- and engine-matched thermostat or thermostat housing assembly.
- New gasket, O-ring, or seal specified for the housing.
- The coolant type and quantity listed for the vehicle.
- Drain pan, clean containers, shop towels, and a funnel.
- Socket set, hose-clamp pliers, and a calibrated torque wrench.
- Scan tool that can display live engine coolant temperature.
- Infrared thermometer for non-contact temperature comparisons.
- Safety glasses and coolant-resistant gloves.
- Spill-free funnel or vacuum-fill equipment if the repair procedure requires it.
Let the engine cool completely before removing any cap, hose, drain plug, or housing. Collect drained coolant in a clean, sealable container and keep it away from children and animals.
Use the coolant specification in the owner’s manual or maintenance guide. See the Toyota-approved coolant guidance for additional service context.
Record the old thermostat’s position before removal, but do not rely on memory alone. Confirm the spring direction, seal position, jiggle-pin position if fitted, and housing orientation against Toyota’s service illustration.
[Products Worth Considering]

This A-Premium serpentine belt is designed to deliver dependable drive performance for compatible Toyota and Scion vehicles with exact-fit sizing for smooth operation. Built with premium EPDM and polyester cord construction, it helps resist cracking, reduce noise, and maintain stable tension in demanding engine conditions. It is a practical replacement choice for restoring reliable accessory drive performance and long-term confidence.

This coolant electric water pump is designed as a replacement for select Toyota vehicles, helping maintain proper engine cooling performance and reliable temperature control. Built to OE specifications, it offers fitment support for compatible Avalon, Camry, and RAV4 models with 2.5L L4 engines. It also includes cross-reference part numbers for easier matching and comes with after-sales support for covered defects.
Camry Thermostat Replacement Checklist
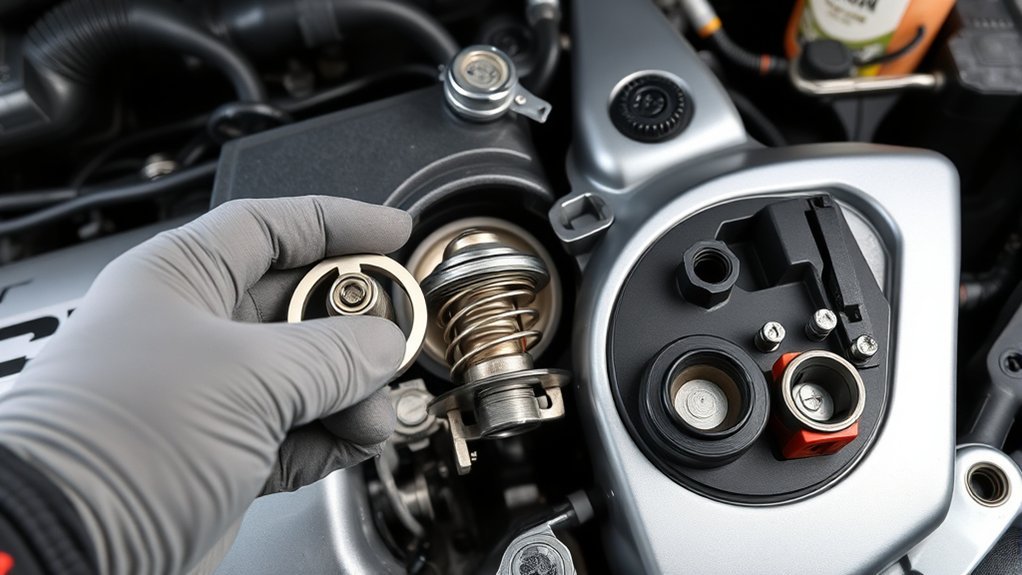
Use this checklist only after testing supports thermostat failure and you have the engine-specific repair procedure.
| Task | Tool/Part | Leak or Error Prevention |
|---|---|---|
| Confirm diagnosis | Scan tool, infrared thermometer | Check coolant level, live data, codes, and other possible causes first |
| Drain coolant below housing | Drain pan and clean container | Open the system only when fully cold |
| Remove housing | Socket set and clamp pliers | Record hose routing and fastener locations |
| Clean sealing surfaces | Plastic scraper and lint-free rag | Do not gouge aluminum or leave old seal material |
| Install thermostat | Matched thermostat and new seal | Confirm direction, seating, and jiggle-pin position if fitted |
| Tighten housing | Calibrated torque wrench | Use the engine-specific torque and sequence |
| Refill and purge air | Correct coolant and specified fill tool | Follow the exact fill point and bleed procedure |
Do not apply RTV, gasket maker, lubricant, or thread sealant unless the repair procedure or part instructions specifically require it. Extra sealant can prevent correct seating or enter the cooling circuit.
Step-by-Step Camry Thermostat Replacement
The sequence below is a general workflow, not a substitute for Toyota repair information. Access, housing design, bolt torque, coolant quantity, active tests, and bleeding requirements vary by engine.
- Confirm the diagnosis and parts. Check coolant level, leaks, stored codes, live temperature data, and applicable Toyota bulletins. Match the replacement part and seal to the VIN and engine.
- Let the engine cool completely. Do not open a pressurized cooling system while it is warm or hot.
- Record the original layout. Photograph hose routing, connector positions, brackets, housing direction, and thermostat orientation before disassembly.
- Drain coolant below the housing. Use the specified drain point and collect the coolant cleanly. A complete system drain may not be necessary unless required by the repair procedure or coolant condition.
- Remove the required access parts. Disconnect only the hoses, ducts, brackets, wiring connectors, or covers identified by the engine-specific procedure.
- Remove the housing and thermostat. Loosen fasteners evenly. Note the old seal position and inspect the housing for cracks, corrosion, distortion, or damaged hose connections.
- Clean the sealing surfaces. Remove old gasket material without scratching the housing or engine surface. Keep debris out of the coolant passage.
- Install the new thermostat and seal. Seat the thermostat fully in the correct direction. If it has a jiggle pin, place it at the top unless Toyota’s engine-specific procedure specifies another position.
- Reinstall and torque the housing. Start fasteners by hand, tighten evenly, and use Toyota’s specified torque. Do not overtighten a plastic or aluminum housing.
- Reconnect removed parts. Restore every hose clamp, electrical connector, bracket, duct, and cover to its original position.
- Refill and bleed the cooling system. Use the specified coolant, fill point, equipment, and bleed or active-test procedure.
- Verify the repair. Inspect for leaks, monitor live coolant temperature, confirm stable heater output, complete a short test drive, let the vehicle cool fully, and recheck the level.
Pro tip: Photograph each connector, hose, bracket, and thermostat position before removal. The photos are more reliable than trying to remember the layout after coolant and tools cover the work area.
[Products Worth Considering]

COMPATIBILITY – Fits 1964-1967 Gordon-Keeble GK1; 1964-1967 Gordon-Keeble IT; 1970-1974 Checker A11; 1970-1974 Checker A11E; 1966-1968 Checker Aerobus; 1969-1974 Checker Aerobus; 1969-1974 Checker Taxicab; 1969-1969 Checker Taxicab; 1969-1970 Checker Delu

How Do You Bleed the Cooling System After Replacement?
Follow the fill and air-purge procedure for the exact Camry engine. Some systems are filled through a radiator neck, while others use a pressurized reservoir, dedicated bleed point, vacuum-fill tool, scan-tool active test, or a combination of these methods.
Do not run the engine with a pressure cap removed unless Toyota’s procedure specifically instructs you to do so. Keep hands, clothing, tools, and the fill equipment clear of fans and belts throughout any engine-running step.
- Close every drain and connection. Confirm the drain plug, housing, hoses, clamps, sensors, and bleeders are secure.
- Add the specified coolant slowly. Use the correct fill point and avoid introducing dirt or incompatible coolant.
- Perform the required purge procedure. Use the specified bleeder, vacuum fill, engine-speed sequence, heater setting, electric-pump command, or scan-tool active test where applicable.
- Monitor the warm-up. Watch live coolant-temperature data and the warning display. Shut the engine off if temperature rises abnormally, coolant escapes, or the level cannot be maintained.
- Check heater consistency and leaks. Stable cabin heat can support proper circulation, but it does not replace temperature monitoring or a leak inspection.
- Allow a complete cool-down. Recheck the cold coolant level at the specified reservoir or fill point and inspect the thermostat housing, drains, and hose connections again.
- Repeat verification. Take a short drive, monitor temperature behavior, allow another cool-down, and confirm that the level remains stable.
Gurgling behind the dashboard, changing heater output, temperature fluctuation, or a falling coolant level after service can indicate trapped air, a leak, or an incomplete fill. Stop and correct the condition instead of continuing to drive.
For broader air-pocket and overheating checks, see how to bleed the cooling system safely.
Common Mistakes That Cause Leaks or Overheating
Most problems after thermostat replacement come from diagnosis, part selection, sealing, torque, or filling errors.
- Replacing the thermostat from P0128 alone without checking coolant level, live data, other codes, or applicable bulletins.
- Ordering a thermostat by model year without confirming the engine, hybrid configuration, or VIN.
- Installing the thermostat backward, off-center, or with the seal outside its groove.
- Positioning a jiggle pin incorrectly when the thermostat uses one.
- Reusing a flattened, swollen, torn, or hardened gasket or O-ring.
- Applying sealant where the design requires a dry O-ring or molded gasket.
- Scratching or gouging an aluminum sealing surface.
- Using an unverified coolant type or mixing incompatible coolant.
- Guessing the housing-bolt torque or overtightening a plastic housing.
- Skipping a model-specific bleed, vacuum-fill, or active-test procedure.
- Failing to perform a cold level and leak recheck after the first heat cycle.
If the Camry still overheats after replacement, do not automatically blame the new thermostat. Recheck coolant level, trapped air, housing installation, temperature-sensor data, cooling-fan operation, radiator temperature distribution, coolant-pump operation, system pressure, and possible combustion-gas leakage.
When Should a Repair Shop Handle the Job?
Stop the DIY repair and use a qualified shop when you cannot obtain the correct torque and bleed procedure, the housing is difficult to access, fasteners are corroded or damaged, coolant contains oil or heavy contamination, the engine has repeatedly overheated, or live data does not support a clear diagnosis.
Professional diagnosis is also appropriate when the repair procedure calls for vacuum filling, scan-tool active tests, electric-pump control, multiple coolant circuits, or high-voltage hybrid-system precautions that your equipment and training do not cover.
Arrange towing rather than driving when the temperature remains high, steam appears, coolant is escaping rapidly, the engine loses power while hot, or overheating returns immediately after the repair.
Frequently Asked Questions
What does a thermostat do in a Toyota Camry?
A Camry thermostat controls coolant flow through the radiator circuit. It restricts radiator flow during cold warm-up, then opens progressively as coolant temperature rises so the cooling system can regulate engine temperature.
How can you tell if a Camry thermostat is stuck open or closed?
A stuck-open thermostat usually causes slow warm-up, weak cabin heat, low coolant-temperature readings, or P0128. A stuck-closed or late-opening thermostat can cause a rapid temperature rise, a high-temperature warning, steam, or limited radiator heating. Confirm the pattern with coolant-level checks, live temperature data, and non-contact temperature measurements.
Does P0128 always mean the Camry thermostat is bad?
No. P0128 means the engine stayed cooler than the ECM expected or warmed too slowly. A stuck-open thermostat is common, but low coolant, trapped air, an inaccurate coolant-temperature sensor, wiring, fan operation, or an applicable calibration issue can also cause the code.
Where is the thermostat located on a Toyota Camry?
The thermostat is normally installed in an engine-side coolant outlet or housing connected to a radiator hose. The exact side of the engine, hose path, access parts, and housing design vary by model year and engine, so use VIN-based service information before disassembly.
Can you drive a Camry with a bad thermostat?
Do not continue driving when the engine is overheating, a high-temperature warning remains on, the gauge enters the red zone, or steam appears. A suspected stuck-open thermostat is usually less urgent than active overheating, but it still needs prompt diagnosis because other faults can produce the same symptoms.
Do you need to drain all the coolant to replace a Camry thermostat?
Not always. Many procedures require draining only enough coolant to lower the level below the thermostat housing. A complete drain may be required by the engine-specific procedure, coolant condition, or related service. Collect the coolant cleanly and follow Toyota’s refill and bleed instructions.
Sources and Service Information
This cross-generation guide uses Toyota owner guidance, Toyota technical information, and cooling-system component guidance. Exact repair specifications must still come from the service information for the vehicle’s VIN and engine.
- Toyota Manuals and Warranties — model-year owner and maintenance information.
- Toyota: How Often to Change Engine Coolant — coolant safety and maintenance guidance.
- Toyota T-SB-0045-13: MIL “ON” DTC P0128 — limited to the vehicles listed in the bulletin.
- MAHLE Vehicle Cooling Technical Guide — wax-element and electronically controlled thermostat operation.
- Gates: Thermostat Jiggle Pin and Bleeder Valve — thermostat orientation and post-replacement air removal.
Conclusion
Diagnose a Camry thermostat in a safe order. Check the cold coolant level and leaks, read stored codes and live temperature data, compare radiator temperature behavior, and bench-test the thermostat only when earlier checks support removal.
Stop driving for a persistent high-temperature warning, a red-zone gauge reading, steam, rapid coolant loss, or repeat overheating. When replacement is justified, use the VIN-matched part, new seal, exact torque, approved coolant, and model-specific bleed procedure. Finish with a complete cool-down, level recheck, leak inspection, and another short monitored drive.