A failing Toyota Camry serpentine belt usually announces itself with a chirp, squeal, burning-rubber smell, battery/charging warning light, weak A/C, heavy steering on belt-driven hydraulic systems, or visible belt damage. Camry accessory-drive layouts vary by model year and engine, so confirm your belt routing and service information in your owner’s manual before replacing parts.
Quick Answer
Replace a Camry serpentine belt if it is oil-soaked, frayed, glazed, chunked, missing ribs, riding off a pulley, squealing after warm-up, or causing charging/accessory problems. On modern EPDM belts, do not rely on cracks alone—rib material loss and pulley/tensioner wear matter just as much.
Key Takeaways
- The urgent signs are belt squeal, burning smell, battery/charging warning, sudden accessory loss, belt wobble, frayed edges, missing ribs, or fluid contamination.
- Modern EPDM serpentine belts can be worn even when they show few cracks, so check rib depth, material loss, glazing, and pulley alignment.
- A new belt can fail quickly if a leaking seal, weak tensioner, rough idler, seized pulley, or misaligned accessory is not fixed first.
- Do not work near a moving belt. Inspect with the engine off, key out, and the engine cool.
At a Glance
| Time Required | 10–20 minutes for inspection; about 45–90 minutes for a typical DIY belt replacement if access is clear |
| Difficulty | Beginner for inspection; moderate for replacement because the tensioner is spring-loaded |
| Tools Needed | Flashlight, gloves, safety glasses, mirror, belt-wear gauge, serpentine-belt tool or breaker bar, torque wrench if replacing pulleys/tensioner |
| Cost | Many shops estimate roughly $142–$197 for Camry belt replacement before taxes, location differences, and related repairs; DIY cost depends on belt brand and whether pulleys or the tensioner are replaced |
Warning: Never inspect or touch the serpentine belt with the engine running. Keep hands, clothing, hair, and tools away from pulleys. Let the engine cool, remove the key, and remember that the belt tensioner is spring-loaded and can snap back with force.
Quick Red Flags: Immediate Serpentine Belt Failure Signs
Check the Camry’s accessory drive right away if you notice any of these symptoms:
- Persistent squeal or chirp: A brief chirp on a cold, wet morning can happen, but a repeat squeal after warm-up usually means slippage, contamination, weak tension, or pulley misalignment.
- Grinding, clicking, or rattling near the belt path: These noises often point to a worn idler, tensioner, alternator pulley, A/C pulley, or another accessory bearing.
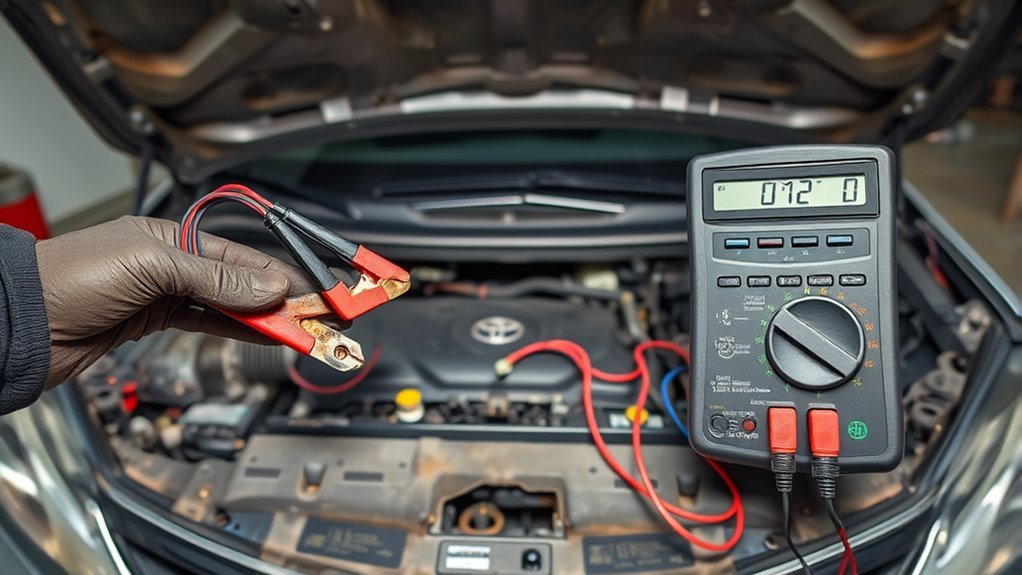
- Battery or charging warning light: On belt-equipped Camrys, a slipping or broken belt may underdrive the alternator and reduce charging.
- Sudden heavy steering: This applies to Camrys with belt-driven hydraulic power steering. Many newer models use electric power steering, so symptoms vary by model year.
- Weak A/C or accessory loss: If the belt cannot drive the pulley correctly, the accessory may stop working or work poorly.
- Burning rubber smell, smoke, or visible belt dust: Stop and inspect. The belt may be slipping, rubbing, or dragging over a seized pulley.
- Engine temperature rising: Some vehicles use the belt to drive the water pump or cooling-related components. Do not keep driving if the temperature gauge climbs.
Note: A bad serpentine belt does not always turn on the check engine light. A battery/charging warning, squeal, accessory loss, or visible belt damage is usually a more direct clue.
Confirm Your Camry’s Belt Setup Before You Remove Anything
Before loosening the tensioner, confirm that your exact Camry year, engine, and trim uses the belt layout you are inspecting. Toyota service information is model-specific, and hybrid and non-hybrid Camrys may use different accessory-drive designs. Use your VIN, under-hood routing label, owner’s manual, or the official Toyota Owners manuals and warranties page to verify the correct routing and service guidance.
Take a clear photo of the belt path before removal. If the routing label is missing or unreadable, do not guess. A belt routed one rib off or around the wrong side of a pulley can shred quickly, slip, or damage accessories.
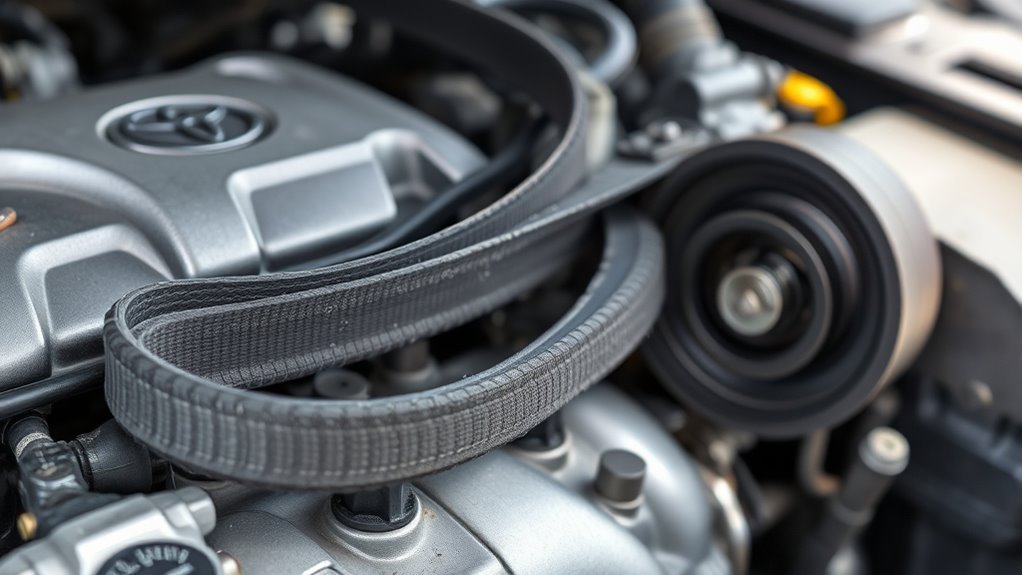
Inspect the Belt Visually: Cracks, Dry Rot, Grooves, and Hidden Damage
Start with a flashlight and inspect the belt across the top run, underside, ribbed face, smooth back, and edges. The old “count the cracks” method can miss modern EPDM belt wear, so treat cracks as one clue—not the only clue.
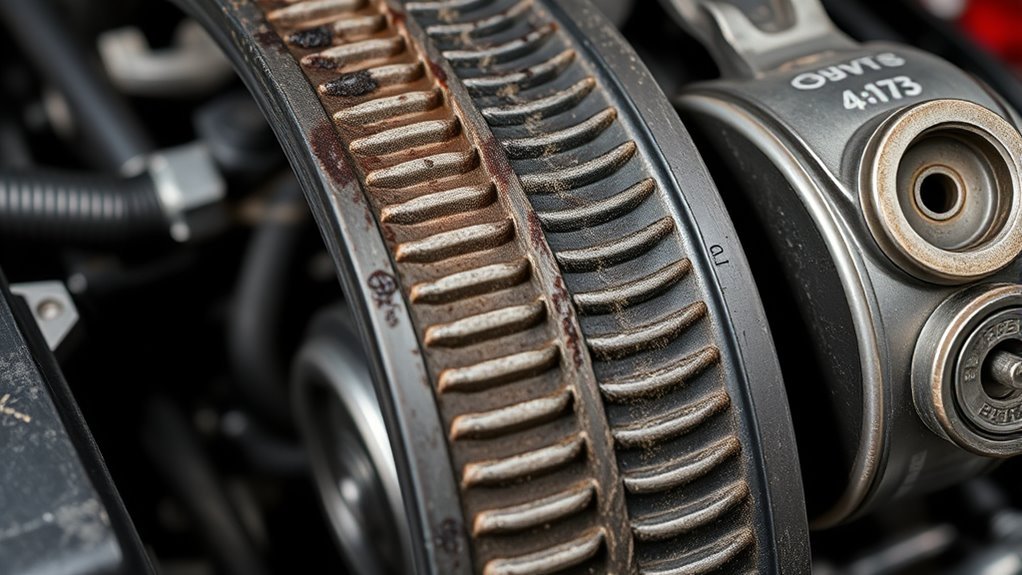
Replace the belt if you find any of these conditions:
- Missing ribs, chunking, or exposed cords: The belt is structurally damaged.
- Frayed edges: The belt may be walking because of pulley misalignment or a bad tensioner.
- Glazing or shiny hard spots: The belt has been slipping or overheated.
- Rib material loss: The ribs become rounded or sit too deep in the pulley grooves, reducing grip.
- Oil, coolant, power-steering fluid, or A/C oil on the belt: Contamination softens rubber and causes slip.
- Deep cracks that reach the cord line: The belt is no longer reliable.
- Stiff, brittle rubber: Age and heat have reduced flexibility.
Pro Tip: Use a serpentine-belt wear gauge on EPDM belts. Many modern belts can look “fine” from the top while the ribs have lost enough material to slip under load.
Cracks matter, but rib wear, material loss, contamination, pulley alignment, and tensioner condition are what decide whether the belt can still grip.
Oil, Contamination, and Wear Patterns That Mean Replace the Belt Now
If you spot oil, coolant, or other fluid on the serpentine belt, replace the belt and fix the leak source before the new belt goes on. Fluid contamination can make the belt slip, squeal, swell, glaze, or crack early. Common leak sources near the belt path can include valve cover seepage, front cover seepage, water pump or coolant leaks, power-steering leaks on older hydraulic systems, and spilled oil from service work.
Look for the pattern, not just the belt:
| What you see | Likely cause | What to do |
|---|---|---|
| Wet, shiny belt ribs | Oil, coolant, or other fluid contamination | Fix leak and replace belt |
| One edge fraying | Misaligned pulley, weak tensioner, or belt running off-track | Check pulley alignment before installing new belt |
| Polished/glazed rib face | Slippage, heat, or pulley wear | Inspect tensioner, pulley grooves, and accessory load |
| Dust near pulleys | Rib wear, misalignment, or belt rubbing | Inspect belt path and pulleys |
| Missing chunks or exposed cord | Advanced belt failure | Do not continue driving; replace and inspect pulleys |
Test the Tensioner and Pulleys for Movement, Noise, and Play
A new belt is only as reliable as the pulleys and tensioner that guide it. With the engine off and cool, relieve belt tension using the correct tool and tensioner direction. If you remove the belt, spin and wiggle the accessible idler pulleys and accessory pulleys by hand.
| What you do | What you hear or feel | What it means |
|---|---|---|
| Pivot tensioner | Snap, bind, or jerky travel | Replace tensioner |
| Release tensioner slowly | Weak return or poor damping | Tensioner may not hold belt grip |
| Wiggle pulley | Rattle, wobble, or side play | Bearing or mounting wear |
| Spin pulley | Grinding, roughness, or clicking | Bearing needs attention |
| Check belt tracking | Belt rides toward one pulley edge | Possible misalignment or bent bracket |
| No issues | Smooth movement and quiet rotation | Recheck after installation |
If a pulley feels rough, loose, or noisy, replace it before installing a new belt. A worn pulley can destroy a fresh belt in minutes. If an accessory pulley is hard to turn, seized, or leaking, diagnose that accessory before driving.
What to Replace and How to Verify Repairs: Parts, Steps, and Restart Checks
Replace the belt whenever it is contaminated, frayed, chunked, glazed, stretched beyond the tensioner range, or visibly damaged. Also replace any worn tensioner, idler pulley, pulley bearing, damper, or accessory pulley that caused the belt damage.
- Confirm belt routing. Use the under-hood diagram, owner’s manual, or VIN-specific service information. Take a photo before removing the old belt.
- Let the engine cool. Keep the key out of the ignition and keep hands clear of the tensioner path.
- Release the tensioner slowly. Use a serpentine-belt tool or correct breaker bar/socket. Do not pry on plastic pulleys or brackets.
- Remove the old belt. Compare its length, rib count, and width with the replacement belt.
- Inspect every pulley. Spin and wiggle idlers, check accessory pulley alignment, and look for bearing noise, wobble, or contamination.
- Install the new belt. Route it exactly as shown. Make sure every rib sits fully in every grooved pulley.
- Release the tensioner gently. Do not let it snap back. Confirm the tensioner indicator, if equipped, sits within its normal range.
- Start and observe. Run the engine at idle from a safe distance. Watch for wobble, belt walk, chirps, squeals, or grinding.
- Recheck after a short drive. Shut the engine off and inspect belt seating, edge wear, and fluid leaks again.
Use Toyota Genuine parts or high-quality parts that match OEM specifications. Toyota notes that non-genuine replacement parts should be equivalent in quality to Toyota Genuine Parts, and parts with different maintenance schedules should follow the part manufacturer’s schedule.
Troubleshooting After a New Belt
If the Camry still squeals or the new belt begins wearing quickly, do not assume the belt is defective. Use the symptom pattern to narrow the cause.
| Symptom after repair | Most likely causes | Next check |
|---|---|---|
| Chirp at startup | Belt not fully seated, weak tensioner, pulley misalignment | Recheck rib seating and tensioner travel |
| Squeal when A/C turns on | Accessory load, slipping belt, A/C pulley issue | Inspect tensioner and A/C pulley bearing/clutch area |
| Belt walks toward one edge | Misaligned pulley, bent bracket, worn tensioner pivot | Check pulley alignment and bracket condition |
| New belt gets shiny quickly | Slippage, contamination, worn pulley grooves | Look for leaks and pulley groove wear |
| Battery warning light remains on | Charging-system issue, alternator, wiring, or belt drive problem | Test charging voltage and alternator operation |
| Grinding remains with belt removed | Noise may not be from belt drive | Stop and diagnose engine/accessory source separately |
Warning: Do not use belt dressing to “fix” a squeal. It can mask the real problem, attract dirt, and contaminate the belt. Find the cause: tension, alignment, fluid, pulley wear, or accessory drag.
Frequently Asked Questions
How often should I replace the serpentine belt on my Camry?
Follow the owner’s manual and inspect the belt at routine service. Many modern serpentine belts can last near 100,000 miles, but replace yours sooner if it is contaminated, frayed, glazed, noisy, chunked, slipping, or worn beyond the belt-wear gauge limit.
Can a bad belt trigger the check engine light?
It can happen indirectly if belt slip causes low voltage or accessory-related faults, but the check engine light is not the most reliable belt warning. A battery/charging light, squeal, burning smell, weak A/C, sudden accessory loss, or visible belt damage is more direct.
Are aftermarket belts as reliable as OEM for Camrys?
A quality aftermarket belt can be reliable when it matches the correct rib count, length, material, and application for your exact Camry. Use reputable brands, verify fitment by VIN or engine, and avoid bargain belts with unclear specifications.
Can I drive home safely if the belt shows minor cracks?
Minor surface cracks alone may not mean instant failure, especially on older belt types, but do not drive far if the belt is squealing, frayed, oil-soaked, missing ribs, riding off a pulley, or causing a warning light. If steering, charging, or cooling is affected, stop and arrange repair or towing.
Do serpentine belt issues affect fuel economy?
A slipping belt can waste energy and underdrive accessories, but fuel economy is usually not the first or clearest symptom. Treat belt noise, charging problems, accessory loss, overheating, and visible belt wear as the important warning signs.
Is the serpentine belt the same as the timing belt?
No. The serpentine belt is outside the engine and drives accessories. A timing belt, when used, is part of the engine’s valve timing system. Most modern Camrys use a timing chain, but always confirm by model year and engine.
What happens if the serpentine belt breaks while driving?
You may lose charging, A/C, hydraulic power steering on some models, and possibly cooling function depending on the engine layout. If warning lights appear, steering gets heavy, or temperature rises, pull over safely and shut the engine off.
Conclusion
Think of your Camry’s serpentine belt as the main link between the crankshaft and several important accessories. When it squeals, walks off-track, gets oil-soaked, loses rib material, or runs over a rough pulley, the safe move is to inspect the whole accessory-drive system—not just the belt. Replace the damaged belt, fix leaks, correct pulley or tensioner problems, verify routing, and confirm quiet operation before you trust the repair.
Sources
- Toyota Owners Manuals and Warranties — official model-specific owner’s manual and warranty access.
- Toyota 2025 Camry Warranty & Maintenance Guide — Toyota maintenance guidance and replacement-parts quality notes.
- Gates Tech Tip: Accessory Belt Drive System — EPDM belt inspection changes, material loss, and crack-count limitations.
- Gates TechZone: Accessory Belt Wear Symptoms — accessory-drive components, belt wear signs, and tensioner/pulley wear context.
- RepairPal Toyota Camry Serpentine Belt Replacement Cost — current cost estimate, symptoms, diagnosis, and replacement overview.