Your Camry’s vacuum brake booster multiplies pedal force using engine vacuum across a diaphragm and a one‑way check valve, so a small foot input becomes larger hydraulic pressure at the master cylinder. You can test it by pumping the pedal with the engine off, starting the engine to see pedal drop, or using a vacuum gauge (15–26 inHg expected). Hissing, hard pedal, or low vacuum point to leaks or diaphragm failure — keep reading for step‑by‑step tests and fixes.
Quick Answer: How to Tell If Your Camry Booster Is Bad
How can you quickly tell if your Camry’s brake booster is failing? You’ll test for assist loss and vacuum integrity to liberate yourself from uncertainty. With the engine off, press the pedal several times: if it stays hard or remains firm after multiple pumps, the booster’s assist is absent. Start the engine—if the pedal drops considerably, the booster’s restoring vacuum is present; if it doesn’t, suspect a vacuum issue or faulty booster. Use vacuum leak detection: connect a vacuum gauge at the booster and expect 15–26 inHg; readings below that range indicate a leak or booster failure. Listen closely for hissing near the booster while someone modulates the pedal; consistent hiss signals a leak compromising performance. For brake booster maintenance, prioritize correcting vacuum leaks, replacing degraded lines, and testing with a gauge rather than guessing. These steps give you direct, actionable diagnostics so you can reclaim control and address the true fault efficiently.
How the Camry Brake Booster Multiplies Pedal Force
While you press the Camry’s brake pedal, the booster uses engine vacuum to convert a small input force into a much larger output force on the master cylinder; a diaphragm and valve assembly isolate vacuum on one side and let atmospheric pressure on the other, creating a pressure differential that multiplies your pedal effort. You’ll feel increased brake force with reduced pedal effort; that’s how the booster improves pedal sensitivity and control, letting you brake decisively without strain. The operating vacuum (typically 15–26 inHg) determines assist magnitude; higher vacuum yields stronger multiplication until design limits. The check valve preserves vacuum so assist persists briefly if the engine stalls, sustaining freedom from sudden hard pedals. During diagnostics, a pedal drop on startup confirms active vacuum engagement and correct multiplication. You can thus trust the booster to amplify your input force predictably, maintaining consistent brake force and pedal sensitivity that supports confident, liberated driving.
| Parameter | Effect |
|---|---|
| Vacuum (inHg) | Assist level |
| Diaphragm action | Pressure differential |
| Check valve | Vacuum retention |
| Startup test | Validates assist |
Camry Booster Parts You Need to Know : Diaphragm, Check Valve, Master Cylinder
You’ve seen how vacuum and the diaphragm work together to amplify pedal force; now look at the three physical parts that make that happen: the diaphragm, check valve, and master cylinder.
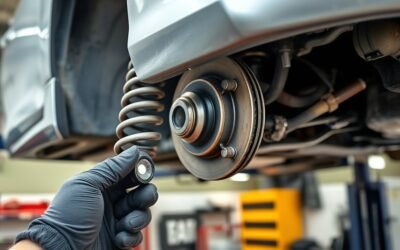
You’ll find the diaphragm is the thin, sealed membrane that separates vacuum and atmospheric chambers; it’s the primary moving element converting pressure differential into mechanical travel. Any tear or loss of seal forces a hard pedal and reduced assist, so prioritize diaphragm replacement when integrity’s compromised. The check valve sits inline with the vacuum source to retain vacuum in the booster; if it fails you’ll lose stored vacuum and assist, so inspect it as part of brake booster maintenance. The master cylinder bolts to the booster and converts the amplified push into hydraulic pressure that actuates calipers and drums. Understand each component’s role and failure mode so you can reclaim control: diagnose leaks, test the check valve, and replace the diaphragm or master cylinder promptly to restore reliable braking performance.
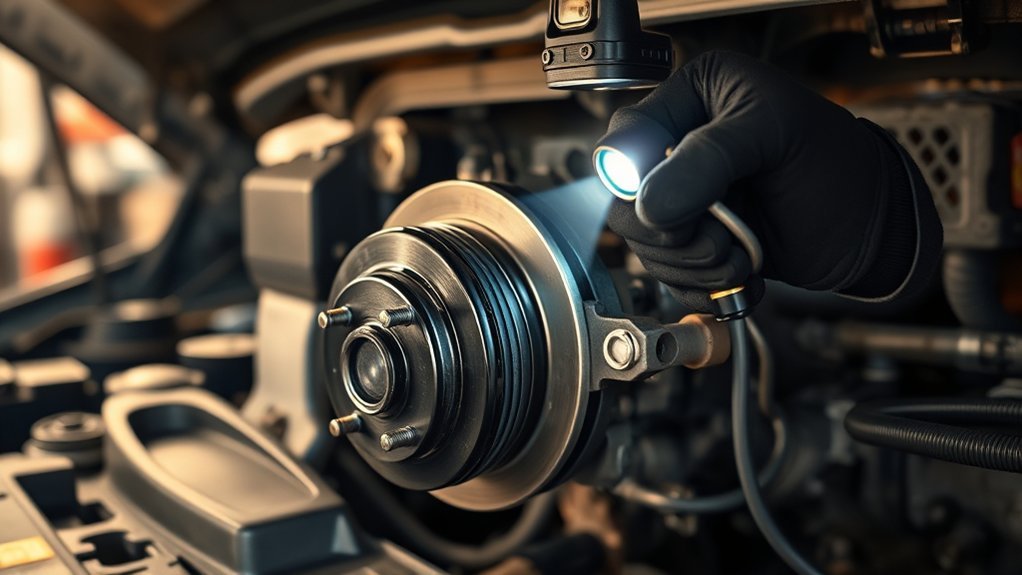
Locate the Camry Vacuum Source and Check Valve
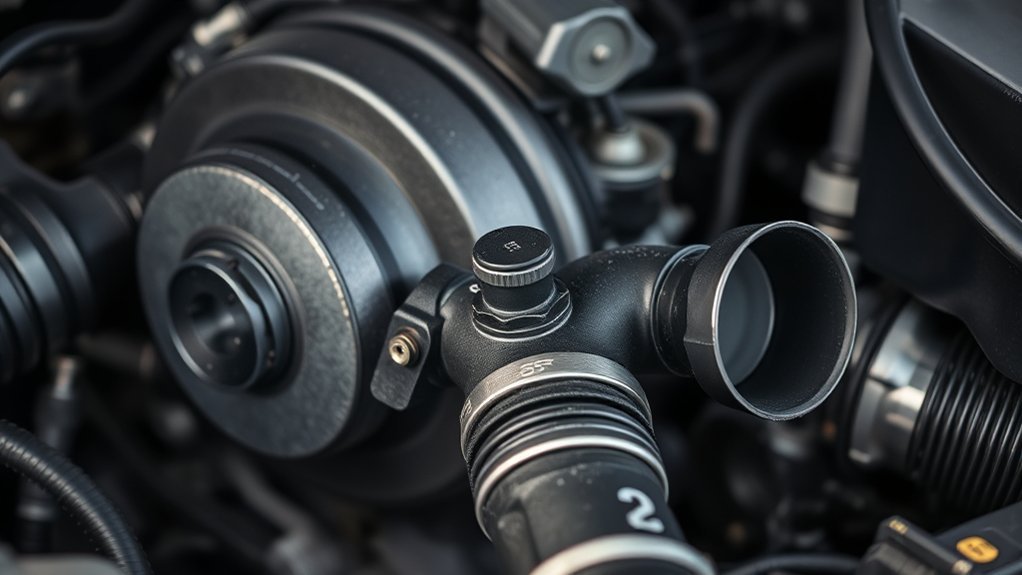
Because the brake booster relies on manifold vacuum, start by tracing the rubber vacuum hose from the booster to the intake manifold to find the vacuum source and check valve; this line should run unobstructed and connect to a one-way check valve near the booster or firewall. You’ll perform vacuum line inspection and basic brake booster maintenance while identifying cracks, loose fittings, or a failed check valve that can cause a hard pedal.
| Item inspected | What to look for |
|---|---|
| Vacuum hose | Cracks, kinks, secure clamps |
| Check valve | One-way operation, no leakage |
| Connections | Tight, seated, no vacuum loss |
Probe the check valve by removing it and confirming airflow one direction only; replace if it allows backflow. Preserve your autonomy by keeping the vacuum source reliable—regular vacuum line inspection prevents sudden failures and maintains braking assist. Prioritize check valve testing during routine brake booster maintenance to guarantee safety and control.
Camry Normal Vacuum Range (inHg) and Why It Matters
When you measure the Camry’s brake booster vacuum it should read roughly 15–26 inHg, since that range provides the negative pressure the diaphragm needs to give consistent power assist; you’ll know the system is healthy when readings sit squarely inside that band. You must monitor vacuum level importance because values below 15 inHg degrade assist, increase pedal effort, and undermine safe control. Use a vacuum gauge on the booster vacuum line to verify performance as part of routine brake booster maintenance.
- Measure: connect gauge to vacuum line; confirm 15–26 inHg at idle and under light load.
- Diagnose: readings <15 inHg indicate leaks, failed check valve, or weak intake vacuum—address immediately.
- Preserve: maintain check valve integrity so retained vacuum supports emergency braking during engine failure.
You’ll act confidently when you assess and correct vacuum deviations, protecting autonomy and safety through disciplined, precise maintenance practices.
Pedal Check: In‑Car Test and Expected Results
Start with the engine off and pump the brake pedal several times until it feels firm and unassisted—this confirms the booster has bled down and the pedal is on its mechanical stop. With the engine off you’ve isolated the vacuum circuit; the check valve should retain any remaining vacuum so you can still stop if needed. Now start the engine. If the brake pedal drops slightly within one or two seconds, the booster is drawing vacuum and providing assist — that’s the expected result and frees you from doubt about booster function.
If the pedal stays hard after starting, you’ll suspect vacuum leaks or a failing booster. That outcome requires further diagnosis (see vacuum testing procedures) rather than continued driving. Remember normal booster vacuum targets are 15–26 inHg; values below that reduce assist. This in‑car check is simple, definitive, and lets you reclaim control of safety decisions without unnecessary dependency.
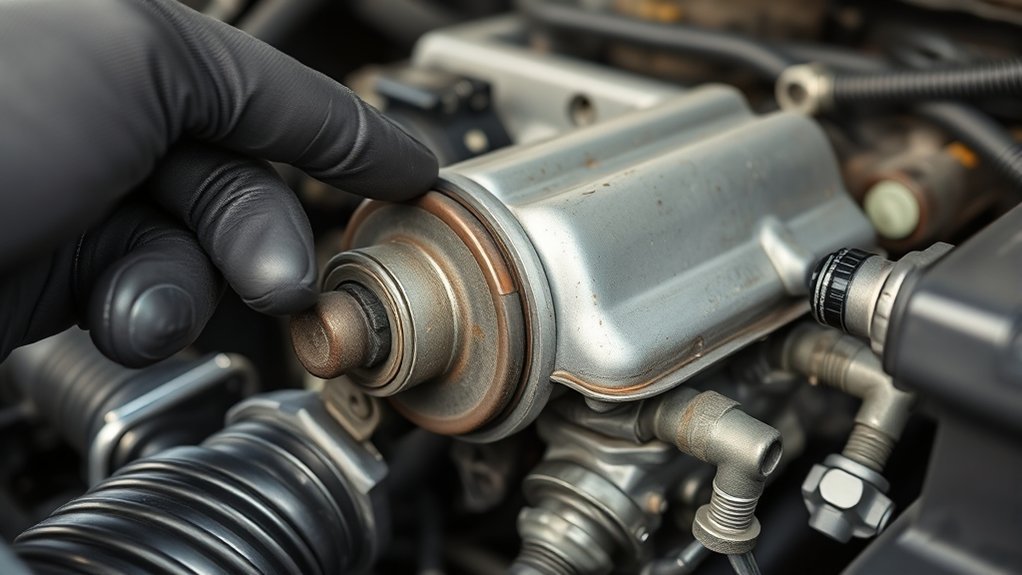
Test Camry Vacuum With a Gauge : Step‑by‑Step
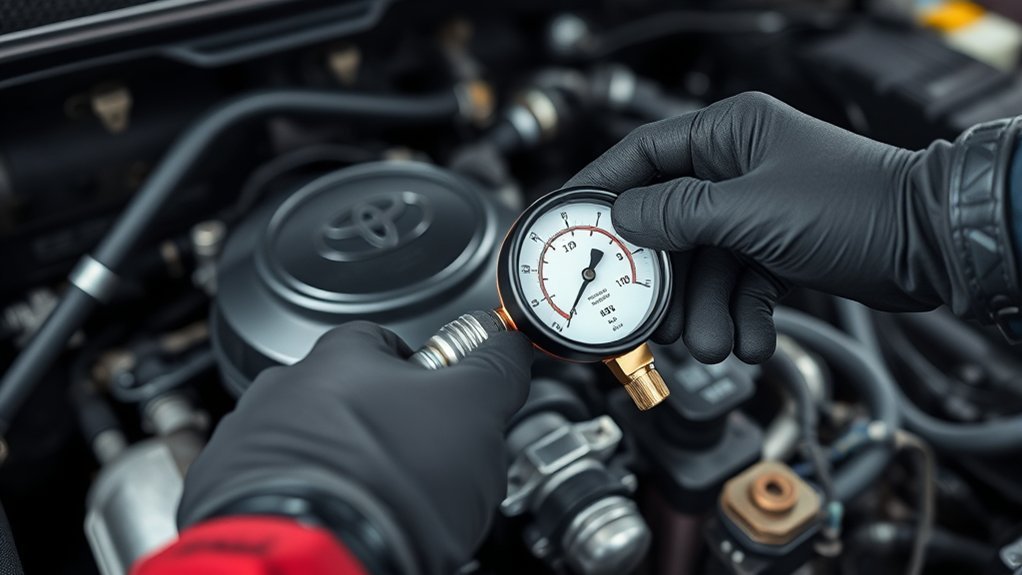
Anyone troubleshooting a Camry’s brake booster should first locate the booster and its vacuum supply, unplug the vacuum line, and attach a quality vacuum gauge to that line so you can read steady pressure while the engine is idle and under vacuum load. You’ll confirm system integrity by observing gauge values and verifying the check valve holds vacuum. Normal vacuum reads 15–26 inHg; below that suggests a weak booster or supply leak affecting braking assist and pedal feel. Also consider brake fluid condition separately—this test isolates vacuum function from hydraulic issues.
- Start engine, watch gauge at idle, note steady reading; rev briefly to confirm vacuum increases under load.
- Shut engine, pump pedal to verify stored vacuum maintains firm pedal feel; a rapid loss implicates the check valve or booster.
- If readings stay below 15 inHg, trace vacuum source and hoses, then replace faulty check valve or booster as needed.
Symptoms That Point to Vacuum Loss vs. Diaphragm Failure
When you start the Camry and the brake pedal is hard, that points toward vacuum loss in the booster rather than a soft-booster condition. If you hear a persistent hissing when you press the pedal or detect a vacuum leak, suspect diaphragm damage or a failing check valve. Note uneven brake response or a sudden pedal height drop with engine start as diagnostic clues to distinguish vacuum supply issues from diaphragm failure.
Hard Pedal On Startup
Although a hard brake pedal on cold startup can come from several causes, you should first distinguish between loss of vacuum and a failed booster diaphragm because diagnostic steps differ and repairs do too. You’ll assess brake pedal firmness and vacuum system integrity to liberate yourself from guessing.
- Check static vacuum: connect a gauge to the booster; 15–26 inHg is normal. Readings below indicate loss of vacuum — inspect source lines and engine vacuum.
- Pedal response test: if pedal drops markedly when engine starts, the diaphragm is likely intact and vacuum assist is present; if pedal remains hard after multiple pumps, suspect vacuum loss.
- Persistent hardness with normal vacuum points to diaphragm failure; replace the booster to restore proper assist and control.
Hissing Or Vacuum Leak
One clear symptom to listen for is a hissing noise at the brake pedal—this usually means air is entering the booster or its vacuum supply, which reduces assist and makes the pedal hard. You’ll distinguish vacuum leak vs. diaphragm failure by symptom pattern and inspection. A vacuum leak often causes intermittent hissing noise when you apply the brake pedal, hard pedal feel, and reduced assist; inspect the vacuum line for cracks, disconnections, and verify vacuum 15–26 inHg. Diaphragm failure typically yields a constant hissing noise and persistent hard pedal, indicating internal sealing loss and requires booster disassembly or replacement. Diagnose systematically: listen, measure vacuum, visually check hoses, then commit to repair. Freedom on the road starts with reliable braking integrity.
Uneven Brake Response
If your Camry’s brake pedal feels uneven or requires varying force, it’s often signaling either insufficient vacuum supply or a compromised booster diaphragm. You’ll diagnose by isolating symptoms: vacuum loss yields a consistently hard pedal and reduced braking efficiency; diaphragm failure produces an unstable pedal feel that changes with engine start/stop.
- Check static vs. running pedal feel: hard when off but improves with engine on suggests adequate vacuum; hard both ways points to vacuum issues.
- Measure vacuum: 15–26 inHg is normal; below that lowers braking efficiency and confirms vacuum issues.
- Observe pedal drop at start: a significant drop then instability indicates diaphragm failure preventing proper pressure separation.
DIY Fixes, Temporary Workarounds, and When to Replace the Booster
If the Camry’s booster gives low assist, you can temporarily restore some braking by pumping the pedal several times before starting the engine to build residual vacuum. Check vacuum lines and connections for leaks and listen for a hissing noise at the booster during pedal application, which suggests a diaphragm breach. Replace the booster when diaphragm failure or persistent vacuum loss is confirmed, and when you do, verify master cylinder connection and correct vacuum levels.
Temporary Brake Assist Tricks
When your Camry’s booster shows signs of failure, you can use a few temporary measures to maintain braking capability until you get a proper repair: You’ll apply practical brake pedal troubleshooting and temporary solutions to stay safe and independent. Use these targeted, short-term tactics only until you can service or replace the booster.
- Pump pedal with engine off: several firm pumps build limited vacuum assist; then apply steady, controlled braking.
- Seal vacuum line cracks: wrap small leaks with tape to reduce vacuum loss; plan replacement ASAP.
- Emergency technique: press firmly and repeatedly, or rely briefly on a hydro-assist alternative (if equipped), monitoring for fluid leaks.
Perform a quick pedal-drop test at startup to confirm booster condition.
When To Replace
How do you decide whether to try a DIY fix, rely on a temporary workaround, or replace the brake booster outright? You prioritize brake performance and personal freedom: if the pedal stays hard after pumping and starting, replace the booster—insufficient vacuum assist risks control. Use a vacuum gauge; readings below 15 inHg point to booster or vacuum-source failure and justify replacement. Hissing or loss of braking power indicates a likely vacuum leak needing immediate attention. Short-term fixes include checking vacuum line fittings and the one-way check valve; these restore function briefly but don’t substitute for a failing diaphragm. Inspect the booster diaphragm per the maintenance schedule; visible wear or damage mandates replacement. Choose prompt replacement when diagnostics show compromised vacuum or structural failure.
Safety Checks and When to Get Professional Service Before Driving
Because braking assist relies on a sealed vacuum system, you should inspect the vacuum source, lines, and check valve for leaks or failure before driving; a loss of vacuum will noticeably increase pedal effort and stopping distance. For brake safety, perform two quick checks: with ignition off pump the pedal five times and hold—if it becomes rock hard, the booster may be faulty and needs professional inspection. Start the engine: if the pedal doesn’t drop slightly, that indicates insufficient vacuum or booster failure and demands immediate service.
- Pump-and-hold test: identifies internal booster failures.
- Listen and feel: hissing or inconsistent pedal travel signals leaks.
- Visual inspect: cracked vacuum lines or a faulty check valve reduce emergency braking capability.
If you detect any anomaly, don’t drive. Seek a mechanic to confirm vacuum integrity and replace defective components. Protect your autonomy by ensuring reliable stopping power.
Frequently Asked Questions
How to Check if a Brake Booster Is Working Properly?
You check if a brake booster is working by performing the testing method: pump pedal with ignition off until hard, start engine—if it drops you’ve confirmed brake booster symptoms are absent; if not, suspect vacuum loss or valve failure.
Does a Brake Booster Have Anything to Do With Power Steering?
Yes — you’ll see separate brake booster functions, separate power steering relationship, yet sometimes combined: vacuum boosters assist braking, hydro boosters use steering pump pressure for both, so systems can be independent or integrated depending on design.
Conclusion
You can usually tell a tired Camry booster by hard pedal, longer stops, or a hissing hint under the dash. The booster uses engine vacuum and a spring‑loaded diaphragm plus a one‑way check valve to multiply your leg force and feed the master cylinder. Check vacuum at the booster (normally about 18–22 inHg at idle), test with a gauge, and isolate the check valve. Temporary tricks like pumping the pedal can help briefly, but a leaking diaphragm calls for replacement. Always verify brake function before driving and seek pro help if you’re unsure.