Cool the engine, disconnect or cover the battery and exposed connectors, and inspect for leaks or damaged hoses before you start. Use a mild degreaser (Simple Green or diluted powersports formula) and work section-by-section: spray, agitate with a brush, let dwell 10–15 minutes, then blot. Rinse with low pressure from top down, avoid coil packs and sensors, and dry connectors promptly. Finish with non‑solvent dressings on rubber and plastic; continue for full post‑clean checks and tips.
Quick 5‑Step Engine‑Bay Wash for 4Runner
Start by letting the engine cool completely, then cover exposed electrical connectors with aluminum foil to prevent moisture intrusion; this protects sensors and wiring while you work. You’ll follow five concise steps for effective engine detailing. First, apply a diluted, gentle cleaning product (Simple Green) from a spray bottle, targeting greasy zones and letting it dwell 10–15 minutes to break down grime. Second, use a low-pressure hose to rinse, directing flow from the grill toward the engine block to avoid forcing water into connectors. Third, blot and wipe remaining residues with microfiber towels, working methodically to remove overspray and runoff from brackets and seals. Fourth, inspect visible hoses, clamps, and seals for looseness or leaks revealed by cleaning. Fifth, take a short drive to help evaporate trapped moisture and reassess the bay when cool. You’ll protect electricals, use proper cleaning products, and move confidently toward maintenance freedom without risking component damage.
Prepare the 4Runner Engine Bay: Cool Down, Inspect, and Gather Tools
Before you start, make sure the engine is completely cool to prevent burns and avoid trapping steam under components. Visually inspect the bay for leaks, damage, or loose connections that should be fixed before any moisture is introduced. Gather a spray bottle, detail brush, mild cleaner, microfibers, and supplies to wrap electrical connectors so you can clean safely with a low-pressure rinse.
Cool Engine Completely
While the engine’s still warm, let it cool completely to ambient temperature to prevent burns and avoid thermal shock to hoses, seals, and sensors; you’ll also reduce the chance of boiling fluids forcing contaminants into sensitive areas. You’ll confirm safe handling, protect components, and set the stage for proper engine maintenance and cleaning tips. Don’t rush—cooling preserves seals and sensors and prevents water vapor intrusion when you rinse.
| Action | Rationale | Time |
|---|---|---|
| Park in shade | Lowers radiant heat | 15–30 min |
| Open hood | Speeds airflow | 5 min |
| Wait to touch parts | Prevents burns | Until ambient |
| Cover battery/ECU | Protects electronics | Before cleaning |
| Gather tools | Ready cleaners/towels | While cooling |
Inspect For Leaks
Once the engine’s cooled, give the bay a careful visual and tactile inspection for fluid leaks, cracked hoses, loose clamps, or oil residue that could worsen when you rinse. You’ll perform leak detection as part of preventative maintenance to free yourself from unexpected failures and keep control of your vehicle’s condition. Check around the valve cover, radiator, and hoses; feel for dampness and trace residue paths. Note any suspicious areas and secure loose clamps before proceeding.
- Inspect hose connections and clamps for seepage or soft spots.
- Scan the radiator, reservoir, and overflow lines for stains or wetness.
- Smell for coolant or fuel odors indicating hidden leaks.
- Record locations and severity to prioritize repairs and avoid worsening issues during cleaning.
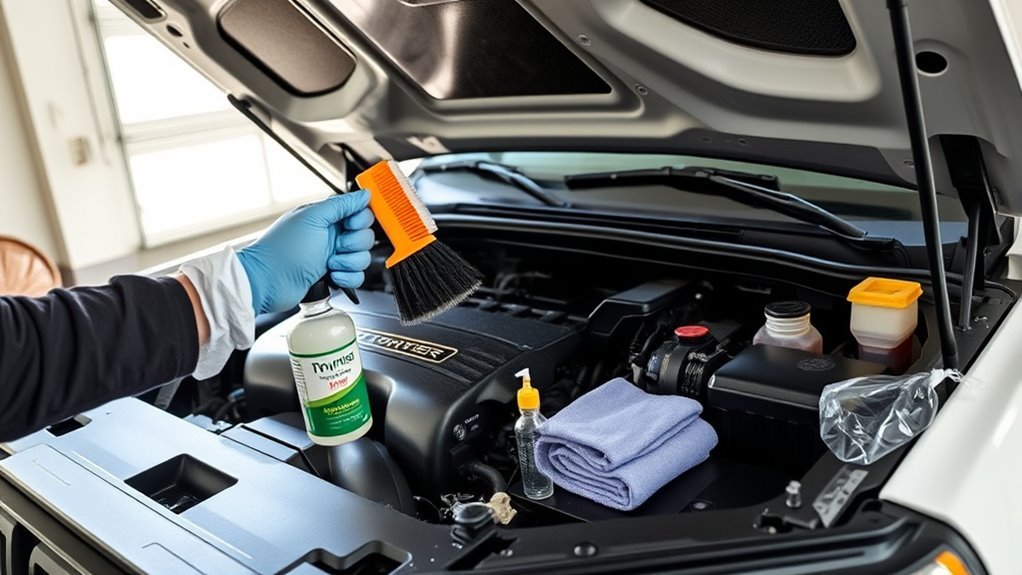
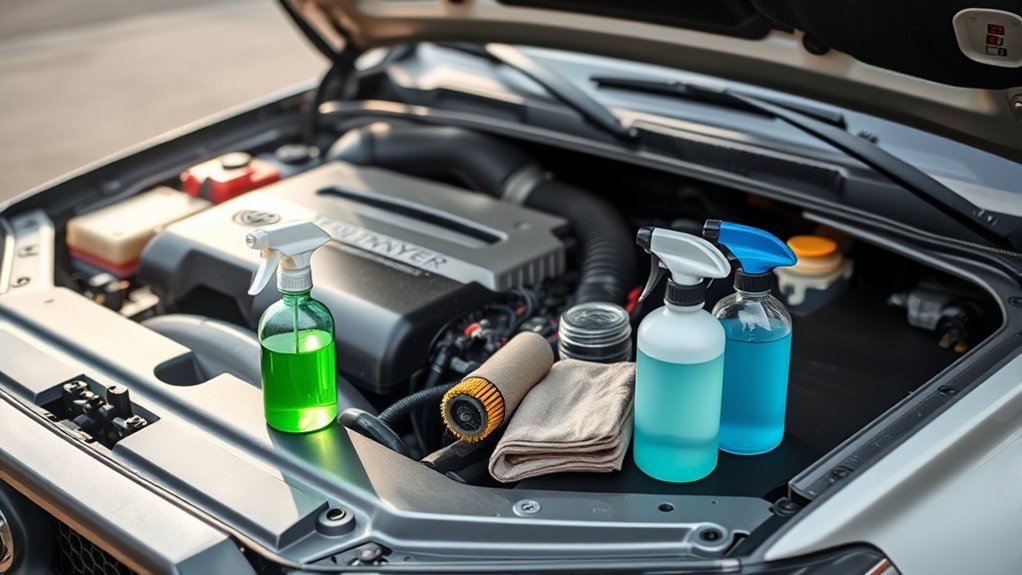
Gather Cleaning Tools
Even if the engine’s cooled and you’ve inspected for leaks, gather the right tools so you can work efficiently and safely: a spray bottle, soft detail brushes, microfiber towels, a mild degreaser (like diluted Simple Green), and low-pressure rinsing equipment. Next, prepare protective covers—use rubber bands or plastic bags to isolate battery terminals, exposed connectors, and air intakes. Choose brushes sized for crevices and hoses; microfiber for drying prevents abrasion. Mix degreaser per instructions to avoid component damage. Keep a small flashlight and inspection mirror to confirm concealed areas are clean and dry. These cleaning techniques minimize water intrusion and electrical risk. You’re reducing dependency on shops by mastering safe engine maintenance practices that grant you control and freedom.
Protect Battery, Coils, and Electrical Connectors Before Cleaning
Before you spray any cleaner, protect the battery, coils, and all exposed connectors by covering them with plastic bags, aluminum foil, or clean towels to prevent moisture, cleaner ingress, and corrosion. This engine protection step is essential for electrical safety and prevents shorts, corrosion, and sensor damage. Remove loose debris near terminals and connectors first so water won’t carry grit into seals.
Before spraying cleaners, shield the battery, coils, and connectors with bags or towels to prevent moisture and shorts.
- Cover battery terminals and case with a sealed bag or foil, securing with tape to block moisture.
- Wrap spark plug coils with clean towels or plastic, avoiding direct spray to prevent short circuits.
- Inspect connector seals; replace or re-seat any worn boots to maintain water resistance.
- Shield sensitive sensors and exposed wiring with rags or foam plugs; leave caps on service ports.
You’re reclaiming control of your vehicle—protect components proactively, follow safety steps, and proceed to cleaning only when protective coverings are secure.
Choose the Right Cleaner: Simple Green, Powersports Degreasers, or Mild Soap
With electrical parts protected, pick a cleaner that removes oil and grime without harming hoses, sensors, or painted surfaces. You want a balance of cleaning safety and product effectiveness so you can reclaim control of your vehicle without tradeoffs. Simple Green is a versatile choice: it cuts oil, rinses clean, and is generally safe on painted and rubber parts when used per label. For heavy off‑road buildup, choose OHV or Powersports degreasers engineered to dissolve stubborn grime and baked-on grease; they maximize product effectiveness but demand strict dilution and contact-time adherence. If components are delicate or you prefer minimal chemistry, use mild soap diluted with water to reduce risk of material degradation. Whatever you select, avoid harsh solvents that can corrode fittings or remove protective coatings. Test any cleaner on a small, hidden area first to confirm compatibility. Follow manufacturer instructions, wear PPE, and work methodically to maintain cleaning safety and preserve your 4Runner’s reliability.
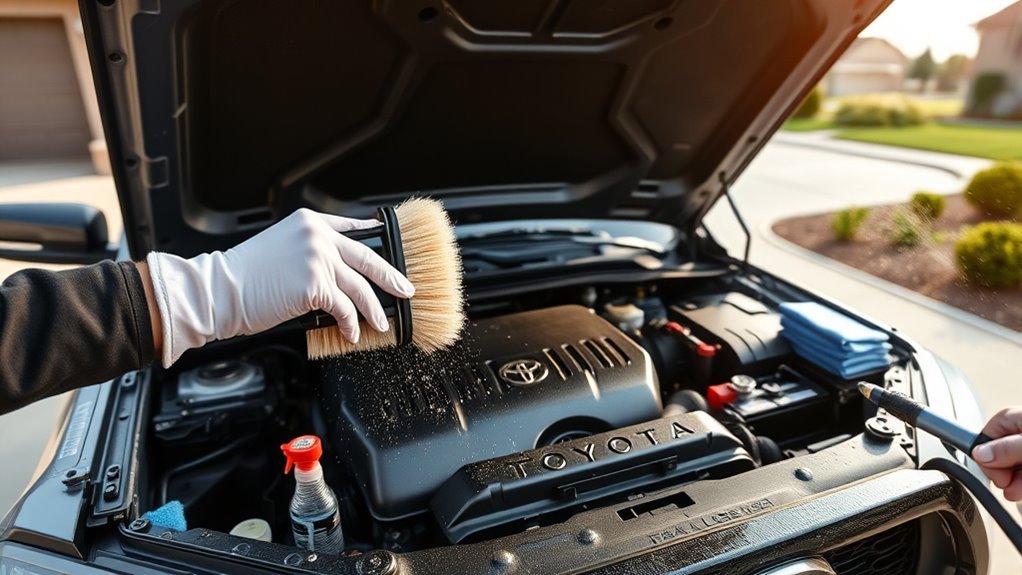
Clean Section‑by‑Section (Spray, Agitate, Wait) for the Engine Bay
Start by working one small area at a time: spray a mild cleaner like Simple Green onto a defined section of the engine bay, then use a detail brush to agitate grime so the solution can penetrate baked‑on oil and dirt. You’ll stay in control, reduce runoff, and limit exposure of sensitive components while using proven engine cleaning techniques and safe products. Agitate firmly but precisely, targeting crevices, valve covers, and mounts. Let the cleaner dwell 10–15 minutes so solvents break bonds; don’t let surfaces dry.
- Spray a 12–18 inch radius, avoiding sensors and exposed connectors.
- Agitate with a nylon detail brush, working edges and seams.
- Wait 10–15 minutes for the cleaner to emulsify oils and loosen debris.
- Blot excess with microfiber and move to the next section.
Work methodically across the bay, repeating spray, agitate, wait. This disciplined approach liberates you from overwhelming tasks while protecting electrical systems and achieving consistent, safe results.
Rinse With Low Pressure to Avoid Water Intrusion
Use a low-pressure nozzle to keep water force controlled and prevent driving moisture into sensitive areas. Aim the spray away from electrical connectors and sensors while you rinse, and work from the top down so runoff carries contaminants away from critical components. This controlled method also helps you spot leaks or loose fittings during the rinse.
Use A Low-Pressure Nozzle
One simple adjustment — switching to a low-pressure nozzle — lets you rinse the engine bay without forcing water into sensitive connectors or coil packs. Embrace low pressure benefits: you gain control, reduce intrusion risk, and still remove dirt and detergent. Use nozzle techniques that deliver a wide, gentle fan pattern and keep flow steady; that preserves fragile components and prevents debris from being driven into seams. You’ll rinse thoroughly while protecting electrical systems.
- Select a nozzle rated for gentle flow to limit PSI and turbulence.
- Maintain a consistent sweep speed to avoid concentrated bursts.
- Keep distance to diffuse impact while ensuring detergent removal.
- Inspect seams and fragile parts after rinsing to confirm no water accumulation.
This approach frees you to clean confidently and safely.
Aim Away From Connectors
Because water forced into connectors can cause shorts and corrosion, always aim your low-pressure rinse away from electrical plugs, coil packs, and sensor housings. You’ll protect circuits and preserve engine protection by keeping spray vectors controlled and directed toward non-electrical surfaces. Use plastic bags or foil to shield vulnerable connectors, then rinse with a wide, gentle fan to minimize water intrusion. After cleaning, inspect and dry connectors promptly to prevent latent water damage and corrosion. You’re claiming freedom from avoidable failures by taking simple, deliberate steps.
| What to protect | How to protect |
|---|---|
| Electrical plugs | Cover with plastic/foil |
| Coil packs | Aim rinse away |
| Sensor housings | Low-pressure fan |
| Post-rinse | Inspect and dry |
Rinse From Top Down
Start at the top of the engine bay—near the grille—and work downward, so loosened dirt and rinsate flow away from already-clean areas. Use a low-pressure hose and controlled sweeping motions to protect sensors and harnesses; you’re managing engine bay maintenance, not power-washing the firewall. Aim water at the engine block and surrounding surfaces, avoiding spark plug coils and electrical connectors to prevent moisture intrusion. After rinsing, drive briefly to accelerate evaporation and reduce corrosion risk.
- Begin at grille; rinse downward in bands.
- Keep pressure low; avoid direct sprays on connectors.
- Focus on engine block and greasy pockets.
- Finish with a short drive to dry residual moisture.
Plan cleaning frequency around use and exposure — frequent gentle rinses beat occasional aggressive washes.
Dry, Detail, and Dress Plastics, Rubber, and Metal Components
After thoroughly drying the engine bay, inspect and treat plastics, rubber, and metal components with purpose-built products to protect function and appearance. Use a plastic cleaner formulated for non-metal parts to remove grime without harming trim — this is plastic protection, not shine for shine’s sake. Wipe plastics with a clean microfiber to avoid abrasion. For rubber maintenance, apply a non-solvent-based dressing to hoses and seals; this prevents drying and cracking while avoiding products that degrade rubber. Metal parts get a dedicated metal polish to restore luster and add a corrosion-resistant layer; buff with a microfiber towel for an even finish. Work methodically, one area at a time, and verify product compatibility with manufacturer recommendations to preserve component integrity. Regularly inspect these surfaces; buildup accelerates wear and can impair engine performance. These steps free you from deferred maintenance, keeping the bay reliable and functional without risking materials or safety.
Use a Pressure Washer or Steam Cleaner Safely and When to Avoid Them
When you’re deciding between a pressure washer and a steam cleaner, choose the method that removes grime while minimizing risk to electricals and seals. You’ll prefer steam cleaner benefits when you want controlled heat and low mechanical force to loosen oil and dirt without blasting connectors. For pressure washer safety, use a low-pressure setting, keep the spray angled from the grille, and never target the engine block or exposed sensors.
- Inspect for leaks or damaged hoses first—high pressure will worsen them.
- Mask electricals (alternator, coils, exposed connectors) to prevent water intrusion.
- If dirt is baked-on, apply degreaser, let dwell, then use steam for gentle removal.
- Use pressure only for peripheral rinsing; maintain distance and low PSI to protect seals.
You’re reclaiming your vehicle’s condition; choose the method that liberates grime while preserving functionality and avoiding unnecessary risk.
Post‑Clean Checks, Test‑Start, and Maintenance Schedule After Off‑Road Trips
Having cleaned the bay, check for leaks, loose hoses, and unmasked connectors before turning the key — water or dislodged fittings can cause shorts or fluid loss. Perform a systematic electrical inspection: dry terminals, reseat harness clips, and verify protective covers are intact. Close all drain plugs and guarantee breather lines sit correctly.
When you test-start, watch gauges, listen for irregular noises, and cycle accessories (fans, lights, infotainment) to confirm circuits remain stable. If a fault appears, don’t drive — isolate the source, replace damaged clamps, and retest.
For post clean maintenance after off-road trips, schedule inspections and cleanings based on exposure: annually at minimum, or immediately after heavy mud, water crossings, or salt exposure. Maintain a simple log of dates and findings to track corrosion or recurring issues. Regularly monitor residual moisture and debris; remove buildup promptly to preserve reliability and protect your freedom to roam without preventable failures.
Frequently Asked Questions
How to Clean an Engine Bay Without Damaging It?
Use low-pressure rinse, mild cleaners, and targeted cleaning tools; let the engine cool, wrap electricals for engine protection, work sectionally, rinse gently, and drive briefly to evaporate moisture—you’ll liberate grime without risking damage.
Is It Safe to Clean a Car Engine Bay?
Yes — you can safely clean an engine bay if you prioritize engine safety, use low-pressure rinsing and gentle cleaning techniques, cover electricals, avoid harsh chemicals, inspect for leaks first, and perform maintenance regularly for liberation and control.
What Is the Best Thing to Use to Clean Your Engine Bay?
Like a scalpel, you’ll prefer engine degreasers (Simple Green or GUNK) with safe cleaning techniques; dilute when needed, avoid acids, protect electronics, wear gloves, and use controlled rinsing so you’ll liberate your engine without causing corrosion or damage.
Conclusion
You’ve treated the 4Runner’s engine bay like a patient—cooled it, shielded its nerves (battery and coils), and flushed away grime with the right agents. That care is more than maintenance; it’s stewardship. Each protected connector and dried gasket is a healed scar, a promise of reliability on future trails. Stay methodical, respect electricals and pressures, and your engine bay will keep repaying you with dependable starts and safer, longer adventures.