If your 4Runner clunks under acceleration or deceleration, start by checking rear mounts, slip yoke splines, and U‑joints—those three cause most clunks. Reproduce the fault by shifting between Drive and Reverse with brakes held, then watch for binding or play. Lubricate the slip yoke every 5k–10k miles and replace worn U‑joints or mounts. Repairs range from minor greasing to full shaft replacement; follow tests to prioritize fixes and learn which repair path to take.
Immediate Fixes and First-Check Tests to Stop a Driveshaft Clunk
If you’re hearing a clunk from the driveshaft, start with quick, practical checks you can do right away: listen for drivetrain noise while revving in drive with the brakes engaged to localize the sound. Inspect rear end mounts for visible damage or looseness—worn mounts let the driveline shift and amplify clunks. Check u-joints for slop, wear, and proper lubrication; play them by hand and look for binding or side-to-side movement. Regularly lubricate the slip yoke every 5,000–10,000 miles with quality moly or synthetic grease to reduce clunking during braking and acceleration. Use targeted lubrication techniques: pack the yoke, work the grease in, then flex the yoke by bouncing the bumper to help distribute grease and relieve pressure if the clunk persists. These quick diagnostics and simple maintenance moves let you take control, stop unnecessary noise, and avoid being tied down by preventable drivetrain problems.
Reproduce the 4Runner Driveshaft Clunk Reliably (Safe Test Steps)
When you need to reproduce the driveshaft clunk reliably, park the 4Runner on a flat surface, hold the brakes, and shift quickly between Drive and Reverse to load the drivetrain while listening for a distinct thump; repeat several times and note whether the noise occurs on acceleration, deceleration, or both. Do the test slowly and safely, keep the parking brake engaged as a backup, and have a partner observe exterior components if possible. Watch the slip yoke for binding during shifts—binding often coincides with a clunk sound under drivetrain stress. Record when the clunk happens and the exact shift direction to free yourself from guesswork during repairs.
| Condition observed | Action to note |
|---|---|
| Clunk on acceleration | Record gear and rpm |
| Clunk on deceleration | Note brake input |
Use these safe, repeatable steps to gather clear, actionable evidence before you start parts replacement or escalate to professional service.
Quick Diagnostics: What Each Test Result Means
Use the engine-brake test to see if the clunk shows under load while the brakes hold the truck; if it does, you’re likely looking at drivetrain or differential issues rather than something loose on the body. Next, check driveline play by wiggling the shaft and inspecting U-joints, CV axles, and differential mounts for slop or movement—any noticeable play points to worn components that need replacement or adjustment. Combine both results to prioritize repairs: engine-brake clunk with driveline play means internal drivetrain/service, while a clunk with no play shifts focus to mounts, lubrication, or gear backlash.
Engine Brake Test
Although it sounds simple, the engine brake test gives you a focused way to reproduce clunks while the vehicle is in drive with the brakes held, letting you isolate issues in the drive shaft, CV axles, differential, or hub flanges. You’ll rev the engine and watch engine performance while listening for clunks; this noise identification step narrows faults quickly. A persistent clunk points to play in the front differential, a worn CV axle, or a loose hub flange and demands hands-on inspection. If clunks occur only during specific shifts (R to D or R), suspect ring-and-pinion backlash. Observe drive shaft rotation during the test to pinpoint misalignment or wear. Document results—clear records guide focused repairs and free you from guesswork.
Driveline Play Check
After you’ve verified clunks with the engine-brake test, check driveline play to pinpoint where the movement’s coming from. Put the truck in gear and watch for clunking when shifting between drive and reverse — that confirms loose or worn parts. During driveline inspection, probe the front differential mount for excess movement; worn mounts cause vibration and sap your control. Grab the hub flange and wiggle CV axles; any play signals wear and possible replacement. Manually rotate the driveshaft and feel for u-joint slop — significant play means imminent failure. Finally, rotate the driveshaft while observing the differential to assess ring-and-pinion backlash; excessive backlash requires adjustment or parts replacement. These checks protect component longevity and restore confident, liberated driving.
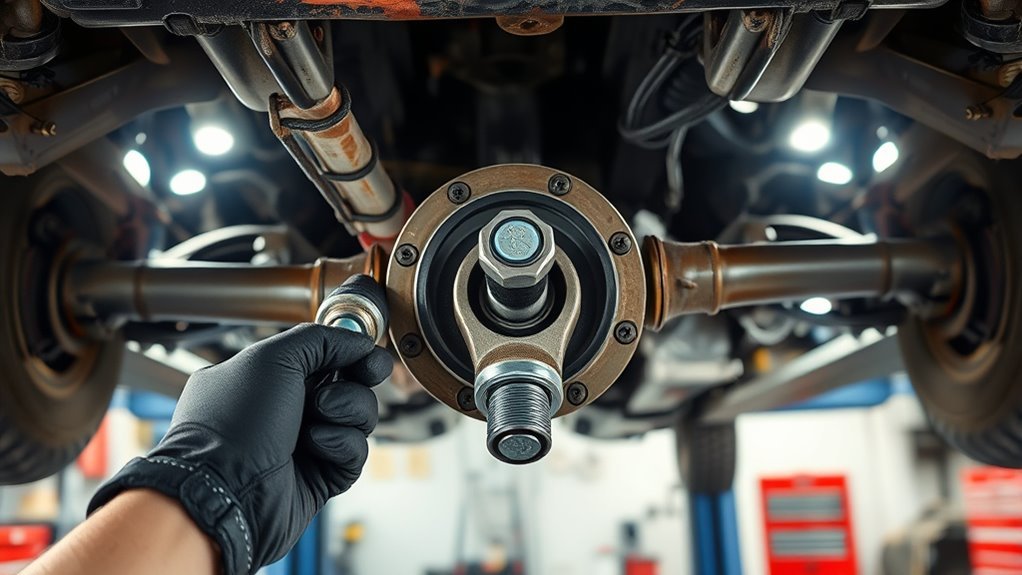
Inspect the Slip Yoke and Driveshaft Splines
Start by jacking the vehicle and safely supporting it so you can access the slip yoke and driveshaft splines; you’ll want good light and a clean rag. For a focused slip yoke inspection, wipe away grime and look for dry, polished areas or scoring that signal inadequate driveshaft lubrication. Push and pull the shaft to detect slop; slight axial movement is normal, but excessive play or binding isn’t. Rotate the splines and feel for rough spots or uneven wear — these predict clunking under load.
If splines are dry, pack them with Teflon grease and work the shaft to distribute lubricant; this reduces binding and noise. Grease the slip yoke every 5,000–10,000 miles as preventive maintenance. If you find deep wear, significant slop, or persistent binding after lubrication, plan replacement of the yoke or driveshaft. Stay proactive — maintaining smooth splines frees the driveline and prevents repetitive failures.
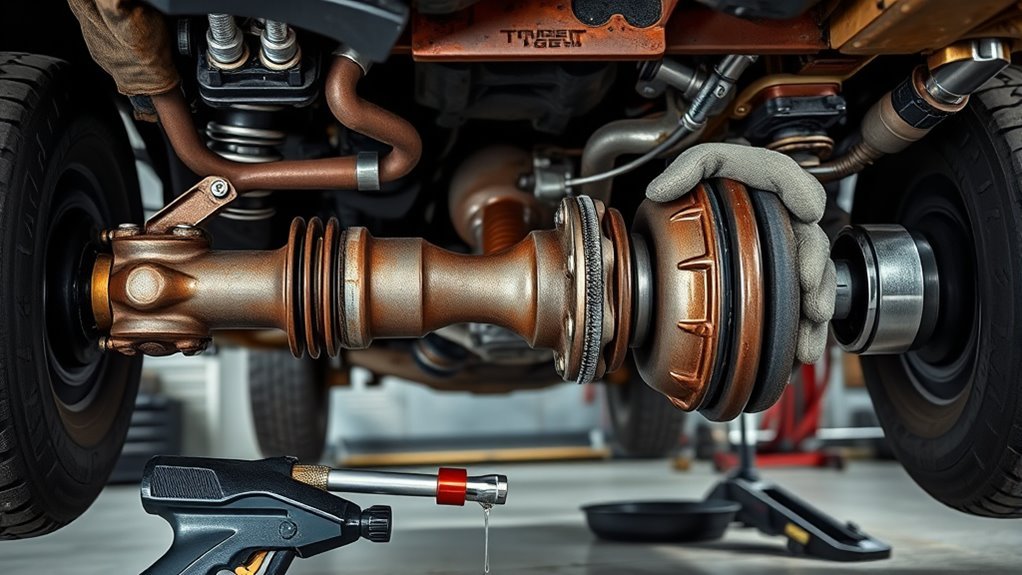
Check U-Joints, Hub Flange, and CV Axles for Play

If you hear a clunk coming from the driveline, inspect the U-joints, hub flange, and CV axles for play—these components often show the first signs of looseness that translate into audible shocks during shifts or load changes. Start with a U joint inspection: grab the driveshaft near each joint and wiggle it laterally and rotationally. Any perceptible slop, rough movement, or visible rust pitting means replace the U-joint. Next, check the Hub flange for play by supporting the wheel and trying to rotate and move the axle in and out; looseness here lets the flange shift under torque, causing clunks. Finally, evaluate CV axles: check boots for tears, listen for clicking under acceleration, and feel for axial play by prying along the shaft. Lubricate serviceable joints, torque fasteners to spec, and replace worn parts. These steps free you from recurring noise and protect the driveline’s lifespan.
Identify Worn Differential Mounts and Bushings
Check the front differential mounts for visible wear or torn bushings, since degraded mounts let the differential move and cause clunks. Grab the differential and try to move it by hand—excessive play or unsteady movement confirms mount or bushing failure. If you see cracks, tears, or clear movement, plan to replace the bushings with OEM or upgraded units to restore stability.
Front Differential Mount Wear
When you hear a pronounced clunk or feel extra vibration during shifts between drive and reverse, inspect the front differential mounts and bushings for cracks, separation, or excessive play—worn mounts let the differential move under torque, misaligning the driveline and producing that harsh noise. You want clear mount inspection steps so you can act and regain control.
- Check for visible cracks, torn rubber, or metal fatigue at each mount; excessive movement under a pry test means replacement is due.
- Assess bushings for play and deterioration; worn bushings allow misalignment that causes the clunk and vibration.
- Plan bushing replacement or mount swaps—DIY’s possible with a shop press and proper tools, saving money and freeing you from dependence.
Bushing Tear Signs
Because worn differential bushings let the axle shift under load, you’ll notice specific tear signs that point straight to replacement rather than guessing at symptoms. You’ll see visible cracks, separation from the mount, and increased vibrations—clear wear indicators tied to degraded bushing material. Inspect regularly; failed bushings ruin driveline alignment and amplify clunks during acceleration or deceleration.
| Symptom | What to look for | Action |
|---|---|---|
| Cracks | Frayed rubber or split edges | Replace bushing |
| Separation | Bushing pulled from housing | Inspect mount |
| Vibration | Increased cabin shake | Check driveshaft |
| Excess play | Axle shifts under torque | Replace parts |
Trust these signs to liberate you from guesswork and restore solid driveline performance.
Mount Movement Test
Start the mount movement test with the vehicle parked, transmission in gear (or in Drive for automatics) and the parking brake engaged, then watch and feel the differential for any excessive play or movement as someone gently revs the engine or shifts between acceleration and deceleration. You want clear signs so you can act and regain control.
- Observe: perform a mount inspection for cracks, tears, or shredded rubber on mounts and bushings; visible damage means replacement.
- Listen: note clunking or thudding during throttle or decel—this often points to worn mounts transmitting shock to the driveline.
- Feel: use vibration analysis—any unusual vibration through the chassis indicates degraded mounts stressing components.
Regular checks prevent failure; replace worn mounts promptly to restore smooth, liberated driving.
Greasing and Lubrication: What Grease, How Much, and How to Apply
If you want to stop driveline clunks, grease the slip yoke every 5,000–10,000 miles with a quality moly‑lithium or EP grease, using a zerk to pump until the yoke just expands—then stop to avoid seal damage. Use appropriate grease types and stick to the lubrication frequency to free yourself from avoidable noise and wear. Fit a grease gun to the zerk, pump slowly, and watch for slight yoke expansion as your fill cue. Remove or loosen the zerk briefly to prevent hydraulic lock and relieve pressure if needed. Bounce the rear on the bumper or flex the yoke to help the grease migrate into the splines and eliminate dry pockets. Inspect the yoke surfaces; polished, dry areas mean you’ve been neglecting lubrication and need immediate attention. Don’t overfill—excess will stress seals and pull contaminants in. Regular, precise greasing keeps the driveline functioning and preserves your independence on the road.
Repair vs Rebuild vs Replace: Costs, Warranty, and When to Call a Shop
Greasing the slip yoke regularly fixes a lot of clunks, but sometimes the noise keeps returning or other parts are worn—then you’ll need to weigh repair, rebuild, or full replacement. You want freedom from noise without wasting money.
- Repair strategies: If clunks come from the slip yoke or U-joints, you can grease or replace those parts for about $100–$300. It’s quick, cheap, and restores function if damage is limited.
- Rebuild options: For broader wear, rebuilding the shaft ($300–$600)—disassembly, cleaning, replacing worn components—gives longer life and is cost-effective compared with repeated repairs.
- Replacement benefits: A full assembly replacement ($600–$1,200) removes doubt and often solves persistent issues permanently.
Check warranty considerations before committing—factory or extended terms vary. When symptoms persist after DIY fixes, seek professional consultation for accurate diagnostics and specialized tools. Choose the path that balances cost, longevity, and your desire to stay liberated on the road.
Preventive Maintenance Schedule and Real-World Tips
Because regular lubrication stops most slip-yoke and U‑joint wear before it starts, you should grease the slip yoke every 5,000–10,000 miles (Mobil1 or moly grease) and check U‑joints and mounts at the same intervals to catch looseness, torn seals, or corrosion early. Create a tight preventive lubrication schedule: list grease type, mileage, and who performs it. On service days, grease slip yoke and u‑joints, then bounce the bumper to flex the yoke so lubricant spreads into bearings. Inspect rear end mounts for cracks, soft bushings, or movement; replace any suspect parts to eliminate vibrations and thuds.
Keep a maintenance checklist and log recurring clunks, dates, and actions—this documents patterns and strengthens warranty conversations. If clunks persist after thorough greasing and mount replacement, escalate to a shop. You want control: routine care prevents most failures, gives you leverage with dealers, and keeps the 4Runner feeling free and dependable.
Frequently Asked Questions
What Can Cause a Driveline Clunk?
Clunks come from worn u-joints, loose slip yokes, differential play, bad ring-and-pinion backlash, or torn bushings; you’ll perform driveline maintenance and vibration diagnosis to reclaim control, fix parts, and free yourself from noise.
Can You Drive With a Clunking Driveshaft?
You shouldn’t drive long with a clunking driveshaft; you’ll risk worse failure. Inspect for clunking symptoms, prioritize drive shaft maintenance, and get prompt diagnostics so you can stay free from escalating costs and mechanical captivity.
What Are Some Common Causes of Drive Shaft Noise?
Funny enough, you’ll often find driveshaft noise from slip yoke binding, dry u-joints, worn bushings, loose hub flanges or CV play; you’ll perform driveshaft maintenance and noise diagnosis, freeing yourself with practical, diagnostic repairs.
Conclusion
You’ll want to tackle that driveshaft clunk like a ticking time bomb—start with quick checks and safe road tests so you’re not chasing ghosts. Feel the slip yoke, spin the flange, and wiggle U‑joints; grease splines and swap worn mounts before cracks spread. When parts look pitted or play persists, choose repair, rebuild, or replace based on cost and warranty. Keep a simple maintenance rhythm and you’ll silence the clunk and drive smooth.