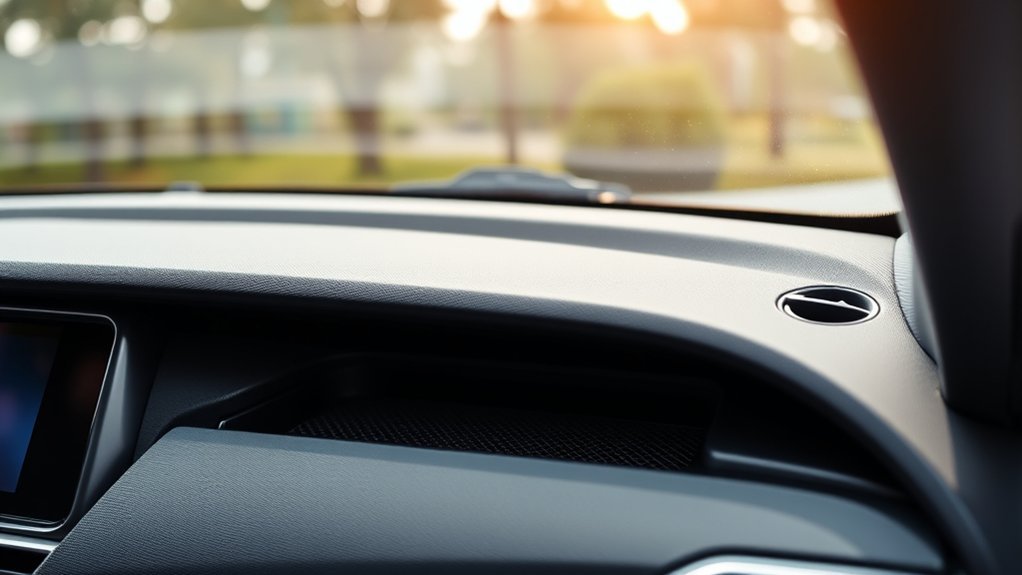
Replacing the cabin air filter in a Hyundai Sonata is usually a simple maintenance job, but the correct filter, service interval, and access procedure can vary by model year. On recent DN8-generation Sonatas, the filter sits behind the glove box. The key is to verify fitment first, lower the glove box carefully, and install the new filter in the correct airflow direction.
Last updated: September 16, 2026 — Hyundai DN8 replacement instructions, cabin-filter maintenance guidance, and current Hyundai service recommendations were rechecked for this update.
Quick Answer
To replace a Hyundai Sonata cabin air filter, verify the correct filter for your exact model year, open and lower the glove box, remove the filter cover, slide out the old filter, and install the new one in the marked airflow direction. Hyundai’s 2025 DN8 procedure shows the airflow arrow facing downward. Follow your Sonata’s model-specific maintenance schedule rather than relying on one universal mileage interval. Jump to the full replacement steps.
Key Takeaways
- Hyundai Sonata cabin-air-filter intervals vary by model year and market, so check the maintenance schedule for your exact vehicle.
- Recent DN8 Sonata instructions place the cabin air filter behind the glove box.
- Hyundai’s 2025 DN8 replacement procedure shows the airflow arrow facing downward.
- Dusty roads, heavily polluted areas, and other severe conditions can justify earlier inspection and replacement.
- If airflow remains unusually weak after a correct filter installation, the problem may be elsewhere in the HVAC system.
At a Glance
| Time Required | Usually a short DIY maintenance task once the correct filter and access procedure are confirmed |
| Difficulty | Easy for most owners |
| Tools Needed | Usually no special tools; a clean cloth and small vacuum are optional |
| Cost | Varies by model year, filter manufacturer, filter media, and whether you install it yourself |
| Full Procedure | Go directly to the step-by-step replacement instructions |
Why Replacing the Cabin Air Filter Is Essential for Your Hyundai Sonata
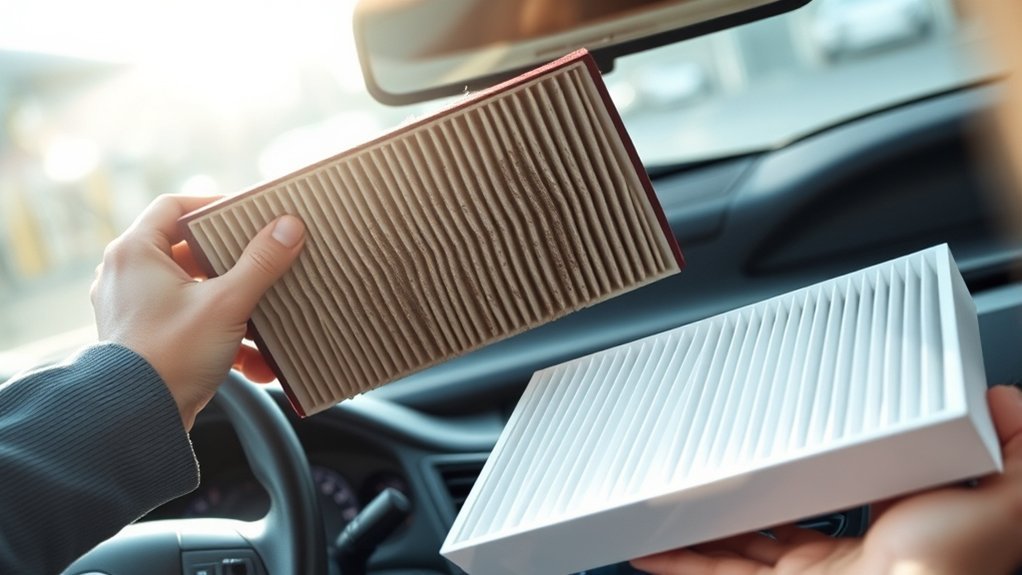
The cabin air filter is part of your Sonata’s heating and air-conditioning system. Hyundai describes its job as filtering dust and other pollutants from air entering the vehicle through the climate-control system.
As debris accumulates in the filter, airflow through the vents can decrease. A heavily contaminated filter can also contribute to stale or unpleasant air from the vents. Replacing it at the appropriate interval helps the ventilation system move air as intended.
For model-specific information, use the Hyundai Digital Owner’s Manual and select the correct Sonata model year or VIN.
Warning: Do not assume that one cabin filter, mileage interval, glove-box design, or installation direction applies to every Hyundai Sonata. Confirm the instructions and part fitment for your exact model year before starting.
Understanding the Function of the Cabin Air Filter
Outside air drawn into the vehicle passes through the cabin filter before moving through much of the climate-control system and into the passenger compartment. The filter captures airborne debris according to the capabilities of its filter media.
Importance of Clean Airflow
A clean, correctly installed filter helps preserve normal ventilation airflow. Hyundai notes that accumulated dust or pollutants can reduce air coming from the vents. If you notice a significant airflow change, inspect the filter first, but remember that a filter is only one possible cause.
Cabin Air Filter vs. Engine Air Filter
The cabin air filter and engine air filter perform different jobs. The cabin air filter cleans air entering the passenger compartment through the heating and air-conditioning system. The engine air filter cleans air entering the engine’s intake system. Replacing one does not service the other, so make sure a parts listing or maintenance recommendation refers to the cabin filter before buying or removing anything.
Filter Replacement Frequency
There is no single replacement mileage that should be applied to every Sonata. Hyundai maintenance schedules can vary across model years and markets. For example, Hyundai’s 2025 Australian DN8 maintenance schedule lists cabin-air-filter replacement every 24 months, while Hyundai USA’s general cabin-filter service guidance recommends replacement every 12,000 miles or sooner when symptoms appear. The safest approach is to follow the maintenance schedule supplied for your exact model year, VIN, and market.
You should also inspect the filter sooner when the car spends substantial time on dusty or rough roads or in heavily polluted conditions. Hyundai’s severe-use guidance calls for more frequent cabin-filter service under applicable conditions.
Your Sonata’s model-specific maintenance schedule should determine the normal replacement interval—not a generic 15,000-, 20,000-, or 30,000-mile rule.
Signs That Indicate Your Cabin Air Filter Needs Replacement
A maintenance interval is useful, but the condition of the filter matters too. Inspect the cabin filter when you notice a change in ventilation performance or when the car regularly operates in dusty conditions.
| Symptom | What It May Mean | What to Do |
|---|---|---|
| Reduced airflow from vents | Filter may be heavily loaded with debris | Inspect the filter and replace it if contaminated |
| Dust or debris on filter media | Filter has accumulated contamination | Replace when condition or maintenance schedule calls for it |
| Persistent musty or stale odor | Contaminated filter or another HVAC moisture/odor source | Inspect the filter; investigate further if the odor remains |
| Noise immediately after replacement | Filter or cover may be installed incorrectly | Recheck orientation, seating, and cover attachment |
| Sudden major loss of airflow | Could involve more than the cabin filter | Inspect the filter, then have the HVAC system diagnosed if airflow remains abnormal |
[Products Worth Considering]

This cabin air filter is designed to fit a wide range of Hyundai, Kia, and Genesis models for cleaner in-car air. Its multi-layer filtration helps trap dust, hair, and fine airborne particles, while activated carbon and baking soda support fresher cabin conditions. Built for long service life, it is recommended for annual replacement or every 12,000 miles.

This activated carbon cabin air filter is designed as a replacement for select Hyundai Sonata gas models and Kia Cadenza vehicles, helping improve in-cabin air quality. It is engineered to capture odors, VOCs, and common pollutants for a fresher driving environment, while matching multiple OE and reference numbers for convenient fitment confirmation.

This filter combo is designed for Hyundai Sonata gas models from 2015 to 2019, including non-hybrid 2.4L vehicles, and replaces both the engine and cabin air filters in one convenient set. It helps improve engine airflow while also refreshing the cabin environment with activated carbon odor control and high-efficiency particle filtration for cleaner, quieter driving.
Should You Inspect, Replace, or Diagnose?
| Situation | Best Next Step | Why |
|---|---|---|
| Filter condition is unknown and the service interval is approaching | Inspect | A visual check confirms whether debris, damage, or contamination is present |
| Filter is heavily dirty, damaged, damp, crushed, or due under the applicable schedule | Replace | A contaminated or damaged disposable filter should not be reinstalled |
| Airflow remains abnormally weak after correct replacement | Diagnose | The restriction or fault may be elsewhere in the HVAC system |
| New rattling, rubbing, or whistling begins immediately after replacement | Recheck installation first | Incorrect seating, orientation, loose debris, or an unsecured cover can cause noise |
How to Inspect Your Cabin Air Filter for Issues
Visual Inspection Techniques
Once you have accessed the filter, examine it under good light. Look for:
- Heavy dust and debris: A visibly loaded filter can restrict airflow.
- Leaves or larger debris: Remove loose debris from the filter housing before installing the replacement.
- Tears or damaged filter media: Replace a damaged disposable filter rather than reinstalling it.
- Deformation: A bent or crushed filter may not seal correctly.
- Moisture or persistent odor: A replacement filter may help, but ongoing moisture or odor can indicate another HVAC issue.
Signs of Airflow Issues
Compare airflow at several fan speeds. If the filter is visibly dirty and airflow gradually weakened over time, replacement is a sensible first step. If airflow suddenly drops or remains poor after a new filter is installed correctly, Hyundai recommends having the climate-control system inspected.
Note: A cabin filter cannot fix every A/C problem. Weak cooling, no blower operation, electrical faults, unusual compressor behavior, or persistent airflow problems can require professional HVAC diagnosis. For normal control operation and settings, see our Hyundai Sonata climate-control guide.
Steps to Replace the Cabin Air Filter in Your Hyundai Sonata
Hyundai’s 2025 DN8 cabin-filter replacement procedure places the filter behind the glove box. Exact clips and hardware can vary, so compare the following procedure with your model-year manual before applying force to any component.
[Products Worth Considering]

This cabin and engine air filter kit is designed for compatible Hyundai Sonata gas models from 2015 to 2019 with a 2.4L engine. It helps improve airflow, capture dust and impurities, and support cleaner cabin air and efficient engine performance. The kit is engineered for long service life and simple installation, making routine maintenance easier.

This cabin air filter combines MERV 13 filtration with activated carbon to help trap fine particles and reduce unwanted odors inside your vehicle. Built with four-layer filtration and OEM-sized fitment, it supports cleaner airflow and straightforward installation for a wide range of compatible Hyundai, Kia, GMC, Chevy, and Saturn models. Replace it on schedule to help maintain fresh, comfortable air for everyday driving.

Puroma cabin air filter helps deliver cleaner, fresher air inside your vehicle while supporting efficient HVAC airflow. Its multi-layer design helps reduce stale odors and capture airborne particles, making daily driving more comfortable. Designed for easy installation and broad fitment across many Toyota, Lexus, Mazda, and Subaru models.
What Can Change by Model Year?
The filter may be accessed from the glove-box area on many Sonata models, but the details are not universal. The glove-box stops, support rod or damper, filter-cover latch arrangement, replacement-filter fitment, and maintenance interval can differ by generation or market. Treat the steps below as a DN8-based procedure and use your exact owner’s manual when the hardware in front of you does not match the description.
- Empty and open the glove box. Removing the contents prevents them from falling when the glove box is lowered.
- Disconnect the glove-box support rod or damper where equipped. Hyundai’s 2025 DN8 procedure shows a support rod that must be released.
- Release the glove-box stops. Carefully press the sides inward as directed so the glove box can lower farther on its hinges.
- Locate the cabin-filter cover. It sits behind the lowered glove box on the recent DN8 design.
- Release the cover latch and remove the cover. Do not force the plastic tabs.
- Check the old filter’s orientation. Note any “AIR FLOW” arrow before pulling the filter out.
- Remove the old filter. Keep it level when possible so accumulated leaves and dust do not spill into the housing.
- Clean loose debris from the housing. Use a small vacuum or clean cloth without pushing debris deeper into the HVAC system.
- Install the correct replacement filter. Hyundai’s 2025 DN8 instructions specify the arrow pointing downward. Follow the marking and orientation specified for your exact vehicle and replacement filter.
- Reinstall the cover and glove box. Reattach the support rod or damper and verify that the glove box opens and closes normally.
- Test the blower. Run the fan through several speeds and listen for new rattles, whistles, or rubbing sounds.
Pro Tip: Before removing the old filter, take a quick photo of its airflow arrow and position. It gives you a model-specific reference when installing the replacement.
Tools and Materials You’ll Need for the Replacement
[Products Worth Considering]

Puroma cabin air filter helps keep your vehicle’s interior air fresher by capturing airborne particles while supporting strong HVAC airflow. Its multi-layer design helps reduce stale odors and promotes a cleaner, healthier driving environment. Designed for easy installation and broad fitment across select Toyota, Lexus, Mazda, and Subaru models, it’s a practical maintenance upgrade for more comfortable everyday driving.

This Puroma cabin air filter uses activated carbon and a close-meshed filter layer to help trap odors, smog, smoke, and microscopic particles before they enter the cabin. It supports fresher air, helps reduce window fogging, and can improve comfort while also helping maintain HVAC airflow and performance. Designed for a straightforward installation, it is a practical replacement filter for a wide range of compatible Hyundai, Kia, Chevrolet, GMC, and Saturn vehicles.

This odor control cabin air filter uses activated charcoal and baking soda to help neutralize unwanted smells while trapping dust, pollen, soot, dander, and other airborne contaminants. Designed for compatible Toyota, Lexus, Subaru, and select other vehicles, it supports cleaner cabin air and balanced HVAC airflow for everyday driving comfort. Installation is straightforward, with vehicle-specific guidance available to help make replacement quick and easy.
Essential Tools Required
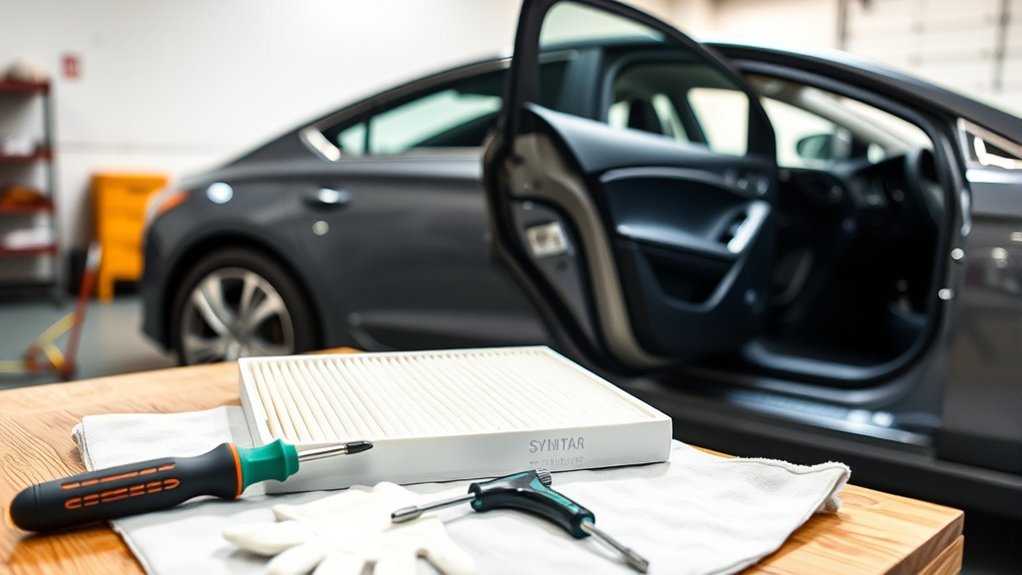
Most recent glove-box-access cabin-filter replacements require little equipment. Prepare:
- An exact-fit replacement cabin air filter verified for your Sonata’s model year and configuration.
- A clean cloth for the glove-box and filter-housing area.
- A small vacuum if leaves or loose debris are present.
- Your model-year Hyundai owner’s manual or digital manual for the correct maintenance and access procedure.
A screwdriver should not be assumed necessary unless your specific Sonata procedure calls for one.
Choosing the Filter Media
Do not buy a cabin filter based only on approximate dimensions. Verify compatibility using the vehicle’s model year, trim/engine information where required, or VIN.
Replacement filters may use different media. A conventional particulate filter is adequate when it meets the correct specification. Some exact-fit aftermarket options add activated-carbon or higher-efficiency media for additional odor or particle control. Those features do not compensate for incorrect fitment.
| Filter Choice | Best For | Check Before Buying |
|---|---|---|
| OEM / Hyundai-specified replacement | Straightforward factory-spec fitment | Confirm correct part for VIN/model year |
| Standard aftermarket filter | Basic replacement and value | Exact application listing and dimensions supplied by manufacturer |
| Activated-carbon filter | Owners wanting additional odor/contaminant adsorption from compatible media | Exact fitment and correct airflow orientation |
Preparing for Installation
Park safely, switch off the vehicle and climate-control blower, empty the glove box, and have the new filter within reach. Compare the replacement filter with the old one before installation. The outer frame should seat naturally without crushing, trimming, or forcing it into place.
Should You Go DIY or Hire a Pro for Cabin Air Filter Replacement?
A cabin air filter is one of the more approachable Sonata maintenance jobs when the filter is accessible behind the glove box and you are comfortable releasing plastic stops and the support rod.
DIY makes sense when you have verified the right filter, the glove-box hardware releases normally, and the HVAC system otherwise operates correctly.
Professional service makes more sense when the glove box or filter cover will not release normally, components appear damaged, airflow remains weak after replacement, the blower makes persistent abnormal noises, or you are diagnosing an A/C problem rather than simply replacing routine maintenance material.
Warning: Do not pry aggressively on the glove box, support rod, or filter-cover tabs. These are plastic interior components, and forcing the wrong release point can cause unnecessary damage.
Savings From DIY Cabin Air Filter Replacement
Replacing the filter yourself can eliminate the labor charge associated with having a shop perform this individual task. The exact savings cannot be stated reliably because filter prices and service charges vary by region, model year, filter media, dealership, and independent repair shop.
The strongest reason to DIY is therefore not a promised dollar amount. It is that the procedure is relatively accessible on many Sonatas and can be completed without specialized automotive service equipment when the owner’s manual supports owner replacement.
How to Verify the Right Cabin Air Filter for Your Sonata

Start with fitment, not marketing claims. A filter that does not seal correctly can allow air to bypass the filter media or may interfere with the housing or cover.
- Identify your model year. Sonata cabin-filter specifications are not necessarily identical across generations.
- Use the VIN when available. A Hyundai dealer or reputable parts catalog can use it to narrow compatibility.
- Confirm exact application. The package or manufacturer’s catalog should specifically list your Sonata.
- Choose the filter media. Standard particulate media is the basic choice; compatible activated-carbon or enhanced-filtration designs are optional.
- Inspect the airflow marking. Make sure the replacement has clear orientation instructions.
- Compare it with the removed filter. The outer frame and sealing surfaces should match before installation.
If a parts catalog and your existing filter disagree, stop and verify the application rather than modifying the new filter to make it fit.
If you own a 2021 Sonata Hybrid and want model-specific HVAC context rather than the broader replacement guidance on this page, see our 2021 Hyundai Sonata Hybrid cabin-air-filter guide.
Essential Maintenance Tips for Keeping Cabin Air Clean
- Follow the model-specific maintenance schedule. Avoid treating a generic mileage number as Hyundai’s rule for every Sonata.
- Inspect sooner in severe conditions. Dusty roads and heavily polluted environments can load the filter faster.
- Keep the cowl and exterior air-intake area clear. Remove obvious leaves and debris where safely accessible.
- Use the correct filter orientation. Incorrect installation can reduce effectiveness or create noise.
- Replace damaged disposable filters. Do not attempt to restore a torn, crushed, or heavily contaminated disposable filter.
- Investigate persistent problems. A new cabin filter will not correct every odor, blower, cooling, or airflow fault.
Troubleshooting After Cabin Air Filter Replacement
Airflow Is Still Weak
Remove the filter again and confirm it is not upside down, crushed, or blocking the cover. Verify that no packaging remains on the filter and that the cover is fully secured. If airflow is still abnormally low, the cause may be elsewhere in the HVAC system.
The Blower Makes Noise After Replacement
A new noise immediately after replacement is a reason to check installation. Confirm the filter is fully seated, the airflow direction is correct, the cover is latched, and no leaves or loose debris fell into the blower area.
A Musty Smell Remains
A cabin-filter change removes one possible odor source, but persistent odor can come from moisture or contamination elsewhere in the climate-control system. If the smell continues after installing the correct clean filter, further HVAC inspection may be needed. For a broader odor checklist, see our guide to preventing Hyundai Sonata interior odors.
The Glove Box Will Not Close Correctly
Check that the support rod or damper, side stops, and any released hardware were returned to their original positions. Do not force the glove box closed against a misaligned component.
Frequently Asked Questions
Where is the cabin air filter located in a Hyundai Sonata?
On recent DN8-generation Hyundai Sonatas, the cabin air filter is located behind the glove box. Earlier Sonata generations can use different details, so check the owner’s manual for your exact model year before disassembling anything.
Can I clean and reuse a Hyundai Sonata cabin air filter?
A conventional disposable cabin air filter should normally be replaced rather than washed or aggressively cleaned. Only reuse a filter if its manufacturer specifically identifies that exact filter as washable or reusable and provides a cleaning procedure.
What type of cabin air filter is best for my Sonata?
The most important requirement is exact fitment for your Sonata’s model year. An OEM-spec particulate filter is a straightforward choice. Exact-fit aftermarket filters with activated-carbon or enhanced-filtration media are alternatives when you want those features and the manufacturer confirms compatibility.
Is the cabin air filter the same as the engine air filter?
No. The cabin air filter cleans air entering the passenger compartment through the HVAC system, while the engine air filter cleans air entering the engine. They are separate filters with different locations and service procedures.
How often should I check or replace the cabin air filter?
Follow the maintenance schedule for your exact Sonata model year and market rather than a universal mileage interval. Inspect or replace it sooner when the vehicle regularly operates in dusty, rough-road, or heavily polluted conditions.
Which way should the Hyundai Sonata cabin filter arrow point?
Hyundai’s 2025 DN8 filter-replacement instructions show the airflow arrow pointing downward. Because designs can vary, note the old filter’s orientation and confirm the instruction for your exact model year before installing the replacement.
Will replacing the cabin air filter improve A/C performance?
If a clogged filter is restricting airflow, replacing it can restore normal airflow through the vents. It will not fix unrelated problems such as low refrigerant, a blower fault, electrical trouble, or another climate-control malfunction.
Why is my Sonata’s airflow still weak with a new filter?
First check that the correct filter is installed, that it is fully seated, that its airflow direction is correct, and that the cover is secured. If airflow remains abnormally low, Hyundai advises having the climate-control system inspected because the filter may not be the underlying cause.
Conclusion
A Hyundai Sonata cabin air filter replacement is usually a manageable DIY maintenance job, but accuracy matters more than following a generic mileage rule. Verify the correct filter and maintenance schedule for your exact model year and market, handle the glove-box hardware carefully, and reproduce the proper airflow orientation. Hyundai’s 2025 DN8 instructions specify the airflow arrow facing downward. If a new filter does not correct abnormal airflow, odor, or noise, recheck the installation first and have the climate-control system diagnosed if the problem remains.
Sources
- Hyundai Digital Owner’s Manual — model- and VIN-specific owner’s-manual lookup.
- Hyundai Sonata DN8 Owner’s Manual — official Sonata manual structure, maintenance, climate-control, and cabin-filter guidance.
- Hyundai Sonata DN8 Cabin Air Filter Replacement — glove-box access, support-rod removal, cover removal, and airflow-arrow orientation.
- Hyundai Sonata DN8 Normal Maintenance Schedule — model-specific cabin-filter maintenance guidance.
- Hyundai Sonata DN8 Climate-Control System Maintenance — filter location, filtration purpose, reduced-airflow guidance, and severe-condition recommendations.
- Hyundai USA Cabin Air Filter Service Guidance — general U.S. replacement guidance and common symptoms.