What’s in This Article
- Quick Check: Confirm the Passenger-Footwell Leak Source
- Before You Begin: Tools, Safety, and Time Needed
- Reconnect or Reroute the HVAC Drain Hose
- Could Paraffin Wax From the Evaporator Be Causing Your Leak?
- When to Replace the AC Radiator/Evaporator Assembly
- When to Stop and Call a Technician
- Parts, Labor, and Cost: Dealer vs. DIY Estimates
- Document the Leak and Work With Your Dealer
- Short-Term Fixes, Odor Control, and Preventing Future Mold
- Frequently Asked Questions
If your Toyota RAV4 pools water in the passenger footwell, act before the carpet pad stays wet long enough to smell. Start with the heating, ventilation, and air conditioning (HVAC) drain hose under the passenger side. Check for a loose connection, a clog, wax residue, and a hose outlet that does not point downward.
Clear the drain with care, reseat the hose, and dry the carpet and insulation right away. If you find paraffin wax or a failed evaporator seal, compare your symptoms with Toyota Technical Service Bulletin (TSB) T-SB-0021-23 and ask your dealer to verify the repair path.
Quick Answer
Water pooling in the passenger footwell of a Toyota RAV4 often comes from the HVAC drain hose or the evaporator area. Toyota T-SB-0021-23 says some 2020-2022 RAV4 vehicles may let water enter when the drain hose disconnects from the air conditioning radiator assembly. Toyota also says paraffin wax leaking from the evaporator may cause the condition.
Start by inspecting the drain hose outlet, hose connection, and passenger-side carpet. Clear minor clogs, reseat the hose, and confirm water drains under the vehicle. If wax residue, oil or grease odor, or repeat water entry returns, plan a dealer inspection for the air conditioning radiator assembly and drain cooler hose.
Key Takeaways
- Check the HVAC drain hose first because a loose or clogged hose can send condensate into the cabin.
- Look for paraffin wax residue or an oil and grease odor because Toyota links those signs to evaporator leakage.
- Confirm your RAV4 model year, start/stop switch, and VIN details before you rely on T-SB-0021-23.
- Dry wet carpet and padding within 24-48 hours when possible to reduce mold risk.
- Stop DIY work if the repair requires opening the AC refrigerant system or removing the AC radiator assembly.
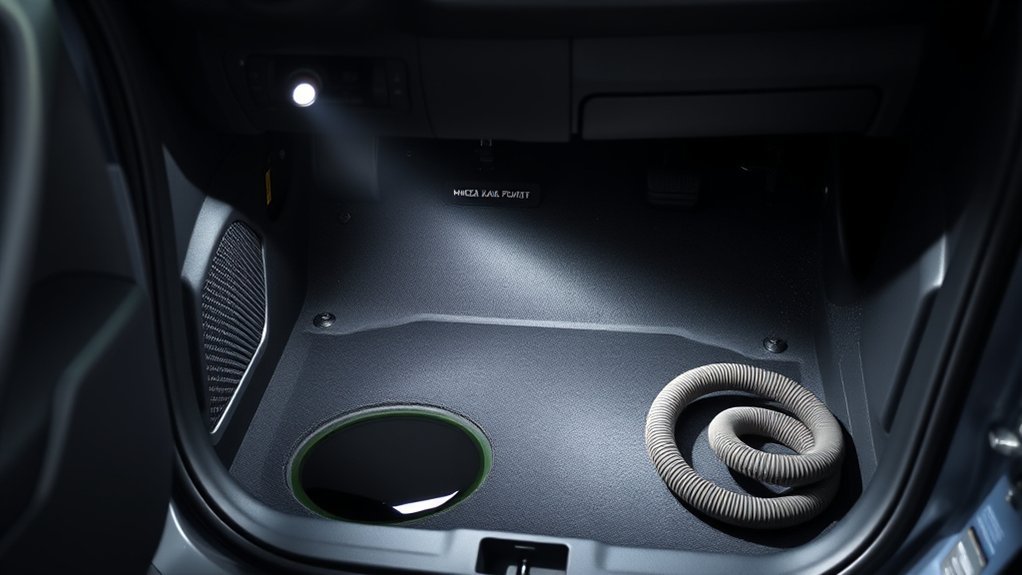
Quick Check: Confirm the Passenger-Footwell Leak Source
Start with a simple source check before you remove major trim. Water after air conditioning use points toward the HVAC drain. Water after rain may still involve the HVAC case, but you should also check door seals, windshield seals, cowl drains, and sunroof drains if your RAV4 has a sunroof.
Inspect the passenger footwell, lower kick panel area, and drain outlet under the vehicle. Look for standing water, damp padding, musty odor, oil or grease odor from the vents, and wax-like residue near the drain path. Follow Toyota T-SB-0021-23 when your vehicle and symptoms match the bulletin.
Note: T-SB-0021-23 applies to certain 2020-2022 RAV4 vehicles with a start/stop switch, so verify your VIN and production details before you assume coverage.
Run a focused water-flow test only after you can see the outlet safely. Pour a small amount of clean water into the evaporator drain area only if you can access it without forcing parts. Ask a helper to watch the outlet under the vehicle and the passenger footwell at the same time.
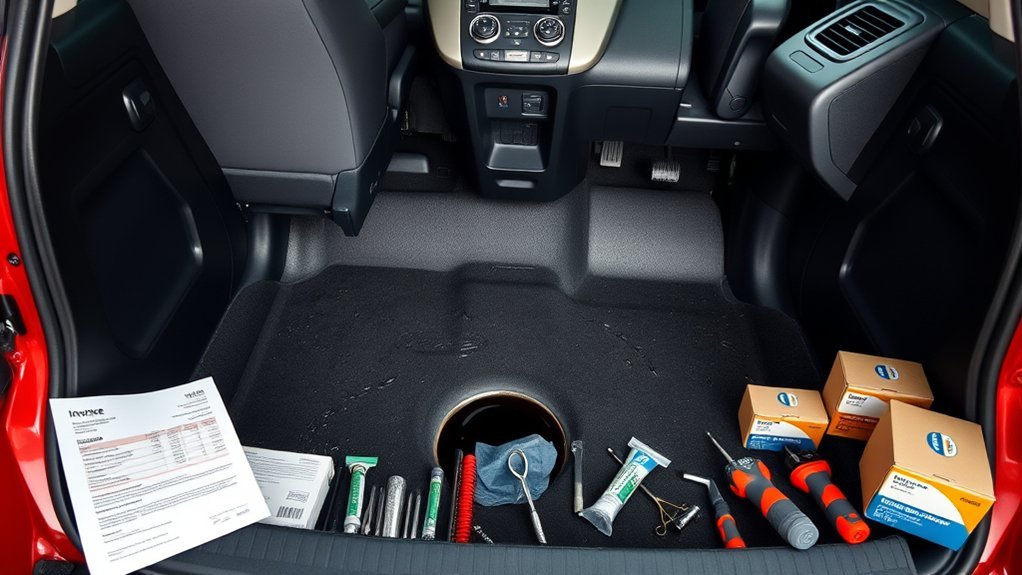
Before You Begin: Tools, Safety, and Time Needed
A basic drain inspection often takes 30-60 minutes. A full air conditioning radiator assembly repair can take several hours because the technician must access HVAC components and handle refrigerant equipment correctly.
- Use a flashlight, trim tools, gloves, towels, and a wet vacuum for inspection and cleanup.
- Use low-pressure air, a vacuum at the outlet, or a flexible nylon line for minor drain clogs.
- Use photos, short videos, and written notes to track water entry and odor symptoms.
- Use a dealer or qualified shop when the repair requires AC line removal or refrigerant recovery.
Warning: Do not open AC refrigerant lines at home because paid motor vehicle AC service in the United States requires proper EPA Section 609 training and equipment.
[Products Worth Considering]

Protect your Toyota RAV4 interior with this custom‑fit windshield sun shade that blocks 99% of harmful UV rays and reduces cabin heat. The mirror cut‑out ensures a seamless fit without gaps, while durable 240T polyester and bendable wire keep it sturdy through repeated use. Foldable and stored in a convenient pouch, it offers easy installation and removal for everyday comfort.

The Autovir windscreen shade offers full windshield coverage for Toyota RAV4 models from 2019 to 2026, blocking up to 99.95% of UV rays and reducing interior heat. Its multi‑layer reflective material provides SPF 100 and UPF 80+ protection while keeping the dashboard, seats, and steering wheel cooler. The foldable design installs quickly and stores conveniently in the glove box, and reinforced stitching ensures long‑lasting durability for daily use.

These silicone cup holder inserts provide a curved, anti‑shake design that securely grips water cups and bottles, preventing spills and rattling while driving. Made from high‑strength, waterproof silicone, they fit most vehicle cup holders and are easy to install with a self‑adhesive backing. The set includes six inserts, cleaning paper, and a manual for optimal placement and lasting stability.
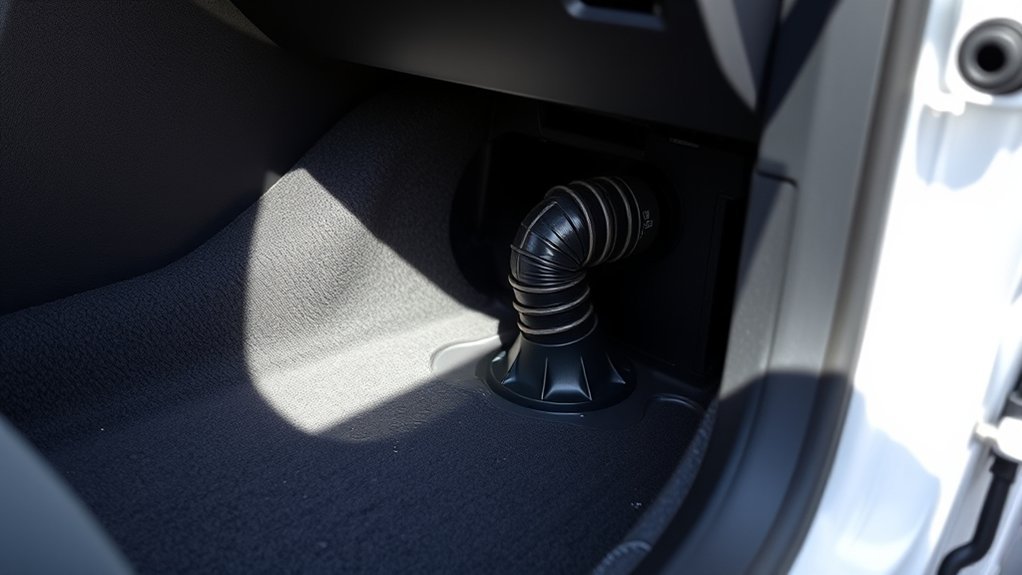
Reconnect or Reroute the HVAC Drain Hose (Step-by-Step)
Use these steps for a visible, loose, or lightly blocked drain hose. Stop if you find wax residue, a damaged fitting, or a leak from inside the HVAC case. Those signs point to a deeper repair.
- Locate the outlet. Find the drain hose or drain outlet under the passenger side and check whether water exits below the vehicle.
- Inspect the hose path. Trace the hose toward the evaporator housing and look for kinks, tears, loose fittings, or sagging sections.
- Clear light debris. Use gentle suction at the outlet or short low-pressure air bursts, then check for water flow again.
- Reseat the hose. Push the hose fully onto its fitting and secure it with the correct clip, clamp, or tie if the original retainer no longer holds.
- Confirm drainage. Run the AC and verify that condensate drains under the vehicle without wetting the passenger footwell.
[Products Worth Considering]

Upgrade your 2026 Toyota RAV4 interior with this soft, breathable armrest cover that offers full protection against scratches, dirt, and wear. Made from eco‑friendly material, it fits the console perfectly and stays securely in place with elastic straps. Installation is tool‑free, providing added comfort and reducing fatigue during long drives.

The KUST Black Dashboard Cover Mat offers a custom, eco‑friendly fit for Toyota RAV4 models from 2019 to 2025, protecting the dash from UV damage, scratches, and glare. Made from post‑consumer recycled polyester with a silicone anti‑slip underside, it stays soft, breathable, and odorless while securely adhering to the surface. Installation is quick and reversible, and the foldable design allows easy storage when not in use.

[Vehicle Fitment]: Compatible with Toyota RAV4 2013-2018 L4 2.5L --- Discharge Line (High Pressure - Compressor to Condenser); This product does not fit hybrid (gas-electric) vehicles; It fits the model using Petrol only
Locate Drain Hose Connection
Identify the HVAC drain hose route near the passenger side before you pull on any part. Trace visible hose sections to their connection points and note where the hose meets the evaporator housing and body outlet.
Inspect for disconnections, kinks, tears, crushed spots, and debris. If you find a loose hose, note the fitting type and angle before you reseat it. A straight, gravity-assisted path helps condensate leave the vehicle instead of backing up into the cabin.
Secure and Reroute Hose
Start by confirming the drain hose route and the exact fitting on the evaporator housing. Push the hose fully onto the fitting, then secure it so vibration cannot pull it loose again.
If the hose points toward the cabin or a body panel, reposition it so gravity sends water downward and away from the interior. Remove kinks, secure the hose with existing clips where possible, and run the AC to confirm steady drainage under the vehicle.
Pro tip: Take one photo before each trim removal step so you can reinstall clips and panels without guessing.
Could Paraffin Wax From the Evaporator Be Causing Your Leak?
Check for paraffin wax migration when the leak returns after you clear the drain hose. Toyota says paraffin wax leaking from the evaporator may cause water entry, a disconnected drain hose, or an oil and grease odor from the vents in affected vehicles.
Wax residue changes the repair plan. Cleaning the outlet may help for a short time, but repeat wax buildup can clog the drain again. If you find wax residue or odor that matches the bulletin, ask the dealer to inspect the air conditioning radiator assembly and drain cooler hose.
Paraffin Wax Migration
Paraffin wax can soften with heat and move into the drain path. When wax collects near the drain, condensate cannot leave the HVAC case fast enough. Water then backs up and enters the passenger footwell.
Do not treat wax residue as a normal debris clog. Document the residue, odor, and water entry with photos and dates. Toyota’s bulletin points technicians toward replacement of the air conditioning radiator assembly and drain cooler hose when the vehicle meets the bulletin criteria.
Evaporator Seal Failure
A failed seal around the evaporator area can let moisture escape into the HVAC cavity. You may notice damp carpet after heavy AC use, a musty smell, or water that returns soon after you dry the floor.
Inspect for softened wax, a loose drain hose, and signs of a seal breach. If moisture keeps returning after drain cleaning, stop chasing the symptom and schedule a full HVAC inspection.
| Symptom | Action |
|---|---|
| Pooling water | Inspect drain hose |
| Wax deposits | Document residue and inspect evaporator area |
| Seal breach | Schedule HVAC case inspection |
| Mold smell | Dry carpet and sanitize HVAC surfaces |
| Recurrent leak | Ask about AC radiator assembly replacement |
Heat-Induced Wax Melt
If your RAV4 footwell fills after AC use, melted paraffin from the evaporator area may block the drain path. Heat can soften wax deposits, which then move into passages meant for water.
This failure can create repeat pooling, odor, and damp carpet padding. Follow T-SB-0021-23 when your RAV4 matches the bulletin. A trained technician may need to replace the air conditioning radiator assembly and drain cooler hose to stop the leak.
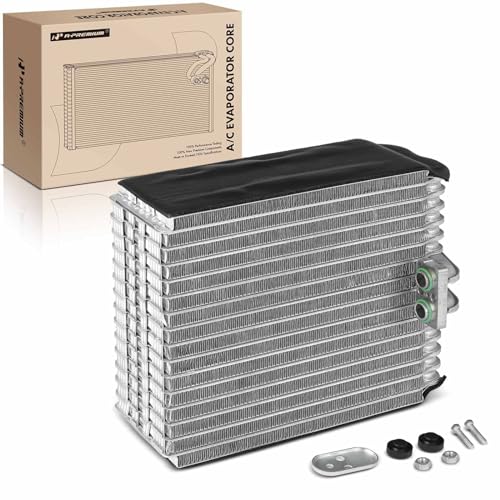
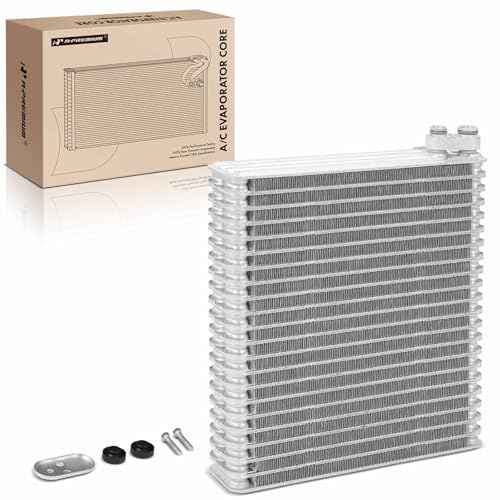
When to Replace the AC Radiator/Evaporator Assembly
Plan assembly replacement when the leak returns after drain cleaning, wax residue appears, or the vents produce an oil or grease odor. Toyota’s repair procedure tells technicians to remove the air conditioning radiator assembly and drain cooler hose, install new parts, and confirm the condition no longer exists.
The bulletin lists 5.4 labor hours for the RAV4 warranty operation. That time explains why this repair costs more than a simple hose cleaning. Ask the dealer to confirm whether your vehicle falls within the affected model, production, and warranty details.
Toyota’s bulletin states that the Toyota Basic Warranty covers the repair for 36 months or 36,000 miles from the vehicle’s in-service date when the specified condition applies. If your RAV4 falls outside that window, you can still use the bulletin to guide diagnosis and compare repair estimates.
When to Stop and Call a Technician
Stop DIY work if the carpet keeps getting wet after you clear the drain outlet. Stop sooner if you smell oil or grease from the vents, see wax residue, or need to remove the air conditioning radiator assembly.
Call a dealer or qualified AC shop if water reaches wiring, control modules, or seat connectors. Water near electrical parts can create faults that cost more than the original leak. A technician can inspect the HVAC case, recover refrigerant correctly, and confirm the drain hose repair.
Parts, Labor, and Cost: Dealer vs. DIY Estimates
Cost depends on the exact cause. A loose hose or minor clog may cost far less than an evaporator-area repair. A full air conditioning radiator assembly job costs more because it involves labor, interior access, refrigerant handling, and final leak checks.
As of 2026, RepairPal estimates Toyota RAV4 AC evaporator replacement at about $1,323-$1,878 on average, with higher estimates for some recent model years. A 2020 RAV4 estimate runs about $1,651-$2,503, before taxes, fees, location differences, or related repairs. Use these figures as a planning range, not a dealer quote.
DIY work can make sense for inspection, drying, and a simple visible hose reseat. Do not treat a full HVAC case repair as a basic DIY job. Request written estimates from more than one dealer or AC shop, and ask each shop to list parts, labor, warranty coverage, and odor remediation.
[Products Worth Considering]

And Vehicle Specific
[Vehicle Fitment]: Compatible with Toyota RAV4 1996-2000 (With Pressing Plate) --- It comes with Pressing Plate
[Vehicle Fitment]: Compatible with Toyota RAV4 2001-2005, Prius 2001-2003, Celica 2000-2005 --- It comes with Pressing Plate
Document the Leak and Work With Your Dealer (T-SB-0021-23)
Photograph or record the water pooling and damp areas in the passenger footwell from more than one angle. Add the date, time, weather, AC use, and driving conditions to each note. This record gives the service advisor a clear pattern to review.
When you contact the dealer, state the symptoms and mention T-SB-0021-23. Ask the dealer to verify whether your RAV4 has a start/stop switch and falls within the affected production range. Also ask for warranty verification before you approve paid work.
Keep copies of work orders, estimates, photos, videos, and receipts. Clear records help you compare repair scope and support a warranty or goodwill request when the symptoms match the bulletin.
Short-Term Fixes, Odor Control, and Preventing Future Mold
Remove standing water right away with towels or a wet vacuum. Lift wet mats and check the carpet padding because padding can stay damp after the top carpet feels dry. The United States Environmental Protection Agency (EPA) says drying wet materials within 24-48 hours can prevent mold growth in many cases.
Ventilate the cabin and use fans or a dehumidifier when you can do so safely. Replace soaked towels often, and do not cover damp carpet with floor mats. If padding stays wet or smells musty, ask a shop about carpet removal, padding replacement, and odor remediation.
Replace the cabin air filter if it smells musty or has moisture damage. Use only cleaners that match the surface and product directions. Do not mix cleaning chemicals in the cabin.
Short-term drying helps protect the cabin, but it does not fix the leak. Keep the passenger footwell dry while you arrange the permanent repair.
Frequently Asked Questions
Why is my passenger footwell leaking water?
Your passenger footwell may leak because the HVAC drain hose has clogged, disconnected, or lost its proper route. On affected RAV4 vehicles, Toyota also links the condition to paraffin wax leaking from the evaporator.
Why is water leaking inside my car passenger side?
Passenger-side water often comes from AC condensate that cannot drain under the vehicle. Rainwater can also enter through seals, cowl drains, or sunroof drains, so match the leak timing to AC use or rain before you repair parts.
Does T-SB-0021-23 apply to every Toyota RAV4?
No. Toyota lists certain 2020-2022 RAV4 vehicles, along with specific Highlander and Tundra vehicles, under this bulletin. Your dealer should verify your model year, start/stop switch, production details, and VIN before applying the bulletin.
Can I drive with water in the passenger footwell?
You can move the vehicle if it drives normally, but you should dry the area and schedule repair quickly. Do not ignore water near wiring, seat connectors, or control modules because moisture can create electrical issues.
How fast should I dry the carpet after a leak?
Start drying the carpet and padding right away. EPA mold guidance says wet materials dried within 24-48 hours often avoid mold growth, but soaked padding may still need removal or replacement.
Safety Disclaimer: This article gives general information about diagnosing a Toyota RAV4 passenger footwell water leak. Always use a qualified technician for AC refrigerant work, electrical concerns, and repairs that require HVAC case removal.
Conclusion
A RAV4 passenger footwell leak usually starts with a drain path problem, so check the HVAC drain hose before you replace parts. If you find wax residue, oil or grease odor, or repeat water entry, use T-SB-0021-23 to guide the dealer inspection. Dry the carpet and padding quickly to reduce odor and mold risk. Keep clear records, verify warranty coverage, and choose a qualified shop when the repair goes beyond a simple hose check.
References
- Toyota T-SB-0021-23 Rev1: HVAC Drain Hose Disconnected From HVAC Case and/or Oil/Grease Odor From Vents – Toyota Motor Sales, USA / NHTSA, 2023
- Section 609 Technician Training and Certification Programs – U.S. Environmental Protection Agency, 2026
- A Brief Guide to Mold, Moisture and Your Home – U.S. Environmental Protection Agency, 2026
- Toyota RAV4 AC Evaporator Replacement Cost Estimate – RepairPal, 2026