You can remove water spots from your Toyota Camry by washing with pH‑balanced car soap, rinsing thoroughly, and drying panel by panel with microfiber towels. Use quick‑detail spray for light deposits; apply a water‑spot remover gel on a microfiber applicator for stubborn mineral buildup, work in controlled circular passes, then wipe clean. Assess etching by fingernail and correct shallow marks with controlled polishing; call a pro for deep clear‑coat damage. Follow preventive waxing and parking tips to minimize recurrence, and more steps follow.
Prep the Camry: Wash, Clay‑Bar Alternatives, and When to Skip

Before treating water spots, wash your Camry with a pH‑balanced car soap to remove loose dirt and debris, then dry it completely with a microfiber towel to prevent new spots. You’ll use disciplined washing techniques: work in shaded areas, rinse thoroughly, foam, and use two-bucket methods to avoid recontamination. Inspect panels under bright light to gauge spot severity and adhesion.
If contaminants are embedded, use clay bar alternatives such as synthetic clay mitts or fine‑grade polishing compounds to decontaminate paint without aggressive abrasion. Apply lubrication, work methodically in small sections, and recheck the surface tactilely.
When spots are superficial and rare, you can skip the decontamination step and proceed to targeted water‑spot treatment after washing. Always finish this prep with a protective wax or paint sealant to form a barrier against mineral etching. You’re aiming for freedom from repeat maintenance: precise prep minimizes repeat work and keeps the Camry’s finish resilient.
Quick Fix for Water Spots on Paint, Glass, and Trim (3‑Step Routine)
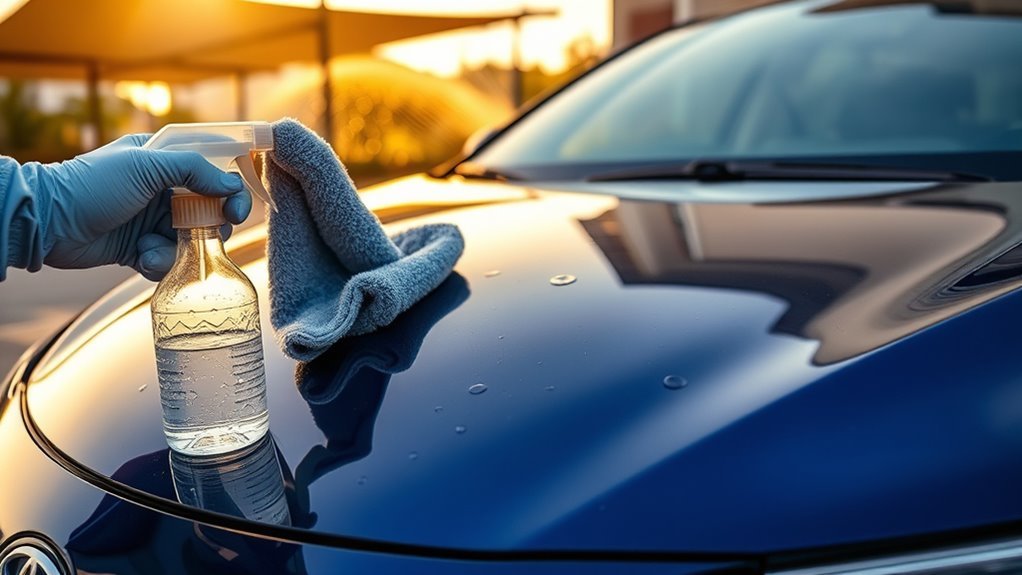
If you want a fast, reliable fix, use a targeted 3‑step routine that handles paint, glass, and trim with minimal abrasion. Start by removing surface contaminants with a quick detail spray and a microfiber—this clears grit so you don’t grind scratches into finish. Next, apply the remover gel in small drops with a microfiber applicator, working it into spots on paint, glass, and trim using controlled, wax‑like passes. Let it dwell briefly to break down alkaline and calcium deposits. Finally, wipe residue with a clean microfiber towel and a bit of detail spray to neutralize any remaining film.
- You see a matte halo on the paint become glossy as deposits lift.
- Glass clears to full transparency, restoring sightlines and safety.
- Trim regains uniform color without harsh sanding or scraping.
Repeat for stubborn spots. Keep detailing supplies handy for water spot prevention and quick post‑rain maintenance to stay free.
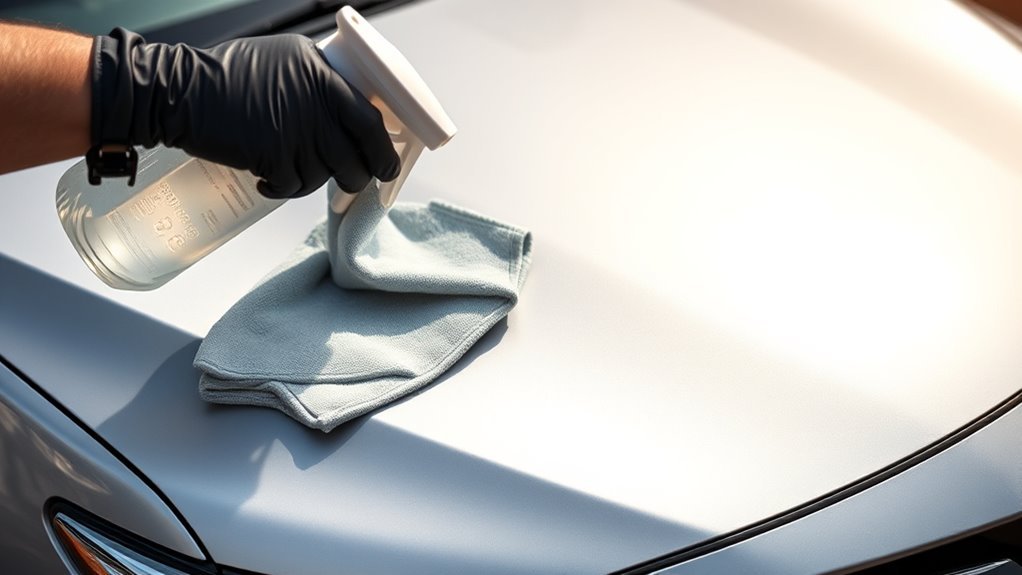
Apply the Heavy Duty Water Spot Remover Gel: Step‑by‑Step
First, you’ll prep the surface with quick detail spray and a clean microfiber to remove any dirt that could interfere with the gel. Next, apply small drops of the heavy‑duty water spot remover gel to a microfiber applicator and work it into the affected areas in tight circular motions, letting it sit briefly to break down mineral deposits. Finally, wipe the residue with a clean microfiber and detail spray, then inspect and repeat as needed until spots are eliminated.
Prep Surface Thoroughly
Start by spraying the panel with a quick detailer and wiping it clean so the gel works on bare paint instead of dirt or grime. You’ll prep for the Heavy Duty Water Spot Remover Gel by confirming surface types (clear coat, painted trim) and selecting appropriate cleaning tools: soft microfiber applicator, gentle towels, and a detail spray. Apply gel only after the panel is contaminant‑free so active ingredients contact deposits directly. Work in small sections and target visible alkaline spots; use controlled pressure and circular motion where deposits resist. Inspect frequently under good light to avoid overworking the paint. Repeat prep if you see residue. This method frees you from guesswork and sets a disciplined stage for effective spot removal.
- smooth clear coat gleaming
- stubborn rings dissolving
- liberated, pristine finish
Apply And Wipe
Gather your supplies, then apply the Heavy Duty Water Spot Remover Gel by placing small drops onto a microfiber applicator and working them into each affected area with controlled circular motions. Start after you’ve removed loose dirt with quick detail spray so the gel application targets deposits, not grit. Use light pressure; mimic waxing strokes to maintain even coverage. Let the gel dwell briefly to break down alkaline residues, but don’t allow it to dry. Wipe residual gel with a clean microfiber and more detail spray to neutralize chemicals and reveal a glossy surface. Inspect under good light; repeat the water spot techniques on stubborn marks. This methodical, intentional approach gives you control and frees you from persistent spotting.
Fix Etched Spots: DIY Polishing vs. When to Call a Pro
How deep are those water spots, and can you restore the finish yourself? Assess etched clarity first: run your fingernail across the mark and inspect under bright light. If it’s surface-level, you’ll regain shine with controlled polishing techniques using a fine compound and a soft pad. Work small areas, keep speed low, and repeat tests.
- Visualize a shallow ghost that blurs when rubbed, reclaimable by patience.
- Picture a white crater that resists buffing, likely through the clear coat.
- Imagine a ragged etch where pigment sits in grooves, needing professional tools.
You’ll avoid harm by testing on an inconspicuous panel and stopping if clarity doesn’t improve. Choose DIY for minor etching and routine upkeep; call a pro when damage penetrates the clear coat or you lack orbital polishers and corrective pads. Professionals restore permanent etching with wet sanding, machine polishing, and paint correction tools — liberating your Camry from permanent marks.
Prevent Future Spots: Parking, Watering, and Protective Coatings
Pick parking spots that keep your Camry clear of overhanging plants and runoff from gutters or sprinklers to reduce exposure to contaminants. When you hose or water nearby landscaping, do it during cooler hours and avoid spraying toward the car so rapid evaporation doesn’t leave mineral residues. Finish with a regular program of drying and applying a quality wax or sealant plus quick-detail wipes to maintain the protective barrier.
Choose Safer Parking Spots
When you park, avoid spots under trees, balconies, or anywhere that exposes your Camry to drips, sap, or fertilizer runoff—these sources accelerate mineral and chemical deposits that cause water spots. Choose safe parking deliberately: prefer covered spaces, garages, or well-drained lots to reduce exposure to rain and airborne contaminants. Use a breathable car cover if you must leave the vehicle outdoors for long periods. Apply protective coatings—ceramic or quality wax—to create a hydrophobic barrier that simplifies future decontamination. Maintain a routine of washing and drying after exposure to precipitating events.
- A shaded garage with closed doors, clean concrete floor, and no overhead planters.
- Open carport where runoff and tree hazards are blocked.
- Temporary covered spot beneath building eaves, protected from sprinklers.
Mind Plant Watering Areas
Wondering where plant watering can impact your Camry? You should park away from planters, balconies, and overhanging branches that produce runoff, sap, or alkaline deposits. Inspect surroundings for plant drainage points and reposition the vehicle if water flows toward it. Establish a watering schedule that avoids overlap with your parking periods; water early morning or late evening when the car is elsewhere. When you must water nearby, direct hoses and use drip irrigation to limit overspray and runoff velocity. Regularly check for leaves or debris that trap moisture against paint and remove them promptly. These methodical steps reduce spot formation, simplify maintenance, and free you from recurring cleanup, letting you control environmental variables that threaten your Camry’s finish.
Apply Protective Coatings
Protect your Camry’s finish by applying a durable barrier—start with a high-quality wax or paint sealant and consider a professional-grade ceramic coating for longer-lasting defense. You’ll perform sealant application methodically: wash, decontaminate, apply product per instructions, cure, and buff. A ceramic coating offers ceramic benefits like hydrophobicity, chemical resistance, and reduced wash frequency, freeing you from constant spot repair. Combine coatings with disciplined habits—park away from trees, rinse with filtered water, and dry promptly to stop mineral etching.
- A smooth, beaded surface repels droplets that would otherwise dry into spots.
- A cured ceramic layer resists acids from plant debris and bird droppings.
- Filtered rinses after parking remove minerals before they bond to the coating.
Adopt this regimen to reclaim control over your Camry’s finish.
Routine Maintenance Checklist to Keep Your Camry Spotless
A simple, regular maintenance routine will keep your Camry free of water spots and preserve its finish. Wash every two weeks using pH-balanced car soap to prevent mineral and alkaline deposits. Rinse thoroughly, then dry immediately with microfiber towels, working panel by panel to avoid evaporation marks. Every three months, apply a high-quality wax or paint sealant to protect paint and glass from water spot formation and environmental etchants. Use a quick-detail spray after drying to eliminate residual spots and restore gloss.
Inside, schedule interior cleaning alongside exterior washes to prevent contaminants tracking onto painted surfaces; vacuum, wipe hard surfaces with appropriate cleaners, and keep textile protectants applied. Monitor wheel wells and brakes for grime transfer; perform tire care—clean with dedicated tire cleaner and dressers—to stop rubber residue from contacting paint. Keep a small maintenance kit in the trunk: microfiber towels, pH-neutral soap, quick-detail spray, and sealant. Follow this methodical checklist to stay free and in control of your Camry’s finish.
Frequently Asked Questions
How Do You Remove Water Spots From a Car Without Damaging Paint?
Use a pH-balanced quick detail spray, work gently with a microfiber applicator, then apply Heavy Duty Water Spot Remover Gel as needed, wipe thoroughly with fresh microfiber towels, and maintain washing/waxing for paint protection—detailing tips that free you.
Does WD-40 Remove Water Spots on Car Glass?
Yes — WD 40 application can remove water spots on car glass temporarily, but it leaves residue. You’ll use glass cleaning techniques afterward to remove grease, and prefer dedicated water-spot removers for lasting, liberation-focused results.
Can Water Spots on a Car Be Permanent?
Yes — water spots can become permanent. Like scars, they etch paint if neglected. You’ll prevent permanence via water spot prevention, prompt detailing techniques, regular maintenance, and timely polishing to avoid costly, irreversible damage.
Conclusion
You’ve got a reliable routine: prep, quick 3‑step fix, heavy‑duty gel for persistent spots, and polishing or pro help for etching. One stat to note: mineral‑spotting can reduce paint reflectivity by up to 20% if left untreated, so act early. Park smart, rinse after watering, and apply protection regularly. Follow the checklist monthly to keep your Camry’s finish intact and minimize costly corrective work down the road.