Road salt helps make winter driving safer, but it is hard on your Camry’s paint, wheels, rocker panels, and underbody when salty moisture sits in seams, chips, and wheel wells. The best protection is not one expensive product. It is a simple routine: rinse salt off often, keep a slick protective layer on the paint, block splash where you can, and repair paint chips before bare metal starts to rust.
Quick Answer
To protect Camry paint from road salt, wash the body, wheel wells, and underside at least every two weeks in winter, and sooner after heavy salt exposure. Add wax, sealant, or ceramic protection before winter, install mud flaps if needed, inspect chips monthly, and touch up exposed metal quickly.
Key Takeaways
- Road salt damage is worst where salty water sits: wheel wells, rocker panels, seams, chips, lower doors, and underbody parts.
- A rinse-first wash routine reduces rubbing salt grit across the clearcoat.
- Wax is affordable and easy, sealant lasts longer, and ceramic coating offers the strongest paint barrier when applied correctly.
- Do not apply undercoating over wet dirt, loose rust, brakes, exhaust parts, sensors, wiring, or drain holes.
- Small chips should be cleaned, primed if bare metal is visible, touched up, and sealed before winter moisture gets in.
At a Glance
| Time Required | 30–60 minutes for a winter wash; 1–2 hours for wax or sealant; longer for coating prep |
| Difficulty | Easy for washing and wax; moderate for sealant, touch-up paint, and underbody spray |
| Tools Needed | Car wash soap or de-salt shampoo, foam sprayer, wash mitt, microfiber towels, hose or pressure washer, undercarriage sprayer, wax/sealant, touch-up paint, gloves |
| Cost | Low for DIY washing and wax; moderate to high for professional ceramic coating or rustproofing |
Quick Winter Checklist: Protect Your Camry Paint Now
Start with a routine you can actually repeat. Toyota’s Camry exterior-care guidance recommends applying water to the vehicle body, wheel wells, and underside, then washing with car-wash soap and waxing when the water-repellent coating deteriorates. Toyota Owner’s Manual guidance is a useful baseline for winter cleaning because salt collects exactly where normal rinsing often misses: lower panels, wheel arches, seams, and the underside.
Use this checklist before and during winter:
| Task | Why It Matters | Best Timing |
|---|---|---|
| Rinse body, wheel wells, and underside | Removes salty film before it sits in seams | Every 2 weeks, sooner after heavy salt |
| Apply wax, sealant, or ceramic coating | Creates a slick barrier that makes salt easier to rinse off | Before winter, then maintain as directed |
| Install mud flaps or splash guards | Reduces salt spray on rocker panels and lower doors | Before first snow or salt treatment |
| Inspect chips and scratches | Stops salt and moisture from reaching exposed metal | Monthly and after gravel/salt-heavy drives |
| Touch up exposed metal | Seals the weak point before rust spreads under paint | As soon as practical |
Pro Tip: Rinse first, then wash. A first rinse removes loose salt crystals and grit so your mitt is less likely to drag abrasive residue across the clearcoat.
Prep Your Camry Before the First Winter Salt Hit
Pre-winter prep is where you save the most work later. Salt does the most damage when it reaches bare metal or sits in tight areas that stay wet. Before the first real salt event, inspect the front bumper, hood edge, lower doors, rocker panels, wheel arches, trunk lip, and rear quarter panels. These are the places most likely to collect chips, slush, and gritty splash.
- Wash and decontaminate the paint. Start with a thorough wash so wax or sealant bonds to clean paint instead of salt film.
- Inspect chips in bright light. Look for dark dots, bare metal, bubbling, or paint edges lifting around the chip.
- Touch up exposed metal. Clean the chip, let it dry, use primer if bare metal is visible, then apply thin coats of color and clear coat.
- Add paint protection. Wax is simple, synthetic sealant usually lasts longer, and a true ceramic coating gives stronger hydrophobic protection when the paint is properly prepared.
- Protect lower panels. Mud flaps, splash guards, and rocker-panel film reduce direct impact from salty spray and winter grit.
- Check underbody condition. If you see flaking rust, damaged factory coating, or wet dirt packed into seams, clean and inspect before applying any protective product.
Note: Road salt is commonly sodium chloride, and chloride is highly mobile in water. That is why frequent rinsing matters: you are not just making the car look cleaner; you are removing salty moisture from places where it can keep attacking metal and coatings.
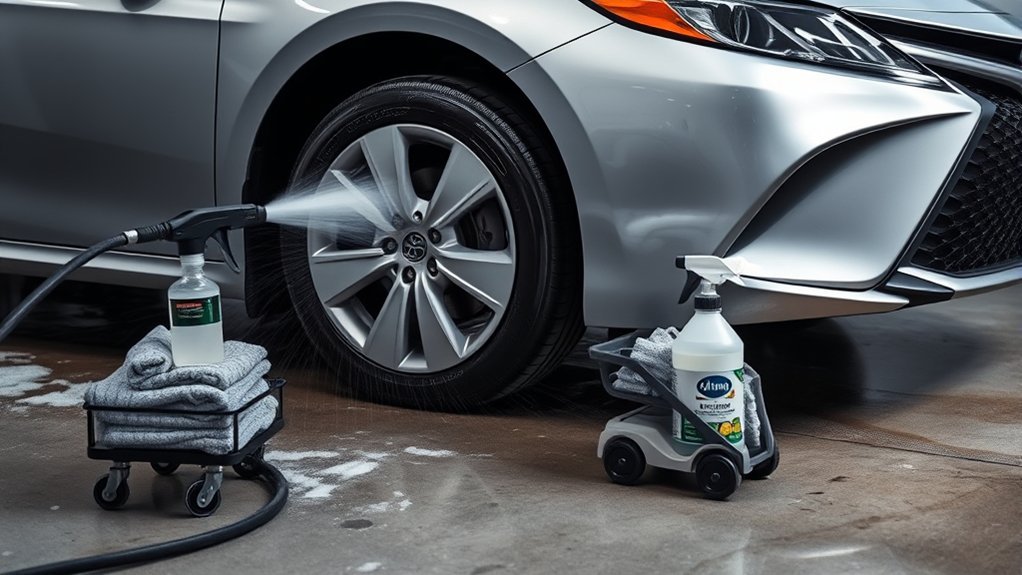
Wash to Remove Salt From Camry Paint & Undercarriage
A winter wash should focus on salt removal, not just shine. AAA recommends washing at least every two weeks in winter, more often after heavily salted roads, prioritizing the undercarriage, rinsing first, and applying wax before winter. AAA’s winter road-salt guidance lines up well with a Camry-focused routine.
Step-by-Step Salt Removal Wash
- Choose the right day. Wash when temperatures are above freezing if possible, or use a wash bay where the car can drain and dry before parking outside.
- Pre-rinse from top to bottom. Flush loose salt and grit off the roof, glass, hood, doors, lower panels, wheels, and wheel wells.
- Foam the body and wheel wells. Let a pH-balanced de-salt shampoo or winter wash foam dwell according to the product label. Do not let it dry on the paint.
- Wash gently. Use a clean wash mitt and plenty of lubricating soap. Work from cleaner upper panels to dirtier lower panels last.
- Rinse the undercarriage. Use an underbody wash, undercarriage sprayer, or wand attachment to flush frame seams, splash shields, suspension areas, and wheel wells.
- Final rinse and dry. Rinse until runoff is clear. Dry paint, mirrors, fuel door area, door jambs, trunk edges, and rubber seals to reduce freezing.
- Inspect while drying. Look for chips, bubbling, chalky residue, and areas where water no longer beads.
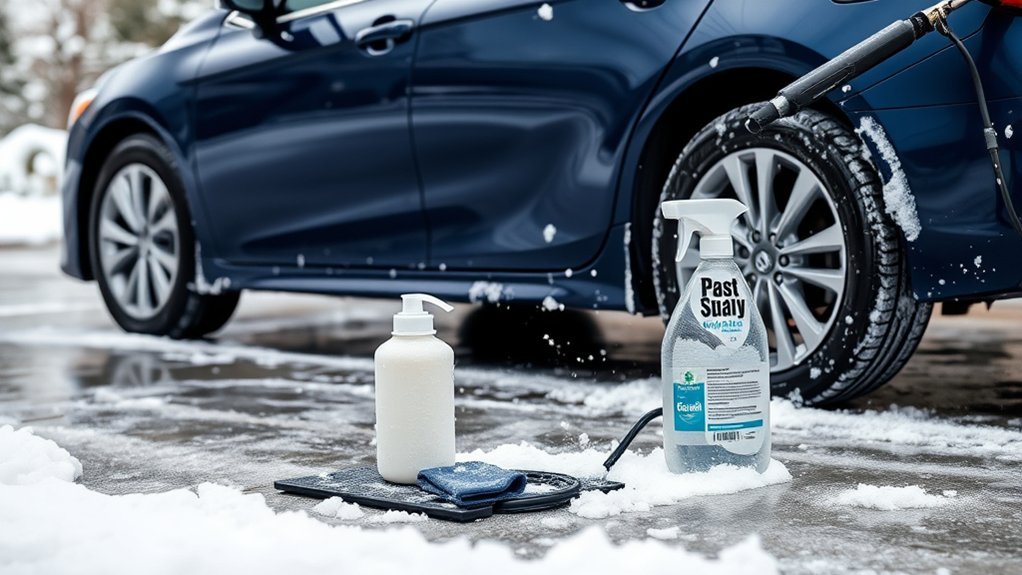
Frequent Undercarriage Rinses
A biweekly undercarriage rinse is a good baseline for winter, but heavy exposure calls for more. If you drive through slush, freshly treated roads, or wet salt spray for hours, rinse sooner. Focus on wheel arches, suspension mounts, brake-line areas, pinch welds, subframe edges, and seams where salty water can sit.
Use enough water to flush contaminants away, but do not blast too close to rubber boots, electrical connectors, sensors, or damaged underbody coatings. Pressure helps, but distance and control matter more than maximum force.
Salt-Removing Snow Foam
A salt-removing snow foam is useful because it clings to vertical panels and wheel wells long enough to loosen film before you touch the paint. Choose a pH-balanced formula that is safe for wax, sealant, or ceramic coatings. The goal is to lift and rinse away salt residue while reducing scrubbing, not to rely on one chemical step as a complete cure.
Foam works best on broad painted surfaces, bumper covers, wheels, and wheel-well liners. For seams and the underside, pair foam with a targeted rinse so dissolved residue actually leaves the vehicle instead of drying in place.
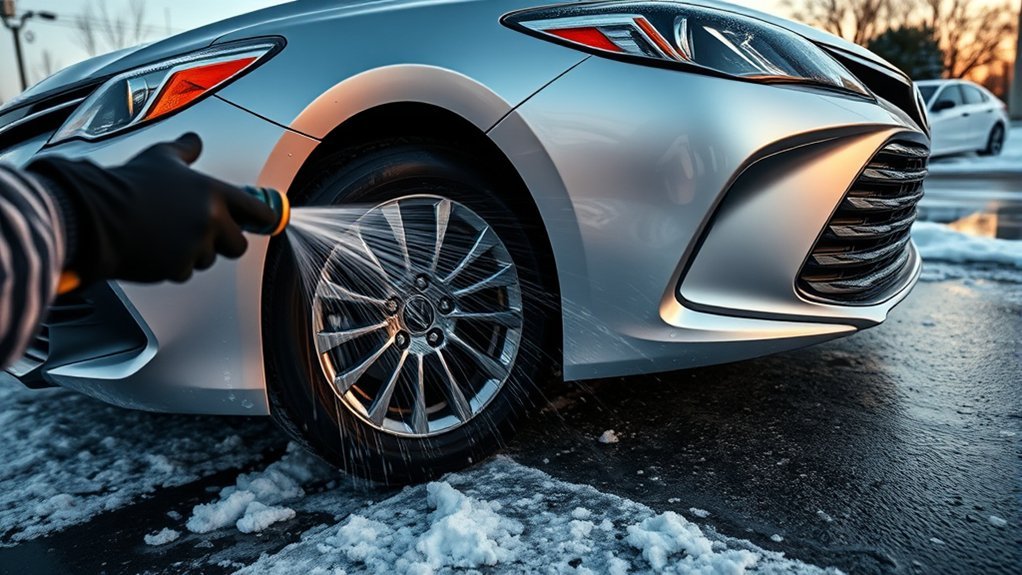
Wheel Well Detailing
Wheel wells take the hardest hit because tires throw salty slush directly into liners, fender lips, and suspension areas. Rinse the inner fenders, splash shields, mud flap edges, and lower rocker seams. Where safe and reachable, use a soft brush with car-wash soap to remove packed dirt. Avoid aggressive scrubbing on painted fender edges because gritty salt can scratch.
After the area dries, check for exposed metal, loose coating, cracked seam sealer, and bubbling paint. If a protective coating has failed, clean the area properly before applying any new product.
Warning: Do not pressure-wash directly into wheel-speed sensors, electrical connectors, torn boots, or damaged seams. Use a wider spray pattern and keep the nozzle moving.
Choose the Right De-Salt Shampoo and Snow Foam
The right winter wash product should do three things: loosen salty film, provide enough lubrication to reduce scratching, and protect the wax, sealant, or coating already on the car. Look for labels that mention automotive paint safety, pH-balanced cleaning, wax/sealant compatibility, and winter grime or salt removal.
pH-Balanced Formulas
A pH-balanced shampoo is usually the safest default for regular winter washing because it is less likely to strip your protective layer. That matters because wax, sealant, and ceramic coating are part of the salt-defense system. If a cleaner is too harsh for routine use, it may remove the very barrier you are trying to maintain.
- Select a shampoo made for automotive paint, not household dish soap.
- Choose high-lubricity formulas to reduce swirl marks from grit.
- Use stronger decontamination products only when needed and only as directed.
- Rinse thoroughly so loosened chloride residue does not dry in seams.
Foam Versus Rinse
Foam and rinsing solve different problems. Foam gives chemical dwell time and lubrication. A targeted rinse physically removes residue from hidden areas. The best winter wash uses both.
| Method | Best Use | Main Benefit |
|---|---|---|
| Snow foam | Paint, bumpers, wheels, wheel wells | Loosens film before contact washing |
| Contact wash | Painted panels after pre-rinse | Removes bonded grime with lubrication |
| High-volume rinse | Undercarriage, seams, splash shields | Flushes hidden salt away |
Wax, Sealant, or Ceramic: Which Protects Camry Paint Best?
Wax, sealant, and ceramic coating can all help protect a Camry from road salt, but they fit different budgets and maintenance styles. None of them makes the car salt-proof. They simply create a slicker, more sacrificial surface so salty grime is easier to rinse away before it attacks chips, trim, and edges.
| Protection Type | Best For | Pros | Trade-Offs |
|---|---|---|---|
| Car wax | Simple DIY winter prep | Affordable, easy to apply, good gloss | Shortest lifespan; may need frequent reapplication |
| Synthetic sealant | Longer DIY protection | More durable than many waxes; strong water beading | Needs clean paint and careful application |
| Ceramic coating | Maximum paint-protection routine | Strong hydrophobic behavior; easier winter cleaning | Requires the best prep; mistakes can be harder to fix |
If you want the easiest plan, apply a quality wax or sealant before winter and refresh it when water stops beading on clean paint. If you want the longest-lasting paint barrier, use a professionally installed ceramic coating or a proven DIY ceramic product, but only after the paint is washed, decontaminated, and polished if needed.
Note: Ceramic coating makes maintenance easier, but it does not replace washing. Salt can still sit on wheels, trim, chips, and underbody parts that the coating does not protect.
Underbody & Wheel-Well Protection: DIY vs Professional
Paint protection handles the visible body. Underbody and wheel-well protection handles the areas you rarely see. Road spray pushes salty water into seams, brackets, fasteners, and cavities. For high-salt regions, a dedicated corrosion inhibitor or undercoating can be worth considering, especially if you plan to keep the car for many years.
DIY Undercoating Steps
DIY undercoating can help, but only when prep is careful. Applying product over wet dirt, loose rust, or trapped salt can seal contamination in place.
- Wash first. Clean the underbody, wheel wells, rocker seams, and splash areas thoroughly.
- Let everything dry. Moisture trapped under coating can worsen corrosion.
- Inspect for loose rust. Remove loose scale and address active rust before coating.
- Mask sensitive areas. Protect brakes, exhaust parts, belts, sensors, wiring, drain holes, and moving linkages.
- Apply only to approved surfaces. Follow the product label for distance, coat thickness, cure time, and ventilation.
- Record the date. Inspect the coating at least once per year, especially after winter.
Warning: Never spray undercoating on brake rotors, brake pads, exhaust components, hot parts, sensors, wiring connectors, belts, or drain holes. For example, 3M’s undercoating technical guidance says not to apply near ignition sources, exhaust components, sparks, flame, or moving parts.
Professional Rustproofing Benefits
Professional rustproofing may be the better choice if you want more complete coverage of cavities, seams, and hard-to-reach areas. A good shop should clean and dry the vehicle, use a product appropriate for your climate, avoid sensitive components, and explain the inspection or reapplication schedule.
Ask these questions before paying for the service:
- What product will be used: oil-based, lanolin-based, wax-based, rubberized, or another coating?
- Will the underbody be washed and dried first?
- Which areas will be masked or avoided?
- Can it affect factory coatings, sensors, or warranty-related inspections?
- Is there a written warranty, and what maintenance is required to keep it valid?
Wheel-Well Spray Techniques
For DIY wheel-well protection, use a dedicated automotive corrosion inhibitor or undercoating product exactly as labeled. Fluid Film, for example, describes automotive undercoating uses and notes that compatibility should be checked because it may soften some vehicle undercoatings. Fluid Film’s automotive application guidance is a good reminder to check product compatibility instead of spraying blindly.
- Focus on inner wheel-well lips, splash-shield edges, rocker seams, and exposed fasteners.
- Do not overspray onto brakes, tires, exhaust, sensors, or wiring.
- Apply thin, controlled coats rather than heavy, dripping coverage.
- Recheck after the first few drives to make sure nothing is dripping, smoking, rubbing, or blocking drain paths.
Install Mudflaps and Protect Rocker Panels Step-by-Step
Mud flaps and rocker-panel protection are simple ways to reduce direct salt blast. They are especially useful if your Camry sees slushy highways, gravel shoulders, or roads treated with brine.
| Task | Tool or Material | Goal |
|---|---|---|
| Clean mounting area | Car soap, microfiber towel, plastic-safe cleaner | Remove grit before fitting parts |
| Test-fit mud flaps | Vehicle-specific kit or template | Confirm alignment and tire clearance |
| Fasten securely | Included clips, stainless hardware, screwdriver or drill if required | Prevent vibration and rubbing |
| Apply rocker protection | Paint-protection film or compatible coating | Add a barrier against salty grit impact |
- Wash and dry the rocker panels and wheel-arch edges.
- Hold each mud flap in place and check that it does not rub the tire at full steering lock.
- Use the supplied mounting points when possible instead of drilling new holes.
- If drilling is required, protect the drilled edge from corrosion before installing hardware.
- For paint-protection film, clean the panel thoroughly and follow the film maker’s instructions for slip solution, heat, and cure time.
- Inspect fasteners monthly in winter because ice buildup can loosen poorly mounted flaps.
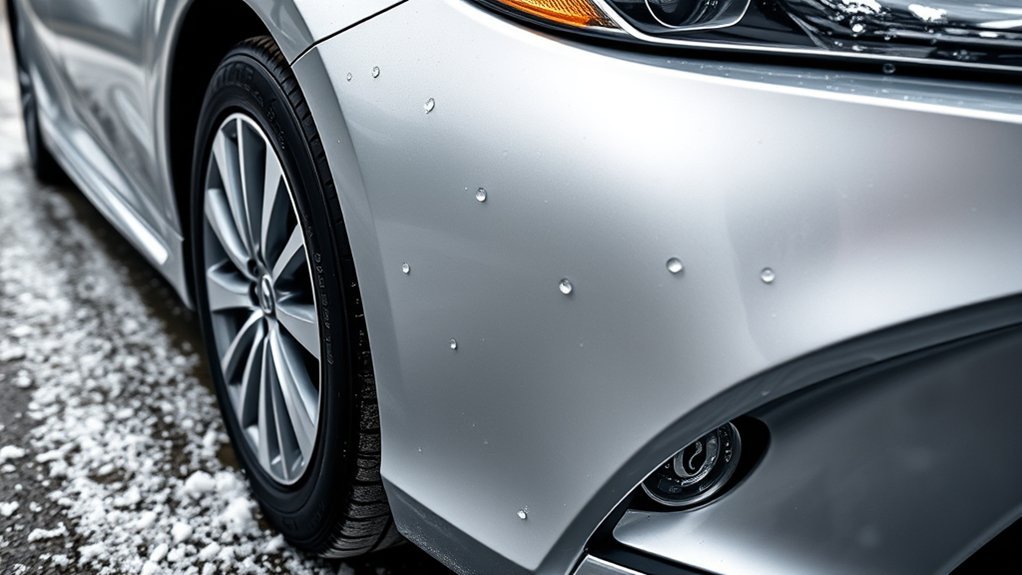
Spot Damage: How to Spot Early Salt Corrosion on Paint, Chrome, and Trim
Salt damage often starts small. The first signs may look like cosmetic defects, but they can become larger repair problems if moisture keeps getting under the finish.
- Paint chips: Look for tiny dark marks, exposed metal, or rough edges on the hood, bumper edge, doors, rocker panels, and wheel arches.
- Bubbling paint: Raised bubbles near seams or fender lips can mean corrosion is forming underneath.
- Orange or brown specks: These may be rust spots or embedded iron contamination.
- White chalky residue: Wheels, aluminum parts, and hardware can show salt residue or oxidation.
- Pitted chrome or trim: Cloudy, rough, or spotted trim may be losing its protective finish.
- Loose underbody coating: Flaking or cracked coating can trap salty moisture behind it.
Use a flashlight around wheel wells and lower seams. Photograph problem areas so you can see whether they are spreading. If paint is bubbling, metal is soft, or rust has expanded beyond a small chip, get a body shop or trusted mechanic to inspect it.
Touch-Ups and Paint Repair: Stop Chips From Becoming Rust
Small chips are urgent in winter because they create a direct path to metal. A careful touch-up does not have to be perfect to be useful. The goal is to seal the area so salty water cannot keep working under the paint edge.
- Wash the area. Remove salt, wax, and dirt around the chip.
- Dry completely. Do not trap water under primer or paint.
- Remove loose edges only. Do not enlarge the chip more than necessary.
- Use primer if metal is exposed. Primer helps protect bare metal and gives color coat a better base.
- Apply thin color coats. Use manufacturer-matched touch-up paint and let each coat flash or cure as directed.
- Add clear coat if required. Clear coat helps seal the repair and restore gloss.
- Let it cure before waxing. Follow the touch-up product instructions before applying wax or sealant over the repair.
Pro Tip: Keep a small winter chip kit in the garage: touch-up paint, primer, clear coat, isopropyl alcohol, microfiber towels, nitrile gloves, painter’s tape, and fine applicators.
Seasonal Maintenance Schedule and Cost vs. Benefit
The cheapest salt-damage plan is prevention. EPA notes that road salt is effective for winter safety but has corrosive effects on cars, trucks, bridges, and roads, along with environmental and property costs. EPA’s road-salt overview explains why salt is useful but costly when overused or left unmanaged.
| Season or Situation | What to Do | Why It Helps |
|---|---|---|
| Before winter | Wash, inspect chips, apply wax/sealant/coating, consider mud flaps | Builds protection before salt exposure begins |
| Normal winter driving | Wash body and underbody every two weeks | Prevents salt buildup from sitting too long |
| After heavy slush or salted highways | Rinse sooner, especially wheel wells and underside | Removes high-concentration salt spray |
| Monthly in winter | Inspect chips, rocker panels, wheel arches, wheels, and trim | Catches early damage before it spreads |
| After winter | Deep wash, inspect underbody, refresh protection, repair chips | Removes leftover salt and resets protection for spring |
A winter wash is not just cosmetic. It is a corrosion-control step for the paint edges, wheel wells, rocker panels, and underbody areas that see the most salty moisture.
Common Winter Salt Protection Mistakes
A good routine can fail if the basics are rushed. Avoid these common mistakes:
- Waxing over salt film: Protection bonds best to clean paint, not leftover residue.
- Skipping the undercarriage: A shiny hood does not protect brake-line areas, seams, or splash shields.
- Using household detergent: Harsh cleaners can strip wax and dry out trim.
- Letting foam dry on paint: Dried soap can leave residue and reduce cleaning effectiveness.
- Ignoring chips until spring: Winter moisture can turn a tiny chip into a larger rust repair.
- Undercoating over wet rust: Coating trapped moisture and loose corrosion can make the problem worse.
- Spraying sensitive parts: Brakes, exhaust, sensors, belts, and drain holes should not be coated.
After-Winter Reset: Remove Leftover Salt and Refresh Protection
When salt season ends, give your Camry a reset instead of waiting for the next winter. Chloride from road salt is soluble and mobile in water, and USGS notes that chloride is a key component of road salt that can persist in runoff and waterways. USGS road-salt chloride research is environmental in focus, but the practical lesson for car care is similar: rinse and remove residue instead of letting it accumulate.
- Do a thorough underbody rinse, including wheel wells and splash shields.
- Wash the body carefully and inspect lower panels while drying.
- Use an iron remover or tar remover only if needed and only as directed for automotive paint.
- Clay or polish only if the paint feels rough after washing and decontamination.
- Refresh wax, sealant, or ceramic topper after the paint is clean.
- Check mud flaps, rocker film, and underbody coatings for winter damage.
- Repair chips before summer heat and humidity accelerate the problem.
Frequently Asked Questions
How do you protect your car from road salt?
Wash the body, wheel wells, and underside regularly, especially after heavy salt exposure. Apply wax, sealant, or ceramic protection before winter, use mud flaps to reduce lower-panel spray, inspect chips often, and touch up exposed metal quickly.
How do you stop salt from getting through paint?
Keep the paint sealed and repair weak spots. Salt reaches metal through chips, scratches, worn edges, and failed coatings. Wash salt off often, maintain wax or sealant, and use primer plus touch-up paint when bare metal is visible.
Does road salt damage car paint?
Yes. Salt residue holds moisture and can speed corrosion where paint is chipped, thin, or damaged. It can also leave dull film and contribute to staining on wheels, trim, and lower panels if it is not washed away.
Does ceramic coating protect against road salt?
Ceramic coating can help by creating a durable, hydrophobic surface that makes salty grime easier to rinse off. It does not protect damaged chips, uncoated underbody parts, brakes, or hidden seams, so regular washing and inspections are still necessary.
How often should I wash my Camry in winter?
A good baseline is every two weeks during salt season. Wash sooner after driving on heavily salted roads, through slush, or after a storm. Focus on the underside, wheel wells, rocker panels, and lower doors.
Should I undercoat my Camry for winter?
Undercoating can help in high-salt regions, especially if you keep the car long term, but prep and product choice matter. The underside should be clean and dry first, and coating should never be applied to brakes, exhaust, moving parts, sensors, wiring, or drain holes.
Conclusion
You can protect Camry paint from road salt with a repeatable winter routine: rinse often, wash gently, protect the paint before salt season, shield the lower panels, and repair chips quickly. Wax, sealant, ceramic coating, mud flaps, and underbody care all help, but none replaces regular salt removal. The winning plan is simple prevention done on schedule, especially around wheel wells, rocker panels, seams, and exposed paint chips.
Sources
- Toyota 2025 Camry Owner’s Manual: Cleaning and Protecting the Vehicle Exterior — supports washing the body, wheel wells, underside, and waxing when protection deteriorates.
- AAA: Winter Road Salt Can Cause Hidden Vehicle Damage — supports biweekly washing, underbody sprays, rinsing first, and applying wax before winter.
- U.S. EPA: Winter Is Coming! And With It, Tons of Salt on Our Roads — supports road-salt context, sodium chloride use, and corrosion/property impact.
- U.S. Geological Survey: Chloride Trends Due to Road-Salt Use — supports chloride mobility and road-salt runoff context.
- 3M Paintable Undercoating Technical Data Sheet — supports undercoating surface-prep and safety cautions.
- Fluid Film Automotive Applications — supports dedicated automotive corrosion-inhibitor use and compatibility checking.