Park your Tundra on level ground, let the engine cool, then check the translucent coolant reservoir against the molded COLD and FULL marks; only inspect when cold. If below COLD, wear gloves and goggles, add a Toyota-approved red coolant mixed 50/50 with distilled water (or pre-mix), pour slowly to the mark, then secure the cap. Run the heater on max and monitor for bubbles, leaks, or discoloration; continue for steps to bleed air, spot issues, and troubleshoot.
Quick How-To: Check and Add Coolant (Tundra)
Start by parking the Tundra on level ground, letting the engine cool completely, and locating the translucent coolant reservoir near the engine bay; read the molded cold-fill and full lines to assess level. You’ll check level only when cold to avoid burns and to get an accurate reading. If the level sits below the cold-fill mark, remove the reservoir cap carefully and add a 50/50 mix of coolant and distilled water or use pre-mixed coolant; understand coolant types to match factory specifications. Inspect fluid color and clarity: clean red fluid is normal, oily sheen can indicate head gasket breach. After topping, secure the cap and run the engine briefly, then recheck for leaks around the reservoir and hoses. Maintaining proper level and leak-free connections prevents engine overheating and preserves your autonomy on the road. Act deliberately, document observations, and correct faults to keep the cooling system reliable and under your control.
When to Check Coolant and Why It Matters
Because coolant level changes gradually and can signal developing faults, you should check it at least once a month and before long trips or extreme weather. Do the check with the engine cold to get an accurate reading and avoid hot-fluid hazards. Inspect the reservoir and radiator cap for low level, contamination, or signs of leakage; early detection prevents progressive damage that compounds cost and limits your freedom to travel.
Routine checks dispel coolant myths that it’s only needed when overheating occurs. You’ll catch slow leaks, dilution, or degraded mixture before they cause overheating, loss of efficiency, or head gasket failure. Proper coolant volume and concentration maintain heat transfer, supporting peak engine performance, fuel efficiency, and engine longevity. Make checking part of your maintenance rhythm—monthly plus pre-trip—to retain control over your vehicle’s reliability and avoid being stranded by preventable failures.
Safety First: Cold Engine and Protective Gear
Monthly checks and pre-trip inspections are only safe if you work on a cold engine, so wait several hours after driving before opening the reservoir or radiator cap. You’ll verify the engine’s cool to touch before you remove any caps. Use safety equipment: safety goggles and chemical-resistant gloves. That protects you from hot-splash risk and reduces skin contact with coolant. Respect coolant hazards — it’s toxic to pets and the environment — and contain or neutralize spills immediately.
| Item | Purpose |
|---|---|
| Safety goggles | Eye splash protection |
| Gloves | Skin contact barrier |
| Rags/absorbent | Spill containment |
| Disposal bag | Secure contaminated waste |
Operate methodically: check temperature, don protective gear, inspect visually, then open only when cold. You’re asserting control — minimizing injury and environmental harm. Keep pets and children away during checks and clean all spills with absorbent material, sealing waste for proper disposal.
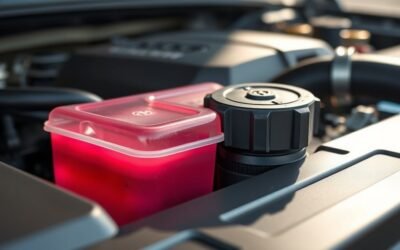
Find the Tundra Coolant Reservoir and Fill Lines
Open the hood and locate the translucent coolant reservoir near the front passenger side of your 2015 Tundra. Read the molded minimum and maximum fill lines on the tank and confirm the level while the engine is cold for an accurate reading. If the coolant sits below the minimum mark, you’ll need to inspect for leaks and add coolant to the correct level.
Locate The Coolant Reservoir
When the engine is cold, pop the hood and locate the translucent plastic coolant reservoir—usually mounted on the passenger side of a 2015 Tundra’s engine bay—so you can clearly see the fluid level against the molded fill lines; never remove the cap until the system has cooled. You’ll inspect visually: the reservoir’s transparency lets you assess level and color without opening the system. Regular checks reveal slow leaks or degradation before they limit your freedom. If level’s low, consult the owner’s manual for approved coolant types and top off with the correct mixture to preserve sealing and cooling performance. Treat reservoir maintenance as routine: note level trends, inspect hoses and cap, and act promptly to avoid roadside confinement.
Identify Fill Line Marks
While the engine’s cold, stand beside the Tundra and locate the translucent coolant reservoir—typically on the driver’s side—and read the molded “LOW” and “FULL” marks to determine proper level. Inspect the side of the tank: the correct cold level sits between LOW and FULL. Use a flashlight if visibility is poor. Remember hot coolant expands to a higher mark; don’t confuse expansion with normal cold level. If the tank is empty, suspect a leak and plan immediate reservoir maintenance to prevent overheating. When topping up, match manufacturer-recommended coolant types and add only with the engine cold. These steps keep you in control, reduce dependency on shops, and let you perform precise, efficient maintenance on your own terms.
Check Reservoir When Cold
1. Locate the coolant reservoir in your 2015 Toyota Tundra—it’s in the engine bay and capped “coolant.” Verify the engine is completely cool before opening or reading the tank to prevent burns and false readings. Check that the fluid sits between the “low” and “full” fill lines; low levels can signal a leak.
| Item | Action | Note |
|---|---|---|
| Reservoir | Find in engine bay | Cap labeled “coolant” |
| Engine temp | Confirm cold | Avoid burns, inaccurate level |
| Fill line | Observe level | Between “low” and “full” |
| Low reading | Refill & inspect | Use specified coolant types |
Follow maintenance tips: use the owner’s manual coolant, document inspections, and act decisively to maintain freedom from roadside failures.
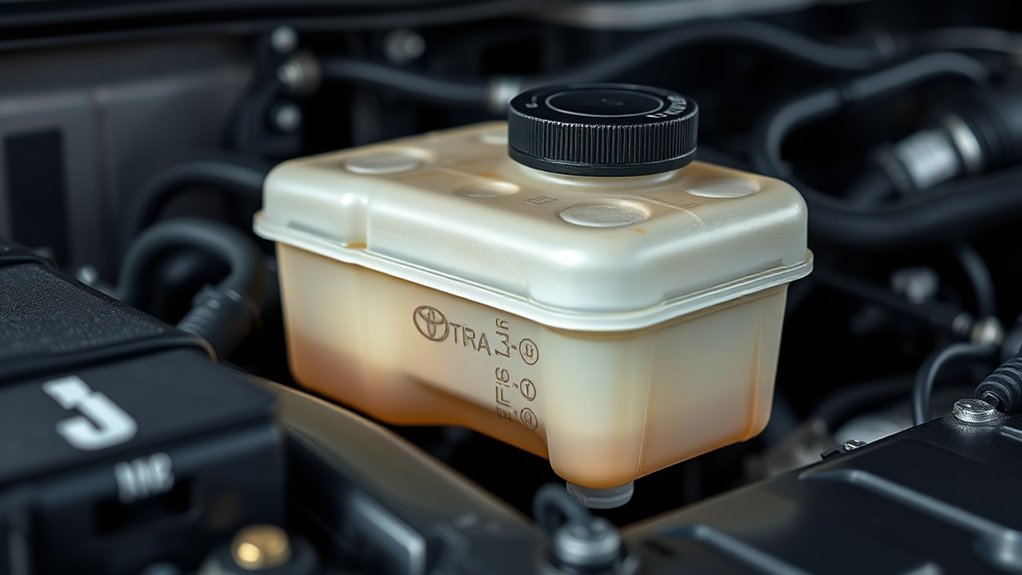
Inspect Coolant: Color, Odor, and Surface Signs
Because the coolant’s appearance and smell tell you a lot about engine health, inspect its color, surface, and odor before adding fluid. For disciplined coolant maintenance, observe that Toyota Tundra factory coolant is typically red; a clear red hue indicates good condition, while brown, cloudy, or faded colors are contamination signs requiring attention. Scan the surface for oil sheens—any oily film can signal a head gasket breach and demands immediate diagnosis rather than topping off.
Smell the fluid: a sweet scent is normal; a burnt or chemical odor suggests overheating or breakdown. Use a hydrometer for quantitative checks if you want exact freezing/boiling protection and concentration data, but rely on visual and olfactory inspection for routine checks. Also verify the overflow tank level when cold—low level can point to leaks. You’re preserving autonomy over your vehicle by diagnosing problems early; don’t ignore abnormal color, odor, or surface clues.
How to Remove the Radiator/Reservoir Cap Safely
Before you touch the radiator or reservoir, make sure the engine is completely cool and you’re wearing safety goggles; removing the cap on a hot system can release scalding coolant and steam. Approach methodically: locate the notches on the radiator cap, place a gloved hand over the cap, push down firmly, and twist counterclockwise to relieve residual pressure before removing it fully. If the cap resists, stop and recheck engine temperature.
Inspect the cap for cracks, warped seals, or corrosion; a damaged cap compromises system pressure and causes leaks. After removal, visually check coolant level and color—cloudiness or rust indicates contamination. Collect any drips in a container and follow proper coolant disposal methods; do not dump onto soil or down drains. These radiator maintenance tips protect you and the environment. Replace a faulty cap promptly and secure the cap by reversing the push-and-twist motion until it seats firmly before restarting the vehicle.
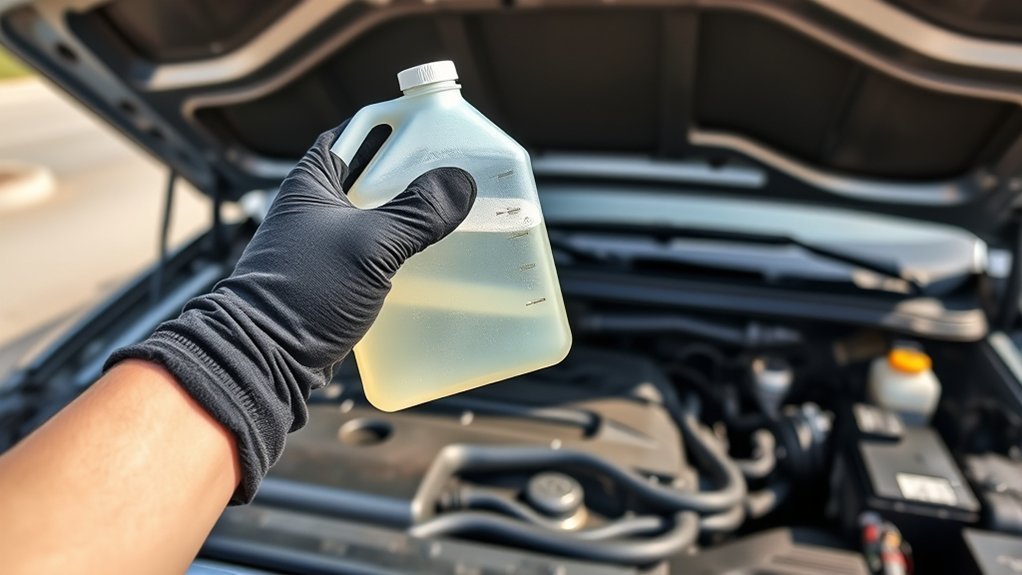
Refill the Overflow Tank: Choosing and Mixing Coolant
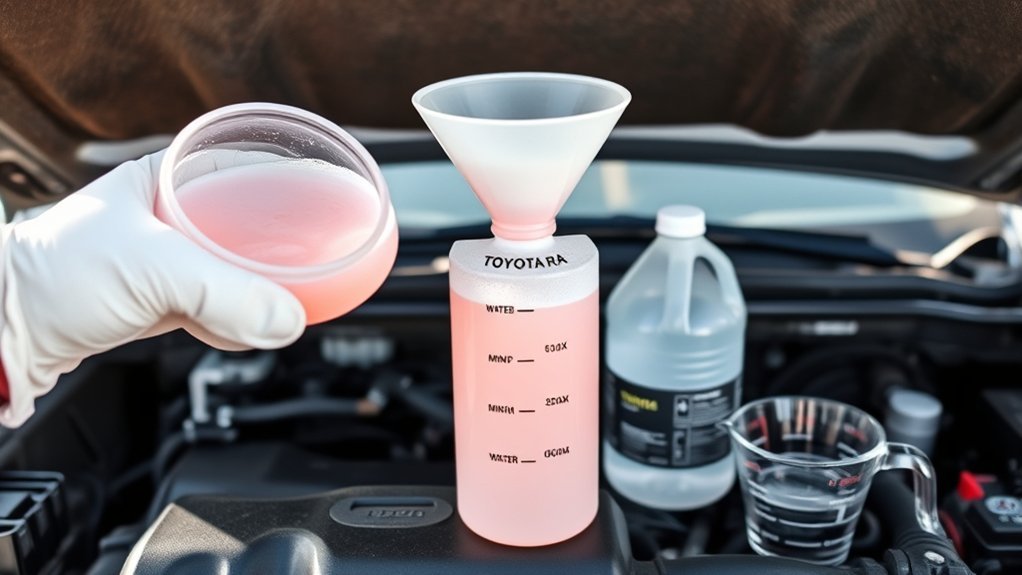
When you refill the overflow tank, use the coolant type specified in your Tundra’s owner’s manual—Toyota typically uses the red factory formula—and mix it with distilled water at a 50/50 ratio unless the label states it’s pre-mixed. Work cold: check level only when the engine is cool, wear safety goggles, and remove the cap carefully to avoid splashes. Choose the correct coolant types; don’t substitute incompatible formulas that can corrode alloys or void warranties. If you have concentrate, measure equal parts coolant and distilled water to achieve the recommended mixing ratios; use a clean container and funnel to avoid contamination. Add fluid slowly to the specified mark on the overflow tank, watching for overflow. After topping off, inspect visible hoses, clamps, and the reservoir for leaks or seepage. This methodical, deliberate approach preserves system integrity, reduces overheating risk, and gives you control—practical steps toward mechanical independence without guesswork.
How to Bleed Air and Check the Engine After Refilling
After topping off the overflow and checking hoses, start the engine and set the heater to max to force coolant through the system and help purge trapped air. Let it idle; this active coolant circulation moves trapped air toward the reservoir. Watch the temperature gauge closely — it should rise to normal operating range without spiking. Every few minutes, with gloves, crack the coolant reservoir cap slightly to allow any air bubble to escape; close it after release.
Inspect visible hoses and the reservoir neck for weeping or wet spots while the system pressurizes. If you see coolant loss, shut down and repair before proceeding. Once the engine reaches operating temperature and the gauge stabilizes, shut off the engine, let it cool slightly, and recheck the coolant level. Add coolant as needed to maintain the specified mark. Repeat the run-and-check cycle until no more air bubbles appear and coolant circulation remains steady, ensuring liberated, reliable engine cooling.
Spot Leaks and Signs of Head Gasket Failure
Check the coolant reservoir for an oily film or milky discoloration—oil in coolant often points to a failing head gasket. Inspect the ground under the truck for external coolant leaks and monitor for sudden level drops without visible seepage. Also watch for white smoke or a sweet exhaust smell, and note any engine overheating or erratic temperature readings as signs coolant may be entering the combustion chamber.
Oil In Coolant
If you spot an oily sheen or milky residue in the coolant, you’re likely looking at oil contamination that can indicate a failing head gasket or a similar breach between oil and coolant passages. You should inspect the reservoir and radiator for milky/frothy fluid, note overheating or unexplained coolant loss, and act quickly to avoid catastrophic engine damage. Perform a cooling-system pressure test to confirm leaks and isolate head gasket failure. Track symptoms, document findings, and plan repair or replacement to reclaim control of your vehicle.
| Visual sign | Likely cause | Immediate action |
|---|---|---|
| Oily film | Oil contamination | Stop, inspect radiator/reservoir |
| Milky coolant | Head gasket breach | Pressure test, check temps |
| Low coolant | Leak into combustion | Repair or replace gasket |
White Exhaust Smoke
Finding oil in the coolant can point to a gasket breach, and another clear indicator to watch for is white exhaust smoke — a sign coolant may be entering the combustion chamber. You’ll note white smoke on startup or under load if the head gasket has failed or if cooling passages are compromised. A sweet odor confirms coolant burning. Check the reservoir: low level or oily residue reinforces suspicion of head gasket compromise and active coolant leaks. Don’t guess — perform a compression or leak-down test to quantify cylinder sealing and isolate the fault. If tests show cross-contamination, plan for repair or replacement with urgency. Act decisively to reclaim control and prevent further engine damage.
External Coolant Leaks
When you spot puddles under the truck or see crusty coolant stains around the radiator, hoses, or reservoir, you’re likely dealing with an external leak that needs immediate attention. Inspect coolant hoses, clamps, radiator seams, and the water pump for wetness, residue, or brittle rubber. Use a clean rag to wipe suspect areas, then run the engine briefly while performing leak detection visually and with a pressure tester if available. Watch the temperature gauge for persistent overheating—this, combined with an oily film on coolant, points to possible head gasket failure and internal mixing of oil and coolant. If coolant levels drop considerably without visible external leaks, stop driving and get a professional diagnosis. Address leaks fast to reclaim control and prevent catastrophic failure.
Coolant Maintenance Checklist and When to See a Mechanic
1 quick checklist will keep your Tundra’s cooling system reliable: check the reservoir level before long trips or seasonal changes. Establish a maintenance frequency—visual reservoir checks weekly, color and residue inspections monthly, and a full coolant system inspection at service intervals or annually for older/high-mileage vehicles. Inspect for leaks: look for puddles, damp hoses, or oily film on the coolant surface that suggests head gasket failure or oil/coolant crossover.
Assess coolant color: clear red equals acceptable; murky, brown, or rust-colored fluid means flush and replace. If you’re topping off more than occasional small amounts, treat that as a potential leak and document level loss over several drives. Tighten clamps and verify cap integrity; replace degraded hoses or caps promptly.
See a mechanic when you detect persistent level drops, oily residue, overheating, or discolored coolant. Professional diagnostics—pressure test, combustion leak test, and system flush—prevent escalation and restore your freedom to drive without fear.
Frequently Asked Questions
How Often Should You Change the Coolant in a Toyota Tundra?
You should change coolant every 30,000 miles or about every two years, unless your manual lists extended-life coolant types allowing longer intervals; follow maintenance tips, monitor condition, and act sooner if discoloration or odor suggests contamination.
Is It Safe to Drive With Low Coolant in My Toyota?
No — you shouldn’t drive with low coolant. You’ll see coolant symptoms like temperature spikes and heater failure; driving risks engine overheating, leaks worsening, and voided warranties, so stop, inspect, and add fluid promptly to protect freedom.
What Kind of Coolant Does a Toyota Tundra Take?
You’ll use Toyota’s Super Long Life Coolant (red), or an equivalent ethylene glycol 50/50 mix; understand coolant types and coolant colors, avoid mixing formulas, and guarantee compatibility to protect seals, aluminum, and system longevity.
Conclusion
You’ve now got a clear, methodical routine: check coolant regularly, use proper PPE, top the overflow tank to the fill line with Toyota‑approved 50/50 mix, bleed air, and recheck for leaks. Treat coolant like the engine’s blood—keep it clean and topped. If you spot milky residue, persistent low level, or overheating, stop and see a mechanic. Routine checks prevent big failures and keep your Tundra running reliably.