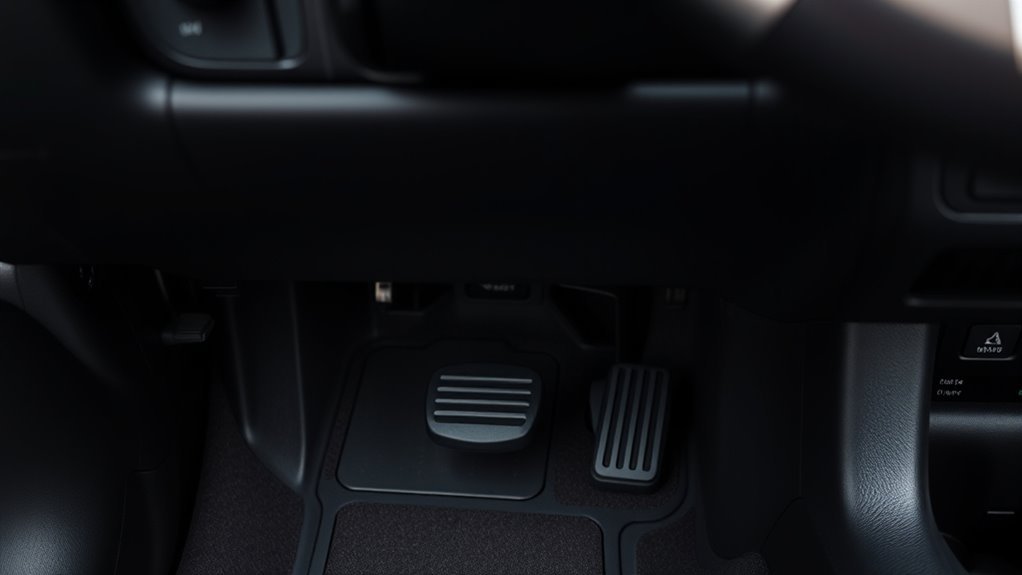
You can quickly fold the Toyota 4Runner’s rear seats to gain temporary cargo room or remove them for a permanent flat platform by following a few simple steps. Gather a ratchet with metric sockets, torque wrench, gloves and a partner for lifting; disconnect power for powered components. Pop the seat bottoms up, unbolt six bolts and two clips per seat, then fold or unbolt seatbacks, labeling wiring before disconnecting. Continue for detailed bolt patterns, supports and sensor tips.
When to Fold or Remove 4Runner Rear Seats (Quick Answer)

When you need more cargo space for gear or camping equipment, fold the 4Runner’s rear seats for a quick expansion; remove them entirely when you want a permanently reconfigured interior or need the maximum flat floor area, remembering removal requires unbolting four bolts per seat plus side-panel hardware and may take 5–30 minutes depending on your experience. Decide to fold when you want temporary cargo capacity gains and retain seating versatility for passengers later. Folded seats keep hinges and wiring intact, so you can revert quickly and avoid potential error lights from unplugged harnesses. Remove seats when you need a consistent flat load floor, want to reconfigure for modular storage, or plan long-term modifications—leave hinges in place to ease future reinstallations. During removal, work methodically: unlatch, unbolt each seat, label hardware, and stow components so you can troubleshoot wiring faults if they appear. Choose the option that frees your lifestyle without compromising functionality.
Tools, Parts & Safety Checklist for 4Runner Seat Removal
Before you start, gather the right tools and take basic safety steps: a ratchet with metric sockets (including common sizes for 4Runner bolts), a torque wrench, an assortment of socket sizes and extensions, and a helper to lift seats, plus gloves and eye protection. Confirm you have spare bolts and small plastic clips—outer seats often use six bolts, center pieces and hinges can use additional fasteners. Carry a small tray to keep hardware organized and labeled.
Check seat materials before handling; leather or fabric covers may hide trim clips or fasteners. Plan for proper weight distribution when lifting or storing seats; two people should share lifting to avoid strain and prevent damage. Use the torque wrench on reinstallation to avoid cross-threading and overtightening. Work on a flat surface, wear eye protection when prying clips, and disconnect power if your 4Runner has powered components. With these tools and safety steps, you’ll remove seats efficiently and responsibly.
Remove Rear Seat Bottoms (Step-by-Step, 6–30 Min)
Pop the rear seat bottoms up and fold them forward to expose the hinge area and fasteners. You’ll see six bolts and two plastic clips per seat. Grab a ratchet with metric sockets, pop off the plastic clips, then break the bolts loose. Work methodically: loosen each bolt a few turns in sequence before fully removing any to keep the part controlled. Expect 6–30 minutes depending on your experience; five minutes is possible if you know the routine.
Keep threads aligned during reinstallation to avoid cross-threading—turn bolts in gently until snug before torquing. A torque wrench is smart to have for final tightening. Ask a partner to help lift and maneuver the seat bottoms; they’re awkward and heavy. When you remove each seat, set it aside where it won’t scuff interior trim. These steps free your 4Runner for cargo, camping, or transformation and keep future seat installation straightforward and secure.
Remove Seatbacks, Hinges & Wiring Safely (Advanced Disassembly)
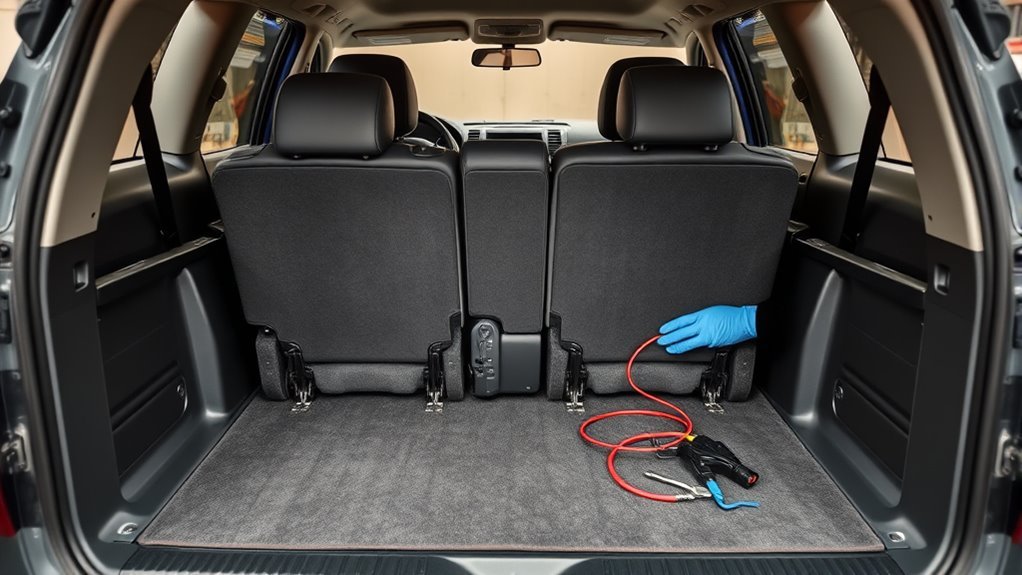
Start by folding the seat bottoms forward and securing them out of the way so you can access the seatback hinge bolts, clips, and any wiring harnesses without strain. For controlled seatback removal, unbolt the six outer bolts (and the center bolts if present) using a ratchet and metric sockets. Pop the two plastic clips—carefully, they’re fragile—and lift hinge assemblies free. Keep the work area clear and have help for heavy, awkward pieces.
- Inspect and label wiring harnesses before disconnecting to avoid dashboard errors; disconnect gently and tuck connectors away.
- Remove hinge bolts methodically, keeping fasteners organized and noting any model variations that change bolt count or clip type.
- Support the seatback as you free the last attachments; use a torque wrench for reinstallation and verify clips aren’t damaged.
You’ll practice safe wiring management and precise seatback removal, gaining freedom from clutter while preserving vehicle systems.
Build a Flat Sleeping Platform on a 4Runner (Bolt Patterns & Supports)
Start by mapping bolt patterns under the rear floor so you know which factory holes you can reuse and which will need new inserts or backing plates. Plan support placement to create a free‑floating platform with small legs that transfer load to the strongest bolt locations and avoid threading into thin sheet metal. Double‑check alignment and bolt size before final assembly to prevent cross‑threading and guarantee the platform sits perfectly flat.
Bolt Patterns Overview
Bolt patterns determine how the rear seats secure to your 4Runner and they’ll dictate the tools and technique you use to remove them; typically each outer seat uses six bolts while the center section can include extra hinges and plastic clips, so expect slight variations by model. You’ll want to identify bolt types (metric hex, carriage, or flange) and note fastener locations before you start. Use a ratchet and metric sockets, keep bolts organized, and enlist help for heavy sections.
- Inspect: map bolt locations, hinge points, and plastic clips; mark them for reinstallation.
- Remove: loosen bolts in opposing sequence to prevent binding; keep hardware ordered.
- Reinstall: follow installation tips—align, thread by hand, then torque to spec to avoid cross-threading.
Support Placement Options
1 option for support placement is a free-floating design that uses small, strategically placed legs to transfer load to the floor while leaving the seat bolt locations accessible; you’ll want the supports aligned with the 4Runner’s existing bolt pattern so they don’t block bolt access, sit clear of any retained hinges, and tie into a solid central support where the center seat bolts were removed. Use the six-bolt outer-seat pattern and any center hardware as locating points. Fabricate supports to match bolt patterns and clear hinges so you can remove or reinstall seats. Prioritize a support design that bridges the void left by the center bolts and distributes weight to multiple legs. Account for stability considerations: test for deflection, secure to floor bolts, and reinforce joints for safe sleeping use.
Troubleshooting: Reinstalling Seats, Sensors & Clearing Error Lights
When reinstalling the rear seats, align the bolt holes carefully and hand-thread fasteners first to avoid cross-threading. You’ll enforce proper seat alignment, fit plastic clips, and reconnect sensor wiring before torquing bolts to spec. If a stud nut was removed, reinstall it and verify torque—this step keeps the seat secure and your freedom intact.
- Inspect and seat clips: confirm plastic clips snap into place and the cushion sits flush; misaligned clips cause rattles and instability.
- Reconnect harnesses: plug the passenger-detection connector fully; partial connections trigger dashboard warnings and complicate error troubleshooting.
- Clear error lights: after reconnection, cycle ignition; if lights persist, use an OBD-II tool to read and clear codes or disconnect the battery briefly following safety steps.
If you’re prepared and practiced, reinstallation can take under 10 minutes. Work deliberately, use a torque wrench, and reclaim control of your vehicle space.
Frequently Asked Questions
Can I Remove Seats Without Disconnecting the Battery?
Yes — you can usually remove seats without disconnecting the battery, but you’ll use seat removal tools, follow safety precautions, and proceed methodically: unbolt anchors, detach wiring clips carefully, and secure removed parts for liberation and reuse.
Are Replacement Clips Available OEM or Aftermarket?
Yes — you can get OEM and aftermarket replacement options; choose OEM for fit, aftermarket for cost. For installation tips, unbolt, align clips, test latch engagement, torque fasteners, and liberate your interior confidently.
Will Removing Seats Affect My Vehicle Warranty?
About 60% of manufacturers won’t void warranties for non-damaging mods; you shouldn’t expect blanket denial. Check warranty implications: document seat removal, avoid wiring damage, and insist dealer proves any denied claim links directly to seat removal.
How Heavy Is Each Rear Seat for One-Person Lifting?
Each rear seat weighs about 40–60 pounds, so you’ll manage solo with proper lifting techniques: brace knees, keep load close, pivot with hips, use straps or a partner for awkward angles, and take breaks to avoid strain.
Can I Legally Drive Without Rear Seats Installed?
Yes — you can often drive without rear seats, but laws vary. Think of shedding anchors to feel free; check seat safety rules, secure cargo, and document vehicle modifications to avoid fines or liability before you hit the road.
Conclusion
Think of your 4Runner like a folding map: every panel you fold or remove reveals new routes. When you follow the steps—check tools, unlatch bottoms, handle wiring, bolt supports and test sensors—you’re charting a safe, reversible path. Keep fasteners labeled, torque specs met and error lights cleared. Done right, the space becomes a reliable campsite or cargo lane; if anything feels off, retrace your steps and restore the map before you drive.