On a RAV4, the Check Engine light signals active faults logged by the ECM—think oxygen sensors, EVAP canister valves, or wheel‑speed sensors—while the Maintenance light is a scheduled service reminder. You should scan OBD‑II for DTCs, inspect connectors, gas cap, and wheel sensors, and note any VSC/ABS cross‑alerts that often stem from shared sensors or wiring. Don’t ignore a steady CEL; continue for step‑by‑step diagnostics, common codes, and repair options.
Check Engine vs Maintenance Light: What Each One Means for Your RAV4

Although they use similar dash icons, the Check Engine Light and the maintenance light mean very different things for your RAV4: you’ll treat each as a distinct signal. The Check Engine Light flags a fault the ECM detected—oxygen sensors, charcoal canister filters (about 31% of failures), or other sensors (around 24%)—and generates Diagnostic Trouble Codes you read with OBDII Diagnostic Tools. You must address CEL codes promptly to protect Engine Performance and avoid escalating damage. The Maintenance Light, by contrast, is a schedule-based reminder for routine service—oil changes, inspections—triggered by mileage or time per the owner’s manual; it usually doesn’t emit standardized codes. Ignoring maintenance reminders erodes reliability and compromises performance over time, so you’ll follow intervals to preserve freedom of mobility. Use Diagnostic Tools for CEL issues; follow prescribed maintenance for the maintenance light. Your priority: diagnose immediate faults, maintain routine service, and reclaim control of your RAV4’s performance.
How Your RAV4’s Dashboard Self-Test Works at Startup
When you turn the key or push Start, your RAV4 runs a quick dashboard self-test that flashes every warning lamp—including the Check Engine and Maintenance lights—to verify the indicator circuits and the ECM’s ability to report faults. You’re seeing the self test significance immediately: the brief illumination confirms warning light functionality and circuit integrity before motion. If any lamp stays lit, the ECM has logged a diagnostic trouble code (DTC) or detected an active fault.
You’ll act on persistent lights—inspect gas cap, sensors, or seek diagnostic scanning—to reclaim control and freedom from uncertainty. The startup check is diagnostic, not alarmist: it’s your first line of defense for early detection and timely maintenance.
| Lamp Group | Normal Startup Behavior | Action if Stays Lit |
|---|---|---|
| CEL | Brief flash | Scan DTCs, investigate sensors |
| Maintenance | Brief flash | Schedule service |
| Other warnings | Brief flash | Diagnose specific system |
Why CEL, VSC, ABS, and 4WD Lights Often Appear Together
When the CEL comes on, you should know it can trigger VSC, ABS, and 4WD warnings because the engine control module will disable or limit related systems to protect drivability. Faulty components—most commonly wheel speed sensors—or damaged wiring can trip multiple circuits and produce simultaneous lights. If lights reappear intermittently, especially on high-mileage vehicles, run a targeted diagnostic for sensors and electrical faults rather than assuming separate failures.
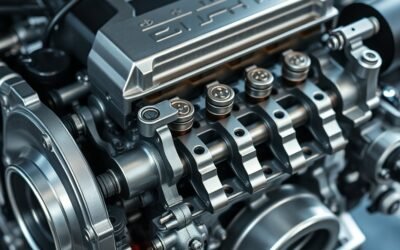
Engine Faults Affect Systems
If your engine control module detects a fault, it can disable or limit systems like VSC, ABS and 4WD because they depend on accurate engine data and sensor inputs. You should run engine diagnostics immediately when warning lights appear; the CEL stores DTCs that point to root causes. Common culprits include faulty O2 sensors (about 24% of CELs) and electrical shorts that trigger multiple systems. While wheel sensor failures often affect VSC/ABS, engine-related faults propagate through shared wiring, power feeds and ECM logic, producing cascading alerts. You’ll want systematic diagnostics: read codes, verify power and grounds, and isolate ECM outputs before replacing components. Resolve engine faults promptly to restore control systems and reclaim safe, uncompromised vehicle operation.
Wheel Sensor Or Wiring
Because wheel speed sensors feed both the ABS/VSC modules and the engine control module, a single sensor fault or damaged wiring can light the CEL, VSC, ABS, and 4WD indicators simultaneously. You should treat those concurrent lights as a linked fault rather than separate nuisances. Start with targeted sensor maintenance: clean sensors, check for debris, and confirm proper tone ring alignment. Perform a wiring inspection—look for chafing, corrosion, or connector contamination that yields intermittent signals. Pull diagnostic codes to distinguish a primary engine fault from a sensor-induced cascade; remember the ECM may disable VSC/4WD when it detects engine issues. Prioritize repairs that restore accurate wheel speed data so safety systems and engine control regain full function and you regain control of your vehicle and choices.
Common Causes on a RAV4: Charcoal Canister, Coolant Bypass, Wheel-Speed Sensors
When your RAV4 shows a CEL or maintenance light, check the charcoal canister first—it’s behind about 31% of CEL cases and often throws codes like P043F or P2401. Inspect the coolant bypass wiring and connectors for corrosion or coolant contamination, since electrical opens/shorts will flag the maintenance light. Finally, test wheel-speed sensors and clean or replace any that’re dirty or faulty, because they cause roughly 63% of VSC/ABS incidents and directly affect safety.
Charcoal Canister Problems
Although it’s easy to overlook, a failing charcoal canister is a leading cause of Check Engine Light triggers on RAV4s and demands prompt diagnostic attention. You’ll want charcoal canister maintenance and emissions system troubleshooting up front: canister filter failure causes ~31% of CEL events, raising fuel use, hard starts, and codes like P043F, P043E, P2401, P2402, P2419. Inspect canister, purge valve, hoses, and gas cap; a loose cap often initiates faults. Fix early to avoid worse engine performance and higher emissions.
| Item | Action |
|---|---|
| Symptoms | Increased fuel, hard starts |
| DTCs | P043F/P043E/P2401/P2402/P2419 |
| Inspections | Canister, hoses, purge valve |
| Priority | Prompt repair to prevent escalation |
Coolant Bypass Electrical
Shifting from charcoal canister faults, check the coolant bypass electrical system next—on 2019 RAV4s it’s electronically controlled and can light maintenance or warning indicators without relating to scheduled service. You’ll inspect for coolant leakage that contaminates electrical connections; moisture in connector housings often causes shorts or opens circuits and sets diagnostic trouble codes. Use an OBD-II scanner and freeze-frame data to identify specific PID failures or DTCs tied to the bypass actuator. Probe connectors for corrosion, continuity, and proper voltage under key-on and run conditions. Replace seals or harness sections where coolant has migrated. Prioritize targeted diagnostics over guesswork so you stay free from unnecessary part swaps and restore accurate indicator behavior quickly.
Wheel Speed Sensors
If you suspect ABS or VSC faults, start by checking the wheel speed sensors—they’re the primary inputs for those systems and account for roughly 63% of related failures on RAV4s, often due to dirt, impact damage, or connector corrosion. You should perform targeted sensor maintenance: clean sensor tips, inspect tone rings for debris or damage, and verify connector integrity. Use diagnostic tools to read ABS/VSC codes and monitor raw wheel speed data; inconsistent pulses confirm sensor or wiring faults. Remember electrical issues from the coolant bypass or charcoal canister–related CEL events can mask or mimic sensor problems, so cross-check CEL codes (including O2 sensor flags). Diagnose systematically, isolate wiring and ground paths, replace only proven-failed sensors, and retest to restore safe control-system operation.
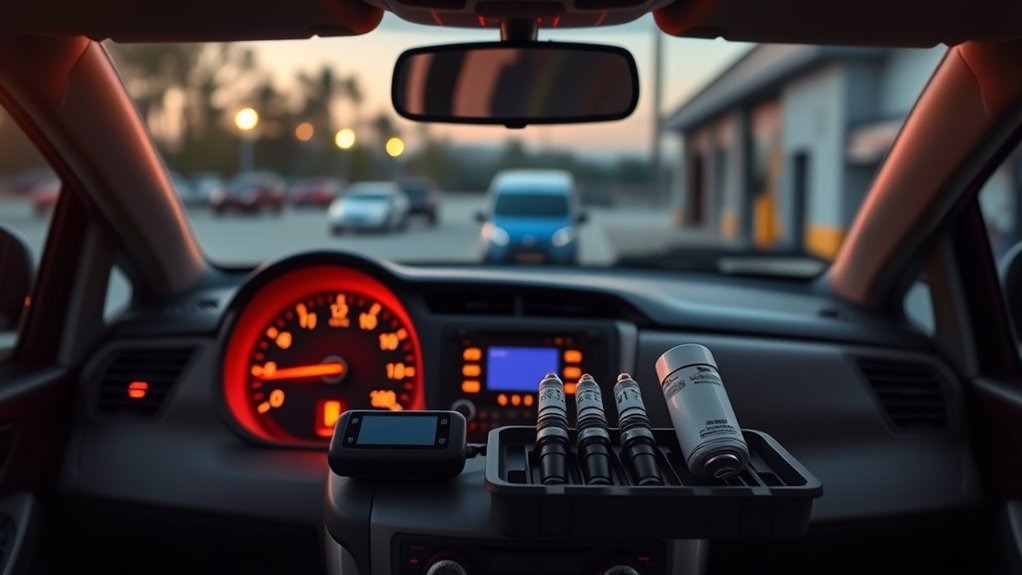
Quick RAV4 DIY Checks Before You Visit a Shop

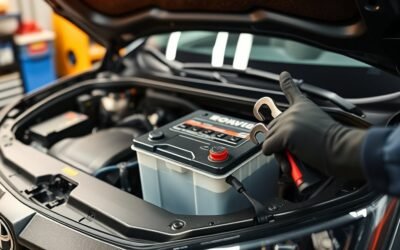
Start with these quick checks you can do yourself to narrow down why a RAV4 is showing a Check Engine or maintenance-related warning. First, verify the gas cap is tight and seats properly—loose caps cause about 19% of CEL triggers. Inspect visible electrical connectors for corrosion or coolant contamination, especially around coolant bypass lines, since compromised connectors create misleading dashboard warnings. Check brake fluid level and confirm the parking brake is fully released; low fluid can illuminate the BRAKE light and indicate hydraulic issues.
After a highway run, note any vibration issues or degraded performance; those symptoms often correlate with stored faults in high mileage concerns (e.g., ~150,000 miles). Use basic maintenance tips: visually secure hoses, fasteners, and grounding straps. Finally, retrieve OBDII codes at the diagnostic port to prioritize repairs before you visit a shop. These diagnostic-first steps free you from uncertainty and help you present clear data to a technician.
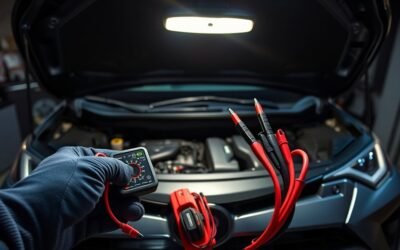
Read and Clear Codes: OBD‑II Scanner and Jumper Method
Now that you’ve checked caps, connectors and fluids, the next step is to read stored faults so you know what you’re dealing with. Use OBD II basics: locate the diagnostic port under the dash near the hood release, plug in a scanner, power the ignition, and run Code reading to pull P‑codes from the engine control module. Codes beginning with “P” point to engine and powertrain systems; note them verbatim.
If you don’t have a scanner, many auto parts stores will read codes for free so you can act without delay. Clearing ECM codes by disconnecting the battery resets only engine history; it won’t clear ABS/VSC faults. For ABS/VSC, use the jumper method: with ignition off, connect pins 4 and 13 at the diagnostic connector, then tap the brake pedal eight times within five seconds per procedure to trigger code erase. Verify lights go out after a drive cycle. You’ll gain control by diagnosing first, then choosing targeted fixes.
Interpreting Common Codes: P2401/P2419, P043F, Wheel‑Sensor Faults
When you pull codes like P2401/P2419 or P043F, or see ABS/VSC wheel‑sensor faults, treat them as targeted clues rather than vague warnings: you’ll diagnose cause, scope, and risk. P2401/P2419 implicate the evaporative emissions system—often the charcoal canister or purge/vent circuits—so inspect hoses, valves, and connections; a failing vent valve (P043F) directly degrades emissions system control and fuel efficiency. Wheel‑sensor faults trigger ABS/VSC lights; 63% stem from damaged or contaminated wheel speed sensors, which you’ll spot with visual checks, cleaning, and connector tests. Remember intermittent CELs on high‑mileage rigs can mean loose caps or sensor malfunction rather than catastrophic failure. Use capable diagnostic tools—OBD‑II and manufacturer scanners—to read EVAP and ABS modules; some ABS/VSC codes won’t appear on basic readers. Prioritize precise maintenance practices: replace or clean sensors, verify wheel alignment affecting sensor readings, and confirm the charcoal canister circuit integrity to restore vehicle performance and emissions compliance.
Repair Costs & Choices: DIY Parts, Shop Labor, and Warranty Tips
Having identified targeted codes and narrowed likely causes, you’ll next weigh repair routes: DIY parts, shop labor, or warranty claims. You’ll assess DIY Savings by comparing parts options — spark plugs or gas caps can cost $10–$50 and you’ll save considerably versus dealership fees. Evaluate Repair Strategies: simple swaps you can handle; electrical or coolant-bypass faults usually need professional diagnostics to avoid misdiagnosis.
Factor Labor Costs: shop rates generally run $75–$150/hour; complex diagnostics add hours. Use Warranty Insights to check coverage before authorizing work — a covered repair removes out-of-pocket risk and alters your cost-benefit analysis. Cross-reference Parts Options between OEM and aftermarket for reliability versus price.
Tap Community Resources: forums and local groups give tested parts sources and step-by-step guides, reducing risk if you choose DIY. Make choices that maximize autonomy while minimizing financial exposure; prioritize accurate diagnosis to avoid repeated costs.
What to Tell Your Mechanic: Vital Info and Questions After Diagnostics
Tell your mechanic the exact diagnostic trouble codes (DTCs) that were stored and when they appeared so they can correlate codes to systems and freeze-frame data. Describe recent symptoms precisely — vibrations, power loss, or changes after highway runs or wet conditions — and note when they started. Also list any recent maintenance or sensor work that might relate to the current codes.
Provide Diagnostic Codes
If you pulled codes before the shop visit, give your mechanic the exact Diagnostic Trouble Codes (DTCs) and freeze-frame data so they can reproduce conditions and prioritize tests; also report any intermittent symptoms (vibration, temp swings, warning lights returning), checks you’ve already done (gas cap tightness, visible coolant leaks), and whether the scan included electrical/self-test results for systems like the coolant bypass that can trigger misleading maintenance alerts. Provide the code list, probable system, and timestamp so they can apply diagnostic tools and troubleshooting techniques efficiently.
| Code | System | Notes |
|---|---|---|
| P0301 | Ignition | Freeze-frame RPM/load |
| P2187 | Fuel Trim | Cold-start data |
Ask which codes map to maintenance vs CEL and what targeted tests they’ll run.
Describe Recent Symptoms
When you report recent symptoms after diagnostics, give concise, timestamped descriptions of what you felt, heard, or saw (e.g., “vibration at 2,200–2,600 RPM after 15 minutes highway driving, persisting in light snow”). Tell your mechanic when lights illuminated, which lights stayed on, and any sequence—CEL, VSC, then maintenance. Note recurring vibration causes: wheel sensor faults, imbalance, or driveline issues. Mention related conditions: coolant bypass code found during scan, electrical faults, or loose gas cap. Report exact RPM range, speed, duration, road surface, and weather. Ask which DTCs map to the symptoms and whether sensors or wiring were tested. Clear, timestamped data speeds accurate diagnosis, helps avoid unnecessary parts changes, and frees you from repeated visits.
Preventive Steps to Avoid Recurring Dashboard Lights on a RAV4
Start by routinely checking a few high-impact systems to prevent recurring dashboard lights on your RAV4: verify the gas cap condition and tightness (loose/damaged caps cause about 19% of CEL events), scan for stored OBDII codes regularly to catch early faults like O2 sensor failures (≈24% of CEL triggers), inspect wheel speed sensors and their wiring since 63% of VSC/ABS faults come from sensor issues, and address any coolant leaks promptly to avoid cascade electrical or maintenance warnings; after repairs, clear stored codes so the instrument cluster reflects the true status. Use preventive maintenance as liberation: set a simple schedule for cap inspection, sensor connector checks, and coolant system pressure tests. Carry an OBDII reader or subscribe to remote diagnostics to pull codes before lights escalate. When you replace components, verify harness integrity and torque specs, then clear codes and road-test to confirm resolution. Treat dashboard alerts as diagnostic prompts, not nuisances, and you’ll reduce repeat faults and maintain control.
Frequently Asked Questions
What Does It Mean When Your Toyota RAV4 Says Engine Maintenance Required?
It means your RAV4 signals scheduled engine maintenance is due via warning indicators; you should run diagnostics, verify oil/service intervals, and address any electrical or coolant-related fault codes promptly so you regain control and safety.
What Does Check Engine Light Mean in RAV4?
Like a flickering alarm light, the Check Engine Light means your RAV4’s ECM detected a fault; you should run engine diagnostics, read warning indicators with an OBDII reader, and act to regain vehicle freedom.
Conclusion
You’ve learned the difference between the check engine and maintenance lights, common RAV4 faults, quick DIY checks, and what to tell your mechanic — now act. Treat dashboard lights like a ship’s warning bell: they don’t guarantee doom, but they demand attention. Start with basic scans, fluid and sensor checks, then decide DIY versus pro based on complexity and warranty. Stay methodical, document symptoms, and address issues promptly to avoid cascading failures.