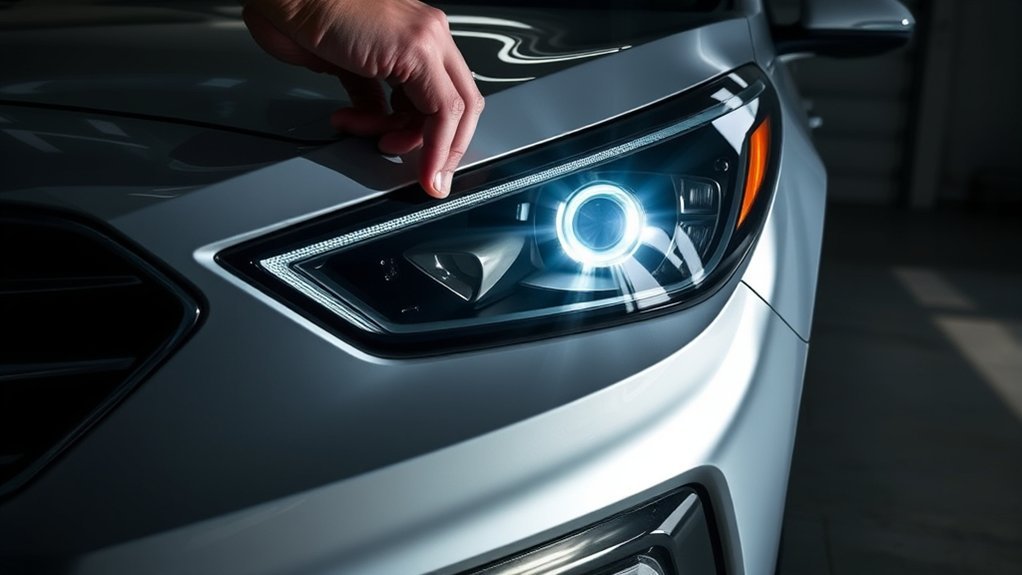
Adjusting the headlight aim on a Hyundai Sonata is a practical DIY check when one beam looks too high, too low, or uneven after bulb replacement, front-end work, or a collision. The goal is simple: set the low-beam cutoff low enough to avoid glare for oncoming drivers while keeping enough light on the road ahead.
Quick Answer
Park your Hyundai Sonata on level ground facing a wall, mark the headlight center height, and adjust the low-beam cutoff so it sits about 3 inches below that mark at 25 feet. Turn each adjuster slowly, check one headlight at a time, and stop if the beam pattern will not respond evenly.
Key Takeaways
- Hyundai’s aiming guide uses a low-beam cutoff drop of 100 mm at 10 m, which is about 3 inches at 25 feet.
- Use your Sonata’s beam cutoff, not just the brightest glare spot, as the main aiming reference.
- Different Sonata years and trims may use different adjusters, so do not force a screw, wheel, or socket that does not move freely.
- Have the lights inspected by a technician after a collision, headlight assembly replacement, broken adjuster, persistent moisture, or a failed LED module.
At a Glance
| Time Required | 20–40 minutes |
| Difficulty | Beginner to moderate |
| Tools Needed | Tape measure, masking tape, flashlight, cardboard or towel, screwdriver or socket/wrench that fits your adjuster |
| Cost | Usually $0 if the adjusters and bulbs are working |
Quick Guide: Adjusting Your Headlights
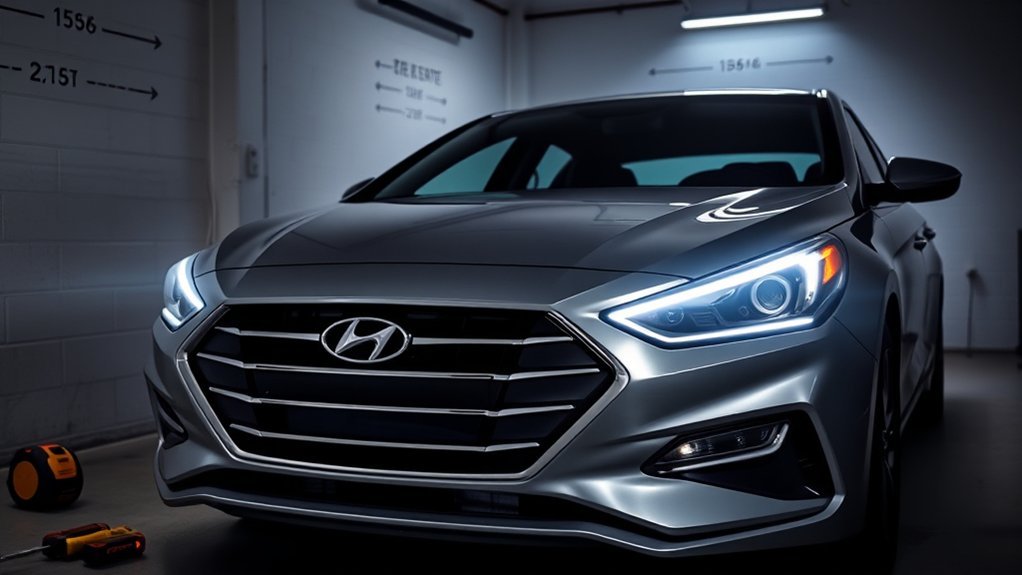
For a safe basic adjustment, park your Hyundai Sonata on a flat surface facing a wall or garage door. Keep the car straight, inflate the tires to the correct pressure, remove unnecessary cargo, and make sure the headlights and battery are in normal condition. If your Sonata has a headlight leveling switch, set it to “0” before checking aim.
Hyundai’s headlight aiming guidance shows a low-beam cutoff drop of 100 mm at 10 m. For a common home setup, that works out to about 3 inches lower at 25 feet. Use that as a practical reference, then confirm the beam pattern looks even and does not shine into oncoming-driver eye level.
Warning: Do not aim the lights higher just because it helps you see farther. A low beam that is too high can create glare for oncoming drivers and may fail a vehicle inspection.
Locate the vertical and horizontal adjustment points behind the headlight assembly. Depending on your Sonata’s year and trim, the adjuster may accept a screwdriver, socket, wrench, or built-in wheel. Turn the adjuster in small increments and watch the beam move on the wall. If it moves the wrong way, reverse direction. Do not force a stuck adjuster.
Common Symptoms of Misaligned Headlights
Headlight aim problems are easiest to spot at night, but you can often see the clues in a driveway or garage. Misalignment usually affects where the beam lands, while a bad bulb, damaged lens, or failed module affects brightness and beam quality.
Dim Headlight Performance
If both headlights look weak, alignment may not be the only problem. Dirty lenses, aging halogen bulbs, low system voltage, moisture inside the housing, or a failing LED assembly can all reduce useful light. Clean the lenses first and compare the beam pattern before adjusting anything.
Uneven Light Distribution
Uneven beams usually show up as one light pointing higher, lower, farther left, or farther right than the other. The table below can help you separate an aiming issue from a bulb or housing problem.
| Symptom | Likely Cause | Action Required |
|---|---|---|
| One beam points much higher | Vertical aim is too high or the bulb/assembly is seated incorrectly | Check bulb seating, then adjust aim |
| One beam is dim but aimed correctly | Weak bulb, cloudy lens, wiring issue, or LED module problem | Diagnose brightness before adjusting |
| Beam pattern is scattered | Damaged reflector, wrong bulb, moisture, or poor bulb seating | Inspect housing and bulb fitment |
| Drivers flash their lights at you | Low beams may be aimed too high or vehicle rear is heavily loaded | Remove load, recheck aim, and lower if needed |
What Tools Do You Need to Adjust Your Headlights?
Most Hyundai Sonata headlight aim checks require only simple tools. Gather everything before you start so you can make small, controlled adjustments instead of guessing.
- Tape measure for the 25-foot distance and headlight-center height
- Masking tape or painter’s tape for wall marks
- Flat wall or garage door on level ground
- Cardboard, towel, or fender cover to block one headlight at a time
- Flashlight for finding the adjusters
- Screwdriver, socket, or wrench that fits your Sonata’s adjuster
- Owner’s manual or official Hyundai manual page for your model year
Pro Tip: Put a small piece of tape on the wall before every adjustment. It gives you a reference point, so you can undo a change if the beam moves the wrong way.
Step-by-Step Guide to Adjusting Your Headlights
Follow these steps slowly. The most common mistake is making large turns before confirming how the beam reacts.
- Prepare the car. Park on flat ground, set the parking brake, inflate the tires properly, remove extra cargo, and keep the fuel/load close to normal driving conditions.
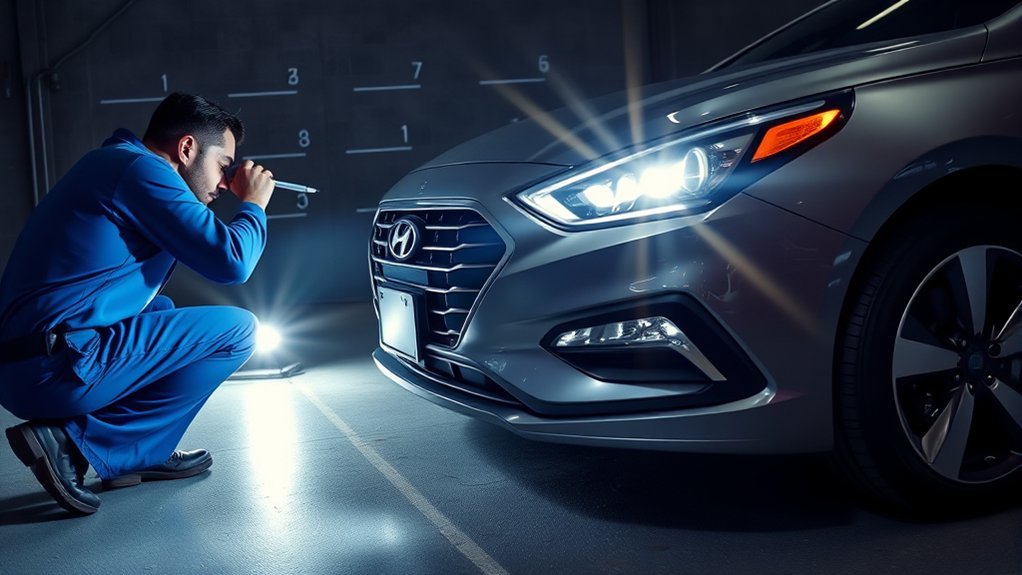
- Position the Sonata. Face a flat wall or garage door from 25 feet away. Measure from the wall to the front of the headlight area, not the rear bumper.
- Mark the wall. Measure from the ground to the center of each headlight. Place a horizontal tape line at that height, then add vertical tape lines aligned with the center of each headlight.
- Add the cutoff target. Place a second horizontal reference about 3 inches below the headlight-center line. This approximates Hyundai’s 100 mm drop at 10 m.
- Turn on low beams. Use low beams, not high beams or daytime running lights. Block one headlight while adjusting the other.
- Adjust side-to-side first if needed. Center the beam pattern near the vertical mark without pushing the beam into oncoming-traffic space.
- Adjust vertical aim. Move the low-beam cutoff until it sits near the lower reference line. Turn the adjuster slowly and watch the wall.
- Repeat on the other side. Match the beams so both cutoffs are even and controlled.
- Road-check safely. Test on a dark, low-traffic road. You should see the lane clearly without lighting up signs, mirrors, or the cabin of vehicles ahead.
Note: Some beam patterns have a step or upsweep on one side. Aim the cutoff according to the design pattern; do not try to make a modern projector or LED beam look like a perfectly flat rectangle.
How to Check for Proper Headlight Alignment?
Proper alignment means the low beams illuminate the road without throwing glare into oncoming traffic. The Insurance Institute for Highway Safety notes that good low beams should light the road ahead without temporarily blinding oncoming drivers.
Visual Inspection Techniques
Start with a daylight inspection. Confirm both headlight lenses are clear, the housings are secure, and the bulbs or assemblies are seated correctly. A loose housing, wrong bulb, or damaged mounting tab can make adjustment impossible.
- Look for water droplets or heavy fogging inside the housing.
- Check whether one lamp sits loose or visibly crooked.
- Confirm both beams have a similar shape and cutoff.
- Make sure the vehicle is not loaded heavily in the trunk during the check.
Alignment Measurement Steps
With the vehicle 25 feet from the wall, compare each low-beam cutoff to your lower tape line. If the cutoff is far above the line, the light is likely too high. If it is far below the line, your road reach may be too short. Adjust only until the pattern is close, even, and stable.
Troubleshooting Common Headlight Issues

If the beam will not adjust correctly, stop and diagnose the cause. Turning the adjuster harder can break the headlight housing or strip the mechanism.
- Beam does not move: The adjuster may be stripped, disconnected, or broken.
- Beam moves but will not stay in place: The adjuster or housing mount may be damaged.
- Beam shape looks smeared: The bulb may be installed incorrectly, the lens may be cloudy, or the reflector/projector may be damaged.
- Moisture keeps returning: Hyundai notes that some condensation can clear after driving with the light on, but persistent moisture should be inspected by an authorized dealer.
- Light flickers or goes out: Hyundai advises contacting an authorized dealer if a light goes out or continues to flicker.
When to Replace Headlight Bulbs for Optimal Adjustment?
Replace a headlight bulb when it is burned out, noticeably dimmer than the other side, discolored, flickering, or the wrong type for the housing. A new bulb can slightly change the beam pattern, so always recheck headlight aim after bulb or headlight assembly replacement.
Hyundai advises using the same wattage when replacing a burned-out bulb and warns that many vehicle light bulbs are difficult to replace because other parts may need to be removed. If your Sonata has a sealed LED assembly, persistent flickering, or access that requires headlight removal, professional service is the safer choice.
Why Regular Maintenance of Headlights Is Crucial
Clean, correctly aimed headlights help you see lane markings, pedestrians, curves, and hazards sooner at night. They also reduce glare for other road users. Check your headlight aim after a bulb replacement, collision, front-end repair, suspension work, or anytime the beam pattern suddenly changes.
A good headlight adjustment is not about making the beam as high as possible. It is about putting usable light on the road while keeping glare out of other drivers’ eyes.
Safety Regulations for Headlight Aiming
Headlight rules vary by location, and inspection requirements can differ by state or province. In the United States, lighting equipment is governed under Federal Motor Vehicle Safety Standard No. 108, which covers lamps, reflective devices, and associated equipment. The standard also defines headlamp aiming hardware such as aiming screws.
Legal Requirements Overview
If your headlights are aimed too high, too low, or too far to one side, your vehicle may be unsafe and may fail a safety inspection where headlight aim is checked. If you recently replaced a headlight assembly or repaired collision damage, a shop with optical aiming equipment can verify the aim more accurately than a wall test.
Proper Alignment Techniques
Use the wall method as a careful DIY check, then confirm the result on the road. Adjust both headlights to the same reference setup, make small changes, and avoid guessing. If the pattern looks distorted, do not compensate with aim; fix the bulb seating, lens, housing, or wiring issue first.
Tips for Driving With Properly Adjusted Headlights
- Use low beams for normal nighttime driving and high beams only when there is no oncoming traffic or nearby vehicle ahead.
- Clean the lenses regularly; cloudy lenses can mimic poor aim.
- Recheck aim after changing bulbs, replacing a headlight assembly, or carrying heavy rear cargo.
- Do not use aftermarket bulbs that do not match the housing design or wattage requirements.
- If other drivers keep flashing their lights at you, check aim before assuming they are mistaken.
When to Get Professional Help
DIY adjustment is fine for a basic aim check, but some problems need professional inspection. Schedule service if the adjuster is stuck, the housing is cracked, the vehicle was in a collision, the beam pattern is distorted, the LED module fails, moisture keeps returning, or the lights cannot be brought into alignment with small adjustments.
Frequently Asked Questions
Can I adjust Hyundai Sonata headlights without professional help?
Yes, you can perform a basic wall-method adjustment at home if the bulbs, housings, and adjusters are in good condition. Use level ground, accurate tape marks, and small adjustments. If the beam pattern is distorted or the adjuster does not respond, get professional help.
What if my headlights are still misaligned after adjustment?
Check for a wrongly seated bulb, broken mounting tab, damaged headlight housing, stripped adjuster, suspension change, or collision damage. If the beam will not move normally or will not hold its position, the headlight assembly may need repair or replacement.
Do I need to adjust headlights after replacing bulbs?
Yes, at least recheck the aim. A replacement bulb or headlight assembly can change the beam pattern, especially if the bulb is not seated perfectly. Hyundai also notes that headlight aim should be adjusted after a collision or when the headlight is replaced.
Can weather conditions affect headlight alignment?
Normal rain, fog, or snow usually does not physically change headlight aim, but it can make poor aim more noticeable. Ice, dirt, or condensation can also reduce light output. Impacts, heavy cargo, suspension changes, bulb replacement, and damaged housings are more common causes of actual misalignment.
How often should I check my headlight alignment?
Check aim any time the beam pattern looks wrong, after replacing bulbs or a headlight assembly, after a collision, after suspension work, or when carrying heavy rear cargo. A quick visual check every few months is a good habit for night-driving safety.
Conclusion
To adjust Hyundai Sonata headlights correctly, start with a flat surface, accurate wall marks, and Hyundai’s low-beam cutoff reference. Aim for about a 3-inch drop at 25 feet, adjust one light at a time, and make small changes until both beams are even. If the adjusters, housing, bulb seating, or LED assembly are damaged, skip the guesswork and have the lights professionally inspected.
Sources
- Hyundai Owner’s Manual: Headlight aiming — supports setup steps, aiming lines, 100 mm at 10 m cutoff reference, and leveling-switch note.
- Hyundai Owner’s Manual: Light bulbs — supports bulb safety, dealer-service guidance, moisture/flicker cautions, and re-aiming after replacement or collision.
- 49 CFR § 571.108, FMVSS No. 108 — supports U.S. lighting equipment and headlamp aiming terminology.
- IIHS: Headlights — supports the safety point that properly aimed low beams should illuminate the road without excessive glare.
- NHTSA Vehicle Headlamp Aim Angle Test Procedure and Tolerance Research — supports current research into on-vehicle headlamp aim-angle procedures and tolerances.