Replacing the cabin air filter in your Toyota Supra is essential for maintaining air quality and ideal HVAC performance. You’ll notice reduced airflow, unpleasant odors, or allergy symptoms if it’s dirty. To start, gather Torx screwdrivers and a vacuum. Remove the glove box to access the filter, then clean the compartment thoroughly before installing the new filter, ensuring the airflow direction is correct. For additional tips on sourcing and installation, keep going to enhance your knowledge.
Why Neglecting Your Cabin Air Filter Can Impact Your Health and Vehicle Performance
Neglecting your cabin air filter can considerably impact both your health and vehicle performance. A worn filter reduces airflow from vents, leading to discomfort and potential overheating of your HVAC system. This inefficiency can cause performance effects that compromise your driving experience. Poor air quality inside the vehicle increases health impacts, heightening allergy symptoms and respiratory issues. Accumulated dirt and pollutants create unpleasant odors, detracting from your enjoyment on the road. Regularly changing your cabin air filter, ideally every 12,000 to 15,000 miles, enhances HVAC efficiency and prolongs its lifespan. If you often drive in high pollution areas or heavy traffic, you’ll need to replace the filter more frequently to guarantee clean air circulation and maintain peak vehicle performance.
Signs That Your Cabin Air Filter Needs Replacement
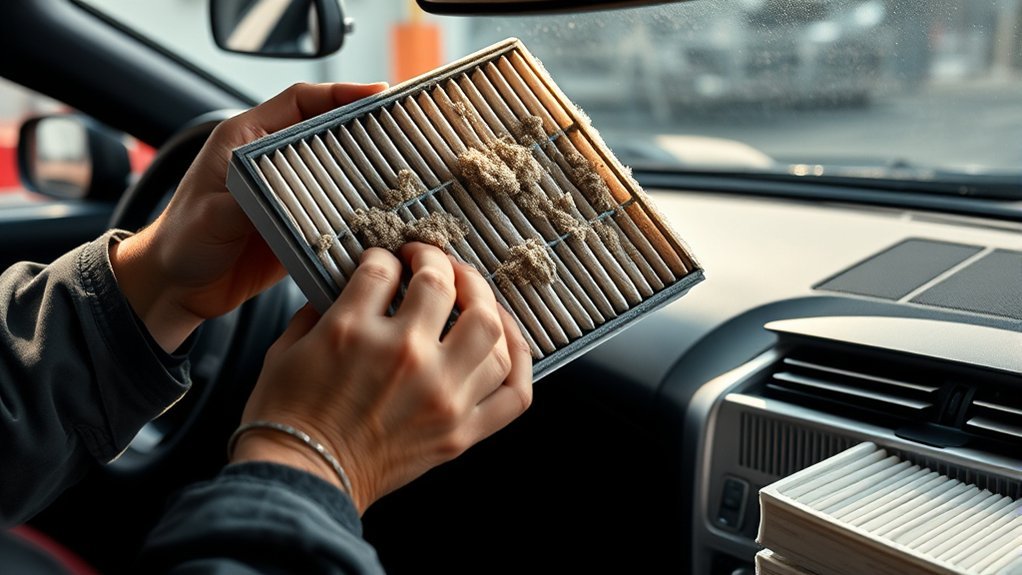
If you notice reduced airflow from your vents, it’s a clear sign that your cabin air filter may be blocked and needs replacement. Unpleasant odors inside your vehicle can also indicate a dirty filter, allowing external smells to infiltrate your cabin. Additionally, if you’re experiencing increased allergy symptoms while driving, it’s time to assess the filter’s effectiveness in trapping pollutants.
Symptoms of Poor Airflow
When you notice reduced airflow from your vents, it’s often a sign that your cabin air filter needs attention. This reduced airflow can lead to airflow issues, impacting your comfort while driving. If you experience increased allergy symptoms, such as sneezing or congestion, your filter may not be effectively trapping allergens. Additionally, unusual noises from the HVAC system can indicate that airflow is restricted due to a clogged filter. Regular filter maintenance is essential, especially if you frequently drive in high pollution areas or heavy traffic, as these conditions increase the filter’s workload. By addressing these symptoms promptly, you guarantee a clean, comfortable driving environment and maintain your vehicle’s performance.
Unpleasant Odors Inside Vehicle
Unpleasant odors inside your vehicle can signal a clogged or dirty cabin air filter. If you notice a musty smell or odors from outside, it’s a strong indication that the filter needs replacement. A dirty filter can harbor mold, mildew, and bacteria, compromising your driving experience. Frequent driving in urban areas with high pollution exacerbates these odors, emphasizing the importance of regular filter maintenance. To improve air quality, implement effective odor elimination strategies by replacing the cabin air filter as needed. Keep an eye on airflow from the vents; reduced airflow often signals obstruction. By following these filter maintenance tips, you can guarantee a fresher, healthier environment inside your Toyota Supra.
Increased Allergy Symptoms While Driving
Increased allergy symptoms while driving often signal that your cabin air filter is clogged or worn out. This obstruction restricts airflow and fails to trap allergy triggers, compromising your driving comfort. If you notice any of the following signs, it’s time to replace your filter:
- Persistent sneezing or coughing
- Increased nasal congestion
- Unpleasant odors from the vents
- Reduced airflow from the HVAC system
- Elevated pollen and dust levels inside the vehicle
Drivers in high-pollution areas may experience heightened symptoms, emphasizing the need for regular filter replacements. Aim to replace your cabin air filter every 12,000 to 15,000 miles to maintain ideal air quality and alleviate allergy symptoms while driving.
Tools You’ll Need for the Replacement Process
To successfully replace the cabin air filter in your Toyota Supra, you’ll need a few specific tools to streamline the process. First, grab a set of Torx screwdrivers to remove the screws securing the glove box. A box cutter or similar sharp tool will help you cut any necessary access points in the air box. If you need to modify the filter doors, a step drill bit is invaluable for creating neat holes. Don’t forget a vacuum or damp rag to clean the filter space before installation. Finally, consider having a rubber seal on hand to guarantee an airtight fit and prevent air leaks. These tools will aid in managing various filter types and implementing effective installation tips.
How to Remove the Glove Box: A Step-by-Step Guide
To remove the glove box, you’ll need a few basic tools, including a screwdriver. Follow these step-by-step instructions to guarantee a smooth removal process. With the right approach, you can access the cabin air filter efficiently.
Necessary Tools Required
Removing the glove box in your Toyota Supra requires just a few essential tools. Having the right tools guarantees a smooth process as you prepare to access various cabin filter types and their recommended filter replacement frequency.
- Flathead screwdriver
- Phillips screwdriver
- Pliers (optional for stubborn clips)
- Clean cloth (to catch any debris)
- Flashlight (for better visibility)
With these tools, you can effectively remove the screws that secure the glove box pin, allowing you to lower the glove box for easy access to the cabin air filter cover. This simple preparation will streamline your filter replacement process, keeping your vehicle’s air quality in check.
Step-by-Step Instructions
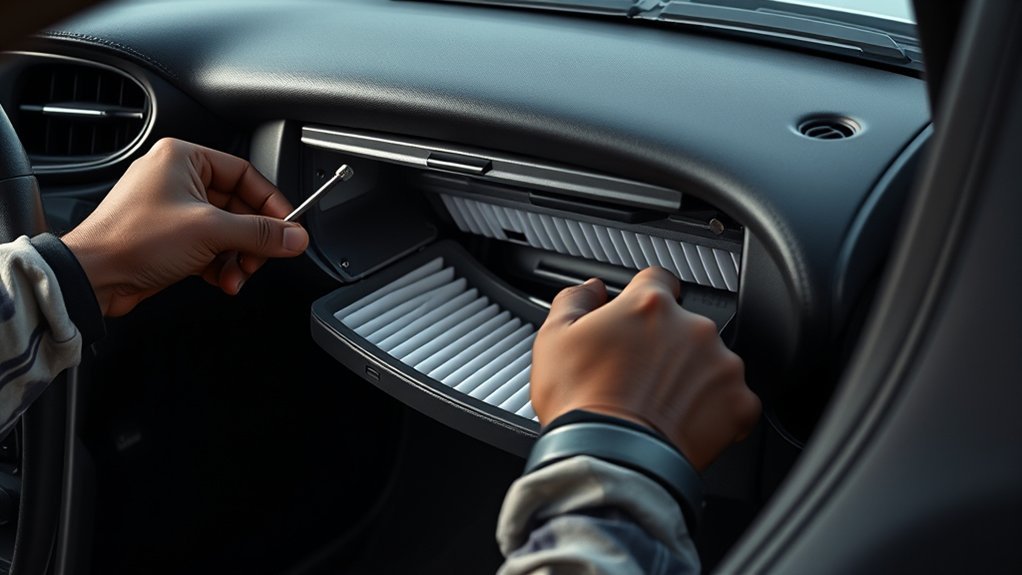
With your tools in hand, you’re ready to tackle the glove box removal process in your Toyota Supra. Start by opening the glove box and emptying its contents to access the screws securing the pin. Locate these screws and remove them to allow the glove box to lower fully. Gently press the sides of the glove box to lower it, revealing the black cover concealing the cabin air filter. Carefully detach this cover by squeezing the tabs and access the old filter. After removing it, clean the cavity thoroughly, preparing for the new filter installation. Remember, regular cabin filter maintenance guarantees peak performance, so adhere to the recommended filter replacement frequency for a better driving experience.
Tips for Smooth Removal
When you’re ready to remove the glove box in your Toyota Supra, begin by confirming all contents are cleared out. Follow these steps for a smooth removal:
- Locate and remove screws securing the glove box pin.
- Gently press the sides of the glove box to lower it.
- Identify the black cover protecting the cabin air filter.
- Squeeze the tabs to remove the cover and access the filter.
- After replacing the filter, verify it’s positioned correctly for airflow.
Here’s How to Easily Remove Your Old Cabin Air Filter
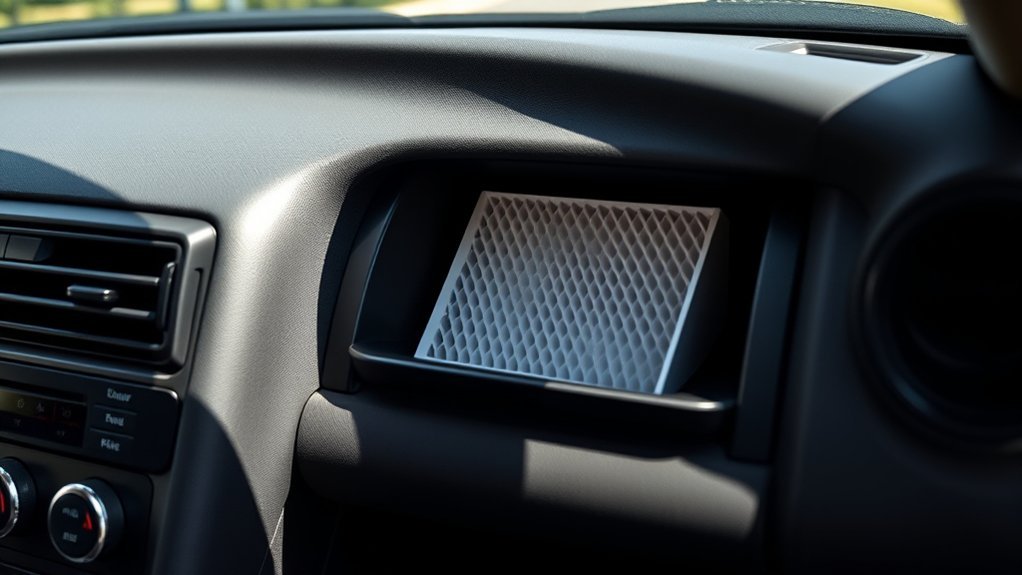
To access your cabin air filter, start by removing the glove box pin; make sure you’ve emptied the glove box beforehand. Gently press the sides of the glove box to lower it, exposing the black cover over the cabin air filter. Squeeze the tabs on the cover to remove it, then carefully pull out the old cabin air filter, noting the airflow direction for the new filter. Regular maintenance frequency is essential for reaping cabin filter benefits, such as improved air quality and HVAC efficiency. Clean the filter compartment with a damp rag or vacuum to eliminate debris. Finally, securely place the new cabin air filter in the correct orientation, snap the cover back on, and reassemble the glove box.
Cleaning the Cabin Air Filter Compartment
Before installing your new cabin air filter, you need to clean the compartment thoroughly. Use a damp rag or vacuum to remove any dirt and debris, ensuring you maintain ideal airflow. Don’t forget to check for mold or mildew, as these can impact air quality and should be addressed before proceeding.
Cleaning Tools Needed
Cleaning the cabin air filter compartment requires specific tools to guarantee excellent results. Proper filter maintenance is essential for optimal air quality, so gather the following tools:
- Damp rag or microfiber cloth: Use this to wipe down surfaces, ensuring cleanliness for the new filter.
- Vacuum cleaner with hose attachment: This helps remove dust and debris from tight spaces.
- Soft brush: Keep this handy to dislodge stubborn dirt in corners and crevices.
- Flashlight: Use it to inspect for mold or mildew, which can indicate moisture issues.
- Trash bag: For disposing of any debris you remove.
With these tools, you’ll set the stage for a successful cabin air filter replacement.
Debris Removal Techniques
While you prepare to install the new cabin air filter, it’s vital to remove any debris that could hinder airflow. Start by inspecting the filter compartment for common debris types, like dirt, leaves, and even mold. Use a damp rag or a vacuum to carefully clean the area around the filter housing, ensuring peak air quality. Regular cleaning frequency is important; aim to do this every time you replace the filter or at least twice a year. Also, check the rubber seals around the housing for wear or damage, as replacing these can prevent air leaks. Keeping the compartment clean will enhance your HVAC system’s performance and prolong the lifespan of your new filter.
Maintaining Air Quality
Maintaining air quality in your Toyota Supra involves more than just replacing the cabin air filter; it requires a thorough cleaning of the filter compartment. This step guarantees peak HVAC performance and enhances your driving experience. Follow these filter longevity tips for better air quality benefits:
- Inspect for mold or mildew, especially in humid climates.
- Use a damp cloth or vacuum to eliminate dirt and debris.
- Confirm the compartment is completely dry before installing the new filter.
- Regularly clean the compartment to prevent contamination.
- Replace the cabin air filter every 12,000 to 15,000 miles.
Tips for Installing Your New Cabin Air Filter Correctly
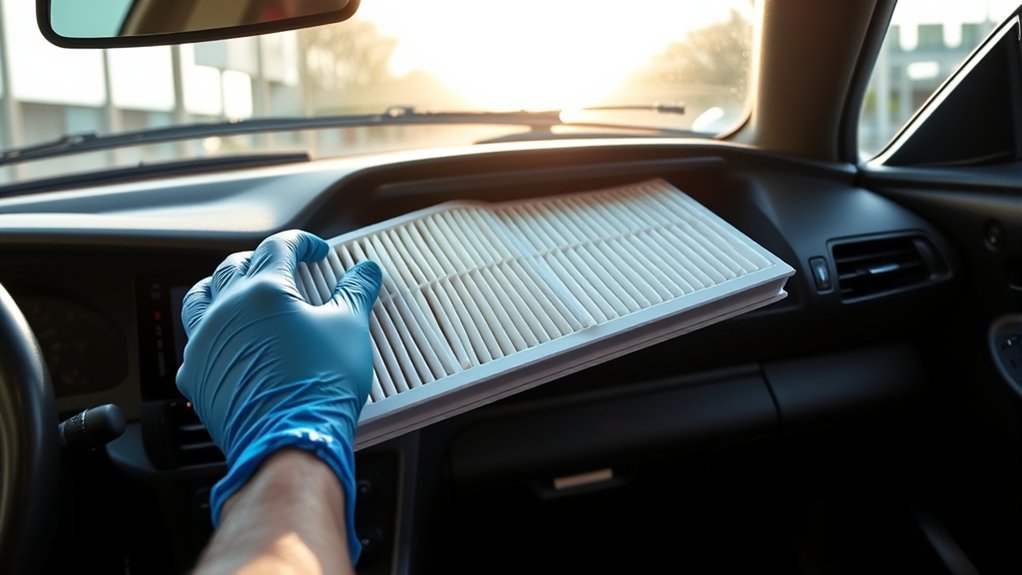
To guarantee a successful installation of your new cabin air filter, it’s crucial to start with the correct part number, such as 88880-30040 for the SC300, to avoid compatibility issues down the line. Use a Torx screwdriver to remove any screws securing the glove box or cover for easier access to the cabin air filter compartment. Pay attention to the airflow direction marked on the new filter to verify it’s installed correctly for peak performance. Clean the filter compartment with a damp cloth or vacuum to enhance air quality. After installation, securely reattach the glove box and screws to prevent rattling while driving.
| Step | Action | Purpose |
|---|---|---|
| Verify part number | Confirm compatibility | Avoid installation issues |
| Remove screws | Access filter compartment | Simplify installation |
| Clean compartment | Improve air quality | Maximize filter benefits |
Essential Tips for Seamlessly Reassembling Your Glove Box
After successfully installing your cabin air filter, you’re ready to reassemble the glove box. Keep these reassembly tips in mind for a smooth process:
- Verify the glove box is completely empty to avoid damage.
- Carefully lower the glove box by pressing the sides to release it from the clips.
- Align the glove box properly with the pin when lifting it back into position.
- Reattach screws or retainers in the order they were removed for stability.
- Before closing the glove box, double-check that the cabin air filter cover is securely snapped back.
Following these steps will help you avoid air leaks and confirm your glove box functions correctly, enhancing your driving experience.
Why a Fresh Cabin Air Filter Matters
A fresh cabin air filter greatly enhances your vehicle’s air quality, guaranteeing you breathe cleaner air while driving. By regularly replacing your filter, ideally every 12,000 to 15,000 miles, you reduce allergens and pollutants, markedly improving your overall comfort. Different filter types, including activated carbon options, can effectively trap odors and contaminants. Installing a new filter not only boosts airflow from vents but also enhances your HVAC system’s efficiency, preventing costly repairs down the line. During allergy seasons or in high pollution areas, a clean cabin air filter can transform your driving experience. Prioritizing this simple maintenance step guarantees a healthier environment inside your Toyota Supra, liberating you from discomfort caused by stale air.
Shop Smart: Where to Find Genuine Cabin Air Filters
Finding the right cabin air filter for your Toyota Supra is key to maintaining the air quality you’ve prioritized. To shop smart, consider these options for genuine filters:
Finding the right cabin air filter for your Toyota Supra ensures optimal air quality and performance.
- Authorized Dealers: Source genuine Toyota filters online for guaranteed compatibility with your 2022 Supra.
- Part Numbers: Check numbers like 88880-30040 to confirm you’re getting the correct filter.
- Local Junkyards: Explore junkyards for hard-to-find cabin filter doors or brackets.
- eBay: Use this online marketplace for genuine or OEM filters, but verify seller ratings.
- Community Forums: Engage with fellow Supra owners for sourcing tips and availability of genuine parts.
Frequently Asked Questions
What Part Number Is the Cabin Air Filter on a Toyota Supra?
The cabin air filter part number for your Toyota Supra is 88880-30040. For ideal Toyota maintenance and to enhance Supra performance, replace it every 12,000 to 15,000 miles or annually for clean air quality.
Conclusion
Replacing your cabin air filter isn’t just a chore; it’s a welcome change for you and your Toyota Supra. By staying proactive, you’ll enhance both your vehicle’s performance and your driving experience. Remember, a clean filter is like a clear window—allowing you to see the road ahead without hindrance. Don’t wait until you notice the signs; make it a part of your routine maintenance and keep your cabin comfortable and healthy.