Inspect your 4Runner’s weatherstripping monthly: look for tears, compression set, rust under the bead, and stiff or cracked rubber. Clean seals with dilute castile soap, rinse, then apply silicone spray or plumber’s grease to restore flexibility. Reattach loose sections with 3M Weatherstrip Adhesive (flexible) or JB Weld for rigid fixes; clean surfaces, press or clamp until cured. Replace visibly torn or permanently hardened seals (OEM part 67881-35060 fits). Keep following for step‑by‑step fixes and choice guidance.
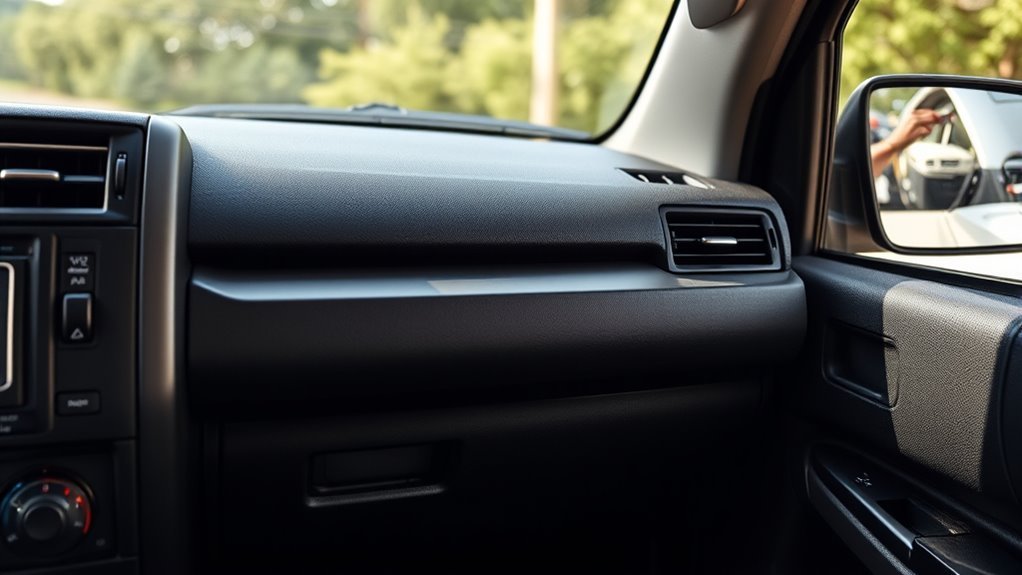
Quick Triage: Inspect Your 4Runner’s Weatherstripping Now
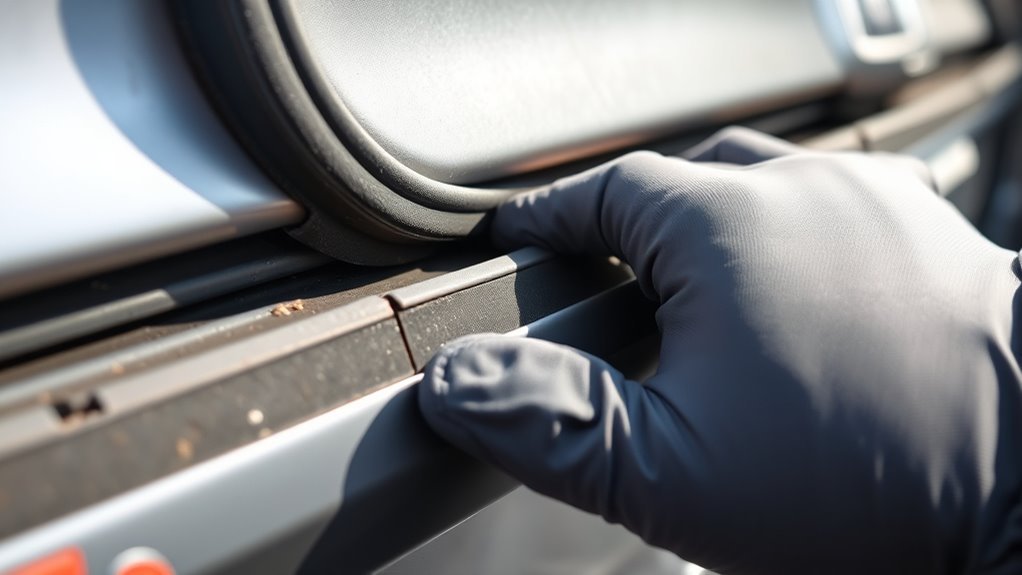
Before you start troubleshooting, visually inspect the weatherstripping around each door—focus on the upper corners of the frame—since wear there often leads to leaks and drafts; begin at the driver’s side and work clockwise. You’ll document tears, compression set, and surface contamination, noting any rust beneath the strip that could undermine attachment. Confirm the part number 67881-35060 if replacement’s required so you can source an exact match. Clean the seal with dilute Dr. Bronner’s castile soap, rinse, and dry; this removes oils and grit that accelerate degradation. Test rubber flexibility by bending short segments—stiffness or cracking indicates loss of elasticity and imminent failure. Apply a light film of silicone spray or Vaseline to restore suppleness and reduce freeze risk, but don’t overapply. Log findings, prioritize failed seals, and schedule replacements or professional service. This rapid triage keeps your 4Runner secure and lets you act with practical autonomy.
Fix Loose Weatherstrips Quickly (Glue, Reposition, Clamp)
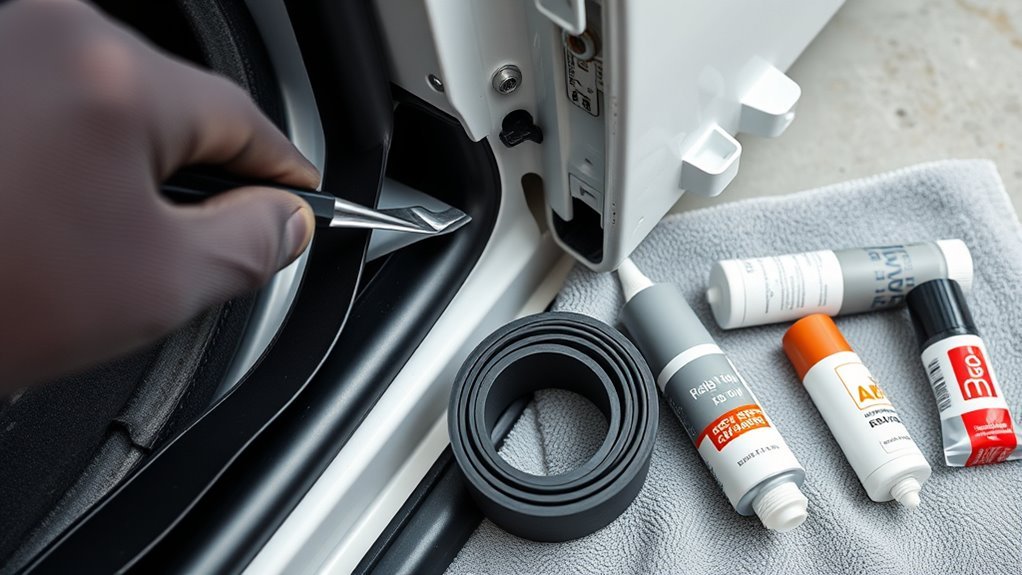
Grab your adhesive and a flat tool—fixing loose weatherstrips is a quick, three-step job: apply JB Weld (red tube) or 3M Weatherstrip Adhesive into the gap between rubber and metal, pull the plastic retaining piece on the door sill to gain slack and reposition the seal, then clamp or press the strip firmly with a flat object (boat paddle) until the adhesive cures. You’ll perform weatherstrip installation systematically: clean mating surfaces, dispense adhesive in a continuous bead into the gap, and align the rubber to the frame. Pulling the retaining clip gives the slack needed for correct placement and prevents gaps. During adhesive application keep movement minimal; clamp pressure guarantees full contact and cures a consistent bond. After curing, test the seal by closing the door and checking compression. Maintain liberty from leaks by inspecting for rust or tear and treating rubber with silicone spray or Vaseline to prevent freezing. This procedure restores sealing integrity quickly and reproducibly.
When to Replace Seals: Signs, Costs, and Part Numbers
If your 4Runner’s door seals show visible tears, stiff or cracked rubber, or gaps that let moisture in, you should replace them promptly to prevent rust and loss of insulation. Inspect seals monthly for tears, loss of flexibility, and gaps; document damage and measure affected length. Prioritize replacement when you detect punctures, continuous cracking, or sustained deformation that compromises the seal. Note replacement frequency depends on climate, usage, and weatherstrip materials; harsh sun and road salt shorten life. Order OEM part 67881-35060 for exact fit, or verify compatibility before buying alternative kits such as the 1996–02 front driver and passenger body-mounted seal (example price $79.95). Budget for parts and labor; simple door seals you can swap yourself with hand tools, larger assemblies may need shop time. Replace promptly to restore insulation, reduce wind noise, and prevent corrosion. Record installation date and condition to establish a practical replacement frequency for future maintenance.
Pick Seals & Adhesives (OEM vs Aftermarket, JB Weld, 3M)
When choosing weatherstrip you’ll weigh OEM fit and long-term reliability against aftermarket cost and variable quality. For reattaches, use a rubber-compatible adhesive — JB Weld’s red tube gives a rigid, high-strength bond if you can separate the rubber from the frame, while 3M “Green Snot” provides a flexible, durable hold preferred for most seals. Finish with silicone spray or petroleum jelly maintenance to preserve whichever seal and adhesive you select.
OEM Vs Aftermarket Adhesives
Choose adhesives based on compatibility, environmental exposure, and required bond life: OEM adhesives are formulated for vehicle materials and preserve warranty coverage, while aftermarket products like JB Weld offer high-strength, permanent repairs and 3M “Green Snot” provides a flexible, weather-resistant bond; select JB Weld for structural fixes where rigidity is acceptable, 3M for pliable seals that must tolerate temperature and moisture changes, and OEM for original-spec performance and warranty retention. You’ll evaluate adhesive performance and bond longevity against service conditions. Use OEM if you want predictable chemical compatibility and warranty-safe outcomes. Choose 3M when seals must flex through temperature cycles and moisture exposure. Use high-strength aftermarket only for non-warranty, structural repairs where stiffness won’t compromise seals.
- OEM: predictable compatibility, warranty-safe
- 3M: flexible, weather-resistant bond
- Aftermarket high-strength: permanent, rigid fixes
JB Weld And 3M
You’ll typically pick JB Weld (red tube) for rigid, structural bonds and 3M “Green Snot” for flexible, weather-resistant seals; both require you to separate the rubber from the frame, apply adhesive into the gap, and hold the trim under pressure while it cures. You’ll check adhesive properties against the rubber type before you commit. For JB Weld use when the clip or channel is damaged and you need a hard rebuild; for 3M use when you need elasticity and weather resistance. Application techniques: clean, roughen, apply sparingly, clamp or tape under pressure, cure fully. Maintain with silicone spray or Vaseline to extend life and guarantee future adhesion.
| Product | Use | Feeling |
|---|---|---|
| JB Weld | Structural | Resolute |
| 3M | Flexible seal | Liberated |
| Maintenance | Preserve | Confident |
Preventive Care for Weatherstripping (Clean, Lubricate, Seasonal Tips)
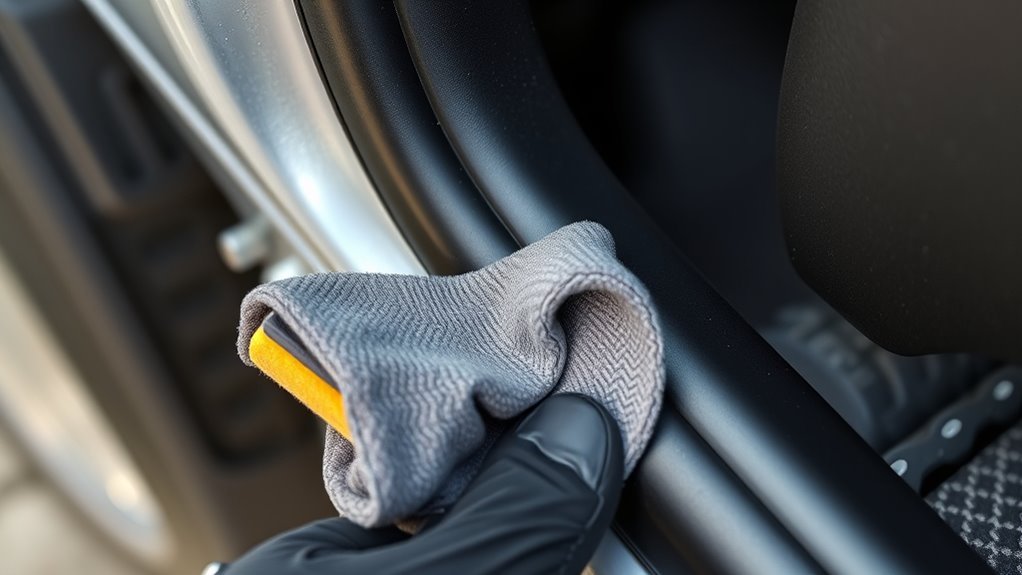
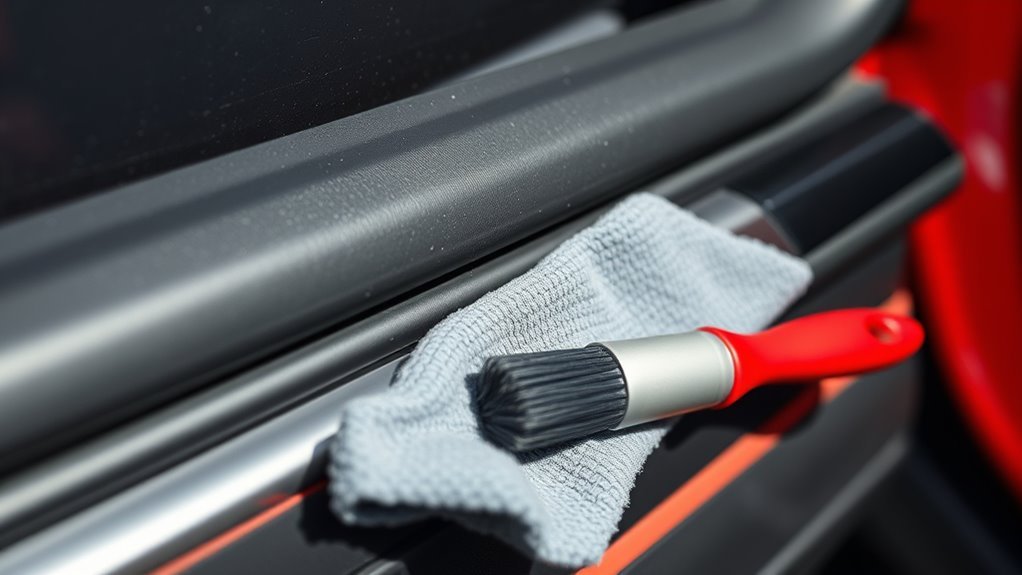
Start by cleaning gaskets with a mild soap solution and a soft cloth to remove dirt and prevent material breakdown. After drying, apply a thin coat of silicone spray or silicone plumber’s grease to rubber seals and window channels to restore flexibility and improve operation. Inspect for cracks or debris while you work and replace any damaged sections promptly to maintain a reliable seal.
Clean Gaskets Regularly
A clean gasket seals better and lasts longer, so inspect and wash your 4Runner’s weatherstripping regularly with a gentle cleaner like Dr. Bonner’s castile soap. For effective weatherstripping maintenance, remove surface grime and road film with diluted cleaning solutions, a soft cloth, and consistent pressure. Rinse thoroughly and dry before reassembly. Check edges and corners for embedded debris or early deterioration; addressing these now preserves freedom from future failure.
- Use a 1:10 soap-to-water mix and a microfiber cloth to lift contaminants without abrading rubber.
- Flush channels and wipe seals after off-road trips to prevent trapped grit from cutting rubber.
- Monitor for cracks, hardening, or compression set; document and replace parts when performance drops.
Stay deliberate, proactive, and liberated from avoidable leaks.
Lubricate With Silicone
When you clean weatherstripping, follow up by applying a silicone lubricant to keep the rubber flexible and prevent freezing or sticking. You’ll gain clear silicone benefits: preserved elasticity, reduced cracking, and improved seals that stop water and drafts. Do this 2–4 times yearly—more in extreme climates—to extend service life and assert control over maintenance.
Prep: wash with a mild soap like Dr. Bronner’s, rinse, and dry. Application techniques: shake the silicone spray, hold the can 6–8 inches away, and apply a light, even coat along the full gasket length. Wipe excess with a lint-free cloth. For installations, a few drops of dishwashing liquid ease seating without stressing material. Repeat seasonally to keep weatherstripping liberated from decay and failure.
Troubleshoot Leaks, Wind Noise, Frozen Doors & Rust
Curious why your 4Runner leaks, whistles, or freezes up in cold weather? Begin with systematic leak detection and noise reduction checks: inspect weatherstripping for tears or separation, run a water test along door seams, and listen for wind at speed. If rubber’s brittle, apply silicone spray or Vaseline to restore flexibility and prevent freezing; that improves door operation immediately.
Curious why your 4Runner leaks or freezes? Check weatherstripping, water-test seams, and lubricate brittle rubber to stop wind noise.
- Remove and inspect strips for adhesion failures, rust, and seam corrosion.
- Reattach loose sections using 3M Weatherstrip Adhesive or JB Weld; press and cure per instructions.
- Treat any surface rust promptly, sand to bare metal, prime, and reseal before reinstallation.
You’ll prevent costly body damage by ensuring seals are fully adhered to the frame. Monitor seams after removal for early rust signs and address them fast. Follow procedural steps, use high-quality adhesives, and lubricate rubber components seasonally to maintain freedom from leaks, wind noise, frozen doors, and progressive corrosion.
Frequently Asked Questions
How Do I Store Spare Weatherstripping Long-Term?
Store spare weatherstripping in a cool, dark, dry place using airtight bags and desiccant; avoid folding, compressing, or sunlight. Rotate stock periodically to extend weatherstrip lifespan; this proper storage preserves flexibility and delays degradation.
Can Rubber Conditioners Harm Painted Surfaces?
Like night and day, you shouldn’t assume all rubber conditioners are harmless; you’ll choose products formulated for rubber maintenance that won’t compromise paint protection, test a small area, apply sparingly, and wipe off excess immediately.
Are There DIY Mold-Resistant Treatments for Seals?
Yes. You can mix diluted bleach or white vinegar with water for mold prevention; apply, scrub, rinse, dry, then coat with silicone or rubber protectant. Follow seal maintenance steps methodically to reclaim control and longevity.
Can Heat Guns Reshape Compressed Weatherstrips Safely?
Yes — you can cautiously use heat gun techniques to reshape compressed weatherstrips. You’ll apply low heat, move constantly, test flex, and avoid overheating to preserve material; this extends weatherstrip longevity and restores sealing performance.
Do Aftermarket Seals Affect Door Alignment or Latching?
Yes — aftermarket seals can shift door alignment or latching if weatherstrip installation is improper. You’ll check fit, adjust striker and hinge tolerances, and test seal durability under load to preserve function and freedom.
Conclusion
You’ve checked seals, reattached loose strips with adhesive and clamps, and even noted part numbers—coincidence or not, the last leak you fixed was the same hinge you blamed for a rattle months ago. Keep OEM or trusted aftermarket seals, use 3M/JB Weld where spec’d, clean and lubricate seasonally, and replace when compression’s gone. Do this routinely and you’ll stop chasing leaks, wind noise, frozen doors, and rust before they start.