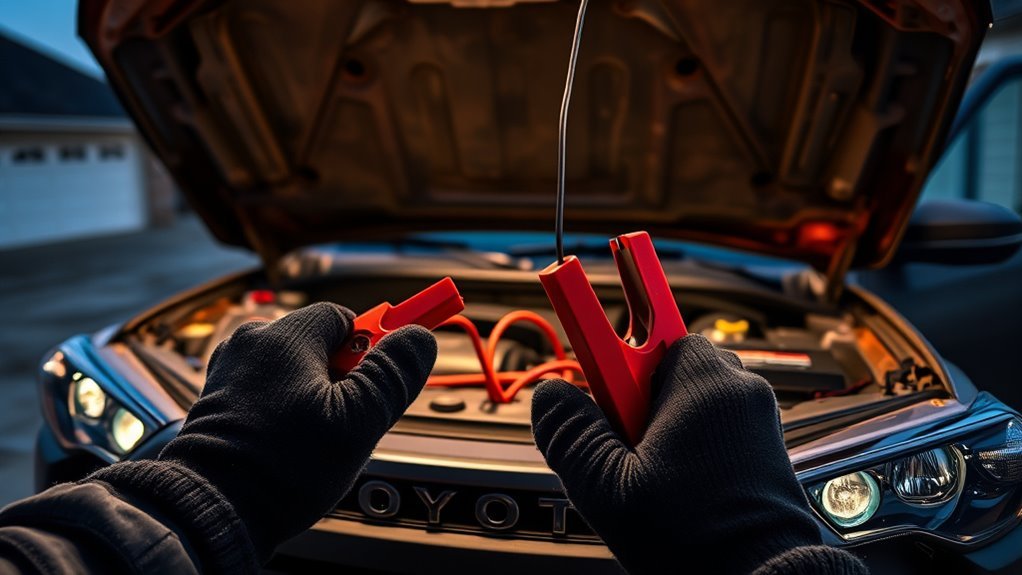
Park both vehicles with brakes engaged and turn them off. Connect the red cable to your 4Runner’s positive terminal, then to the donor positive. Attach the black cable to the donor negative, then to a clean, unpainted metal ground on your 4Runner. Start the donor, let it run several minutes, then start your 4Runner. Disconnect cables in reverse order and check voltage and alternator output; continue for more steps and troubleshooting if needed.
Quick Jump-Start Steps & Safety Checklist

Before you begin, make sure both vehicles are off and parked close together with parking brakes engaged. You’ll follow a strict sequence to protect yourself and the 4Runner’s electrical system. As a safety precaution, connect the red (positive) cable to the dead battery terminal first, then to the assisting vehicle’s positive terminal to establish the correct circuit. Next attach the black (negative) cable to the assisting vehicle’s negative terminal, then clamp the other negative end to a clean, unpainted metal grounding point on the Toyota—this reduces spark risk. Start the assisting vehicle and let it run for several minutes so the depleted battery gains charge. Attempt to start the 4Runner; if it starts, keep it running to stabilize charging. Disconnect cables in the reverse order: negative from the Toyota, negative from the assisting vehicle, positive from the assisting vehicle, then positive from the Toyota. These steps support immediate battery maintenance and empower you with safe, controlled action.
Locate the 4Runner Battery and Terminals
Open the hood and locate the battery on the driver’s side for easy access. Identify the positive terminal by the red cover or ‘+’ marking and the negative terminal by the black cover or ‘–’ marking. Verify terminals are clean and tight before attaching jumper cables to prevent electrical hazards.
Battery Location Under Hood
You’ll find the 4Runner’s battery under the hood on the driver’s side; it has a red-covered or ‘+’ positive terminal and a black-covered or ‘–’ negative terminal. Before you touch anything, turn the vehicle off and remove the keys. You’ll typically see a Type C (LN4) battery rated 75Ah (20HR) or higher with 776 CCA or greater; note these specs if you replace the battery. Inspect terminals for terminal corrosion and clean lightly with a brush if needed, then tighten clamps to secure connections. Good battery maintenance frees you from roadside dependency: keep terminals protected, check hold-downs, and replace aging units proactively. Stay methodical, prioritize safety, and you’ll control your vehicle’s starting reliability.
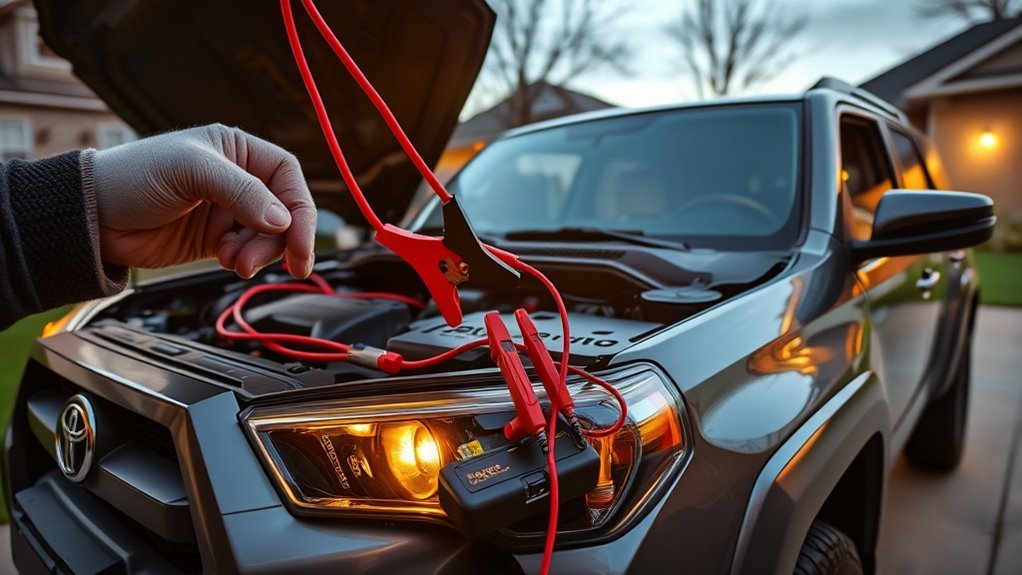
Identifying Positive Negative
Locate the 4Runner’s battery on the driver’s side under the hood and identify the terminals by their covers and markings: the positive terminal has a red cover or a ‘+’ symbol, and the negative terminal has a black cover or a ‘–’ sign. You’ll perform terminal identification before any connection to guarantee electrical safety and avoid sparks or damage. Inspect both posts: remove loose debris and corrosion with a stiff brush or terminal cleaner; corrosion impedes current flow and risks failure. When ready, attach the red jumper cable to the positive terminal first, confirming a secure clamp on bare metal, then connect the black cable to the negative terminal or a recommended chassis ground. Maintain deliberate, controlled actions throughout the procedure.
Attach Jumper Cables: Step-by-Step
Before you start the engines, connect the cables in this order: clamp the red cable to the 4Runner’s positive (+) terminal, attach the other red clamp to the booster vehicle’s positive (+) terminal, fix one black clamp to the booster’s negative (−) terminal, and finally secure the remaining black clamp to an unpainted metal ground on the 4Runner away from the battery; verify each connection is tight to prevent arcing. Use correct cable types rated for automotive use and inspect insulation for cuts. Wear safety gear: goggles and gloves, and keep sparks, cigarettes, and loose clothing away. Position both vehicles so cables reach without tension and set parking brakes; engines off, lights and accessories off. Verify terminal polarity again before clamping. Confirm clamps grip exposed metal and avoid painted surfaces to prevent poor contact. If connections are loose, stop and reposition clamps. With secure, correct connections, you’re ready to proceed to the donor-start step. Maintain calm, act deliberately, and reclaim mobility.
Start the Donor Car and Jump-Start Your 4Runner
Start the donor vehicle and keep it running so it can supply charging current to the 4Runner. Let the donor idle for several minutes with a slight throttle to increase alternator output. After a few minutes, attempt to start the 4Runner; if it won’t crank, wait a bit longer and confirm all cable connections are secure.
Start Donor Engine First
Fire up the donor vehicle and keep it running so it can supply steady voltage to your 4Runner’s dead battery. You’re asserting control: prioritize donor vehicle importance and follow battery safety precautions before proceeding. Verify cable clamps are secure and free of corrosion.
- Confirm donor engine is started and stable before any connection.
- Attach clamps correctly; ground negative away from the battery to reduce spark risk.
- Keep donor idling with slight throttle to maintain output while charging begins.
- Wait a few minutes after connections before cranking the 4Runner to allow initial charge.
This sequence minimizes battery damage and sparks, giving you a reliable, controlled power transfer so you can liberate your 4Runner from a dead-battery state.
Let Donor Idle Minutes
With the jumper cables attached, let the donor vehicle idle for about 5 minutes so the 4Runner’s dead battery can accept an initial charge; keep the donor running the whole time and apply a slight throttle to boost charging rate if needed. Stay vigilant: monitor clamps and cable insulation at connection points for heat or sparks. Maintain a firm hold on safety—do not let cables dangle into moving parts. This controlled jump time optimizes battery care and reduces stress on both charging systems. After five minutes, attempt to start the 4Runner. If it fails, let the donor idle a few more minutes and recheck connections before retrying. Once started, disconnect cables in reverse order and drive to complete a full recharge cycle.
Disconnect Cables Safely and Perform Immediate Checks
Unhook the jumper cables in the precise reverse order to prevent sparks: remove the black (negative) clamp from your Toyota first, then from the assisting vehicle, then the red (positive) clamp from the assisting vehicle, and finally the red clamp from your Toyota. During cable removal, keep clamps clear of metal and each other.
- Perform cable removal in that sequence, using steady motion to avoid contact and arcing.
- Conduct a terminal inspection immediately: look for corrosion, loose clamps, or melting; clean and retighten if needed.
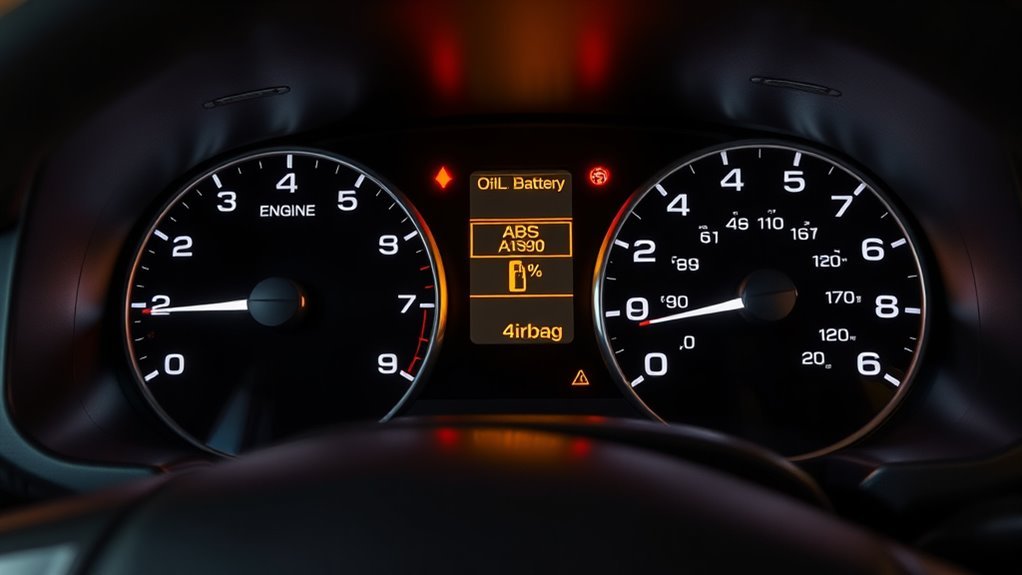
- Measure battery voltage with a multimeter; confirm at least 12.4 V to validate a successful charge before shutting down.
- Start the engine, monitor electrical systems, and plan a 20–30 minute highway drive to restore charge.
Act decisively—this procedure protects you and the vehicle, preserves freedom of movement, and makes sure the 4Runner won’t strand you again.
If It Won’t Start: Quick Troubleshooting Tips
If your 4Runner still won’t crank after a jump, start by verifying the battery reads at least 12.4 volts and that both positive and negative terminals are clean and tight. Next steps:
1) Voltage testing: confirm resting voltage and load behavior. If below spec, battery health is compromised.
2) Connection issues: inspect clamps for corrosion and tightness; clean and retighten.
3) Ground check: verify negative cable body and chassis ground are secure and free of paint/oxide.
4) Alternator function: if battery holds voltage but drains quickly, test alternator output with engine running.
| Check | How | Expected |
|---|---|---|
| Battery health | Voltage testing, load test | ≥12.4V idle; holds under load |
| Connections | Visual clean, tight clamps | No corrosion, firm fit |
| Ground check | Torque and contact area | Solid metal-to-metal contact |
| Alternator function | Measure charging volts | ~13.5–14.5V running |
If issues persist, pursue deeper diagnostics with a professional to liberate you from recurring failures.
After the Jump: Drive, Inspect, and When to Call a Mechanic
Once the 4Runner accepts the jump, drive it for at least 20–30 minutes at highway speeds (above ~45 mph) to allow the alternator to recharge the battery, then pull over and inspect the battery terminals and cable connections for tightness and corrosion. You’ll want to confirm charging and rule out surface issues before declaring freedom.
- Check terminals: clean corrosion, tighten clamps, apply dielectric grease to prevent future buildup.
- Verify charging: with headlights on, observe brightness; dim lights suggest poor alternator output or weak battery.
- Monitor repeat failure: if the battery dies again soon, suspect a failing alternator or parasitic draw requiring electrical diagnostics.
- Call a mechanic when: you see flickering lights, repeated no-starts, or error codes—don’t accept patterned failure.
These steps combine battery maintenance and focused diagnostics so you can reclaim mobility. If problems persist, professional electrical diagnostics will identify alternator faults, bad cells, or wiring issues so you can act decisively.
Frequently Asked Questions
How to Use Jumper Cables on a Toyota?
You attach jumper cables properly: secure both vehicles, connect red to positive terminals, black to donor negative and 4Runner’s unpainted metal, start donor, then your engine; follow jumper safety and battery maintenance steps so you stay liberated.
How to Jump 2018 4runner?
Like lighting a trapped spark, you’ll revive the 2018 4Runner: position vehicles, connect red to positives, black to donor negative and metal ground, start donor, check battery health, observe jump safety, then run 20–30 minutes.
Conclusion
You’ve followed the steps like a checklist; now treat the 4Runner like a cold engine warmed back to life. Start it, let it run a few minutes, and drive at highway speeds 15–30 minutes to recharge the battery. Inspect for loose cables, corrosion, or warning lights. If it dies again, don’t guess—call a mechanic. Keep jumper cables and safety gear in the truck; think of them as a portable lifeline for roadside rescues.