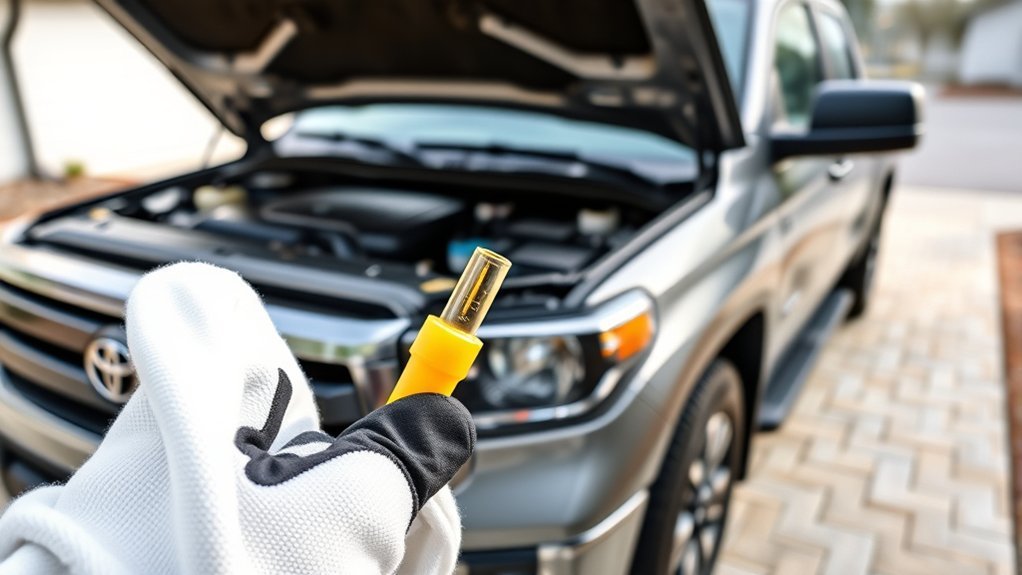
You can quickly check your Toyota Tundra’s oil by parking on level ground, running the engine a few minutes, then shutting it off and waiting a few minutes for oil to settle. Pull the brightly colored dipstick, wipe it clean, reinsert fully, then withdraw and read between the two marks. Add SAE 0W‑20 oil gradually if below the lower mark, rechecking after small fills to avoid overfill. Keep a rag and funnel handy — more tips follow.
Quick Answer: How to Check Tundra Engine Oil

Start by locating the brightly colored engine oil dipstick under the hood, then pull it out, wipe it clean, fully reinsert it, and remove it again to read the level between the two dots; if it’s below the lower mark, add SAE 0W-20 oil gradually, checking after each small fill so you don’t overfill (the dots span about one quart). You’ll act deliberately: wipe, reinsert, read. If the mark sits low, add engine oil in small amounts, let it settle, then recheck until it reaches between the dots. This simple routine protects your engine and keeps your Tundra running free from avoidable harm. Treat this as a core maintenance tip: check regularly, especially before long trips and after heavy use. You’ll gain control over performance and costs by monitoring levels instead of reacting to problems. Keep a funnel and a quart of SAE 0W-20 handy, and make this quick check part of your liberation through practical vehicle care.
When to Check Oil on a Toyota Tundra
Because oil level can change with use and temperature, check your Tundra’s engine oil at least once a month and before any long trip. Do it after driving and letting the engine cool a bit so readings are accurate and you won’t burn yourself. Check after every oil change to set a baseline; that helps you spot abnormal consumption or sudden drops that hint at leaks or other issues.
Seasonal shifts are key — inspect more often when temperatures swing, since cold or heat can affect oil behavior and highlight early engine wear. If you see a decline between checks, investigate promptly; catching problems early protects your freedom to travel and reduces repair constraints.
| When to Check | Why it matters |
|---|---|
| Monthly | Monitors oil change frequency and consumption trends |
| After trips | Guarantees safe level before long drives |
| After oil change | Establishes baseline, detects engine wear early |
Tools to Check Tundra Oil (Dipstick, Funnel, SAE 0W‑20)
Locate the dipstick first — it’s usually marked with a brightly colored handle so you can quickly check oil level between the two dots (each dot ≈ one quart). Use that dipstick to confirm the level sits between the marks; that simple act keeps you in control of your vehicle and aligned with your maintenance schedule. Keep a clean funnel handy when you add oil to avoid spills and contamination — it’s a small tool that protects the engine and your freedom to travel without breakdowns.
Use SAE 0W-20, the manufacturer-recommended viscosity noted on the oil fill cap, for correct lubrication and peak efficiency after an oil change. Carry a spare quart if you’re on the road; topping up immediately helps prevent damage. Regularly checking oil, especially after adding, preserves engine life and honors the maintenance schedule you set. These basic tools—dipstick, funnel, and proper oil—let you maintain autonomy and confidence in your Tundra.
How to Prepare Your Tundra for an Accurate Oil Check

Before you check the dipstick, park your Tundra on level ground, run the engine for a few minutes, then shut it off and wait several minutes so the oil can settle—this sequence gives the most accurate reading. Open the hood, find the brightly colored dipstick handle, and gather your rag and funnel. This simple routine frees you from guesswork.
Pull the dipstick, wipe it clean, reinsert fully, then remove it again to read the level against the marks. If it’s below the lower mark, you’ll add oil gradually to avoid overfilling; confirm the correct oil viscosity on the fill cap or owner’s manual before adding. Make checking frequency part of your vehicle ownership—monthly or before long trips—to keep control of your truck’s health. These steps let you act deliberately, not reactively: level surface, warm engine, settled oil, and the right viscosity make your reading trustworthy so you can maintain independence on the road.
How to Check Oil With the Dipstick
When you’re ready, pull the brightly colored dipstick, wipe it clean, reinsert it fully, then withdraw it again to read the oil level against the two markings; the oil should sit between them. Find the dipstick location—usually a bright loop near the front of the engine—then follow this quick, freeing routine: remove, clean, reinsert, withdraw, and read. Use a funnel when adding oil to avoid spills and contamination, and screw the oil cap back on tight.
| Action | Tip |
|---|---|
| Locate dipstick | Bright handle near engine front |
| Clean dipstick | Use a lint-free cloth |
| Reinsert fully | Guarantee accurate reading |
| Add oil gradually | Check level after each pour |
| Replace cap | Prevent contamination |
Respect oil viscosity recommendations for your Tundra; thicker or thinner oil changes feel different on the stick. If low, add oil slowly—each mark is roughly a quart—until level sits between marks.
What the Dipstick Marks Mean (Dots, Quarts, Settling Time)
Now that you’ve read the dipstick and topped off as needed, understand what the two marks mean: they’re roughly one quart apart, so oil sitting at the lower mark means you’re about a quart low and at the upper mark you’re full. Treat those dots as simple oil level indicators that guide your action and preserve your engine‘s freedom from preventable harm. After adding oil, give it time to settle before rechecking so the reading reflects true level, not temporary surface oil.
- Check after settling: wait a few minutes so oil drains into the pan; this makes dipstick maintenance accurate.
- Add incrementally: a half-quart can move the level noticeably, so check between pours to avoid surprises.
- Monitor often: consistent readings between the marks show healthy consumption; drops below the lower dot can reveal leaks or internal issues.
Use the dipstick as a tool of autonomy—regular dipstick maintenance keeps you in control of vehicle health.
How Much Oil to Add and How to Avoid Overfilling

Although adding oil seems simple, you should pour slowly and check often—remember the dipstick dots are about one quart apart, so a half-quart can move the level noticeably. Add in small increments (¼–½ qt), wait a few minutes for oil to settle, then recheck the dipstick. Use a funnel to keep spills and contamination out of the fill neck.
Stick to the manufacturer-recommended oil viscosity and avoid mixing drastically different grades; doing so preserves film strength and clearances. Be cautious with oil additives: only use ones Toyota approves, since some can alter viscosity or harm seals. Overfilling creates pressure, foams oil, and risks crankshaft aeration or seal leaks.
If the level’s near the upper mark, stop—don’t top off “just because.” Regular checks empower you to maintain proper level and performance without dependence on costly service visits. Keep records of how much you add so future top-offs are precise and controlled.
Troubleshooting Common Issues (Hard‑to‑Find Dipstick, Inconsistent Readings, Leaks)
If you can’t spot the dipstick right away, don’t panic—check the owner’s manual for its exact location and look along the front or side of the engine bay for a brightly colored handle. You’ll save time and reclaim control by knowing the dipstick location before you start. If readings seem inconsistent, make sure the engine’s been off long enough for oil to settle and fully insert the dipstick; partial insertion gives false lows or highs.
- Check insertion and settling: always push the dipstick all the way in, wait a few minutes after shutdown, then recheck to get consistent readings.
- Inspect for leaks: if oil levels drop between checks, look under the truck and around the oil filter inspection area, drain plug, and gasket seals.
- Act fast on ground spots: finding oil on the ground means you must trace the source immediately to prevent damage.
Stay empowered — routine checks protect your freedom on the road.
Clean‑Up, Safe Oil Disposal, and Logging Checks
Wipe up any drips or puddles right after checking the oil to prevent burning smells and keep your work area safe; use absorbent pads or rags and dispose of them with the used oil. Wear rubber gloves during any oil contact to protect your skin. For oil spill cleanup, contain and absorb immediately, then transfer contaminated materials into a sealed container.
Label and seal all used oil containers before transport. Follow local recycling guidelines: take used oil and absorbents to designated recycling centers or hazardous-waste facilities—never dump on soil or drains. Recycling prevents contamination and reclaims resources, aligning with practical, collective freedom from careless waste.
Keep a brief log of each oil check—date, mileage, dipstick measurement, and any notes on color or odor. Store logs digitally or in a small notebook kept with the vehicle. Regular entries help you spot trends early and maintain control over your truck’s health without relying on others.
Why Oil Checks Matter for the 2013 Tundra 5.7L (Signs of Trouble)
You should check oil regularly because low levels cause increased friction, overheating, and poor lubrication that can damage the 5.7L engine. Watch the dipstick: the distance between dots equals about one quart, so a quick check can spot abnormal consumption or a leak before it worsens. If you notice frequent drops in level or dark/contaminated oil, get the engine inspected for worn rings, bad seals, or other faults.
Low Oil Symptoms
When your Tundra 5.7L starts making knocking or ticking sounds, it’s a clear sign the engine isn’t getting enough oil to lubricate moving parts. You’ll hear engine noise that signals lubrication issues; ignore it and you risk increased friction, overheating, and costly damage. A dashboard warning light can follow when levels are critically low, demanding immediate action. You’ll also notice reduced performance and poorer fuel efficiency as the engine struggles.
- Listen for persistent knocking/ticking — immediate check and top-up can prevent severe wear.
- Watch the oil warning light — stop and address levels before driving.
- Keep to frequent oil checks and changes — freedom from breakdowns comes from disciplined maintenance.
Abnormal Consumption
A falling oil level on your 2013 Tundra 5.7L is more than an annoyance — it’s a warning that the engine may be leaking or burning oil and needs immediate attention. If the dipstick shows levels below the marks between checks, don’t ignore it. Regular monitoring helps you spot abnormal consumption early, preventing engine wear and costly repairs. Blue exhaust smoke, frequent top-offs, or drops between oil changes indicate burning oil from worn piston rings or valve seals. That demands prompt diagnosis and repair; temporary fixes like oil additives can mask symptoms but won’t reverse mechanical damage. Stay proactive: check oil frequently, document losses, and act quickly to restore reliability and keep your truck free—secure—from avoidable failure.
Frequently Asked Questions
Can I Check Oil Immediately After Driving a Short Distance?
You shouldn’t check oil immediately after a short drive; oil temperature stays high and can give a false reading. Let the engine cool or idle briefly to stabilize oil for accurate level checks and maintain ideal engine performance.
How Often Should Oil Be Professionally Changed Versus DIY Top‑Ups?
Have it done professionally every 5,000–10,000 miles, and top up yourself between services; balance oil change frequency with top up intervals, trust expert inspections for major maintenance, and reclaim control by staying informed and proactive.
Does Synthetic Oil Change the Dipstick Reading Procedure?
No — synthetic oil doesn’t change the dipstick reading procedure; you’ll still follow the same steps. You’ll benefit from synthetic benefits like stability and cleaner oil, and dipstick accuracy remains reliable when you check correctly and consistently.
Can Cold Weather Affect the Oil Level Reading Accuracy?
Like a slow river, cold weather effects can thicken oil; you’ll see engine oil viscosity rise and a slightly low dipstick reading. Don’t panic—warm the engine briefly, then check, and you’ll get accurate level info.
Is It Safe to Drive With the Oil Slightly Below the Full Mark?
You can drive briefly if oil’s slightly below full, but monitor oil consumption and engine performance; don’t ignore repeated drops, top up soon, and address leaks or burning to protect your engine and preserve your vehicle freedom.
Conclusion
You should check your Tundra’s oil at least every 1,000 miles or once a month—drivers who don’t see a mechanic until warning lights average 3× more engine failures. Regular checks are quick: warm the engine, park level, pull the dipstick, and top with 0W‑20 only as needed. That simple routine cuts wear and costly repairs. Keep records, dispose of used oil responsibly, and address odd readings or leaks immediately to protect your engine.