Your Camry’s exhaust can rust from road salt, trapped moisture, short-trip condensation, road debris, and age. Once corrosion opens a seam, flange, flex pipe, muffler, or gasket, you may notice a hiss, ticking, loud rumble, soot marks, exhaust smell, poor fuel economy, or a check-engine light. Because exhaust gases can contain carbon monoxide, treat a suspected leak as a safety issue first and a repair-cost issue second.
Quick Answer
A Toyota Camry exhaust leak is usually caused by rusted pipes, a cracked flex pipe, a leaking flange gasket, a damaged muffler, or corrosion near the catalytic converter. Do not ignore it: leaks can increase noise, affect emissions readings, hurt fuel economy, and allow dangerous exhaust gases near the cabin.
Key Takeaways
- Common Camry leak points include the exhaust manifold gasket, flex pipe, flanges, catalytic converter area, resonator, muffler seams, and rusted pipe sections.
- Exhaust smell inside the car, dizziness, headache, a hanging pipe, or a leak near the front of the vehicle means you should stop driving and get the car inspected.
- Tape, putty, clamps, and foil are temporary emergency measures only; welding, gasket replacement, clamp replacement, or part replacement is the real fix.
- If you live in a Utah emissions county, an exhaust leak, emissions-related check-engine light, or damaged catalytic converter can interfere with registration testing.
- Toyota’s rust-through warranty is not a general exhaust-rust warranty; it generally applies to corrosion perforation of sheet metal/body panels, subject to warranty terms.
At a Glance
| Time Required | 10–30 minutes for a basic driveway inspection; 30–90 minutes for a shop diagnosis |
| Difficulty | Easy inspection; moderate to advanced repair depending on rust and access |
| Tools Needed | Flashlight, gloves, eye protection, jack stands or ramps, OBD-II scanner, soapy water or smoke test at a shop |
| Cost | Temporary patch: usually low cost; gasket, muffler, pipe, or catalytic converter replacement can range from a few hundred dollars to over $2,000 depending on the part |
What This Camry Exhaust Leak Guide Covers
This guide is for Toyota Camry owners and DIY technicians who want to identify exhaust rust, understand leak symptoms, decide whether the car is safe to drive, and choose the right repair. It covers the most common failure points: the exhaust manifold, manifold gasket, flex pipe, catalytic converter area, flanges, resonator, muffler, hangers, and tailpipe.
You will also learn how to do quick checks at home, when to stop driving, what temporary fixes can and cannot do, how to compare welding versus replacement, what to ask a repair shop, and how to reduce future rust during winter driving.
Quick Checks for a Camry Exhaust Leak
Start with a cool vehicle on level ground. Never crawl under a car supported only by a jack. Use ramps or jack stands on solid ground, wear eye protection, and keep hands away from hot exhaust parts.
Warning: Do not run the engine in a closed garage. Exhaust gases contain carbon monoxide, which is colorless and odorless. If you smell exhaust inside the cabin, open the windows, stop driving when safe, and have the vehicle inspected promptly.
Visual Soot and Rust
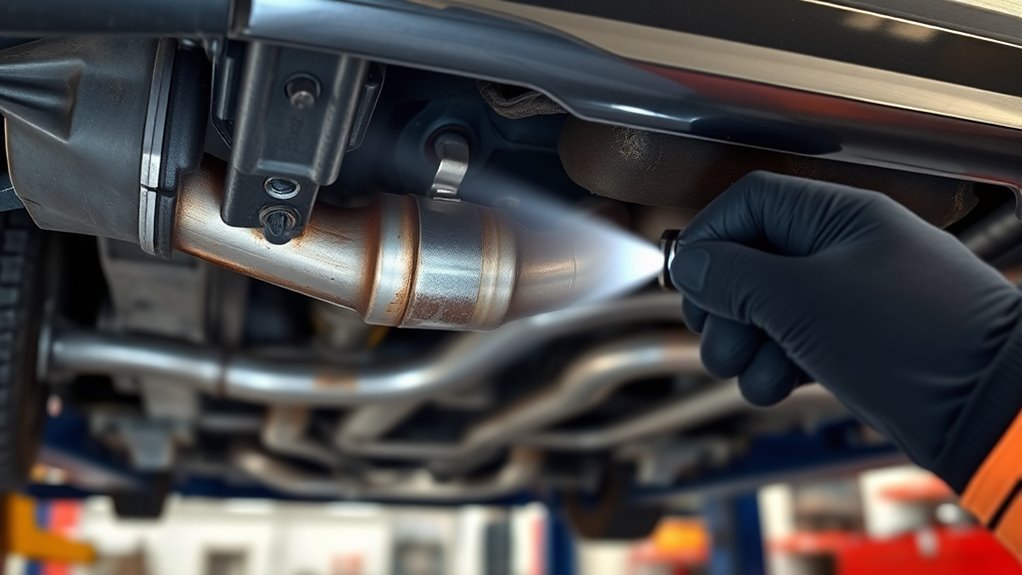
Look from the engine side of the exhaust toward the tailpipe. Check the manifold area, flex pipe braid, flange connections, catalytic converter shell, resonator, muffler seams, pipe bends, hangers, and clamps. Black soot streaks often point to a leak because escaping exhaust carries carbon deposits onto nearby metal.
Rust does not always mean the part has failed. Surface rust is common on exhaust steel. The bigger concerns are flaking layers, bubbling seams, holes, cracked welds, soft metal, broken hangers, or a pipe that moves more than it should. If a screwdriver can easily punch through a rusted area, the metal is no longer a good candidate for a simple patch.
Listen for Hissing, Ticking, or Rumble
With the vehicle outside and the parking brake set, start the engine and listen near the front, middle, and rear of the car. A front-end ticking sound that is louder on cold start often points to an exhaust manifold gasket or manifold leak. A hiss or flutter under the front seats often points to a flex pipe or flange. A deep rumble near the rear usually points to the muffler or tailpipe.
Leaks can be louder during acceleration because exhaust pressure rises under load. If you only hear the noise while driving, ask a shop to inspect the car on a lift so they can check the system safely while the engine is running.
Simple Tailpipe Pressure Check
A quick shop-style check is to have one person briefly restrict the tailpipe with a heavy rag while another listens for hissing under the car. Do this only for a few seconds, only outdoors, and only with the exhaust cool enough to avoid burns. If pressure builds and you hear hissing from a joint or pipe, that area likely leaks.
For a more accurate diagnosis, ask a repair shop for a smoke test or lift inspection. A smoke test can reveal small leaks at flanges, flex sections, welds, and gasket surfaces that are hard to see from the ground.
Note: On Camry Hybrid models, the gas engine may shut off at idle. If the engine will not stay running long enough for a safe inspection, have a Toyota-experienced shop perform the leak test.
Is It Safe to Drive With an Exhaust Leak?
A small rear muffler leak may let you drive directly to a repair shop, but an exhaust leak should never be treated as normal. The risk depends on leak size, leak location, cabin fumes, noise level, and whether the pipe or catalytic converter is loose or damaged.
Do not keep driving if you notice exhaust smell inside the cabin, headache, dizziness, nausea, a leak near the manifold or firewall, a pipe hanging low, sparks, a missing catalytic converter, or a loud break that makes conversation difficult. In those cases, park the car safely and arrange repair or towing.
- Inspect safely: look for soot, holes, cracks, loose hangers, and damaged flanges.
- Limit driving: avoid enclosed spaces, keep windows open if you must move the car a short distance, and drive only to a repair facility.
- Repair and verify: fix the leak, replace damaged gaskets or hardware, and recheck for noise, fumes, and emissions-related codes.
Why Exhaust Leaks Matter: CO, Emissions, and Performance
Exhaust leaks matter for three reasons: safety, emissions, and engine control. Exhaust gases can contain harmful carbon monoxide, and Toyota’s owner guidance warns that exhaust gas entering the vehicle can create serious health hazards. Toyota’s exhaust-gas precautions also advise inspection as soon as possible if exhaust gases are smelled inside the vehicle.
An upstream leak can also affect oxygen sensor readings. If outside air enters near a sensor, the engine computer may adjust fuel trim incorrectly. That can cause rough idle, hesitation, reduced fuel economy, increased emissions, or a check-engine light.
Leaks around the catalytic converter can be especially expensive because the converter is part of the emissions system. Do not remove, bypass, hollow out, or defeat the catalytic converter or any emissions-control device. The EPA states that tampering with vehicle emissions controls is illegal under the Clean Air Act.
Where Camry Exhausts Usually Leak

Because the Camry exhaust system is exposed to heat, vibration, water, salt, and road impacts, leaks usually happen at predictable weak points.
| Leak Area | Common Signs | Likely Fix |
|---|---|---|
| Exhaust manifold or gasket | Cold-start ticking, exhaust smell near engine, soot near head or manifold | Gasket, hardware, manifold repair, or manifold replacement |
| Flex pipe | Hiss or flutter under front seats, frayed braided section, vibration | Flex section replacement or pipe assembly replacement |
| Flanges and donut gaskets | Soot at joint, broken bolts, leak after a bump or repair | New gasket, bolts, springs, flange repair, or clamp repair |
| Catalytic converter area | Rattle, check-engine light, emissions failure, leak at shell or flange | Compliant converter repair or replacement |
| Muffler and tailpipe | Deep rumble, rust holes, broken hanger, rear soot marks | Muffler, tailpipe, hanger, or welded section replacement |
A leak before the catalytic converter or oxygen sensors is usually more urgent than a small rear tailpipe leak because it can affect fuel control, emissions testing, and cabin-fume risk.
Temporary Fixes You Can Use Now
Temporary fixes can reduce noise and slow a small leak long enough to reach a repair shop, but they are not permanent repairs. Exhaust tape, exhaust putty, band clamps, and repair sleeves work best on small holes or cracks in straight pipe sections. They do not reliably fix rotten metal, broken flex pipes, manifold leaks, damaged catalytic converters, or leaks close to the cabin.
| Temporary Fix | Best Use | Limit |
|---|---|---|
| Exhaust tape | Small cracks or pinholes in pipe | Needs clean metal; may fail on heavy rust |
| Exhaust putty | Small gaps around pipe or seams | Not for flex sections or structural damage |
| Band clamp or repair sleeve | Straight pipe splits with enough solid metal | Requires proper sizing and solid pipe ends |
| Wire or foil emergency wrap | Last-resort noise reduction to move the car | Not a repair; drive only to a shop |
Warning: Never patch a hot exhaust. Never use household tape, plastic, or flammable material. Do not patch over or remove a catalytic converter, and do not rely on a temporary patch if fumes can enter the cabin.
Permanent Repair Options: Welding, Gaskets, Clamps, and Part Replacement
The right repair depends on the metal condition and leak location. A clean crack in otherwise solid pipe may be weldable. A leaking flange usually needs a new gasket and hardware. A failed flex pipe usually needs a new flex section or assembly. A muffler with rusted seams is usually better replaced than patched.
Welding for Structural Repairs
Welding can be durable when the surrounding metal is clean, thick enough, and not deeply pitted. A good exhaust shop will grind the area to bare metal, check whether the pipe still has strength, weld the crack or sleeve, and confirm that the leak is gone.
Welding is not the best answer when rust has thinned a large area. If the pipe flakes apart while being cleaned, the repair will not last. In that case, replacement of the pipe section, muffler, or assembly is safer and usually more cost-effective.
Gasket and Part Replacement
Gaskets seal joints that expand, contract, and vibrate. If a Camry has a leak at a flange, ask the shop to replace the gasket, bolts, springs, and damaged hardware together. Reusing rusted hardware can cause another leak soon after the repair.
When replacing parts, compare OEM and quality aftermarket options. OEM parts usually offer the best fit. Aftermarket parts can be cost-effective, but they should be direct-fit, emissions-compliant, and made from suitable materials such as stainless or aluminized steel. For catalytic converters, confirm the replacement is legal for your state and vehicle configuration.
Pro Tip: Ask the shop to show you the failed part, point out the leak location, and include gaskets, hangers, clamps, and hardware in the estimate. Small missing hardware can turn a good repair into a repeat leak.
Typical Costs and Utah Emissions/Inspection Considerations
Repair costs vary by model year, engine, rust severity, shop labor rate, and whether the repair uses OEM, direct-fit aftermarket, or universal parts. A small local weld may be inexpensive, but major exhaust parts can cost far more. Current RepairPal estimate pages list Toyota Camry exhaust pipe replacement around $871–$916, muffler replacement around $597–$633, catalytic converter replacement around $1,827–$2,165, and exhaust manifold gasket replacement around $271–$382. Use those as planning ranges, not guaranteed local prices.
| Repair | Typical Situation | Cost Notes |
|---|---|---|
| Small weld or sleeve | Small hole in solid pipe | Often lowest-cost shop repair, but not suitable for widespread rust |
| Gasket and hardware | Flange leak or manifold gasket leak | Labor can exceed parts cost because rusted bolts take time |
| Flex pipe repair | Frayed, cracked, or leaking flex section | May be replaced as a section or larger pipe assembly |
| Muffler or pipe replacement | Rusted seam, broken hanger, perforated pipe | Direct-fit parts cost more but usually fit better |
| Catalytic converter replacement | Failed, damaged, stolen, or leaking converter | Usually one of the most expensive exhaust repairs |
For Utah drivers, emissions requirements depend on where the vehicle is registered. The Utah DMV directs drivers to county emissions programs and identifies Cache, Davis, Salt Lake, Utah, and Weber counties in its emissions-related registration guidance. If your Camry is registered in one of those counties, repair exhaust leaks before testing, especially if the leak affects the catalytic converter, oxygen sensors, or OBD-II readiness.
After an emissions-related repair, do not clear the check-engine light right before an inspection unless the actual fault has been fixed. The monitors may show “not ready,” and the car may need a normal drive cycle before it can pass.
Choosing Parts and a Shop: OEM vs Aftermarket and Inspection Checklist
Choose a shop that works on Toyota exhaust systems regularly, gives itemized estimates, and explains whether the repair is a patch, weld, gasket replacement, section replacement, or full assembly replacement. The cheapest quote is not always the best quote if it reuses rusted hardware or installs a poor-fitting part.
OEM Versus Aftermarket
OEM exhaust parts usually cost more but offer reliable fit, factory-style routing, and fewer surprises during installation. Aftermarket parts can save money, especially for older Camrys, but quality varies. Check material, weld quality, flange thickness, gasket type, hanger placement, and warranty terms.
- Confirm fitment: match model year, engine, emissions family, and body style.
- Check emissions compliance: converters and emissions-related parts must be legal for your state and vehicle.
- Inspect materials: stainless or aluminized steel usually resists corrosion better than thin low-grade steel.
- Replace hardware: new gaskets, bolts, springs, clamps, and hangers help the repair last.
Shop Selection Tips
Ask each shop the same questions so you can compare quotes fairly.
| Question to Ask | What to Verify |
|---|---|
| Where exactly is the leak? | Manifold, flex pipe, flange, converter, pipe, or muffler |
| Is the metal weldable? | Solid surrounding metal, not widespread perforation |
| What parts are included? | Gaskets, bolts, clamps, hangers, and shields |
| Is the converter compliant? | Correct vehicle application and legal emissions part |
| What warranty is provided? | Parts warranty, labor warranty, and rust exclusions |
Pre-Purchase Inspection Checklist
If you are buying a used Camry, inspect the exhaust before purchase. A clean-looking body can still hide an expensive exhaust repair underneath.
- Look for soot marks, holes, crushed pipe sections, patched areas, missing heat shields, and broken hangers.
- Listen for ticking at cold start and rumbling during acceleration.
- Check whether the catalytic converter appears original, compliant, and undamaged.
- Scan for emissions-related codes and confirm OBD-II readiness if an emissions test is required.
- Ask for repair receipts if the exhaust was recently replaced.
Preventing Future Rust and Leaks: Maintenance and Winter Care
Road salt and chloride-based deicers can speed corrosion of steel vehicle parts. Minnesota transportation research notes that salt corrodes steel in vehicles and infrastructure, which is why winter maintenance matters for any Camry driven in salted-road regions. Minnesota DOT research summary
| Task | Frequency | Why It Helps |
|---|---|---|
| Undercarriage rinse | After salted-road driving when temperatures allow | Removes salt film from pipes, hangers, and seams |
| Visual exhaust inspection | Every oil change and after hard winter storms | Catches small holes, loose hangers, and flange leaks early |
| Drain and debris clearing | As needed | Prevents packed snow, mud, and leaves from trapping moisture |
| Hanger and heat shield check | Twice a year | Reduces vibration and metal fatigue |
| Upgrade rusted sections | When repair is needed | Stainless or better-quality parts can last longer in salty climates |
Rust inhibitors can help some exposed metal areas, but do not spray products on oxygen sensors, catalytic converters, hot exhaust parts, belts, brakes, or electrical connectors. Follow the product label and let the exhaust cool before applying anything near it.
Frequently Asked Questions
What is the main cause of Camry exhaust leaks?
Rust and corrosion are the most common long-term causes, especially in areas that use road salt. Leaks can also come from worn gaskets, cracked flex pipes, broken hangers, road impacts, loose flanges, or previous low-quality repairs.
What is the rust warranty on a Toyota Camry?
Toyota lists rust-through coverage as 60 months with unlimited miles for corrosion perforation of sheet metal, subject to the warranty guide. That is not the same as a general warranty for exhaust rust. Exhaust corrosion from age, salt, impact, or wear is usually not covered unless a dealer confirms it is a covered defect.
How much does it cost to fix a rusted Camry exhaust?
A small weld or clamp repair may be relatively inexpensive, but replacement parts can cost much more. Current estimate ranges show Camry manifold gasket, muffler, exhaust pipe, and catalytic converter repairs can run from a few hundred dollars to over $2,000 depending on the part, model year, and local labor rate.
Can I drive with a small exhaust leak?
Only for a short trip to a repair shop if there are no cabin fumes, no severe noise, no loose pipe, and no symptoms such as headache or dizziness. If you smell exhaust inside the car or the leak is near the engine or firewall, stop driving and arrange repair or towing.
Will exhaust tape or putty permanently fix a Camry exhaust leak?
No. Exhaust tape and putty are temporary fixes for small leaks in suitable areas. They can fail quickly on rusty, flexible, hot, or structural sections. A lasting repair usually requires welding, a repair sleeve, gasket replacement, clamp replacement, or part replacement.
Can an exhaust leak make a Camry fail emissions?
Yes. A leak can affect oxygen sensor readings, trigger emissions-related codes, create OBD-II readiness problems, or point to damaged emissions equipment. If your county requires emissions testing, repair the leak and confirm readiness before the inspection.
Conclusion
A small Camry exhaust leak can turn into a safety problem, an emissions problem, or a much more expensive repair if rust spreads. Start with a safe visual and sound check, focus on common leak points, and do not ignore exhaust smell inside the vehicle. Use temporary patches only to reach a repair shop, then choose a proper fix: gasket and hardware replacement, welding on solid metal, flex pipe repair, muffler replacement, or compliant catalytic converter replacement.
The best long-term plan is simple: inspect the exhaust regularly, rinse away road salt when practical, replace weak hangers and gaskets before they break, and choose parts that fit correctly and meet emissions requirements.
Sources
- Toyota Owner’s Manual — Exhaust Gas Precautions — supports carbon monoxide and exhaust-fume safety guidance.
- Toyota Warranty Coverage Summary — supports rust-through coverage clarification.
- Utah DMV Vehicle Inspections — supports Utah emissions-county guidance.
- U.S. EPA Vehicle Emissions Inspection and Maintenance — supports general I/M program context.
- U.S. EPA Tampering and Aftermarket Defeat Devices — supports emissions-control and catalytic-converter compliance guidance.
- RepairPal Toyota Camry Repair Estimates — supports current planning ranges for common Camry exhaust-related repairs.