Your Camry’s emission system controls fuel vapors, crankcase vapors, air-fuel mixture, exhaust gases, and catalyst efficiency so the engine can run cleanly and meet emissions rules. When the MIL or check-engine light turns on, do not guess or clear the code first. Save the OBD-II codes and freeze-frame data, inspect the simple items, then test the affected system in order.
Quick Answer
The Toyota Camry emission system uses EVAP controls, PCV ventilation, oxygen or air-fuel ratio sensors, catalytic converters, and engine computer feedback to reduce fuel vapor and exhaust pollution. If the MIL comes on, scan the OBD-II codes, record freeze-frame data, inspect the gas cap and hoses, then diagnose the exact code before replacing parts.
Key Takeaways
- Camry emission parts vary by model year, engine, market, and California/PZEV certification, so verify parts by VIN before buying anything.
- EVAP codes often point to vapor leaks, purge/vent valve issues, fuel cap problems, or canister-pressure faults.
- Oxygen and air-fuel ratio sensor data should be checked with a scan tool and factory specs, not judged by one universal voltage number.
- A flashing MIL, raw fuel smell, severe misfire, or glowing-hot catalytic converter is a stop-driving situation.
- After a repair, readiness monitors may need normal drive-cycle conditions before an emissions inspection will pass.
At a Glance
| Time Required | 10–20 minutes for basic checks; 1–2 hours for code-specific testing |
| Difficulty | Beginner for scanning and visual checks; intermediate for live data, smoke testing, and sensor tests |
| Tools Needed | OBD-II scanner, flashlight, gloves, basic hand tools, scan tool with live data; smoke machine or multimeter for advanced checks |
| Cost | Free to scan at some parts stores; typical diagnosis and small repairs vary widely by code, region, and part quality |
How the Toyota Camry Emission System Works
The Camry’s emission system is not one single part. It is a group of systems that work with the engine control module, or ECM, to control fuel mixture, fuel vapors, crankcase pressure, and exhaust after-treatment. U.S. OBD rules require modern vehicles to detect emission-control malfunctions, store diagnostic trouble codes, and alert the driver when needed through the MIL, according to 40 CFR 86.1806-27.
During cold start, the ECM may run in open loop until the engine and sensors warm up enough for accurate feedback. During normal operation, it uses sensor data to adjust injector pulse width and keep combustion near the correct air-fuel target. For gasoline, the chemically ideal mixture is often described as about 14.7 parts air to 1 part fuel, but real driving conditions may be richer or leaner depending on load, temperature, catalyst protection, and engine strategy.
Most Camrys use a mix of these emission-related parts:
- EVAP system: stores gasoline vapors in a charcoal canister and purges them into the intake when conditions are right.
- PCV system: routes blow-by gases from the crankcase back into the intake instead of venting them to the atmosphere.
- Oxygen or air-fuel ratio sensors: report exhaust oxygen content so the ECM can adjust fuel trim and monitor catalyst performance.
- Catalytic converter: reduces hydrocarbons, carbon monoxide, and nitrogen oxides after combustion.
- EGR system, where equipped: recirculates a controlled amount of exhaust gas to reduce combustion temperature and NOx formation. Not every Camry engine uses the same EGR hardware.
Note: Camry emission hardware changes by year, engine, trim, state emissions package, and market. Before ordering parts, confirm the exact system with your VIN, emissions label, owner documents, or Toyota service information.
What to Do When the MIL Lights Up
When the MIL comes on, start with information gathering. The code tells you which system failed a self-test, but it does not automatically identify the failed part. A P0446, for example, may involve an EVAP vent control issue, wiring, a valve, a pressure sensor, a blocked line, or a canister problem.
Pro Tip: Record stored codes, pending codes, freeze-frame data, fuel trims, and readiness monitor status before clearing anything. Clearing codes erases useful evidence and resets readiness monitors, which can delay an emissions test.
First 10-Minute Checklist
- Scan the codes. Write down all stored and pending OBD-II codes.
- Check freeze-frame data. Note coolant temperature, speed, fuel level, load, and fuel trim when the fault was recorded.
- Inspect the gas cap. Make sure it is the correct cap, tightened, and not cracked or missing its seal.
- Look for obvious hose damage. Inspect EVAP hoses, PCV hoses, intake ducts, and vacuum lines for cracks, loose clamps, or disconnected fittings.
- Inspect wiring. Look for melted, corroded, rubbed-through, or oil-soaked wiring near oxygen/A/F sensors, purge valves, vent valves, and the canister area.
- Check for drivability symptoms. Note rough idle, fuel smell, poor mileage, hesitation, stalling, rattling exhaust, or a rotten-egg odor.
Warning: Do not work around a hot exhaust or catalytic converter. Do not smoke near fuel vapors. If the MIL is flashing, the engine is misfiring badly, or the catalyst smells hot or sulfur-like, stop driving and arrange diagnosis to prevent converter damage.
What the Code Does and Does Not Tell You
OBD-II codes are starting points. They identify a circuit, system, or monitored condition that failed. EPA OBD inspection rules also rely on the MIL command and readiness-monitor status, not just whether the car feels normal. Under federal OBD test standards, a 1996-or-newer vehicle can fail an OBD inspection when the MIL is commanded on, and readiness monitors may also affect pass/fail results as described in 40 CFR Part 85 Subpart W.
That means the right repair process is:
- scan the code,
- read the freeze-frame data,
- inspect the affected system,
- test the part and circuit,
- repair the confirmed fault,
- drive until monitors complete,
- rescan before the emissions inspection.
Toyota Camry EVAP, PCV, Sensors, and Catalyst Layout
For 2002–2011 Camrys, common emission-control items include the EVAP canister, fuel tank cap, purge vacuum switching valve, ventilation or PCV valve, heated oxygen sensor, and air-fuel ratio sensor. Toyota service-manual layouts for the 2007–2009 2AZ-FE, for example, show emissions parts such as the ventilation valve, vacuum switching valve, heated oxygen sensor, air-fuel ratio sensor, canister, and fuel tank cap.
Do not assume every Camry from every year has the same layout. A four-cylinder, V6, hybrid, California/PZEV, federal-emissions, or later Dynamic Force Camry can use different sensor locations and exhaust hardware.
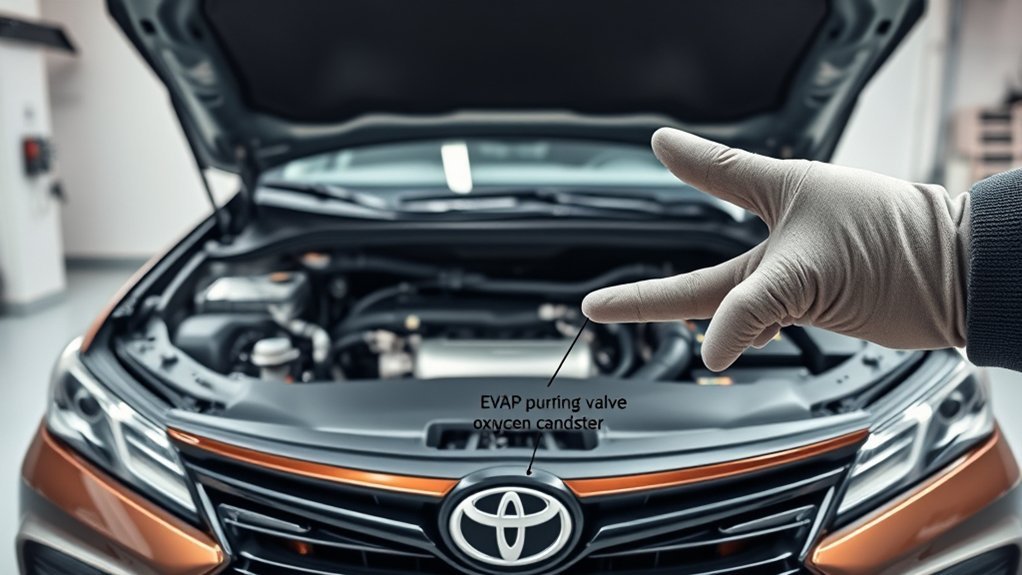
EVAP System Function
The EVAP system prevents gasoline vapors from escaping directly into the air. Vapors from the tank are stored in a charcoal canister. When the ECM commands purge, a purge valve meters those vapors into the intake so they can be burned during normal combustion.
Common EVAP-related parts include:
- Fuel cap: seals the filler neck and is often the easiest item to inspect.
- Charcoal canister: stores vapor until purge conditions are met.
- Purge valve or VSV: controls vapor flow from the canister to the intake.
- Vent valve or canister close valve: helps seal the system during leak checks.
- Canister pressure sensor or leak detection pump: helps the ECM test the system for leaks or flow faults, depending on generation.
Typical EVAP symptoms include a fuel smell, hard starting after refueling, repeated gas-cap warnings, failed readiness monitors, or codes such as P0440, P0441, P0442, P0446, P0455, or P0456.
PCV Valve Operation
The PCV valve handles crankcase vapors. Combustion gases that slip past the piston rings, called blow-by, enter the crankcase. The PCV system routes those vapors back into the intake instead of venting them outside the engine.
A stuck or clogged PCV valve can cause rough idle, oil leaks, oil consumption, sludge, whistling noises, or fuel-trim problems. A simple inspection often includes checking hose condition, oil contamination, correct one-way valve function, and whether the valve is restricted. Replace it with the correct part for the engine if it is clogged, loose, stuck, or oil-soaked.
Oxygen and Air-Fuel Ratio Sensors
Many Camrys use an upstream air-fuel ratio sensor and a downstream heated oxygen sensor, although exact layouts vary. The upstream sensor helps the ECM control fuel trim. The downstream sensor helps monitor catalytic converter oxygen-storage and conversion performance.
Older narrowband oxygen sensors often switch rich/lean during closed-loop operation. Wideband A/F sensors work differently and may be represented by scan-tool data such as current, equivalence ratio, lambda, or calculated voltage. Because the displayed values vary by scanner and vehicle, use factory specifications and live data trends rather than one universal voltage rule.
Sensor-related codes can be caused by the sensor itself, but also by exhaust leaks, intake leaks, misfires, contaminated fuel, oil burning, wiring problems, or a failing catalytic converter. Replace a sensor only after confirming power, ground, heater circuit, signal response, and the absence of upstream air or exhaust leaks.
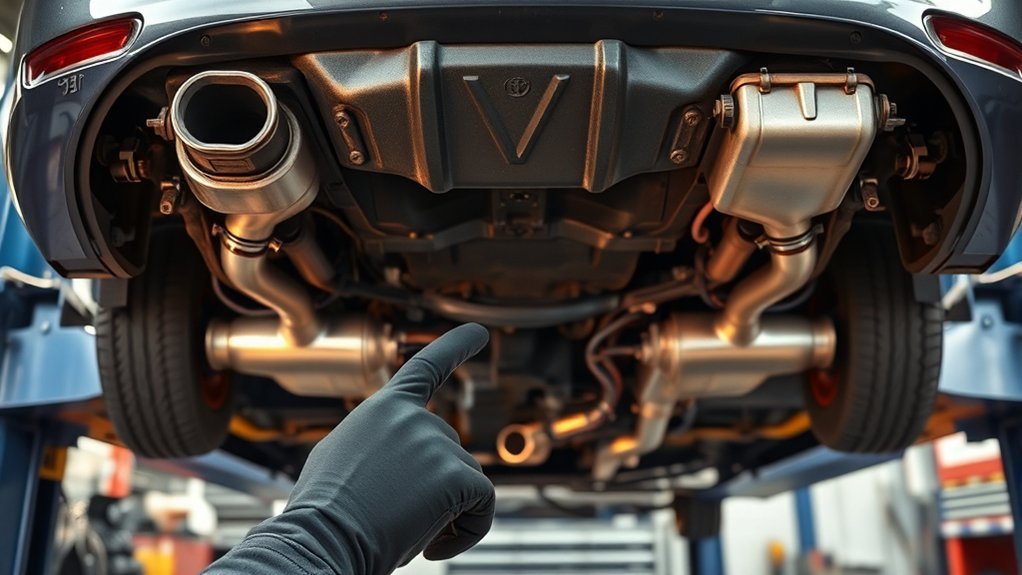
Catalytic Converter Function
The catalytic converter is the exhaust after-treatment device. It uses a coated substrate to reduce hydrocarbons, carbon monoxide, and nitrogen oxides. A healthy converter needs correct air-fuel control. Repeated misfires, oil burning, coolant burning, rich operation, or fuel contamination can overheat or poison the converter.
Signs of catalyst trouble may include P0420/P0430 codes, rattling from a broken substrate, sulfur odor, lack of power from restriction, or failed emissions inspection. However, a catalyst-efficiency code does not always mean the converter is the first part to replace. Confirm sensor data, exhaust leaks, misfires, and fuel control first.
EGR Where Equipped
EGR lowers combustion temperature by routing a controlled amount of exhaust gas back into the intake. This can reduce NOx emissions. Some Camry engines and markets use dedicated EGR hardware; others may use different strategies. Because EGR availability is year- and engine-dependent, treat EGR diagnosis as “where equipped,” not as a universal Camry step.
When EGR is present, common faults include carbon buildup, stuck valves, blocked passages, wiring issues, or insufficient flow. Symptoms may include rough idle, spark knock, hesitation, or EGR-related codes. Always confirm that the engine actually has the hardware before buying an EGR valve.
2002–2011 vs. 2018+ Camry Emission Differences
The original article mixed older Camry emission layouts with later A25A/Dynamic Force engine details. It is better to separate them.
| Generation / engine context | What to know |
|---|---|
| 2002–2011 Camry | Common systems include EVAP, PCV/ventilation, oxygen or A/F sensors, catalytic converters, and fuel-trim control. Exact parts differ by 2AZ-FE, V6, hybrid, PZEV, and market package. |
| 2018+ Camry with Dynamic Force engines | Toyota’s later 2.5L Dynamic Force family uses newer combustion, cooling, injection, and emissions strategies. Toyota states the engine family was designed for high driving and environmental performance and reaches high thermal efficiency in gasoline and hybrid forms. |
| Hybrid Camry | Hybrid operation changes engine run time and warm-up behavior. The engine may shut off when conditions allow, so catalyst warm-up, readiness, and diagnostics can feel different from a gasoline-only Camry. |
For later Toyota engine development, Toyota’s own global release on the 2.5-liter Dynamic Force engine is a better source than applying older Camry assumptions to newer cars.
Common Camry Emissions Codes and Likely Checks
The table below is a diagnostic starting point, not a parts-buying list. Always confirm the fault before replacing a component.
| Code family | What it usually points to | First checks |
|---|---|---|
| P0440 | EVAP system malfunction | Fuel cap, EVAP hoses, canister, purge/vent valves, pressure sensor data |
| P0441 | Incorrect EVAP purge flow | Purge valve operation, blocked lines, vacuum supply, stuck-open purge valve, wiring |
| P0442 / P0456 | Small EVAP leak | Gas cap seal, filler neck rust, small hose cracks, smoke test |
| P0446 | EVAP vent control problem | Vent valve, canister close valve, canister filter, wiring, canister pressure response |
| P0455 | Large EVAP leak | Loose cap, disconnected hose, cracked canister, filler neck, smoke test |
| P0130–P0167 | Oxygen/A/F sensor or heater circuit faults | Sensor heater power/ground, connector corrosion, exhaust leak, live data response |
| P0171 / P0174 | System lean | Intake leaks, PCV hose, MAF contamination, fuel delivery, exhaust leak before sensor |
| P0420 / P0430 | Catalyst efficiency below threshold | Misfires, exhaust leaks, upstream/downstream sensor data, fuel trims, oil/coolant burning, converter condition |
Step-by-Step DIY Diagnosis
Step 1: Scan and Save Data
Use a scanner that can read stored codes, pending codes, freeze-frame data, and readiness monitors. A basic code reader is enough for the first look. A better scan tool that shows live fuel trim, sensor data, and EVAP monitor status makes diagnosis much easier.
Step 2: Inspect Simple Causes
Before buying sensors or a catalytic converter, check the simple failure points:
- loose or wrong fuel cap,
- cracked EVAP hose,
- split intake tube after the MAF sensor,
- loose PCV hose,
- damaged oxygen/A/F sensor wiring,
- exhaust leak before the downstream sensor,
- recent battery disconnect or code clearing that reset readiness monitors.
Step 3: Use Live Data
Live data helps you see whether the ECM is adding or subtracting fuel. Short-term fuel trim changes quickly; long-term fuel trim shows learned correction. A lean code with high positive trims may suggest unmetered air, weak fuel delivery, or a sensor reporting issue. A rich condition may point to a stuck purge valve, leaking injector, fuel pressure issue, contaminated sensor, or restricted air intake.
For catalyst codes, compare upstream and downstream sensor behavior. A downstream sensor that closely mirrors the upstream sensor after warm-up can suggest low converter oxygen storage, but exhaust leaks and sensor problems must be ruled out first.
Step 4: Test the System That Matches the Code
For EVAP codes, smoke testing is often the most direct method. For sensor codes, test heater circuits, wiring, grounds, and response. For lean/rich codes, check intake leaks, fuel trim patterns, MAF data, and PCV condition. For catalyst codes, fix misfires, oil burning, coolant burning, and exhaust leaks before installing a new converter.
Note: Fuel pressure, injector resistance, and sensor test values are engine-specific. Use the factory repair information for your exact model year and engine rather than applying one pressure or resistance number to every Camry.
Step 5: Repair, Drive, and Verify
After repair, clear the code only when you have saved the original data and completed the fix. Drive normally until the relevant readiness monitor runs. Then rescan for pending codes before booking an emissions inspection. The EPA’s Vehicle Emissions Inspection and Maintenance guidance explains that OBD checks are part of inspection and maintenance programs, and monitor readiness can matter.
Readiness Monitors and Emissions Inspection Prep
Readiness monitors are self-tests for systems such as the catalyst, oxygen sensor, oxygen-sensor heater, EVAP system, EGR where equipped, misfire detection, and fuel system monitoring. After a dead battery, cleared code, or ECM reset, some monitors may show “not ready.”
Before an emissions test:
- make sure the MIL is off and not commanded on,
- confirm no stored or pending emission-related codes are returning,
- check readiness monitor status,
- drive the vehicle under normal city and highway conditions,
- avoid clearing codes immediately before testing.
If a monitor will not set, diagnose why instead of repeatedly clearing codes. Common reasons include low fuel level, temperature conditions not being met, unresolved sensor faults, EVAP leaks, or incomplete drive-cycle conditions.
Repairs, Maintenance Cost Tips, and Trusted Camry Service in Airmont, NY
Emission repairs can be inexpensive or costly depending on the confirmed failure. A gas cap, hose, PCV valve, or purge valve is usually far less expensive than a catalytic converter. The best way to control cost is to diagnose in the right order and avoid replacing parts based only on a code description.
For Camry owners near Airmont, NY, a Toyota dealer or qualified independent shop with Toyota scan-tool experience can help with EVAP smoke tests, A/F sensor diagnosis, catalyst-efficiency testing, and readiness-monitor issues. Interstate Toyota lists a Toyota service center serving Airmont, Suffern, Ramsey, New City, and Nanuet on its service page. Whether you choose a dealer or independent shop, ask for the code list, freeze-frame data, test results, and the reason a part failed.
Good maintenance habits include:
- replacing the correct PCV valve at sensible intervals,
- repairing oil or coolant burning before it damages the catalyst,
- fixing misfires quickly,
- using the correct fuel cap,
- keeping intake and exhaust leaks repaired,
- checking recall and warranty coverage before paying for major emissions work.
Warranty, Recalls, and Aftermarket Parts
Before paying for an expensive emissions repair, check coverage. Toyota provides manuals and warranty documents through Toyota Owners manuals and warranties. Federal emissions warranty rules generally include 2 years/24,000 miles of emission-defect coverage for many items and 8 years/80,000 miles for specified major emission-control components, including catalytic converters and emission control modules, under 40 CFR 85.2103. State emissions warranties, hybrid coverage, and California rules can differ, so check the booklet for your model year and state.
For recalls, use your VIN. NHTSA’s recall lookup explains that VIN or license-plate searches show whether a specific vehicle has an unrepaired recall, while year/make/model searches are more general. Toyota also offers its own recall lookup through Toyota Owners.
Warning: Removing catalytic converters, disabling oxygen/A/F sensors, installing non-compliant “test pipes,” or using ECU tunes that defeat emissions controls can violate federal or state law and may cause inspection failure.
Frequently Asked Questions
How do emissions regulations differ by country for the Camry?
Camry emissions hardware and calibration can differ by market because the U.S., California, Canada, Europe, Japan, and other regions use different standards, test cycles, warranty rules, and certification packages. Use the emissions label, VIN, and local owner documents to confirm the correct parts for your car.
Can aftermarket performance parts affect Camry emissions compliance?
Yes. Intakes, headers, exhaust parts, catalytic converters, oxygen-sensor spacers, and ECU tunes can affect emissions compliance if they change monitored systems or remove certified equipment. Use emissions-compliant parts for your state and keep documentation for inspections.
What warranty coverage applies to emissions components on used Camrys?
Coverage depends on model year, in-service date, mileage, state, and the part that failed. Federal rules generally provide longer coverage for specified major emission-control components, but used-car buyers should verify the remaining warranty through the Toyota warranty booklet, Toyota Owners, or a dealer using the VIN.
How does a hybrid Camry emissions system differ from a gasoline-only Camry?
A hybrid Camry can shut the engine off and restart it based on driving conditions, battery state, and temperature. That changes engine run time and warm-up behavior. The emission system still uses sensors, catalyst monitoring, EVAP controls, and ECM diagnostics, but readiness and warm-up behavior may feel different.
Are there emissions-related recalls for certain Camry production years?
Recalls are VIN-specific. Do not assume your Camry is covered because another Camry from the same year had a campaign. Check NHTSA and Toyota recall tools by VIN, then ask a Toyota dealer whether any open recall, service campaign, or warranty enhancement applies.
Can I pass emissions right after clearing a check-engine light?
Usually not right away. Clearing codes resets readiness monitors. Even if the MIL is off, the vehicle may need normal drive-cycle conditions before catalyst, oxygen-sensor, EVAP, and other monitors show ready. Check readiness status with a scanner before going to the test station.
Conclusion
When the MIL lights up on a Toyota Camry, the smartest path is scan, save data, inspect, test, repair, and verify. Start with the code and freeze-frame data, then check simple causes such as the fuel cap, EVAP hoses, PCV hoses, intake leaks, wiring, and exhaust leaks. Treat EGR, A/F sensor values, fuel pressure, and catalyst testing as model-specific, not universal. A careful diagnostic process protects the catalytic converter, avoids wasted parts, lowers repair cost, and helps the car complete readiness monitors for emissions inspection.
Sources
- eCFR 40 CFR 86.1806-27 — Onboard diagnostics — supports OBD/MIL/DTC explanation.
- eCFR 40 CFR Part 85 Subpart W — OBD inspection and warranty test provisions — supports readiness monitor and inspection guidance.
- eCFR 40 CFR 85.2103 — Emission warranty — supports federal emissions warranty timing and major component coverage.
- Toyota Owners — Camry manuals and warranty information — supports model-year/VIN-specific owner document guidance.
- Toyota Global — 2.5-liter Dynamic Force engine — supports later Dynamic Force engine context.
- NHTSA — Vehicle recall lookup — supports VIN-specific recall guidance.