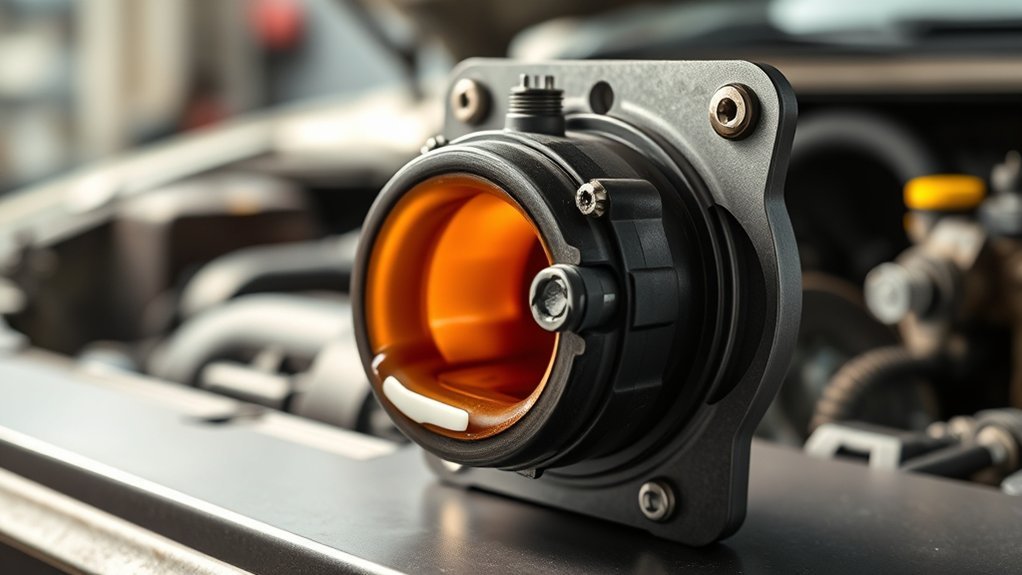
Your Camry’s active engine mount is designed to reduce engine vibration before it reaches the cabin. On Camry models equipped with Toyota’s Active Control Engine Mount system, the engine control module can command a vacuum switching valve to change how the mount responds at low engine speeds. When the mount, vacuum hoses, or valve fail, you may feel extra vibration at idle, hear clunks during takeoff, or notice rougher shifts.
Quick Answer
A Camry active engine mount uses a controlled vacuum valve and a sealed mount assembly to reduce low-speed engine vibration. Common failure signs include cabin vibration at idle, clunking when shifting into gear, visible fluid leakage, torn rubber, or excessive engine movement. A leaking active mount is normally replaced, not refilled.
Key Takeaways
- Not every Camry uses the same mount layout. Active-control hardware varies by model year, engine, drivetrain, and market.
- The safest first checks are visual inspection, symptom logging, vacuum hose inspection, and a low-risk engine movement check.
- Do not try to refill a hydraulic active mount. If the sealed mount is leaking or torn, replacement is the normal repair.
- A scan tool can help test the vacuum switching valve circuit, but a bad physical mount may not trigger a dashboard warning.
- Replacement cost varies widely; current Camry engine mount estimates commonly run several hundred dollars and can rise if an active mount or multiple mounts are involved.
At a Glance
| Time Required | 15–30 minutes for basic inspection; 1–3+ hours for professional replacement, depending on mount location |
| Difficulty | Basic inspection: beginner to intermediate; replacement: intermediate to professional |
| Tools Needed | Flashlight, gloves, wheel chocks, phone for recording movement, scan tool for advanced active tests, service information for your VIN |
| Cost | DIY inspection is usually free; shop replacement often costs several hundred dollars, with current Camry estimates commonly around $629–$720 before taxes and location differences |
Warning: Do not rev the engine to high RPM to test a mount. Do not stand in front of or behind the vehicle during a load check. Never get under the car unless it is correctly supported on rated jack stands or a lift, and never rely on a hydraulic jack alone.
Signs Your Camry’s Active Engine Mount Is Failing
The most common sign of a failing active engine mount is excessive cabin vibration, especially when the engine is idling in Drive or Reverse. You may also hear a dull clunk when shifting from Park to Drive, feel a thud during takeoff, or notice more engine movement than usual when the throttle is lightly applied.
Look for these symptoms:
- Vibration at idle: The steering wheel, seat, dashboard, or floor may shake more than normal.
- Clunking during gear engagement: A worn mount can let the engine rock when torque loads change.
- Visible fluid stains: Many hydraulic mounts are sealed; oily residue around the mount usually means the mount has failed internally.
- Torn or collapsed rubber: Cracks, separation, or sagging rubber can reduce isolation.
- Rougher shifts or takeoff feel: Excessive engine movement can make normal drivetrain changes feel harsher.
- More noise in the cabin: A failed mount can transmit engine vibration and resonance through the body structure.
Note: A bad mount does not always turn on the check-engine light. Electrical faults in the active-control circuit may store diagnostic trouble codes, but a torn rubber mount or leaking hydraulic mount is often found by inspection and movement testing.
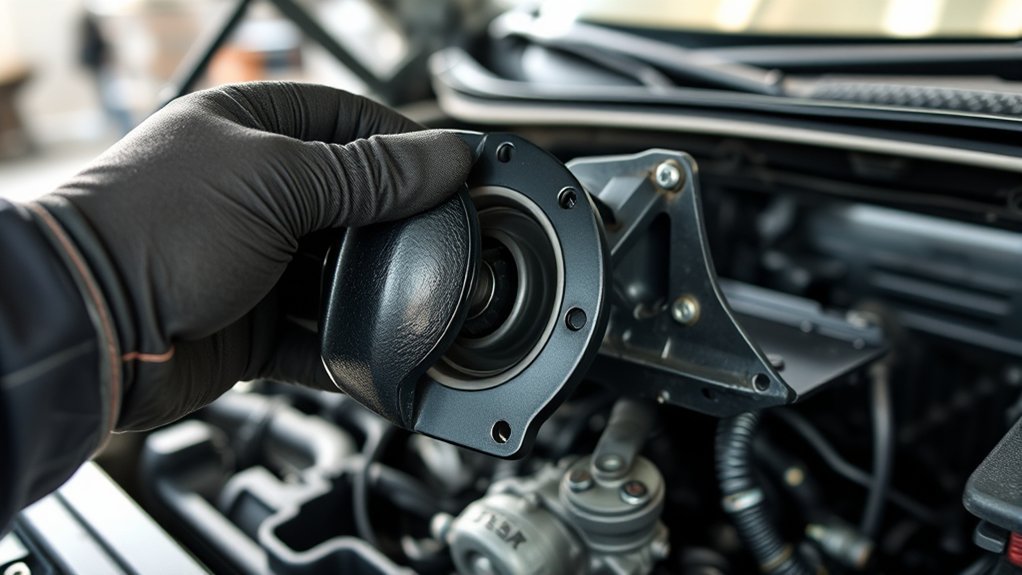
How the Active Engine Mount Works
A standard engine mount holds the engine in position and absorbs vibration through rubber and, in some cases, hydraulic fluid. An active-control mount adds a control element. On Camry systems that use Active Control Engine Mount hardware, service information describes a vacuum switching valve controlled by the engine control module. The system is used to reduce engine vibration at low engine speed by changing the mount’s behavior through vacuum control.
In simple terms, the system has three jobs:
- Hold the engine securely. The mount and brackets limit how far the engine can move.
- Absorb vibration. Rubber and sealed hydraulic chambers help isolate vibration before it reaches the body.
- Change response when commanded. The vacuum switching valve can change the mount’s low-speed vibration response when the engine computer commands it.
| Component | What It Does | What to Check |
|---|---|---|
| Mount / insulator | Supports the engine and isolates vibration | Cracks, collapse, separation, leakage, loose fasteners |
| Hydraulic chamber | Damps vibration inside a sealed mount assembly | External fluid stains or wet residue |
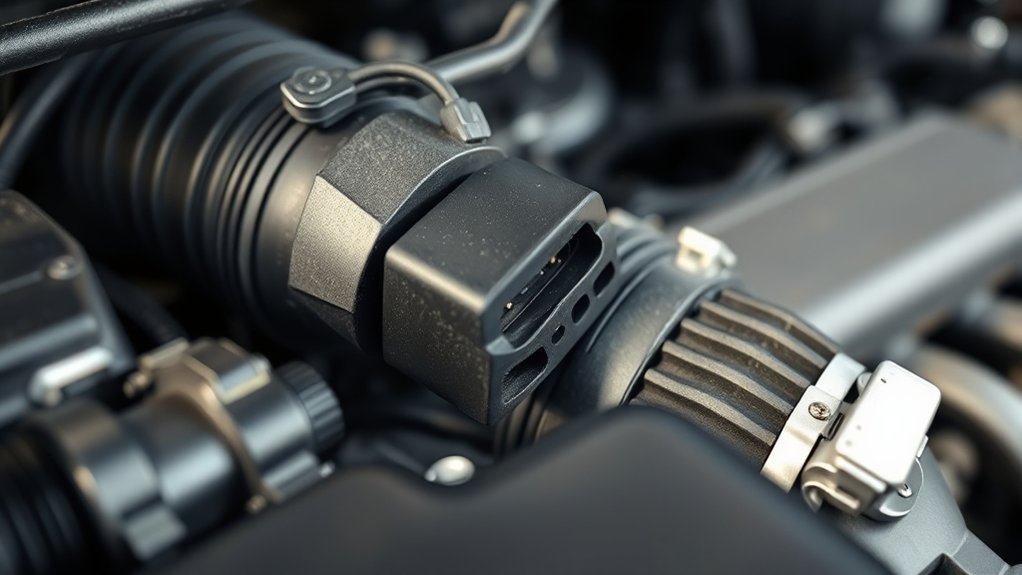
| Vacuum switching valve | Directs vacuum flow when commanded by the control system | Vacuum hose condition, connector condition, scan-tool active test |
| Vacuum hoses | Carry vacuum to the active mount system | Loose, cracked, disconnected, or blocked hoses |
| Brackets and fasteners | Keep the mount fixed to the engine and body structure | Rust, missing bolts, incorrect torque, bent brackets |
For a technical reference, Toyota-style service information for the Camry Active Control Engine Mount system explains that the vacuum switching valve is controlled by an ECM pulse signal matched to engine speed to reduce vibration. Toyota’s parts information also describes vacuum switching valves as components that manage vacuum flow in connected engine systems.
5 Safer Checks to Diagnose the Mount
These checks can help you decide whether the mount needs professional diagnosis or replacement. They are not a substitute for the repair manual for your exact VIN.
1. Confirm Your Camry’s Mount Layout
Before ordering parts, confirm the model year, engine, drivetrain, and market version. Camry mount layouts are not universal. Some models use active-control hardware, and others use conventional mounts. Use a Toyota parts catalog, your VIN, or a trusted repair database to confirm whether your car has a front active mount, rear active mount, vacuum switching valve, or standard mounts.
2. Do a Visual Inspection
With the engine off and cool, use a flashlight to inspect the visible mounts. Look for torn rubber, collapsed rubber, metal-to-metal contact, cracked brackets, missing fasteners, or oily stains. A hydraulic mount with wet residue around the body of the mount usually needs replacement.
3. Watch for Excessive Engine Movement
Have a helper sit in the driver’s seat with the parking brake set and the brake pedal firmly pressed. From a safe position beside the vehicle, watch the engine while the helper briefly shifts between Park, Reverse, Neutral, and Drive. Do not stand in front of the car. A small amount of movement is normal; a hard jump, knock, or large rocking motion points toward a worn mount or torque strut.
4. Check Vacuum Hoses and the Vacuum Switching Valve
Inspect the vacuum hoses near the active mount system for looseness, cracks, disconnections, or blockage. If you have a scan tool with Toyota active-test capability, a technician can command the active mount control and listen for vacuum switching valve operation. Electrical testing of the valve circuit should follow service manual procedures.
5. Rule Out Other Causes of Vibration
Do not blame the active mount too quickly. A rough idle, misfire, worn spark plugs, exhaust contact, bad transmission mount, damaged torque strut, worn CV axle, or incorrect idle speed can feel like a mount problem. If vibration changes with engine RPM, gear selection, or road speed, write down the pattern before visiting a shop.
Pro Tip: Record a short video of the engine movement during the low-load check. A clear video helps a technician compare normal movement against excessive rocking and can make diagnosis faster.
Key Parts: Diaphragm, Hydraulic Fluid, and Vacuum Valve
A hydraulic active mount is built as a sealed assembly. Inside the mount, rubber, fluid chambers, and diaphragm-style components help absorb vibration. The fluid is not a maintenance item like engine oil or coolant. If the mount leaks, the damping ability drops and the mount should usually be replaced.
The vacuum switching valve matters because it controls vacuum flow to the active-control system. If the valve fails electrically, sticks, or loses vacuum because of a cracked hose, the mount may no longer respond correctly at low engine speeds. That can create extra vibration even if the rubber portion of the mount still looks acceptable.
The rubber body of the mount is just as important. Even if the active-control side works, torn rubber can let the engine move too far. Once the rubber separates or collapses, the mount can no longer hold the engine in the correct position.
Why the Vacuum Switching Valve Matters
The vacuum switching valve is the control point for the active system. Toyota’s service information describes the valve as ECM-controlled, with pulse frequency matched to engine speed to reduce vibration. In plain language, the engine computer can command the valve so the mount behaves differently when low-speed vibration would otherwise be most noticeable.
It Helps Control Mount Response
When the vacuum switching valve and hoses work correctly, the active mount can respond as designed. When the valve does not operate, the hoses leak, or the circuit has a fault, the mount may feel too harsh or may fail to cancel vibration at idle.
It Reduces Low-Speed Resonance
Engine mounts are part of the vehicle’s noise, vibration, and harshness system. Active mounts are used because engine vibration changes with engine speed. By changing the mount response during low-speed operation, the system can reduce the vibration that would otherwise be felt in the cabin.
A mount that looks small can make a big difference: once it stops isolating vibration, the steering wheel, seat, dashboard, exhaust, and drivetrain can all feel harsher.
Common Failures, Repairs, and Estimated Costs
Active engine mount problems usually fall into four groups: the sealed mount leaks, the rubber tears, the vacuum control side fails, or another mount lets the engine move too far.
| Failure | Common Signs | Typical Repair |
|---|---|---|
| Hydraulic fluid leak | Wet mount, more vibration, clunking | Replace the sealed mount assembly |
| Torn or collapsed rubber | Engine rocking, thud on takeoff, harsh idle | Replace the mount or torque strut |
| Vacuum hose leak | Active system does not respond correctly | Repair or replace hoses |
| Vacuum switching valve fault | Possible stored code, failed active test, idle vibration | Test circuit, replace valve if confirmed faulty |
| Loose bracket or fastener | Knock, shifting clunk, visible movement | Inspect threads and brackets; torque to service specification |
Common Failure Modes
The two most visible failure modes are fluid leakage and rubber separation. A leaking hydraulic mount loses damping ability. A torn rubber mount allows too much engine movement. Either condition can transfer vibration into the body and place extra stress on nearby exhaust, hoses, and drivetrain parts.
Repair Costs Breakdown
Cost depends on the mount location, model year, engine, labor rate, and whether the active-control valve or hoses also need work. RepairPal’s Toyota Camry engine mount estimate lists an average range of about $629–$720, while some year-specific estimates are lower or higher. Dealer pricing, OEM active mounts, rusted fasteners, and multiple failed mounts can raise the total.
Before paying out of pocket, check warranty status. Toyota’s basic warranty is commonly 36 months/36,000 miles, and the 2025 Camry Warranty & Maintenance Guide lists engine mounts under powertrain coverage for 60 months/60,000 miles, subject to exclusions. Warranty decisions depend on model year, in-service date, cause of failure, maintenance history, and dealer diagnosis.
When to Replace vs. Rebuild the Mount
For most Camry active or hydraulic mounts, replacement is the correct repair when the mount leaks, collapses, or separates. The mount is a sealed component, so adding hydraulic fluid is not a normal repair. Rebuilding may exist through specialty aftermarket services, but it is not the usual DIY or factory-style repair path.
Use this decision flow:
- Replace the mount if rubber is torn, the mount is collapsed, fluid is leaking, or engine movement is excessive.
- Test the vacuum switching valve if the mount looks intact but active-control operation is suspect.
- Repair vacuum hoses if they are loose, cracked, disconnected, or blocked.
- Check the other mounts if one mount failed; a weak transmission mount or torque strut can mimic an active mount problem.
- Use OEM or high-quality equivalent parts for active mounts, especially when the vehicle is still under warranty or the mount is difficult to access.
Note: Replacement often requires supporting the engine safely while the mount is removed. If you do not have the correct lifting points, support tools, torque specifications, and service procedure, have a qualified technician do the job.
Frequently Asked Questions
What is the function of the motor mount?
A motor mount holds the engine in position and reduces vibration transfer into the vehicle body. On an active engine mount system, the mount can also change its vibration response when commanded by the control system.
How many motor mounts does a Toyota Camry have?
It depends on the Camry’s year, engine, drivetrain, and market. Many Camrys use several engine and transaxle mounts or torque struts, but the active-control layout is not the same for every model. Check by VIN before ordering parts.
Can I drive with a bad active engine mount?
A short, gentle drive to a repair shop may be possible if the engine is not moving violently and no hoses, wiring, exhaust parts, or drivetrain parts are being pulled. Avoid hard acceleration and get it inspected quickly. If the engine clunks heavily or shifts position, do not keep driving.
Will a bad active engine mount turn on the check-engine light?
Not always. A torn or leaking mount may cause vibration without a warning light. A vacuum switching valve, wiring, or control-circuit problem may store a diagnostic code, so scan-tool testing can help when the active-control side is suspected.
Can I refill the hydraulic fluid in an active engine mount?
No. Treat the mount as a sealed assembly. If hydraulic fluid is leaking from the mount, replacement is normally required.
Should I use OEM or aftermarket mounts?
For active mounts, OEM or a high-quality equivalent is usually the safest choice because fit, damping behavior, and vacuum-control compatibility matter. A cheap mount may fit physically but transmit more vibration or fail sooner.
Conclusion
A Camry active engine mount is more than a rubber block. It supports the engine, absorbs vibration, and, on equipped models, works with a vacuum switching valve to reduce low-speed cabin shake. If you feel strong idle vibration, hear clunks, see fluid leakage, or notice excessive engine movement, inspect the mount and vacuum-control parts before the problem stresses nearby components. For a leaking or torn sealed active mount, replacement is usually the right repair.
Sources
- Mitchell/Toyota Camry Active Control Engine Mount service information — active-control system description, vacuum switching valve testing, vacuum hose checks, and circuit checks
- Toyota Genuine Vacuum Switching Valve — vacuum switching valve function and Toyota parts context
- 2025 Toyota Camry Warranty & Maintenance Guide — basic warranty, powertrain warranty, and engine mount warranty context
- RepairPal Toyota Camry Engine Mount Replacement Cost — current cost estimate range
- Chinese Journal of Mechanical Engineering: Principle and Control of Active Engine Mount — general active mount and NVH background