Your Camry’s starter typically lasts about 80,000–150,000 miles, but you’ll see failure earlier if you do lots of short trips or have corroded connections. Signs include a single click, no crank with lights on, intermittent engagement, slow cranking, or a burning smell. Check battery voltage (~12.4 V), terminals, S-terminal and ground before blaming the starter. You can repair worn solenoid contacts or replace the unit; continue for step‑by‑step tests, costs, and maintenance tips.
Signs Your Camry Starter Is Failing (Quick Checklist)
When your Camry struggles to start, check for a single click when you turn the key—that means the starter’s getting power but isn’t engaging the engine; likewise, if the engine doesn’t crank at all while dashboard lights remain on, the starter is a likely culprit. You’ll note starter symptoms like a solitary click, total silence during cranking, or intermittent engagement—each indicates mechanical or electrical failure at the starter. Smell for burning during start attempts; that odor points to electrical issues in the starter windings or wiring insulation. Track frequency: frequent short trips accelerate wear and can produce progressive failure patterns you shouldn’t ignore. Diagnose by observing consistency—does the fault appear only when hot or after several attempts? That detail narrows causes toward solenoid or commutator wear versus wiring faults. You want freedom from repeated breakdowns; act on these focused cues to reclaim reliability and plan a timely starter assessment or replacement.
Quick Checks to Run Before Blaming the Starter
Before condemning the starter, check the battery voltage — it should read about 12.4 volts with the engine off to guarantee adequate cranking power. Inspect the battery terminals and starter wiring for corrosion, loose connections, or damaged insulation that can drop voltage to the starter. If voltage and wiring are sound, move on to testing the ignition switch, starter relay, and neutral safety switch as potential causes of a no-crank condition.
Check Battery Voltage
If your Camry won’t crank, start by measuring the battery voltage with a voltmeter—expect about 12.4 V or higher for reliable starter engagement. You’ll assess battery health quickly: readings below 12 V often signal a weak cell that can’t deliver cranking current. Check for terminal corrosion and loose clamps, since contact resistance can produce voltage drops that mimic starter failure. If voltage measurement is within spec and connections are solid but the starter still won’t turn, proceed to targeted starter and relay diagnostics.
- Use a quality voltmeter and note open-circuit voltage before cranking.
- Clean and tighten terminals; retest voltage.
- Repeat measurements in cold conditions to stress the pack.
- Log readings to track degrading battery health over time.
Inspect Starter Wiring
Start by visually and electrically inspecting the starter wiring harness and terminals for loose, corroded, or damaged connections, since poor contact can mimic a bad starter even when the motor and solenoid are fine. You’ll check heavy-gauge feed for ~12.4 V under key-on to confirm power delivery. Probe the S terminal for wiring corrosion and resistance that can block solenoid actuation. Verify chassis-to-starter ground continuity; a weak ground defeats torque and wastes diagnostics. Test the starter relay for coil and contact integrity; a failed relay stops power flow despite clean wires. Document voltage drops at each junction to prove connection integrity. If any reading deviates, repair or replace the specific wire, terminal, or relay before condemning the starter.
How the Camry Starter Works : And Why a Bad One Won’t Start the Car
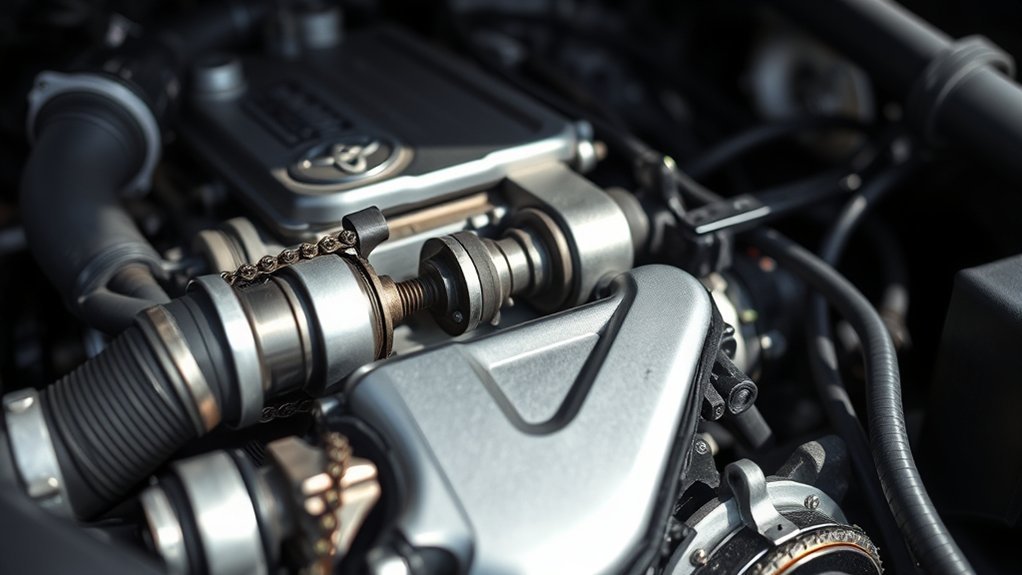
While the Camry’s starter looks simple, it actually uses a solenoid-driven pinion gear to spin the engine at roughly 200–500 RPM so the combustion cycle can begin. You’ll learn how starter components link to the ignition process and why a bad starter prevents starting. The solenoid must engage cleanly; if it sticks or fails, the pinion won’t mesh or the motor won’t spin, producing “no crank” or intermittent cranking. Wear reduces torque, causing slow cranking that kills freedom to go when you need it.
- Solenoid actuation moves the pinion into the flywheel and applies battery power to the motor.
- Heavy gauge battery feed supplies motor torque; the S terminal commands the solenoid.
- Sticking solenoid or worn brushes cut engagement or motor output.
- Progressive wear yields slow cranking, then failure.
Diagnose by confirming electrical command and motor response; replace a weak starter to restore reliable ignition and mobility.
Test Starter Voltage, Solenoid, and Connections (Step‑by‑Step)
Before you touch anything, gather a multimeter, wrenches, and safety gear so you can verify starter voltage, solenoid command, and connections methodically. Begin with a voltage measurement at the heavy gauge battery lead on the starter; it should read at least 12.4 volts with ignition off and similar under cranking. Perform terminal inspection of the S (signal) terminal for tightness and corrosion — a compromised S terminal often prevents solenoid activation. If the S terminal has no power when key is turned, test the starter relay next; it controls high amperage to the solenoid and can mimic starter failure. Verify the starter housing and battery negative are solidly grounded; poor ground equals lost current and failed engagement. If both heavy lead and S terminal show correct voltage yet the starter won’t engage, the starter assembly itself is suspect and will likely need replacement. Work deliberately; freeing your vehicle from dependence requires accurate diagnostics.
Common Camry Starter Failures and How to Prevent Them
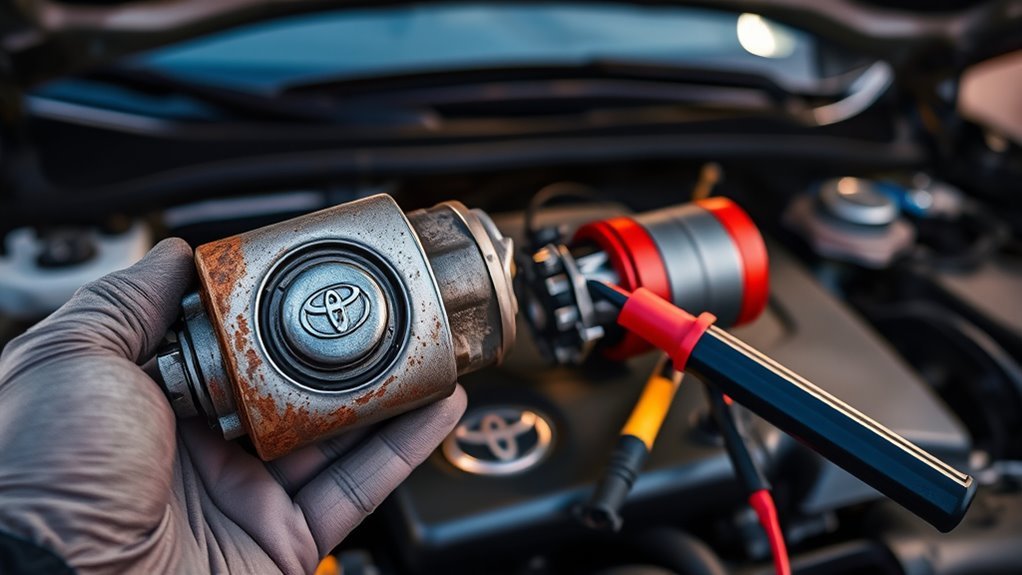
Watch for early warning signs like a single click when you turn the key, slow cranking, or the engine not engaging despite dash lights on — these point to starter motor or solenoid failure. You can prevent premature wear by keeping battery and ground connections tight, avoiding excessive short trips, and inspecting wiring for corrosion. Perform regular checks and address any odd noises or voltage drops immediately to extend starter life.
Preventive Maintenance Tips
A few simple checks can prevent most Camry starter failures, so inspect and clean the starter’s electrical connections regularly to avoid corrosion and voltage drop. You’ll extend starter longevity by following a tight maintenance checklist focused on connections, solenoid condition, and duty cycle. Monitor trip patterns and add longer drives to reduce strain from frequent short starts. Use OEM parts for replacements to preserve reliability and specification fit.
- Clean and torque battery and starter terminals; remove corrosion and verify voltage under load.
- Inspect solenoid contacts; replace if points are pitted to restore reliable engagement.
- Track driving habits; schedule occasional longer runs to lower starter wear.
- Use genuine OEM starters or solenoids per Toyota specifications to guarantee fit and function.
Early Warning Signs
When your Camry shows a single click at key-turn, or the dash lights come on while the engine stays silent, you’re looking at classic early signs of starter trouble that you should diagnose immediately. You’ll hear a click when the solenoid gets power but the drive fails to engage; that’s often the first audible sign before starter grinding appears. If the engine won’t crank, inspect battery connections for corrosion or looseness—dash illumination with no crank isolates the starter. A burning smell near the starter indicates electrical shorts or damaged wiring that demand immediate repair. Monitor gradual starting difficulty; it precedes complete failure. Diagnose electrical loads, secure connections, and test starter draw. Act early to avoid being stranded and to retain control of your vehicle independence.
When to Repair vs Replace a Camry Starter (Costs & Decision Guide)
How do you decide whether to repair or replace your Camry’s starter? You’ll weigh repair cost against replacement benefits, diagnose symptoms, and consider service history. If you hear a single click, no burning smell, and connections are intact, a targeted repair (solenoid contacts, brushes) at $100–$300 can restore function. If the unit shows heavy corrosion, internal damage, or has been repaired repeatedly, replacement ($300–$600) delivers reliability and peace of mind.
- Inspect electrical connections, battery health, and for intermittent cranking.
- Note mileage and frequency of failures; starters past 100,000 miles with recurring faults favor replacement.
- Choose professional diagnosis when vibration, smoke, or ambiguous symptoms appear.
- Consider DIY only for minor, well-documented fixes; otherwise prioritize longevity.
Decide by comparing immediate repair cost to long-term uptime. Opt for replacement when repairs become recurring or when corrosion/internal failure predicts imminent repeat breakdowns.
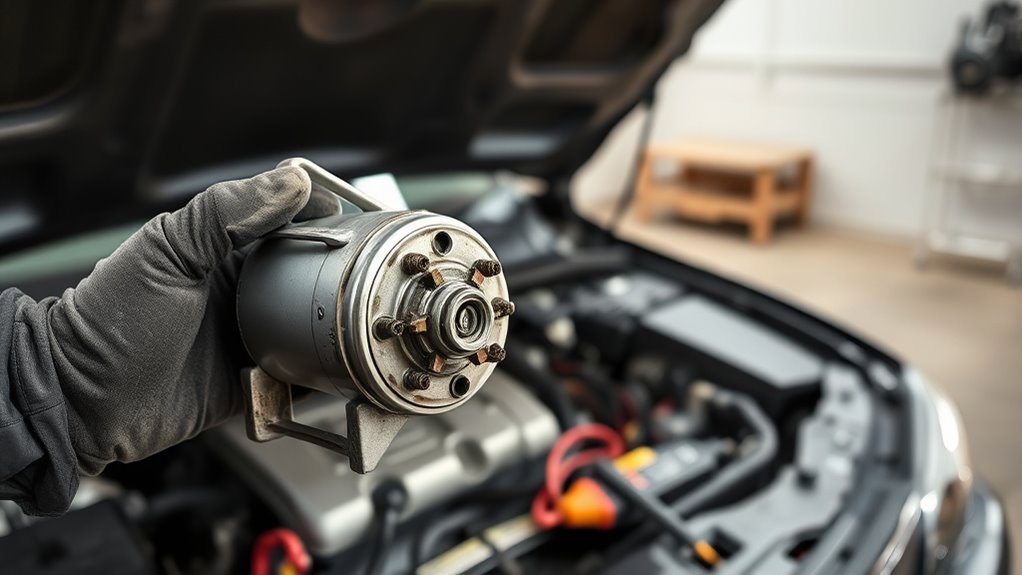
Choosing a Replacement: OEM vs Remanufactured vs Aftermarket
Choosing the right replacement starter means balancing fit, reliability, and long-term cost: OEM units (Toyota/Denso) give the best fit and warranty, remanufactured units offer a cost-effective compromise after testing and component replacement, and aftermarket options vary widely in engineering quality and risk. You’ll favor OEM Benefits when you want guaranteed specs, precise tolerances, and stronger warranties that minimize repeat labor and failure modes. Remanufactured Considerations include thorough bench testing, swapped wear items, and lower purchase cost; choose reputable remanufacturers to preserve reliability. Aftermarket Risks stem from inconsistent materials, looser tolerances, and potential compatibility gaps that can shorten service life. Assess Installation Differences — connectors, mounting points, and solenoid engagement — before you buy to avoid fitment surprises. For liberation-seeking owners, prioritize Long term Value over upfront savings: a Performance Comparison should weigh projected lifespan, warranty coverage, and expected electrical efficiency. Make a decision that frees you from recurring downtime and unnecessary expense.
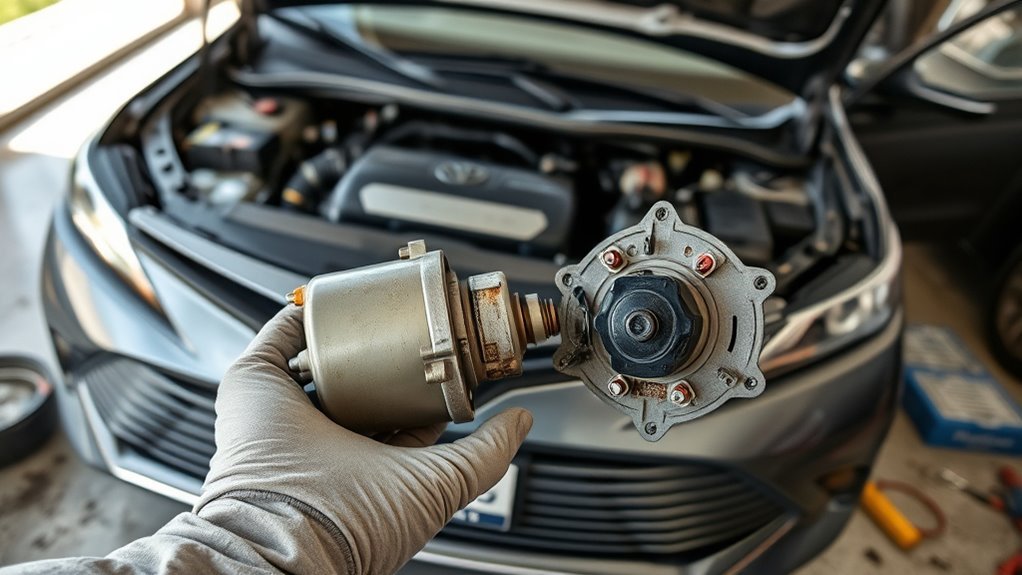
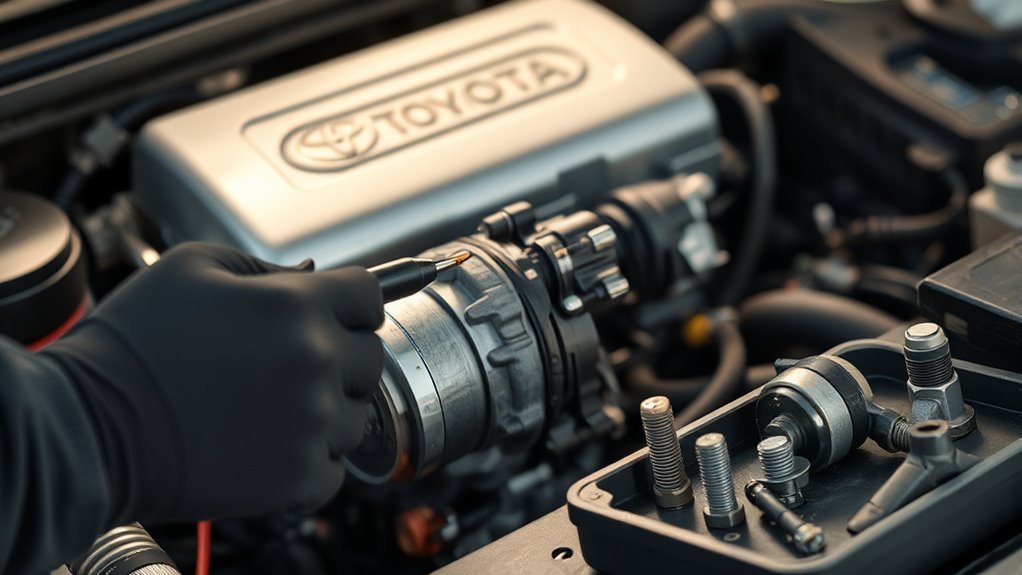
What to Expect During Professional Starter Replacement
Before touching the starter, the technician will disconnect the negative battery terminal to eliminate electrical hazard and prevent shorts while they access the unit. You’ll watch as they remove the heavy gauge wire and two 14mm bolts securing the starter, extract the unit, and inspect it for rust, wear, or sticking. Technician expertise guides the choice of a genuine Toyota or remanufactured starter for compatibility and reliability. During starter installation they seat the unit, torque the bolts, and reconnect the heavy wire with clean contact points. Before reconnecting the battery, they secure and clean connections to prevent post-install electrical faults. After power is restored, they run diagnostic checks to confirm cranking speed and solenoid operation, then reattach covers to guard against corrosion.
- Removal: heavy gauge wire and two 14mm bolts
- Inspection: rust, sticking, component wear
- Installation: torque, secure connections, clean contacts
- Verification: diagnostic cranking and solenoid tests
This process frees you from uncertainty through precise, skilled work.
Maintenance Tips to Extend Your Camry Starter’s Life
While you don’t need to be a mechanic, regular checks and targeted habits will keep your Camry’s starter operating longer: inspect and perform starter cleaning on terminals and mounting points to remove corrosion that impedes electrical flow. Check battery voltage and condition monthly; a weak battery forces the starter to draw excessive current and accelerates wear. Limit frequent short trips so the starter reaches ideal operating temperature and avoid heat-related fatigue. Listen for diagnostic cues—grating, clicking, or slow cranking—and act immediately to prevent cascading damage. When parts fail, install OEM or high-quality replacements to maintain tolerances and longevity. Tighten connections to spec and protect exposed wiring from chafing or moisture intrusion. If you’re fluid about freedom from dependency, adopt a simple maintenance schedule: visual inspection, terminal cleaning, voltage test, and road-pattern adjustment every 3–6 months. These targeted interventions preserve function, reduce unexpected failures, and extend the starter’s service life without surrendering control.
Frequently Asked Questions
How Long Do Camry Starters Last?
You can expect Camry starters to last 100,000–320,000 miles. You’ll use starter maintenance tips, watch common symptoms like slow cranking or grinding, and diagnose early to extend life and reclaim control over vehicle readiness.
How Long Do Toyota Camry Starters Last?
You’ll usually get 100,000–200,000+ miles from a Camry starter; some OE units reach 320,000. You’ll use starter maintenance tips, spot common starter issues early, and reclaim freedom from sudden failures.
Conclusion
You’ll spot failing starters by cold/no-crank, grinding, or intermittent starts—catching issues early saves you time and money. Did you know starters fail on average around 100–150k miles, but poor connections cut that life considerably? Run quick voltage and solenoid checks before swapping parts. If diagnostics point to wear or gear damage, replace; if it’s just contacts or mounts, repair. Keep connections clean and heat-shielded to extend starter life.