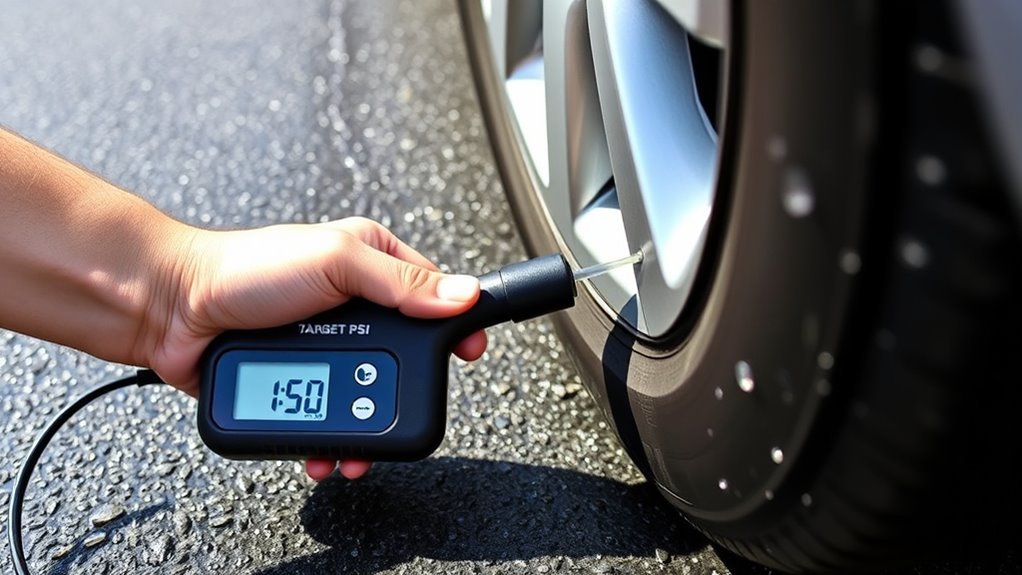
To set the target PSI on your tire inflator, locate the recommended pressure on the driver’s side door jam. Power on the inflator and use the control buttons to adjust your target PSI. For pre-set models, select the correct tire type, which automatically calculates the pressure. Connect the inflator to the tire valve, monitor the digital display for real-time pressure updates, and watch for an automatic shut-off when the desired PSI is reached. Discover more about optimizing your inflator’s performance.
Why Use a Digital or Pre-Set Tire Inflator?
When you opt for a digital or pre-set tire inflator, you’re choosing precision and ease in maintaining your vehicle’s tire pressure. These inflators allow you to set a target PSI, ensuring that your tires are inflated to the correct level for peak performance. The automatic shut-off function prevents over-inflation, giving you peace of mind. With a clear digital display, you can easily monitor real-time pressure readings, making the inflation process straightforward and efficient. Pre-set models simplify your experience by providing common tire pressure settings for various vehicles, saving you time and effort. In short, using a digital inflator enhances safety and performance while liberating you from the hassle of manual inflation methods.
Understanding Tire Pressure Basics
Understanding tire pressure is vital for safe driving and peak vehicle performance. You should make certain to monitor your tire pressure regularly, especially before long trips. Here are three key points to take into account:
Regularly monitoring your tire pressure is essential for safe driving and optimal vehicle performance, especially before long trips.
- The recommended tire pressure is found on a sticker in the driver side door jam.
- Tire pressure is measured in pounds per square inch (PSI); maintaining the correct level is essential.
- Be aware that when you pull the trigger of an inflator, the pressure gauge may read 1.5 to 2 PSI higher, so release it for an accurate measurement.
Next time you stop at a gas station, check your tire pressure to guarantee you’re driving safely and efficiently. We’ll see how this affects your overall driving experience.
Essential Features of Digital Tire Inflators You Should Know
When choosing a digital tire inflator, two essential features to contemplate are the automatic shut-off function and the digital pressure display. The automatic shut-off prevents over-inflation by stopping the inflator once it reaches your set PSI, ensuring tire safety. Meanwhile, the digital pressure display provides real-time readings, allowing you to monitor inflation accurately and efficiently.
Automatic Shut-Off Feature
The automatic shut-off feature in digital tire inflators is an essential component that enhances both safety and convenience during the inflation process. This feature not only prevents over-inflation but also guarantees that you can focus on other tasks without constant monitoring. Here are some automatic shut off benefits:
- Prevention of Tire Damage: Stops inflation once the preset PSI is reached, safeguarding your tires.
- User Convenience Features: Easily adjustable target PSI settings allow customization for different vehicles.
- Inflation Safety Measures: Audible alerts or visual indicators notify you when the desired pressure is achieved, enhancing overall safety.
With these features, you can inflate your tires confidently, knowing that both accuracy and safety are prioritized.
Digital Pressure Display
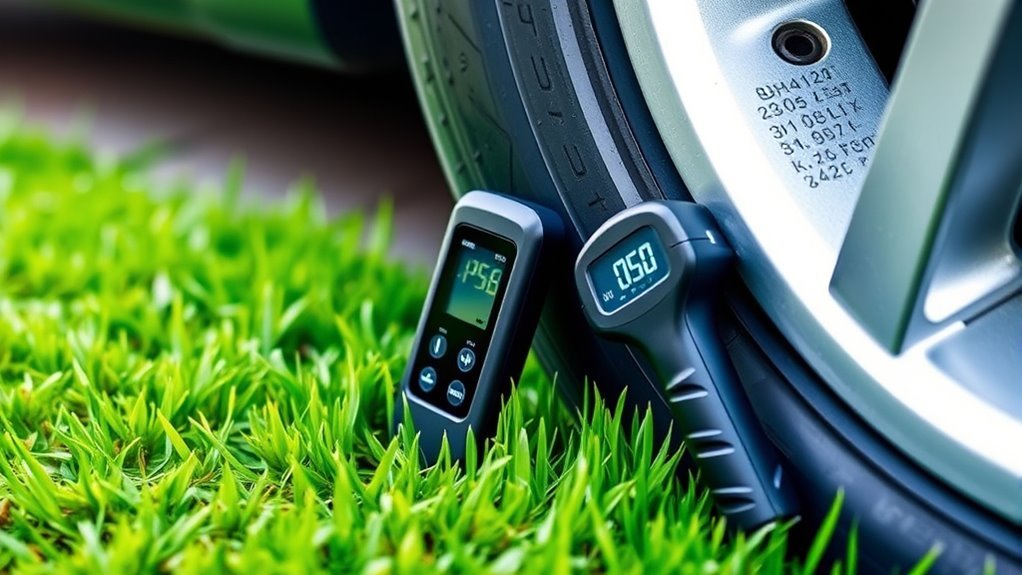
Digital tire inflators come equipped with a digital pressure display that enhances your tire inflation experience by providing real-time pressure readings. These digital display advantages guarantee you can effortlessly monitor tire pressure, allowing for precise adjustments as needed. The accuracy benefits of digital displays can’t be overstated; they often show both current and target pressures, simplifying the inflation process. Many models even feature backlit screens for visibility in low light, making nighttime inflation tasks manageable. Additionally, you can switch between measurement units like PSI, BAR, or KPA, catering to your preferences and specific tire needs. With effective pressure monitoring, you can achieve peak tire inflation, ensuring safety and performance on the road.
How to Power On Your Tire Inflator
To power on your tire inflator, first, locate the power button, typically marked with a “Power” symbol. Before pressing it, confirm that the battery is fully charged or the device is connected to a power source. Once activated, a digital display will illuminate, signaling that your inflator is ready for use.
Locate Power Button
Before you can start inflating your tires, it’s essential to power on your tire inflator. Begin by locating the power button, which is generally marked with a “Power” symbol or clearly labeled. Here’s how to do it effectively:
- Identify Power Button Locations: Look for the button on the front or side of the device.
- Choose the Right Inflator Button Type: Some inflators require you to press and hold, while others may just need a quick press.
- Follow Inflator Usage Tips: Wait for the display to light up, confirming readiness.
Once powered on, you’re ready to set your desired target PSI for accurate inflation. This step guarantees your inflator is operational and ready for efficient tire maintenance.
Connect to Power Source
Connecting your tire inflator to a power source is vital for initiating the inflation process. For corded models, plug the power cord into a suitable outlet; for cordless models, make certain the 18V battery is fully charged and securely attached. Check the power indicator light; it should illuminate when the inflator is powered on and ready. If the unit doesn’t activate, inspect the battery for proper connection and adequate charge, as effective battery maintenance is essential. Additionally, examine the power cord for any damage or loose connections. Once everything is confirmed, press the power button, typically marked with a “Power” symbol, to initiate the inflator charging and get ready to inflate your tires with ease.
Check Battery Level
After verifying your tire inflator is connected to a power source, the next step involves checking the battery level. This is essential to avoid interruptions during inflation. Here are some key points to take into account:
- Power On: Locate the power button, usually marked with an icon or label, and press it firmly.
- Battery Indicator: If your model has a battery level indicator, check it to monitor charge status.
- Automatic Shut-Off: Be aware that some inflators may power down after inactivity to conserve battery life.
For effective battery maintenance, follow these battery maintenance tips and charging best practices. Always consult the user manual for specific instructions, especially regarding inflator compatibility concerns, to guarantee maximum performance.
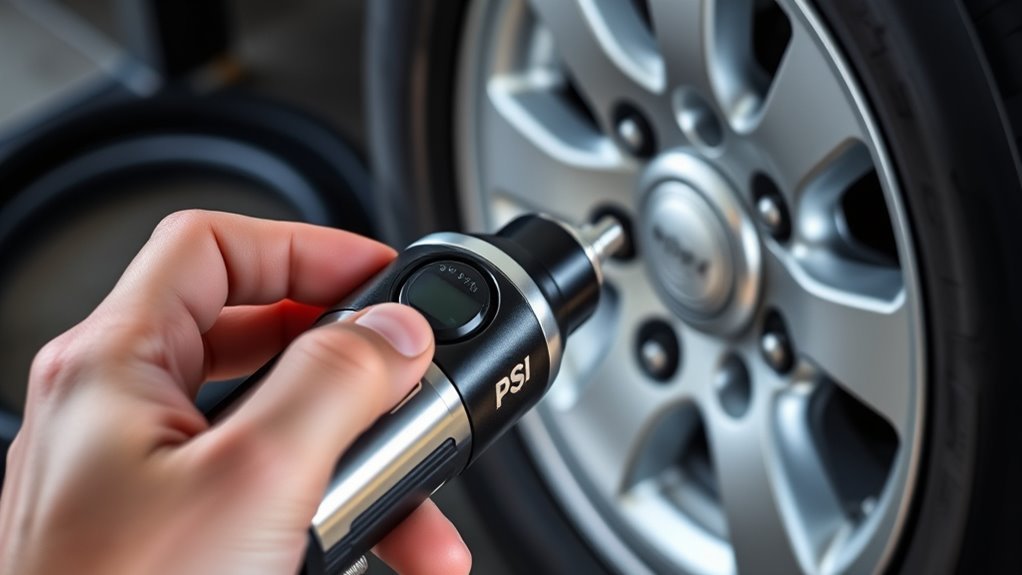
Setting the Target PSI: Step-by-Step Guide
Setting the target PSI on your digital tire inflator is straightforward and essential for ideal tire performance. Start by checking the recommended tire pressure on your driver side door jam for accurate reference. Use the control buttons on the inflator to adjust the target PSI to match this setting. Verify the inflator is connected to the tire valve to maintain inflator accuracy and avoid discrepancies in pressure readings. For pre-set models, simply select the appropriate tire type, and the device will calculate the ideal PSI. Monitor the digital display as the inflator calibrates automatically, stopping when the desired pressure is reached.
| Step | Action | Note |
|---|---|---|
| Locate PSI | Check driver’s side door jam | Reference for accuracy |
| Adjust Target PSI | Use inflator buttons to set PSI | Match recommended pressure |
| Monitor Inflation | Watch display for completion | Inflator stops automatically |
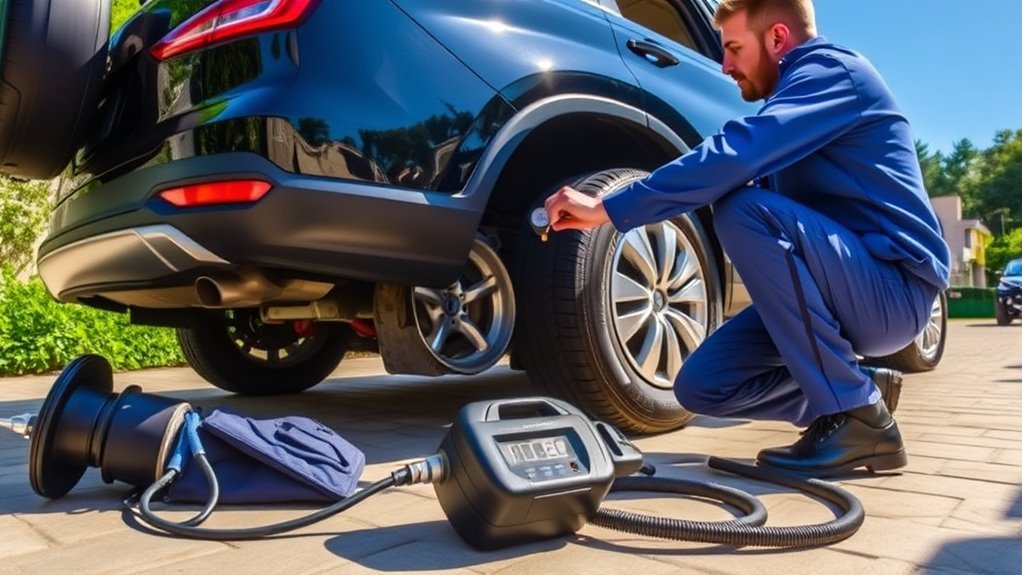
How to Attach the Inflator to Your Tire Valve
With the target PSI set on your tire inflator, the next step involves attaching the inflator to your tire valve. Follow these inflation techniques to guarantee a proper inflator attachment:
After setting the target PSI, securely attach the inflator to the tire valve for effective inflation.
- Locate the valve stem: It’s usually on the inner side of the tire and has a removable cap.
- Remove the valve cap: Twist it counterclockwise and set it aside to prevent loss during inflation.
- Attach the inflator hose: Firmly connect it to the valve stem, guaranteeing a secure fit. You might hear a slight hissing sound as air begins to flow.
After attaching the inflator, pull the trigger to start inflation. Once you hit the desired pressure, release the trigger, detach the hose, and promptly replace the valve cap to maintain tire integrity.
Monitoring the Inflation Process Effectively
While monitoring the inflation process, it’s vital to keep an eye on the pressure display of your inflator, which provides real-time updates on the current tire pressure. Remember, when you pull the trigger, the reading can temporarily spike by 1.5 to 2 PSI. To guarantee monitoring accuracy, release the trigger for an accurate assessment. Aim for pressure adjustments that align with the recommended PSI listed on the driver side door jam for peak performance. Regularly check the pressure, especially before long trips, as this is one of the vital inflation safety tips. After each inflation session, let the inflator rest for 5 minutes to prevent overheating, assuring reliable readings during subsequent uses.
Steps After Reaching Target PSI
After confirming the target PSI, carefully detach the hose to minimize any air loss from the tire. Next, inspect the tire condition for abnormalities or damage that could affect performance. Finally, store your inflator properly to guarantee it remains in good working order for future use.
Detach Hose Safely
Once you’ve reached the target PSI, it’s crucial to handle the hose carefully to avoid any air loss or damage. Follow these safety precautions for effective valve maintenance:
- Release the Trigger: Stop the inflation process by releasing the inflator’s trigger to guarantee an accurate pressure reading.
- Detach the Hose: Unscrew the hose from the tire valve slowly and carefully to prevent sudden air loss or potential damage to the valve.
- Secure the Valve Cover: Replace the valve cover immediately to protect it from dirt and debris, making sure the valve remains in good condition.
Finally, double-check the pressure gauge to confirm the tire pressure holds at the desired level before you drive. Store your inflator safely for future needs.
Check Tire Condition
Checking the condition of your tires is essential for ensuring safety and performance on the road. After reaching your target PSI, visually inspect each tire for damage, such as cuts, bulges, or punctures that may need immediate attention. Use a tread depth gauge to check that your tires meet safety standards, ensuring adequate traction. Inspect the valve stem; it should be securely covered to prevent air leaks, maintaining ideal pressure. Additionally, monitor the tire’s temperature, as excessive heat can indicate under-inflation or alignment issues. Regularly assess for uneven tire wear patterns, which may signal alignment or suspension problems. Keeping a close eye on these factors enhances your driving experience and promotes tire longevity.
Store Inflator Properly
To guarantee your tire inflator remains in peak condition, turn it off immediately after reaching the target PSI. Follow these maintenance best practices for optimal storage:
- Detach the Hose: Carefully remove the hose from the tire valve and replace the valve cover to keep dirt and debris out.
- Choose Storage Wisely: Store the inflator in a cool, dry place, away from extreme temperatures and moisture to protect its components.
- Charge the Battery: If not in frequent use, verify the battery is charged and stored separately, which helps maintain battery health for emergencies.
Troubleshooting Common Tire Inflator Issues
When your tire inflator encounters issues, it’s essential to diagnose the problem quickly to avoid frustration and assure efficient operation. Common inflator problems include failure to start, which often stems from a drained battery. Verify it’s charged and properly connected. If you notice inaccurate pressure readings, check that the hose is firmly attached to the tire valve. Should the inflator overheat, allow it to rest for at least 5 minutes after every 5 minutes of use. For digital models with display issues, reset the device or replace its batteries. If the inflator doesn’t reach the set target PSI, inspect for air leaks in the hose or tire. Employ these troubleshooting tips to assure effective maintenance practices.
Maintenance Tips for Your Tire Inflator
Maintaining your tire inflator is essential for guaranteeing it operates efficiently and reliably when you need it most. Follow these inflator longevity tips to keep your device in top shape:
- Air Intake Maintenance: Regularly check and clean the air intake to prevent dust and debris from hindering performance.
- Usage Guidelines: Allow your inflator to rest for at least 5 minutes after 5 minutes of continuous use to avoid overheating.
- Battery Care Advice: Keep the battery charged and inspect it periodically, replacing it as needed for peak performance.
Finally, store your inflator in a dry, accessible location within your vehicle. By following these tips, you’ll guarantee your inflator remains ready for any emergency.
Frequently Asked Questions
How to Use a Digital Tire Inflator With Pressure Gauge?
To use a digital tire inflator, power it on, select your desired pressure, attach it securely to the valve, and trigger inflation. Monitor tire pressure continuously and follow inflator maintenance tips for ideal performance.
How to Find Target Tire Pressure?
To find your target tire pressure, check the driver side door jam sticker; it’s essential for safety. Maintaining proper pressure enhances performance and longevity, aligning with your vehicle’s maintenance schedule for ideal driving experiences.
How to Reset Digital Tire Pressure Gauge?
To reset your digital tire pressure gauge, locate the reset button and press it until the display zeros out. For accurate pressure measurement, guarantee proper digital gauge maintenance and follow tire safety tips for ideal results.
How to Calibrate a Digital Tyre Inflator?
To calibrate your digital inflator, check tire pressure settings against a reliable gauge, adjust if necessary, and guarantee it’s powered on. Regular maintenance enhances calibrating inflator accuracy, guaranteeing consistent and accurate tire pressure readings.
Conclusion
Now that you know how to set the target PSI on your digital or pre-set tire inflator, you can confidently tackle tire maintenance. Picture yourself on a sunny day, effortlessly inflating your tires, while the gauge ticks steadily toward your desired pressure. With each beep signaling completion, you feel reassured, ready to hit the road. Remember, a well-maintained tire not only enhances safety but also improves fuel efficiency, ensuring every drive is smooth and economical.