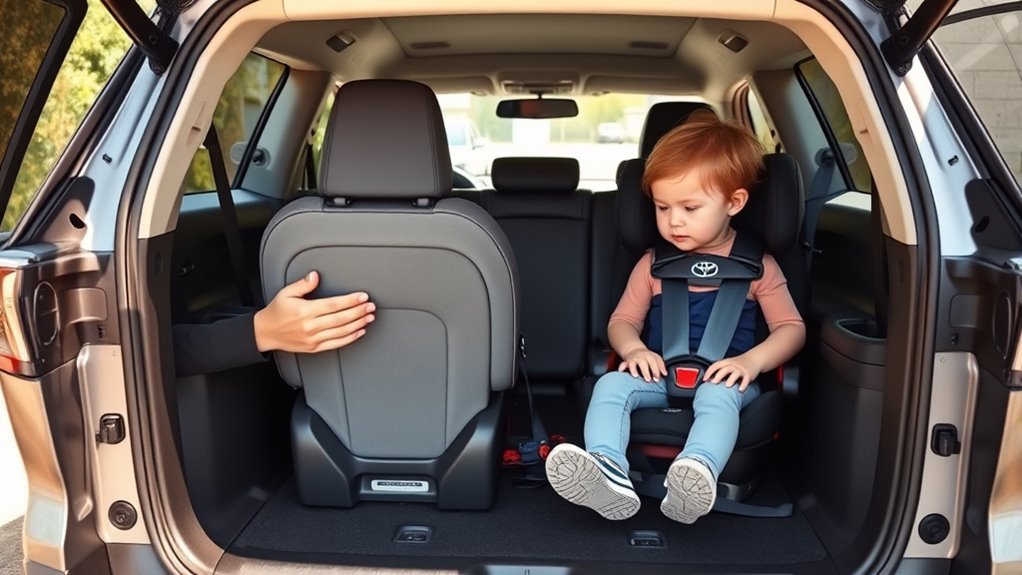
Car seat installation can look simple, but one loose strap can change how the seat works in a crash. In your Toyota RAV4, you can use the lower anchors or the vehicle seat belt, but you should follow both manuals and avoid using both systems together unless the manuals allow it. This guide shows you how to find the anchors, set the seat level, attach the top tether, check booster fit, and know when to get help from a certified Child Passenger Safety Technician (CPST).
What’s in This Article
- RAV4 Seats and Anchors: Which to Use
- Before You Begin Installing a RAV4 Car Seat
- Quick-Fit Grades: Infant, Rear, Forward, and Booster
- Quick Install Steps for RAV4 Car Seats
- Positioning and Leveling a Child-Seat Base
- Installing With LATCH: Locate Anchors and Secure Lower Straps
- Installing With the Seat Belt: Routing, Locking, and Tightening
- Top Tethers: Finding Buried Anchors and Connecting Securely
- Seat-Specific Notes: Infant Carriers, Rear-Facing, and Forward-Facing Convertibles
- Booster Fit Tips, Common Obstacles, and Troubleshooting
- Common RAV4 Car Seat Installation Mistakes
- Frequently Asked Questions
Quick Answer
Use the RAV4’s lower anchors or the seat belt path to secure the child seat, then check for less than one inch of movement at the belt path. For every forward-facing harnessed seat, attach and tighten the top tether. Set the recline with the car seat’s level indicator, and get a certified inspection if the seat still feels loose.
Key Takeaways
- Use either lower anchors or the seat belt unless both manuals clearly allow using both.
- Check movement at the belt path, not at the top of the child seat.
- Attach the top tether every time you install a forward-facing harnessed seat.
- Follow the child seat’s level indicator to set the right rear-facing recline angle.
- Ask a certified CPST to inspect the installation if you can’t get a firm fit.
RAV4 Seats and Anchors: Which to Use
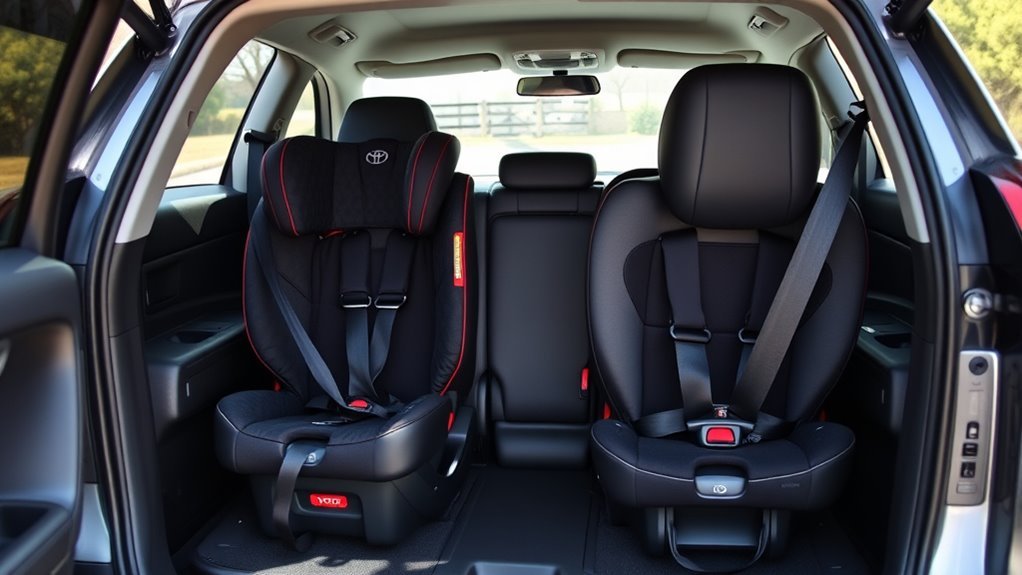
When fitting a child seat in your Toyota RAV4, start with the seating position that gives you the tightest correct install. You can use the clearly visible lower anchors for many rear-facing infant seats and convertible seats, but you must follow the child seat’s lower-anchor weight limit.
Lower anchors can make installation easier in the second row. They often leave enough front-seat room for an average adult passenger when you choose a compact rear-facing seat and set the recline correctly.
For forward-facing convertible seats, lower anchors may work if the child and seat remain within the allowed weight limit. You still need the top tether because it helps reduce forward movement during a crash.
Some RAV4 tether anchors sit on the back of the rear seat and may hide under carpet or trim. Pull the cover back gently and check your owner’s manual before connecting the tether hook.
For boosters, focus on belt fit instead of anchor use. The lap belt should sit low on the hips, and the shoulder belt should cross the center of the shoulder.
Before You Begin Installing a RAV4 Car Seat
Plan about 20 to 30 minutes for your first careful installation. You may need less time once you know the anchor points and belt path.
Gather these items before you start:
- Your Toyota RAV4 owner’s manual
- Your child seat manual
- The child seat or booster
- A towel or pool noodle only if the car seat manual allows it
- A flashlight for finding hidden tether anchors
Park on flat ground and remove loose items from the rear seat. Keep the child seat manual open so you can check the belt path, recline range, and weight limits.
Warning: Do not use the lower anchors and seat belt together unless both the vehicle manual and child seat manual allow it.
[Products Worth Considering]

Protect your Toyota RAV4 interior with this custom‑fit windshield sun shade that blocks 99% of harmful UV rays and reduces cabin heat. The mirror cut‑out ensures a seamless fit without gaps, while durable 240T polyester and bendable wire keep it sturdy through repeated use. Foldable and stored in a convenient pouch, it offers easy installation and removal for everyday comfort.

Upgrade your 2026 Toyota RAV4 interior with this soft, breathable armrest cover that offers full protection against scratches, dirt, and wear. Made from eco‑friendly material, it fits the console perfectly and stays securely in place with elastic straps. Installation is tool‑free, providing added comfort and reducing fatigue during long drives.

Upgrade your RAV4 interior with a sleek, retractable 4‑port USB hub that adds vibrant RGB lighting and fast charging for phones, tablets, and accessories. The intelligent retractable cables keep the console tidy while the snap‑in design ensures easy installation. Compatible with 2020‑2025 RAV4 models, it blends modern tech with a clean aesthetic.
Quick-Fit Grades: Infant, Rear, Forward, and Booster
Start by checking each seat type for ease of installation, anchor access, and daily use. A good fit should feel firm, match the child’s size, and let the belt or harness sit in the right place.
Infant seats usually install quickly with lower anchors in the second row. Many bases fit well when you adjust the front passenger seat slightly and set the correct recline angle.
Rear-facing convertibles can also fit well, but larger models may reduce front-seat legroom. Try more than one seating position if the front seat touches the child seat or limits passenger comfort.
Forward-facing convertibles need a tight install and a snug top tether. Accessing the tether anchor may take more effort if trim or carpet covers the anchor point.
Booster seats need a proper lap-and-shoulder belt fit. Low buckle height and raised seat cushions can make it harder for a child to buckle independently.
[Products Worth Considering]

The Autovir windscreen shade offers full windshield coverage for Toyota RAV4 models from 2019 to 2026, blocking up to 99.95% of UV rays and reducing interior heat. Its multi‑layer reflective material provides SPF 100 and UPF 80+ protection while keeping the dashboard, seats, and steering wheel cooler. The foldable design installs quickly and stores conveniently in the glove box, and reinforced stitching ensures long‑lasting durability for daily use.

The Autopect side window sunshade sock screen-shade provides universal, elasticized mesh protection for car, truck, SUV, and van side windows. It filters UV rays, keeps interiors cool, and offers privacy while allowing fresh breezes and bug protection. Easy no‑tool installation and a compact drawstring pouch make it portable for travel and camping.
Quick Install Steps for RAV4 Car Seats
Start by locating the lower anchors or choosing the correct seat belt path. Position the child seat so the connectors or belt can reach without twisting.
Tighten the installation at the belt path, then check the seat’s recline indicator. For forward-facing harnessed seats, finish by attaching and tightening the top tether.
- Read both manuals before choosing LATCH or the seat belt.
- Place the child seat flat on the vehicle seat.
- Connect the lower anchors or route the seat belt through the correct belt path.
- Tighten the strap or belt while pressing down into the child seat.
- Check for less than one inch of movement at the belt path.
- Attach the top tether for a forward-facing harnessed seat.
- Confirm the harness height and chest clip position before each ride.
Locate LATCH Anchors
Locate the lower anchors by checking the rear seat crease for anchor symbols or visible metal bars. Lower Anchors and Tethers for Children (LATCH) uses lower anchors and a top tether to help secure many child seats.
Feel along the seat crease and pull back the fabric only as needed. Clip each car seat connector onto the correct lower anchor, then confirm that each connector locks in place.
For forward-facing seats, find the top tether anchor on the back of the seat. It may sit under carpet or a small trim cover, so use a flashlight if needed.
Secure With Seatbelt
If you use the seat belt method, thread the lap-and-shoulder belt through the child seat’s marked belt path. Buckle the belt and make sure the webbing lies flat.
Lock the belt exactly as your RAV4 manual and child seat manual explain. Many vehicles use a switchable retractor that locks after you pull the belt fully out and let it retract.
- Thread the belt through the correct belt path.
- Remove twists before tightening.
- Lock the belt according to the manual.
- Pull the belt tight while pressing into the seat.
- Check the belt and buckle for wear during routine checks.
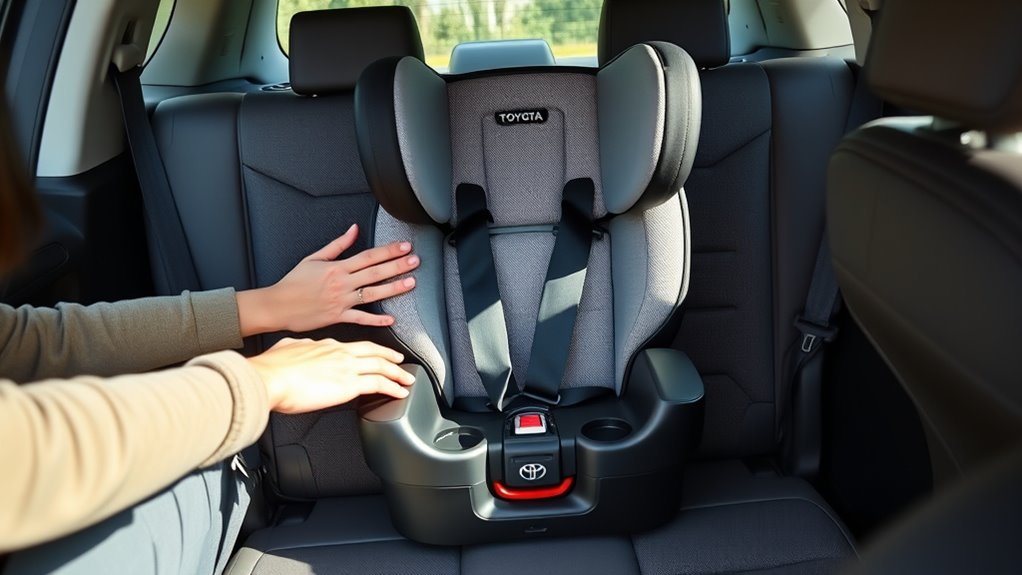
Check Tightness and Level
Grab the child seat at the belt path and tug it side to side and front to back. The seat should move less than one inch in either direction.
Do not judge tightness by pulling near the headrest or top of the seat. That area can move even when the belt path stays tight.
Use the car seat’s built-in level indicator to verify the recline angle. Adjust the base, recline foot, or approved towel support if the manual allows it.
Positioning and Leveling a Child-Seat Base
Place the base on the vehicle seat so the level indicator sits within the approved range. The base should rest flat against the seat cushion without leaning sideways.
Check front-seat clearance before you tighten the base. Some rear-facing seats need space so the vehicle seat does not press hard against them.
Tighten the center strap or seat belt while pressing down on the base. Recheck movement at the belt path before you place the child in the seat.
Leveling Indicator Alignment
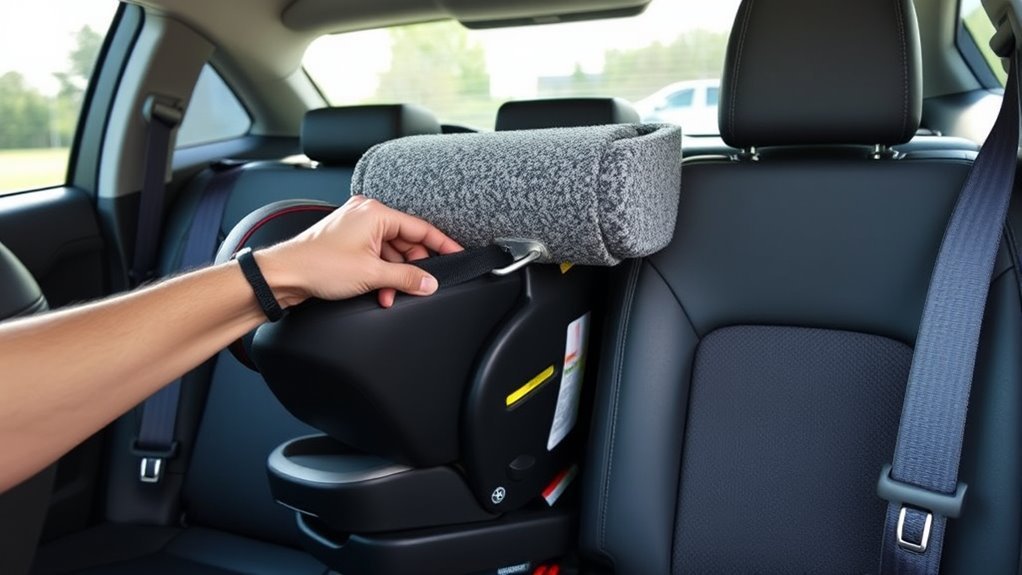
Align the child seat’s built-in level indicator with the correct range shown on the seat label. Rear-facing seats need the right recline angle to help protect a child’s airway.
If the base tilts, follow the child seat manual before using a pool noodle or rolled towel. Place support only where the manual allows it.
- Check the level indicator before tightening.
- Use approved support only if the manual allows it.
- Retest the indicator after tightening.
Seat Base Angle
After you align the level indicator, confirm that the base sits flat against the RAV4 seat. A stable base should not tip forward or lean to one side.
Rock the base only at the belt path when checking tightness. Less than one inch of movement means the base meets the common installation test.
Recheck the angle after tightening because the base can shift as slack leaves the belt or lower-anchor strap. Use the exact recline range listed in your child seat manual.
Front Seat Clearance
Set the front passenger seat so the child seat has enough room without forcing the passenger into an unsafe position. Keep the front passenger comfortable, but do not change the child seat’s required recline angle.
Check whether your child seat manual allows contact with the front seat. Some seats allow light contact, while others require clear space.
- Adjust the front seat until the child seat fits without pressure.
- Check the recline indicator again after moving the front seat.
- Reinspect the base before each trip.
Installing With LATCH: Locate Anchors and Secure Lower Straps
Start by locating the two lower anchors for the seating position you plan to use. Place the child seat base so the lower-anchor connectors line up with those anchor bars.
Attach each connector firmly and make sure the straps do not twist. Pull the adjuster strap while pressing down into the child seat to remove slack.
Check your child seat label for the lower-anchor weight limit. Once your child and seat exceed that limit, switch to the seat belt method and keep using the top tether for forward-facing harnessed seats.
| Action | Verify |
|---|---|
| Attach clips | Clips click and lie flat |
| Tighten strap | No slack at the belt path |
| Check movement | Less than one inch of movement |
| Inspect anchors | Clean, visible, and undamaged |
If the seat still feels loose, detach the connectors and start again. A fresh install often fixes twisted straps or poor connector angles.
Pro tip: Press your knee or hand into the child seat while pulling the strap to remove more slack.
Installing With the Seat Belt: Routing, Locking, and Tightening
If you can’t use LATCH or prefer the seat belt method, route the belt through the child seat’s marked belt path. Use the rear-facing or forward-facing path shown in the child seat manual.
Buckle the belt, remove twists, and lock it as directed. Many RAV4 seat belts lock when you pull the shoulder belt all the way out and feed it back in.
Push down into the seat while pulling the shoulder belt or lap portion tight. Then test the seat at the belt path and confirm less than one inch of movement.
- Route the belt through the marked belt path.
- Buckle the belt and remove twists.
- Lock the belt according to the manual.
- Pull the belt tight while pressing into the child seat.
- Test for less than one inch of movement.
Check the seat belt and buckle during routine cleaning. Replace or repair damaged vehicle parts through a qualified service provider.
Top Tethers: Finding Buried Anchors and Connecting Securely
Do not skip the top tether on a forward-facing harnessed seat. The tether helps reduce how far the seat and child move forward during a crash.
On many RAV4 models, the tether anchors sit on the back of the rear seat. They may sit under carpet, trim, or a small cover, so check your owner’s manual for the exact location.
Connect the tether hook to the correct anchor, then pull the tether strap until it feels snug. Do not attach the tether to cargo hooks or any point not marked for child restraints.
| Step | Action |
|---|---|
| 1 | Find the marked tether anchor |
| 2 | Open the cover or move carpet gently |
| 3 | Attach the tether hook securely |
| 4 | Tighten the tether until snug |
| 5 | Recheck after each reinstall |
Anchor access can vary by model year and seating position. If the connection feels awkward, move the seat or ask a CPST to inspect it.
Seat-Specific Notes: Infant Carriers, Rear-Facing, and Forward-Facing Convertibles
Infant carriers often install well in the RAV4 second row when you use the correct lower anchors or seat belt path. Check the recline indicator every time you reinstall the base.
Rear-facing convertible seats may take more space from the front passenger area. A compact convertible can help if you need more front-seat legroom.
Forward-facing convertibles need a firm install and a top tether. If the lower-anchor limit no longer allows LATCH, use the seat belt and keep the tether attached.
- Check tightness: Test movement only at the belt path.
- Verify angle: Match the recline indicator to the child’s stage and seat manual.
- Confirm tether routing: Attach the forward-facing tether to the correct anchor.
Recheck the harness after you install the seat. Rear-facing harness straps usually sit at or below the shoulders, while forward-facing straps usually sit at or above the shoulders.
Booster Fit Tips, Common Obstacles, and Troubleshooting
Booster fit depends on belt position, not just the child’s age or weight. Seat the child upright and make sure the lap belt sits low across the hips.
The shoulder belt should cross the center of the shoulder and chest. It should not rub the neck or fall off the shoulder.
If the booster does not sit flat, check whether the head restraint blocks the backrest. Remove or adjust the head restraint only if your RAV4 manual and booster manual allow it.
| Issue | Cause | Quick Fix |
|---|---|---|
| Hard to reach buckle | Seat cushion bolsters | Shift booster slightly if the manual allows it |
| Low buckle height | Vehicle seat design | Try a booster with better belt guides |
| Shoulder belt rubs neck | Poor belt guide position | Adjust guide or choose a different booster |
| Loose fit over time | Daily movement | Re-seat booster and check belt fit |
Teach your child to sit upright for the whole ride. A booster cannot protect well if the child leans, slouches, or places the shoulder belt behind the back.
Common RAV4 Car Seat Installation Mistakes
Many installation problems come from small steps that seem easy to miss. Check these issues before you finish:
- Using LATCH and the seat belt together without manual approval
- Skipping the top tether on a forward-facing harnessed seat
- Testing tightness at the top of the child seat instead of the belt path
- Leaving twists in the lower-anchor strap or vehicle belt
- Using the wrong belt path for rear-facing or forward-facing mode
- Ignoring the child seat’s recline indicator
- Keeping bulky coats under the harness
Fix one issue at a time, then retest the full installation. If the seat still moves too much, start over or get a CPST inspection.
Note: A certified inspection can help you confirm the install, but you still need to learn how to repeat it yourself.
Frequently Asked Questions
Can You Fit Three Car Seats in the Back of a RAV4?
Sometimes, but you need narrow seats and careful placement. Test each seat in the exact RAV4 seating position and check every belt path separately.
Should a Car Seat Go in the Middle or Side?
The middle can offer more distance from a side impact, but only if you can install the seat correctly there. If the side seat gives you a tighter approved install, use that position instead.
Can You Use LATCH for a Booster Seat in a RAV4?
Some boosters use lower anchors to hold the booster in place when the child is not sitting in it. The vehicle seat belt still restrains the child, so belt fit remains the main safety check.
When Should You Stop Using LATCH in a RAV4?
Stop using lower anchors when the child seat manual or label says the child and seat exceed the allowed limit. After that, install with the seat belt and use the top tether for forward-facing harnessed seats.
Where Can You Get a RAV4 Car Seat Installation Checked?
You can look for a certified Child Passenger Safety Technician through local safety programs, hospitals, fire departments, or child passenger safety events. Bring your child, car seat, manuals, and vehicle to the appointment.
Safety Disclaimer: This article gives general child passenger safety information and does not replace your Toyota RAV4 owner’s manual, child seat manual, or advice from a certified Child Passenger Safety Technician. Always follow the instructions for your exact vehicle, child seat, and child size.
Final Safety Check Before You Drive
A safe RAV4 car seat install comes down to the right method, a tight belt path, a correct recline angle, and a snug top tether when required. Check the lower anchors, seat belt, harness, and booster belt fit before regular use.
If the child seat moves more than one inch at the belt path, reinstall it before driving. When you feel unsure, book a certified inspection and learn how to repeat the install with confidence.
References
- Car Seats and Booster Seats — National Highway Traffic Safety Administration
- Car Seat Safety Tips — Safe Kids Worldwide
- Car Safety Seats: Information for Families — American Academy of Pediatrics