A floor jack that slips with you underneath can kill you. One wrong jack point bends your frame. One missing stand turns a routine oil change into a tragedy. This guide shows you exactly where to lift a RAV4, which tools protect the pinch welds, and how to set stands so they hold.
Quick Answer
Park on level ground, engage the parking brake, and chock the wheels on the opposite side. Place a floor jack with a pinch-weld adapter at the correct side notch, raise the vehicle just high enough, then lower it onto jack stands under solid frame members. Never work under a RAV4 supported only by a floor jack.
Key Takeaways
- Always place jack stands under solid frame members — a floor jack alone is never safe to work under.
- Use a pinch-weld adapter or reinforced hockey-puck block to protect the RAV4’s thin sheet metal when you lift.
- Confirm the exact jack and stand points for your RAV4 in the owner’s manual before you start.
- Test stability by pushing the vehicle firmly before going underneath — reposition if anything shifts.
- Chock the wheels on the opposite side of the lift point to prevent any chance of rolling.
What You’ll Need
Gather everything before you move the car. Scrambling for gear with a vehicle half in the air is how accidents happen.
- Hydraulic floor jack (rated at or above your vehicle’s weight)
- Two jack stands rated for at least half the vehicle’s curb weight each
- Pinch-weld adapter, neoprene pads, or reinforced hockey-puck block
- Wheel chocks (at least two)
- RAV4 owner’s manual (for exact jack-point diagrams)
- Flat, solid, level surface such as concrete or compacted asphalt
Pro tip: Set up all your gear and read the manual’s jacking diagram before moving the car — a 10-minute setup prevents dangerous mid-lift improvising.
[Products Worth Considering]

Protect your Toyota RAV4 interior with this custom‑fit windshield sun shade that blocks 99% of harmful UV rays and reduces cabin heat. The mirror cut‑out ensures a seamless fit without gaps, while durable 240T polyester and bendable wire keep it sturdy through repeated use. Foldable and stored in a convenient pouch, it offers easy installation and removal for everyday comfort.

The Autovir windscreen shade offers full windshield coverage for Toyota RAV4 models from 2019 to 2026, blocking up to 99.95% of UV rays and reducing interior heat. Its multi‑layer reflective material provides SPF 100 and UPF 80+ protection while keeping the dashboard, seats, and steering wheel cooler. The foldable design installs quickly and stores conveniently in the glove box, and reinforced stitching ensures long‑lasting durability for daily use.
The KUST Black Dashboard Cover Mat offers a custom, eco‑friendly fit for Toyota RAV4 models from 2019 to 2025, protecting the dash from UV damage, scratches, and glare. Made from post‑consumer recycled polyester with a silicone anti‑slip underside, it stays soft, breathable, and odorless while securely adhering to the surface. Installation is quick and reversible, and the foldable design allows easy storage when not in use.
How to Jack a RAV4: Step-by-Step
Estimated time: 15–20 minutes
- Park on a flat, stable surface. Concrete or solid asphalt works best. Avoid gravel, soft soil, or any slope.
- Engage the parking brake fully. Pull or press it before you touch the jack — every time, no exceptions.
- Chock the opposite wheels. Place chocks in front of and behind both wheels on the side you are not lifting.
- Find the correct jacking notch. Check the jacking diagrams section of your owner’s manual for the exact side notch at the corner you’ll lift. Each corner has one reinforced notch along the pinch weld.
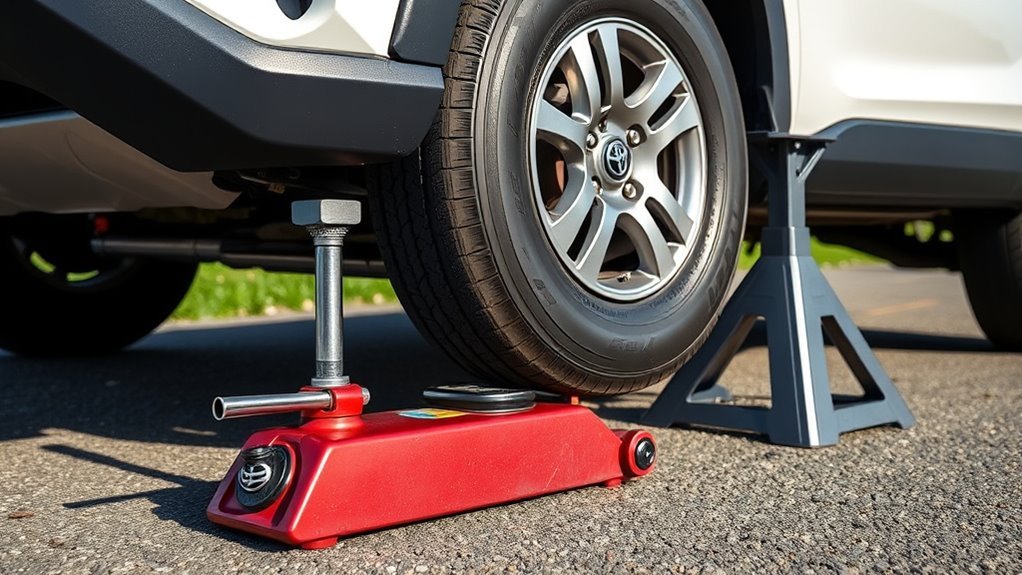
- Fit an adapter to the floor jack saddle. Slide a pinch-weld cup, neoprene pad, or hockey-puck block onto the saddle so it won’t cut the seam.
- Center the jack under the notch. Confirm the adapter seats squarely in the notch before you pump.
- Raise the vehicle slowly. Pump until the tire clears the ground by a few inches — only as high as you need for the stands to fit underneath.
- Slide jack stands under solid structural members. Place stands under reinforced frame members or the designated front center point. Keep them off the pinch welds.
- Lower the vehicle onto the stands. Open the jack valve slowly so the weight transfers to the stands without a sudden drop.
- Test stability before going underneath. Push the vehicle firmly from the side. If it shifts at all, raise it again, reposition the stands, and retest.
Warning: Never slide under a RAV4 resting on a floor jack alone — hydraulic seals can fail without warning, and a jack that slips will not give you time to move.
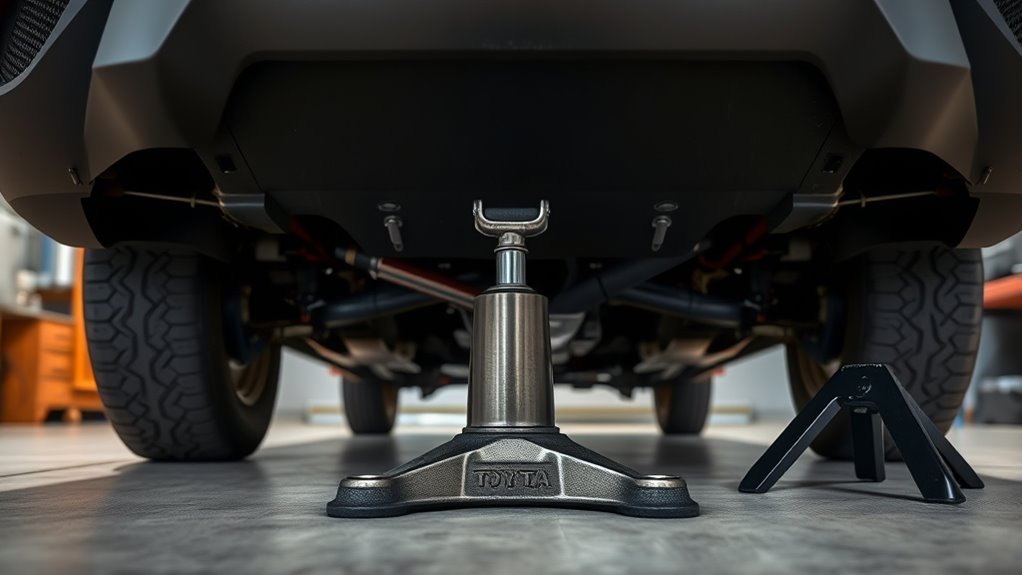
RAV4 Jack and Stand Points (Front, Rear, Center)
The RAV4 uses approved jack and stand points built on reinforced structure so the vehicle’s weight loads onto steel, not sheet metal. Your floor jack goes at the side jacking notches — one at each corner. For front and rear stand placement, use the dedicated structural points shown in the jacking diagrams section of your owner’s manual. The reinforced front center point supports jack stands or ramps when you lift both front wheels at once.
Stands go under solid structural members only — never under pinch welds for long-term support. Your owner’s manual shows exact rated points and load capacities for your model year. Confirm them before you lift.
Note: Jack-point locations can differ between RAV4 model years and trim levels — always verify with the manual specific to your vehicle before lifting.
[Products Worth Considering]

The TPXSIUE passenger storage organizer mat provides a custom‑fit, non‑slip silicone tray that keeps items secure and the console tidy. It slides into the grab‑handle slot without tools, protecting the interior from scratches and rattles while offering easy access to pens, gum, and other essentials. Designed for RAV4 models from 2019 to 2024, it delivers a perfect OEM‑like fit and enhances vehicle organization.

These silicone cup holder inserts provide a precise fit for the 2026 Toyota RAV4, offering anti‑slip grip and noise reduction while protecting the interior from spills and scratches. Made from high‑quality silicone, they are durable, easy to clean, and install without tools, ensuring your drinks stay stable during every drive.
Exact Jack-Stand and Ramp Placement
Place jack stands only under reinforced structure — designated frame members or solid structural beams — and verify each saddle sits flat and centered before you lower the car. Work only on a flat, stable surface to prevent any shift during setup.
For jack stands, align each stand so its saddle contacts the metal evenly, not just at one edge. Confirm every stand is fully extended, locked, and stable before you release the jack valve. Open the valve slowly so the weight transfers gradually — a sudden drop can knock an improperly seated stand.
For ramps, drive each wheel straight onto the ramp face and center the tire before setting the parking brake. If you need stands on the opposite side, place them while the vehicle is still on the ramps. Give the vehicle a firm push to confirm nothing shifts before you go under.
Tools and Adapters to Prevent Pinch-Weld Damage
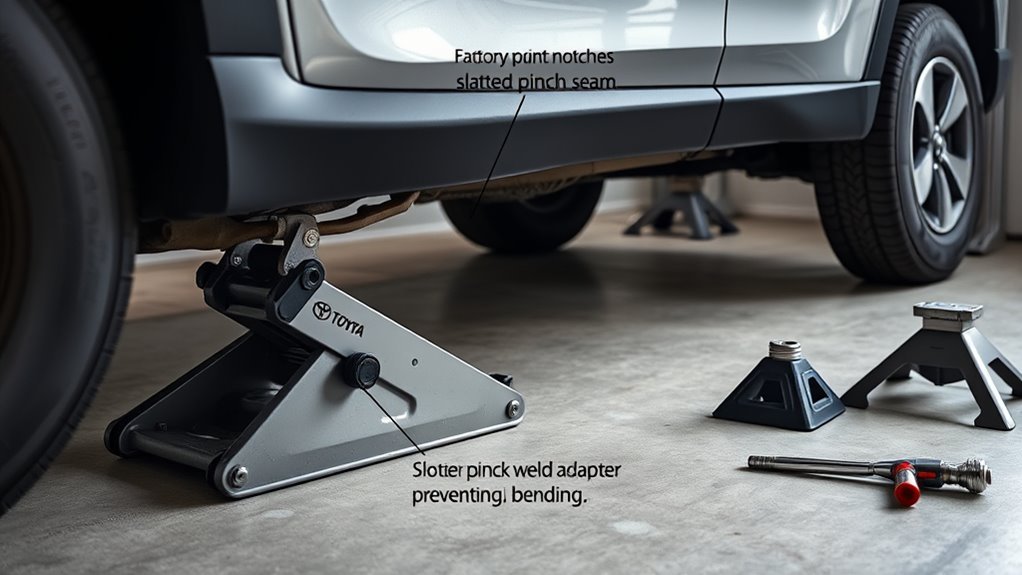
Three adapters protect the RAV4’s thin sheet metal when you lift with a trolley jack: pinch-weld cups, neoprene pads, and reinforced hockey-puck blocks. Each one spreads the load across a wider area so the jack saddle doesn’t cut or bend the seam.
Pinch-weld cups clamp around the seam for a secure, centered grip. Neoprene pads conform to sharp edges and absorb pressure without slipping — a good choice when the weld has rust or irregular edges. Reinforced hockey-puck blocks give rigid, flat support and work well when you need a stable bearing surface; choose ones modified with a channel for pinch seams specifically. Inspect every adapter for cracks, soft spots, or deformation before each use — worn adapters spread load unevenly and increase your risk.
After lifting, move jack stands to solid structural members and keep the pinch welds clear. The jack-point adapter is for lifting only, not long-term support.
Common Mistakes, Troubleshooting, and Safety Checklist
Most jacking injuries trace back to one skipped step. Run through this checklist before you go underneath.
- Park on flat, solid ground — no gravel, no inclines.
- Engage the parking brake fully before positioning the jack.
- Chock all wheels on the opposite side.
- Use only the side notch locations shown in your owner’s manual — not random seams or body panels.
- Fit a pinch-weld adapter before every lift.
- Place jack stands under solid structural members only.
- Inspect jacks and stands for leaks, cracks, or deformation before each use.
- Test vehicle stability with a firm push before going underneath.
If the vehicle rocks, the jack slips, or a stand shifts, lower the vehicle immediately. Reposition on a confirmed structural point, reset every stand, and retest. Check stand seating, ground stability, and jack hydraulic pressure before trying again. If the jack loses pressure mid-lift, do not proceed — switch to a properly rated jack before continuing.
Frequently Asked Questions
Is it safe to lift a RAV4?
Yes — a RAV4 is safe to lift when you follow proper technique. Use the designated jack points from your owner’s manual, fit a pinch-weld adapter, and support the vehicle on rated jack stands placed under solid frame members before working underneath. Never rush the setup.
Can I use the scissor jack that came with the RAV4?
The scissor jack included with the RAV4 is designed for emergency roadside tire changes only. For any maintenance that requires time under the vehicle, use a hydraulic floor jack and rated jack stands. The scissor jack is too small and too unstable for shop use.
Where is the front center jack point on a RAV4?
The RAV4 has a reinforced front center point intended for stand or ramp support when you lift both front wheels. Its exact location varies by model year, so check the jacking diagram in your owner’s manual before placing anything there.
What weight capacity do my jack stands need?
Each stand should be rated for at least half your RAV4’s curb weight. Most RAV4 trims weigh between 3,600 and 4,400 pounds depending on drivetrain and options, so stands rated at 2 tons (4,000 lb) each give you a safe working margin for all configurations.
What happens if I skip the pinch-weld adapter?
Lifting without an adapter concentrates the full weight of the vehicle on a narrow metal seam. This can bend, crack, or cut through the thin sheet metal, causing body damage that is expensive to repair and can compromise the structural integrity of the vehicle’s rocker panel area.
Safety Disclaimer: This article is for informational purposes only. Working under a lifted vehicle carries a serious risk of injury or death if done incorrectly. Always follow the jacking procedures in your RAV4 owner’s manual and Toyota’s official guidance. When in doubt, have a qualified mechanic do the work.
Conclusion
Safe RAV4 jacking comes down to three non-negotiables: the right jack points, a pinch-weld adapter, and rated stands on solid frame members. Shortcuts — wrong points, no adapter, no stands — risk structural damage or worse. Use this checklist every single lift, and you’ll work under your RAV4 with confidence.
References
- Toyota Owner’s Manual Resources — Toyota Motor Corporation (consult the manual specific to your RAV4 model year for jacking diagrams and rated points)
- Automotive Service Safety Guidelines — U.S. Occupational Safety and Health Administration (OSHA)