You should check your RAV4’s tire pressure at least every two weeks using a calibrated gauge and the PSI on the driver’s door jamb (not the tire sidewall). Park on level ground, let tires cool, remove valve caps, press the gauge firmly until hissing stops, and record each tire’s PSI. Inflate or deflate with a portable inflator or station pump in short bursts, recheck frequently, and replace valve caps. Continue for troubleshooting TPMS alerts and maintenance guidance.
Quick: Check Your RAV4 Tire Pressure Now

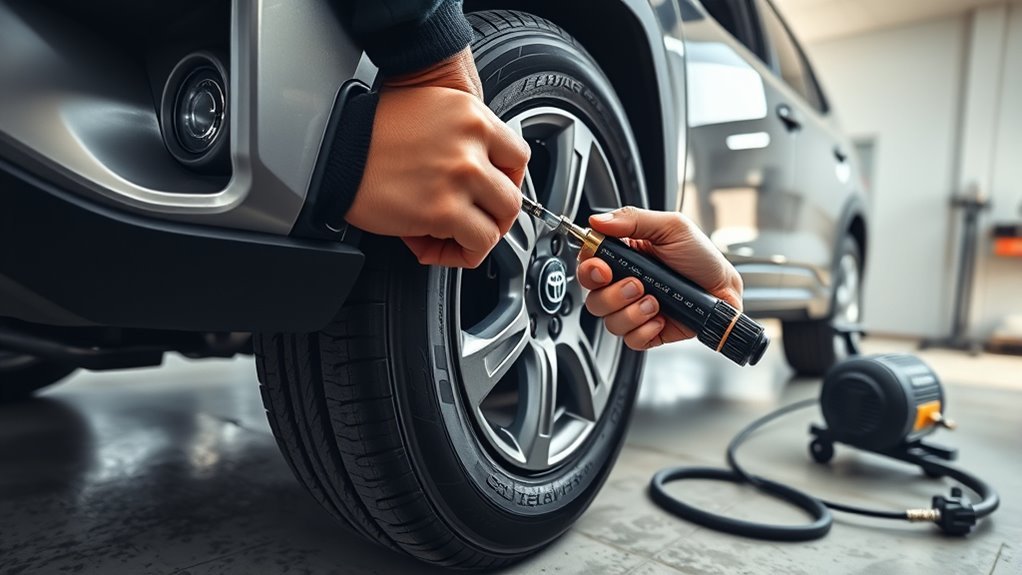
Grab a tire pressure gauge and remove the valve stem cap from each tire; you’ll check each wheel individually to get accurate readings. You place the gauge firmly on the valve, read the value, and record it immediately. This is precise tire maintenance: manual pressure monitoring complements any dashboard readout and verifies sensor accuracy. Do this biweekly, or after temperature shifts, since pressure drops roughly 1 PSI per 10°F decrease. You won’t rely solely on indicators; you confirm actual PSI with the gauge and note discrepancies. If a tire reads low, inflate to the correct value specified for your vehicle (see door jamb sticker) and recheck. Replace each valve stem cap after testing to prevent contamination and slow leaks. Your methodical routine preserves handling, fuel efficiency, and safety, and it empowers you to control your vehicle’s condition rather than surrendering it to neglect or complacency.
Find the Correct PSI (Door Jamb Sticker & Tire Size)
Open the driver’s door and read the manufacturer’s PSI label on the jamb for the specified pressures. Confirm the tire size stamped on the tire sidewall (for example 225/65R17) matches the vehicle’s listed size, since different sizes can require different PSI. If anything’s unclear, consult the owner’s manual for the exact pressure for your RAV4 model and year.
Check Driver Door Jamb
Where exactly is the correct PSI for your RAV4? Open the driver door and inspect the door jamb sticker—this is the authoritative source for manufacturer-recommended PSI. Read the listed front and rear pressures (typically 30–35 PSI) and note the specified tire size; different sizes can change the recommendation. Ignore the tire sidewall’s maximum pressure; it isn’t the vehicle’s operating setting. For consistent tire maintenance tips, record the door jamb values and set your pressure monitoring routine around them. Use a calibrated gauge when tires are cold to match the sticker’s conditions. By relying on the door jamb sticker, you assert control over vehicle safety and performance while removing ambiguity from pressure monitoring and maintenance decisions.
Match Tire Sidewall Size
Because tire sizes affect the vehicle’s recommended pressure, you should always verify that the size stamped on the tire sidewall matches the tire size listed on the driver door jamb sticker before setting PSI. Confirm numbers such as 225/65R17 or 235/55R19; mismatches alter the manufacturer’s pressure specification. Do not use sidewall size as the PSI source—use it only to confirm which jamb-listed specification applies. Inspect tires for tire aging and document any replacement that changes size. Account for seasonal changes: ambient temperature shifts lower PSI roughly 1 psi per 10°F drop, so adjust checks accordingly. Maintain the door-jamb–specified pressure (typically 30–35 psi) for the confirmed size to guarantee safety, efficiency, and control.
Use Manufacturer PSI Label
On the driver’s door jamb you’ll find the manufacturer’s PSI label specifying front and rear pressures for your RAV4; use that label as the authoritative setting once you’ve verified the tire sidewall size matches the jamb listing. Consult that sticker first: it gives model- and load-specific PSI, typically in the 30–35 PSI range but variable by tire size. Verify tire sidewall markings to confirm the jamb recommendation applies. When inflating, set pressures to the label values cold, then recheck after short drives. Track pressures regularly as part of tire maintenance; temperature drops reduce PSI roughly 1 PSI per 10°F, so plan seasonal adjustments. Follow manufacturer guidance exactly to preserve handling, safety, fuel efficiency, and your freedom to drive confidently.
Step-by-Step: Check RAV4 Tire Pressure With a Gauge
Before you start, park the RAV4 on level ground, set the parking brake, and let the tires cool for at least 30 minutes; cold tires give the most accurate PSI readings. You’ll use precise measurement techniques to liberate yourself from guesswork. Remove the valve stem cap, keep it safe, and press a calibrated tire pressure gauge firmly onto the valve stem until the hissing stops and the gauge stabilizes. Read the PSI and record it immediately. Compare the value to the manufacturer’s recommended range (typically 30–35 PSI for many RAV4 models). Repeat for each tire, noting discrepancies and patterns.
| Step | Action |
|---|---|
| 1 | Remove valve stem cap |
| 2 | Apply gauge to valve |
| 3 | Read and record PSI |
| 4 | Replace valve cap |
Perform checks biweekly or before long trips. Secure the cap after each check to prevent contamination. Maintain these disciplined routines to guarantee safety and autonomy on the road.
Inflate or Deflate to the Right RAV4 Tire Pressure
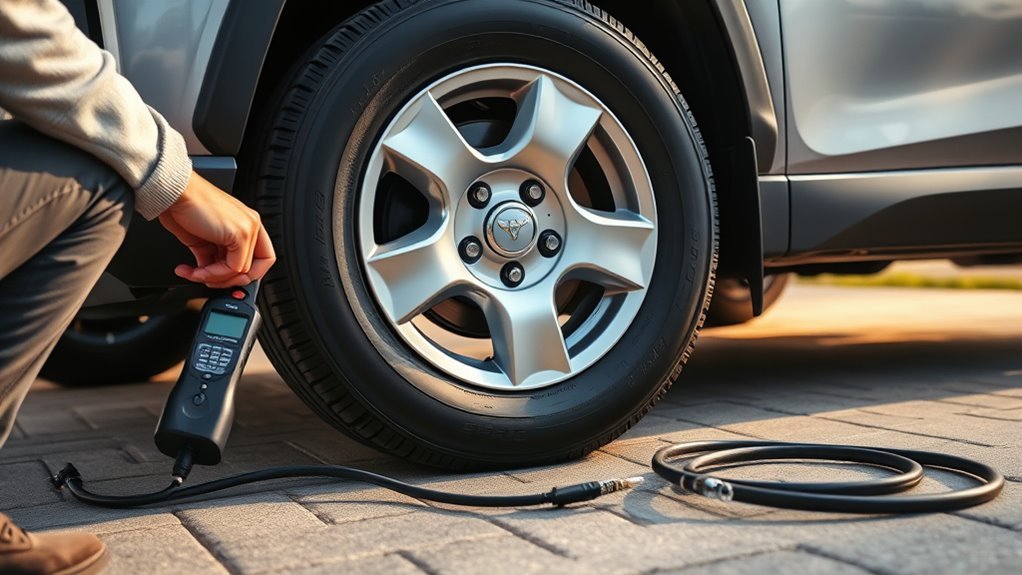
Now that you’ve measured each tire’s PSI, adjust any that fall outside the manufacturer’s recommended range (refer to the driver’s door jamb sticker). You’ll bring tires to the 30–35 PSI target using clear, repeatable steps that restore control and freedom on the road.
- Select a device from tire inflator options: a portable inflator or a gas station air pump at known air pump locations.
- Remove the valve cap and attach the gauge, then inflate or deflate incrementally.
- To inflate, run the inflator in short bursts, recheck PSI frequently to avoid overfill.
- To deflate, press the valve stem gently with a tool or fingertip until the gauge reads within range.
- After each adjustment, secure the valve cap and log the PSI; check biweekly and when temperatures fall (≈1 PSI per 10°F drop).
You’ll emphasize accuracy and routine; properly inflated tires improve performance, fuel efficiency, and safety, enabling independent, confident travel.
Responding to Your RAV4 TPMS Light
When the TPMS light comes on, check each tire’s pressure immediately with a calibrated gauge rather than relying on the dashboard alert alone; the system only signals low pressure, it doesn’t give PSI values. You’ll perform TPMS troubleshooting by confirming actual PSI at each valve, comparing readings to the recommended 30–35 PSI. If ambient temperature has dropped, remember pressure can fall roughly 1 PSI per 10°F, so factor seasonal shifts into your assessment.
Inflate any tire to the specified PSI, then re-check all four tires to verify balance and safety. The TPMS should reset automatically once pressures are corrected; if the indicator remains, isolate the affected tire and perform a soap-bubble leak check at the bead and valve stem. Maintain a monthly tire maintenance routine and check before long trips to reduce recurrent alerts. If you can’t find a leak or the light won’t extinguish after correct inflation, consult qualified diagnostics.
When to Get Professional Tire Service or Replacement
If you spot visible tire damage—cuts, bulges, or embedded objects—stop driving and have a technician inspect the tire. If pressure drops frequently or the TPMS light stays on despite correct inflation, schedule professional leak detection and repair. Measure tread depth; if it’s near or below the legal/minimum spec or wear is uneven, consult a service shop for replacement and alignment.
Visible Tire Damage
Visible tire damage demands prompt attention because cuts, bulges, punctures, sidewall cracks, and abnormal tread wear can all undermine structural integrity and handling. You should inspect each tire visually and by touch, freeing yourself from complacency and regaining control of vehicle safety.
- Check for tire bulges and any localized deformity that signals internal cord breakage; replace immediately.
- Scan sidewall cracks and splits; even hairline fissures can propagate under load and heat.
- Identify punctures in the tread area; small plugs may be temporary, but professional assessment is required.
- Observe uneven tread wear patterns; this often indicates alignment or inflation errors needing corrective service.
- Consult a certified technician when damage, doubt, or recurrent issues appear to prevent failure and extend tire life.
Frequent Pressure Loss
Although a slow leak can start imperceptibly, you should treat consistent pressure loss as a fault requiring professional inspection. If pressure drops more than 1 PSI per week, schedule tire service; persistent loss suggests a slow leak, damaged valve stem, or puncture that compromises safety. Monitor pressures regularly to establish baselines and detect trends; sudden deviations demand immediate examination. Perform a methodical visual check for cracks, bulges, or embedded objects, then pursue professional leak detection and repair or replacement when defects are confirmed. Ask the technician to evaluate valve components and the TPMS for faults that may yield inaccurate readings. Prioritize corrective action promptly—timely tire maintenance preserves control, reduces risk, and restores your freedom to drive confidently.
Tread Depth Concerns
Following persistent pressure loss, inspect tread depth next, since worn rubber compounds reduce wet and dry traction and raise blowout risk. You’ll assess tread wear and safety implications with disciplined checks and prompt professional action when limits are exceeded. Use the penny test and monitor patterns to decide replacement.
- Tread depth minimum: 2/32″ — replace immediately if below.
- Penny test: Lincoln’s head visible → tire is bald.
- Uneven tread wear → possible alignment or inflation fault; see a pro.
- Check every 5,000 miles or at oil changes for consistent traction.
- Excessive vibration/noise → professional inspection for tread and overall tire health.
Act decisively to reclaim control; degraded tread limits your freedom and increases hazard — replace or service promptly.
Frequently Asked Questions
Does the Toyota RAV4 Show Tire Pressure?
Yes—you’ll see tire pressure alerts via Dashboard indicators; newer RAV4s display individual Tire pressure readings through Connected Services, while older models only trigger a TPMS warning, so you’ll still need a gauge for precision.
Where Can I Find Toyota Tire Pressure?
Like a map on your door, you’ll find tire specifications on the driver’s door jamb sticker; consult the owner’s manual for variants and use a pressure gauge at the valve stem to verify and freely correct PSI.
How Do You Know Which Tire Is Low on a Toyota?
If your TPMS warning light comes on, newer RAV4s show individual tire pressure readings so you’ll see the low tire; otherwise, measure each tire pressure with a gauge, methodically identifying the underinflated tire.
Conclusion
Quickly check your RAV4’s tire pressure every month and before long trips to keep handling sharp and tires lasting. The recommended PSI is on the door-jamb sticker and varies by load; over- or underinflation reduces mileage and safety. Use a calibrated gauge: remove valve cap, press firmly, read PSI, and adjust with an air compressor or release air as needed. Note: a 10% underinflation can cut tire life by about 20%, so be precise.