You should flush your Toyota Tundra’s coolant at the factory initial interval of 100,000 miles, then every 50,000 miles after that, with inspections and top‑ups every 15,000 miles. Use Toyota’s pink long‑life organic‑acid coolant mixed 50/50 with water, bleed air after refill, and watch for overheating, cold heater output, rust, or noises that signal issues. Follow proper safety and torque steps during service, and continue for guidance on symptoms, tools, and troubleshooting.
Quick Answer: Toyota Tundra Coolant-Flush Interval
For your Toyota Tundra, follow a coolant-flush schedule of every 30,000 miles or every two years, whichever comes first; after the initial service at 100,000 miles, flush every 50,000 miles thereafter. You’ll inspect coolant levels and debris every 15,000 miles to catch problems early and assert control over vehicle longevity. Use a cleaner during the flush to remove particles and corrosion, then refill the system with the specified coolant to restore proper concentration and pressure.
You’ll apply these coolant maintenance tips systematically: drain to empty, introduce cleaner, run engine per cleaner instructions, drain again, then refill and bleed air pockets. Check hoses, clamps, and radiator fins during the procedure to confirm integrity. These engine cooling solutions prevent overheating and engine damage, freeing you from avoidable breakdowns. Keep records of dates and mileage to maintain autonomy over service intervals and guarantee predictable, reliable operation.
Symptoms Your Toyota Tundra Needs a Coolant Flush
Watch the temperature gauge and stop immediately if it trends higher than normal or you see steam from the radiator/hood, as this indicates overheating that often requires a coolant flush. If the heater stops producing heat, check coolant level and flow—loss of cabin heat commonly signals low or degraded coolant. Inspect the reservoir and drain for rusty, sludgy, or contaminated fluid; presence of sediment means you should perform a flush to prevent corrosion and clogging.
Overheating Or High Gauge
If your Tundra’s temperature gauge consistently reads high, you’re likely facing reduced cooling efficiency that a coolant flush can resolve. You’ll inspect the gauge behavior during idle and load, noting any spike patterns tied to airflow or rpm. Check coolant color and clarity for sediment or rust; contamination impairs coolant maintenance and compromises engine efficiency. Listen for grinding or gurgling that indicates air pockets or low fluid; bleed the system after a flush to restore circulation. If steam appears at the radiator or under the hood, stop driving, let the system cool, then perform a controlled drain, flush, and refill with specified coolant. Follow torque specs on drain and fill points, pressure-test the system, and document results for ongoing maintenance.
Heater Not Producing Heat
When your Tundra’s heater blows cold or only lukewarm air, you’re likely facing low coolant volume, a clogged heater core, or poor circulation that a coolant flush can address; check coolant level and color, feel inlet/outlet hoses for temperature differential, and verify the thermostat operation before proceeding with a drain-and-flush. If you see reduced heater performance, inspect coolant maintenance records and confirm service intervals—regular checks every 15,000 miles catch degradation early. Monitor the temperature gauge for abnormal readings that indicate circulation faults. Procedurally, top off to spec, test thermostat function, and perform a controlled flush if hoses show little temperature difference or coolant appears contaminated. Execute the flush to restore flow, protect the heater core, and reclaim reliable cabin heating.
Rusty Or Sludgy Coolant
Because coolant turns rusty or sludgy as corrosion and sediment build up, you should inspect the reservoir and radiator cap for discolored, particulate-filled fluid and plan an immediate flush if you see brown, muddy, or gelled coolant. You’ll shut the engine, allow cool-down, then sample and visually check fluid clarity and color. If you detect rust flakes, sludge, or gel, schedule a flush to remove contaminants that reduce heat transfer and obstruct flow. Watch the temperature gauge and cabin heat: elevated temp readings or a failing heater often indicate blocked passages or heater-core sediment. Perform coolant maintenance on a set interval and after contamination events to prevent corrosion progression. Act decisively—flushing restores system efficiency and protects engine integrity.
DIY or Shop: Step-by-Step Tundra Coolant Flush
Before you start, prepare tools, PPE, and a cool, ventilated workspace, and verify coolant type and level per the 30,000-mile/2-year schedule. Next, drain and flush the system with a cleaner to remove corrosion and debris, then thoroughly refill with the correct antifreeze/water mix. Finish by bleeding trapped air, checking heater operation, and monitoring engine temperature for proper circulation.
Prep And Safety
As you prepare to flush your Tundra’s coolant, start by securing the vehicle, checking hose firmness and clamps for bulges, and removing the radiator cap to let air into the system for smoother drainage. Wear gloves and eye protection; keep a spill kit and rated container ready for about 1.5 gallons of old coolant. Use a 12-volt impact to remove 10mm–12mm skid plate bolts and access the drain without stripping hardware. Inspect hose alignment marks before removal so you can reinstall correctly and avoid leaks. Know coolant types and follow maintenance tips for correct refill fluid and mixture. After refilling, monitor temperature and check for leaks while you reclaim control of your vehicle’s cooling system.
Drain And Flush
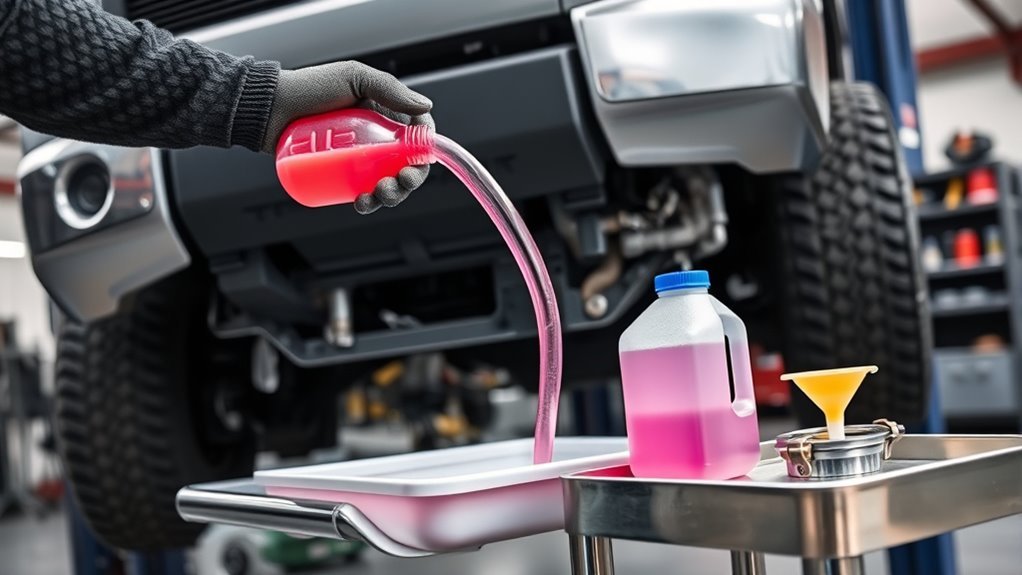
Start by draining the system: place a rated catch container under the radiator, carefully access the radiator drain near the oil filter, and twist the petcock valve to release coolant while avoiding over-torquing the fitting. Collect old fluid and dispose of it per regulations. Remove the overflow and heater hoses, and use compressed air to purge residual coolant from the heater core for a complete evacuate. After flushing out contaminants, reinstall hoses in their original positions, securing clamps snugly without over-tightening. Note coolant types and follow Toyota specifications when selecting replacement fluid. Understand flush benefits: improved corrosion control, thermostat and heater-core performance, and extended service life. Monitor temperature when you restart the engine to confirm circulation.
Refill And Bleed
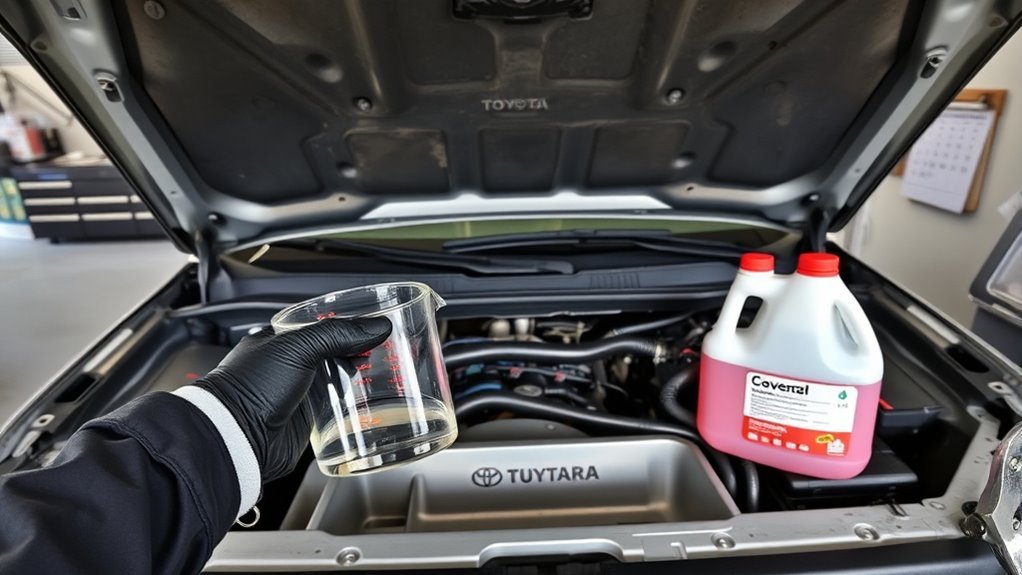
With the system drained and flushed, refill the radiator with the Toyota-specified coolant mixed to the correct concentration, adding roughly the amount removed (about 1.5 gallons) while also topping the overflow reservoir to the “full” mark. Verify coolant compatibility—use only approved Toyota formulas or equivalent to avoid corrosion and warranty issues. Reinstall hoses in their marked positions and tighten clamps snugly without over-torquing. Start the engine and let it idle; monitor temperature and watch for leaks. Execute the bleed procedure by holding the engine at 3000 RPM for five minutes to purge trapped air, then cycle heater to hot to evacuate heater core pockets. Recheck radiator and overflow levels, topping as needed. Secure caps and dispose of waste coolant responsibly to free yourself from contamination.
Which Coolant Should You Use? Types and Expected Lifespan
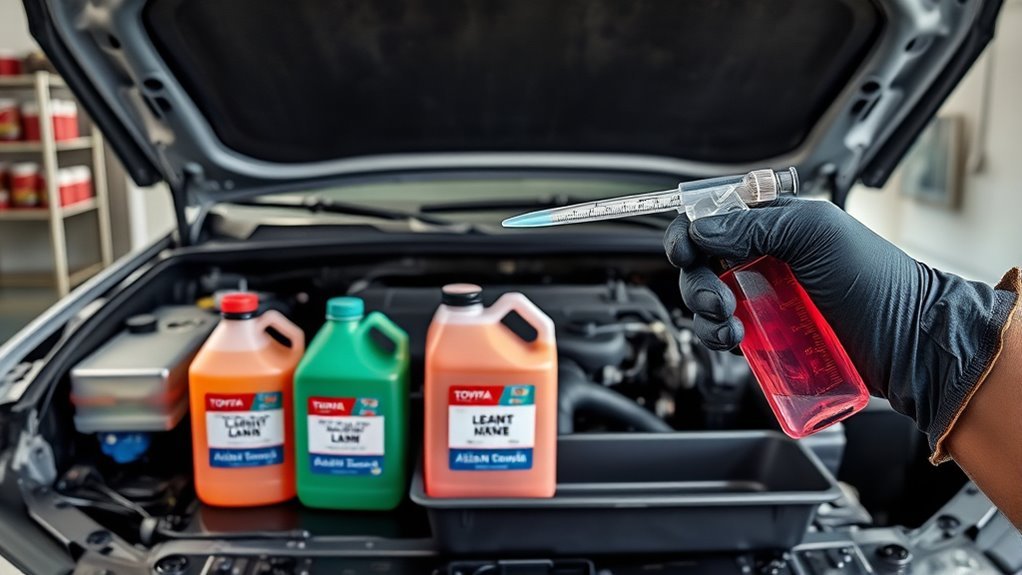
Which coolant should you use depends on your Tundra’s model year and maintenance goals: Toyota specifies the pink long-life organic-acid coolant for extended protection, so you should use that unless a retrofit calls for an alternative. Use the pink organic-acid type to meet manufacturer specs; it’s formulated for corrosion control and improved longevity expectations versus older formulas. Mix 50/50 with ethylene glycol and clean water to preserve freezing/boiling protection and inhibit deposits.
Choose differently only when a retrofit or parts compatibility forces it. Green coolant works but typically needs service every two years due to silicates and phosphates that form deposits. Field reports show variable real-world life; some users see water-pump issues before 100k, so inspect components more often than a calendar-based schedule.
- Feel empowered by using the approved pink formula.
- Reject premature failures with proper mixture and checks.
- Liberate your maintenance routine through disciplined coolant management.
Practical Schedule: Initial 100K, Then Every 50K + Interim Checks
Most Tundras do best if you perform the first coolant change at 100,000 miles, then replace coolant every 50,000 miles thereafter while checking levels and system condition every 15,000 miles. You’ll follow a simple, liberating routine: schedule the initial flush at 100k to restore coolant chemistry and protect seals, then set reminders for 50k intervals to purge residual fluid left in the block. Every 15k miles inspect level, color, and debris; top off with specified coolant if low. Use this cadence to sustain coolant maintenance and preserve engine performance without overcomplicating service. During each scheduled flush, verify the system is fully drained, pressure-tested, and refilled to spec to reduce trapped old coolant and lower risk to the water pump and hoses. Keep concise records of dates and mileage so you control maintenance timing. This procedural approach frees you from surprise failures and keeps the cooling system predictable and serviceable.
Common Issues After a Tundra Coolant Flush : Diagnosis & Fixes
After a flush, watch the cooling system closely for specific symptoms that point to common post-service problems; diagnose by matching signs to causes and fix them promptly to avoid engine damage. If heater output falls or temperature reads high, bleed the system—air pockets often block circulation. Check coolant level, thermostat operation, and run the engine to circulate and purge trapped air. Grinding from the front end usually means water pump bearing failure; inspect the pump, confirm contamination from long-life pink coolant, and replace immediately if noisy. Steam or visible leaks demand an immediate integrity check: pressure-test the system, inspect hoses, radiator, and clamp seals, and repair any breach. If you see rust or sediment, flush again and consider replacing corroded components to liberate the cooling path.
After a flush, watch for air, leaks, noisy pumps, or rust—diagnose and fix quickly to protect the engine
- You’re responsible — act fast to prevent catastrophic damage.
- Don’t tolerate silence; diagnose noisy pumps immediately.
- Reclaim control by restoring proper flow and sealing leaks.
Cost, Tools, and Tips to Make Your Flush Easier

Those post-flush checks matter because a planned, well-equipped service reduces rework and failure risk; now look at cost, tools, and practical tips to make the flush faster and more reliable. You’ll prioritize cost saving strategies: premix Toyota coolant is expensive, so scheduled flushes every 30,000 miles or two years prevent coolant degradation and far costlier engine repairs.
Prepare tools: a flush kit, hose separator pliers, and a coolant filler are essential for efficient maintenance. Lay out tools, wear gloves, and set a drain pan. Mark heater hoses with tape or paint pens to guarantee correct reinstallation and avoid leaks. Use compressed air to purge the heater core — it forces residual fluid out, maximizing replacement volume.
Procedure discipline frees you: work from cold engine, open drain, circulate fresh fluid until clear, bleed air via upper radiator and heater valves, then torque clamps to spec. Record service date and mileage to sustain reliable intervals and liberated ownership.
Frequently Asked Questions
How Often Should I Change the Transfer Case Fluid on My Toyota Tundra?
You should change the transfer case fluid every 30,000 to 50,000 miles; for severe use do it sooner. Follow transfer case maintenance procedures, verify levels, use manufacturer fluid, and document fluid change frequency for freedom from breakdowns.
Is Toyota Coolant Lifetime?
No — you shouldn’t treat it as lifetime. Picture old seals versus fresh coolant: coolant longevity depends on age and use, so follow maintenance tips, check levels every 15k, and change per Toyota’s schedule to stay free.
Conclusion
You’ll keep your Tundra running reliably if you follow the coolant schedule: initial flush at 100K miles, then about every 50K with interim visual and temperature checks. If you spot discoloration, low level, or overheating, act fast. Use Toyota-approved long-life coolant, bleed the system properly, and torque fittings to spec. After a flush, verify no leaks and watch operating temperature like a hawk — as steady as a metronome — to catch issues early.