You’ll understand the Supra cooling system faster if you separate the big idea from the model-specific details: coolant absorbs heat in the engine, the pump moves it through the system, the thermostat controls when full radiator flow begins, airflow removes heat at the radiator, and the pressure cap or expansion tank keeps the coolant from boiling too soon. The exact layout changes between A80/MK4 2JZ cars and modern A90/A91 GR Supra models, so always verify specs against your owner’s manual or factory repair information before replacing parts.
Quick Answer
A Supra cooling system manages heat by circulating coolant through the engine, thermostat, radiator, hoses, pump, and expansion or recovery tank. The radiator removes heat with airflow, while the cap maintains pressure. On turbo models, charge-air cooling, A/C, transmission, and oil coolers can add extra heat load.
Key Takeaways
- The water pump creates circulation; the thermostat decides when coolant is routed through the radiator for full cooling.
- A healthy pressure cap raises the coolant boiling point and helps the expansion or recovery tank work correctly.
- A80/MK4 Supra service data lists an 80–84°C thermostat opening range and a standard radiator-cap relief range of 93–123 kPa.
- Modern GR Supra models have separate coolant reservoirs/circuits, so check both levels only when the engine is cool.
- Most overheating checks start with coolant level, leaks, cap pressure, fan operation, thermostat behavior, airflow blockage, and pump condition.
At a Glance
| Time Required | 10–20 minutes for basic checks; longer for pressure testing, bleeding, or repairs |
| Difficulty | Beginner for visual checks; intermediate for thermostat, pump, radiator, or fan testing |
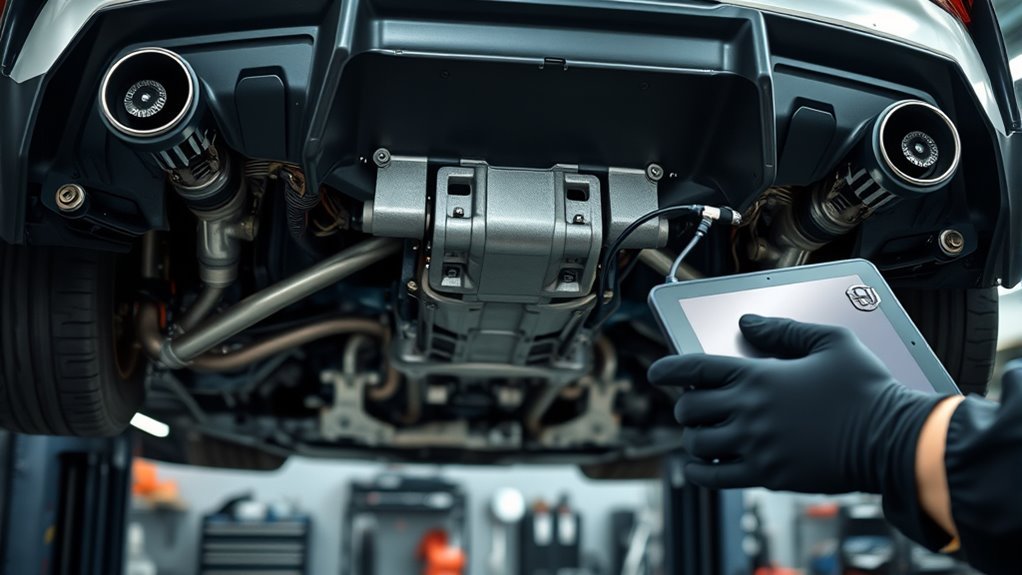
| Tools Needed | Flashlight, gloves, coolant tester, scan tool or temperature reader, pressure tester, basic hand tools |
| Cost | Low for inspection and cap replacement; moderate to high for radiator, pump, fan, or auxiliary-cooling upgrades |
Know Your Supra Generation First
“Supra cooling system” can mean different hardware depending on the generation. The A80/MK4 Supra with the 2JZ engine uses a conventional engine-coolant loop with radiator, thermostat, water pump, fan system, hoses, reservoir, and model-specific auxiliary cooling. The A90/A91 GR Supra is a newer BMW-derived platform with different packaging, electric controls, and separate coolant reservoirs/circuits in the engine bay.
That difference matters because a specification from one generation can be wrong for another. For example, the A80/MK4 factory service data lists the thermostat valve opening temperature at 80–84°C and the standard radiator-cap relief pressure at 93–123 kPa, while Toyota’s GR Supra owner information tells owners to check both coolant reservoirs on gasoline-engine vehicles and to open the system only after the engine cools.
Warning: Never remove a radiator cap or coolant-reservoir cap when the engine is hot. Hot coolant and steam can escape under pressure and cause serious burns.
How the Supra Cooling System Manages Heat
While you’re driving, the Supra’s cooling system carries heat away from the engine so metal parts, oil, seals, and electronics stay within a safe operating range. Coolant absorbs heat in the cylinder head and block, then flows toward the radiator when the thermostat opens. Air passing through the radiator fins removes heat from the coolant before it returns to the engine.
The core parts are simple: the water pump moves coolant, the thermostat controls warm-up and flow, the radiator rejects heat, the fan supports airflow when road speed is low, and the cap/expansion-tank system maintains pressure and recovery. Turbocharged and automatic-transmission models may also add heat through charge-air cooling, transmission-fluid cooling, oil cooling, or A/C condenser load.
Note: Aftermarket single-turbo kits, front-mount intercoolers, thicker radiators, ducting, undertrays, and electric-fan conversions can change airflow. Diagnose the actual setup on your car, not just the stock diagram.
Coolant Flow Step by Step
- Cold start: The thermostat stays closed or mostly closed so the engine warms up quickly.
- Warm-up: Coolant circulates through the engine and bypass passages while temperature rises.
- Thermostat opening: As coolant reaches the thermostat’s rated range, the valve opens and sends more coolant through the radiator.
- Heat rejection: The radiator tubes and fins transfer heat to airflow moving through the front of the car.
- Low-speed support: The fan pulls or pushes air through the radiator when road speed does not provide enough airflow.
- Pressure and recovery: As coolant expands, the cap and tank system controls pressure and stores/recover coolant as temperatures change.
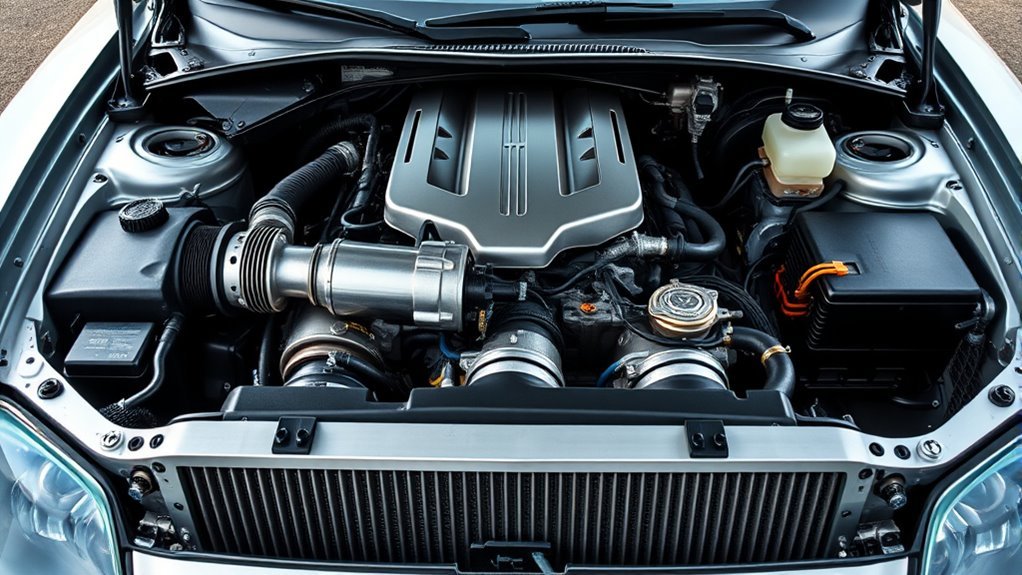
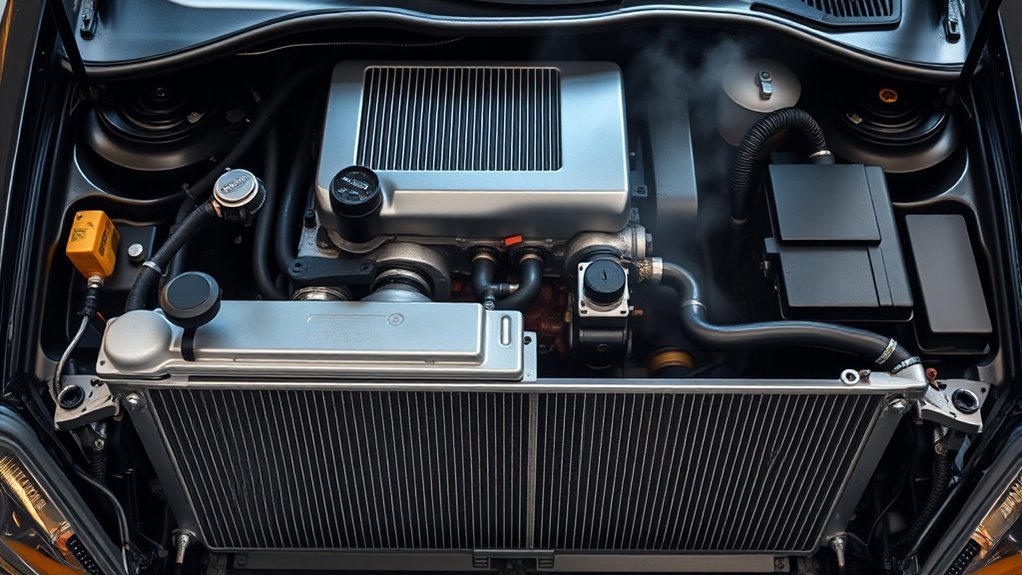
Main Radiator: Design, Placement, and Airflow
The main radiator sits in the front airflow path so incoming air can pass through its fins. Inside the core, hot coolant moves through tubes while heat transfers into the fin pack and then into the air. A clean core, sealed ducting, intact undertrays, and working fans are just as important as radiator size.
On A80/MK4 cars, inspect the radiator core, plastic or aluminum end tanks, hose necks, upper mounts, lower mounts, cap seat, and fan shroud. On modern GR Supra models, also pay attention to the condition of the separate coolant reservoirs and the airflow path through the front heat exchangers.
| Component | Function | Action |
|---|---|---|
| Core | Transfers heat from coolant to air | Inspect fins, clean debris, check for corrosion |
| Tanks | Distribute coolant into and out of the core | Check seams, hose necks and seals |
| Fan/shroud | Improves airflow at idle and low speed | Test operation and confirm shroud fitment |
| Ducting/undertray | Forces air through the heat exchangers | Replace missing panels and seal gaps |
Pro Tip: Before buying a larger radiator, clean the condenser/radiator stack, restore missing ducting, verify the fan shroud, and check that air is not escaping around the core. Airflow problems often look like radiator problems.
Radiator Cap and Pressure Control
The radiator cap or pressure cap is small, but it controls one of the most important parts of the system: pressure. A sealed, pressurized cooling system raises the coolant boiling point, reduces boil-over risk, and helps coolant return from the recovery tank as the engine cools.
Radiator Cap Functionality
A properly sealed cap keeps the cooling system pressurized so coolant can stay liquid at higher temperatures. On the A80/MK4 Supra, factory service data lists a standard radiator-cap relief-valve opening pressure of 93–123 kPa (0.95–1.25 kgf/cm², 13.5–17.8 psi), with 78 kPa (0.8 kgf/cm², 11.4 psi) as the minimum opening pressure before replacement is required.
Replace the cap if the rubber seals are cracked, the spring is weak, the cap fails a pressure test, coolant is pushed out repeatedly, or the radiator neck is corroded. A weak cap can cause coolant loss, air entry, unstable temperature, and boiling at a lower-than-intended temperature.
Pressure and Vacuum Valves
The pressure valve vents excess pressure when the system exceeds its rated limit. The vacuum valve allows coolant to return from the recovery tank as the engine cools and coolant contracts. Together, these valves help keep the radiator full and reduce air pockets.
Do not install a higher-pressure cap just because the car overheats. Higher pressure may delay boiling, but it can also stress old hoses, plastic tanks, heater cores, gaskets, and clamps. Match the OEM rating unless the full cooling system has been built and tested for the higher pressure.
Expansion Tank Interaction
When coolant heats up, it expands. The cap routes extra coolant into the expansion or recovery tank. When the system cools, the vacuum valve allows coolant to return. That closed recovery action helps maintain the correct coolant volume and reduces air ingestion.
| Component | Function | Effect |
|---|---|---|
| Pressure cap | Controls pressure and recovery | Raises boiling margin and prevents coolant loss |
| Expansion/recovery tank | Stores expanded coolant | Helps return coolant during cool-down |
| Hoses and clamps | Maintain sealed flow paths | Prevent air entry and pressure loss |
Surge (Expansion) Tank: Function and Maintenance
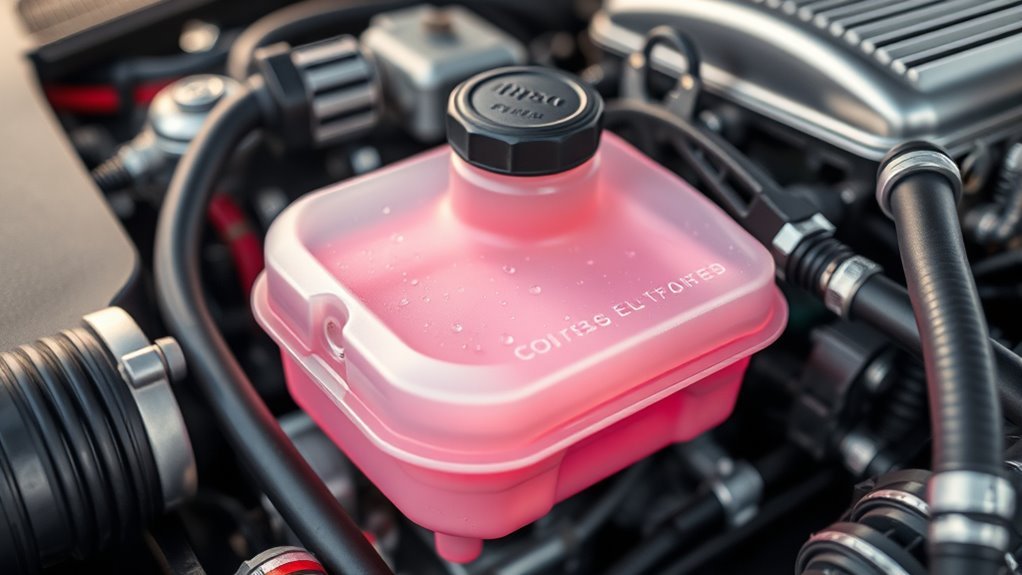
Because coolant expands and contracts with temperature, the surge or expansion tank captures excess coolant and helps return it when the system cools. On modern GR Supra models, Toyota owner information notes that gasoline-engine vehicles have two cooling circuits, so both coolant levels must be checked and refilled as needed.
Inspect the tank for cracks, cloudy plastic, staining, clogged return ports, weak caps, loose hoses, and dried coolant residue. Low coolant is not normal. If the level drops repeatedly, find the cause instead of simply topping it off.
Water Pump and Coolant Flow Path
The water pump is the cooling system’s active circulator. It moves coolant through the engine, radiator, heater circuit, and related passages. If pump flow drops, the radiator can be clean and the thermostat can be new, but the engine may still overheat because heat is not being carried away fast enough.
On belt-driven pump systems, check belt tension, pulley alignment, bearing noise, shaft play, and weep-hole leaks. On vehicles with electric or electronically controlled cooling hardware, scan for fault codes and monitor commanded versus actual temperatures where supported.
Supra Thermostat: Opening Temperature and Symptoms
The thermostat controls when coolant gets full access to the radiator. It stays closed or partly closed during warm-up, then opens as coolant reaches its rated temperature. For A80/MK4 Supra factory service data, the thermostat valve opening temperature is listed as 80–84°C (176–183°F), with valve lift checked at 95°C (203°F).
A stuck-closed thermostat can cause fast overheating because coolant cannot move properly through the radiator. A stuck-open thermostat can make the engine warm up slowly, reduce heater performance, and hurt efficiency. A thermostat that opens late can cause temperature spikes under load.
Warning: Do not remove the thermostat as a “fix” for overheating. Toyota’s A80/MK4 repair information warns that removing the thermostat can reduce cooling efficiency.
Intercooler, A/C Condenser and Oil Cooler Roles

The radiator is not the only heat exchanger in the front of a Supra. The A/C condenser rejects heat from the refrigerant, turbocharged models use charge-air cooling to manage intake temperatures, and some models or builds use oil and transmission-fluid coolers. These parts compete for airflow and can heat-soak each other when packaging is poor.
On a modified Supra, the cooling stack often changes. A large front-mount intercooler can block radiator airflow if ducting is weak. An oil cooler without a thermostat can overcool oil on the street. A transmission cooler mounted directly in front of the radiator can add heat during track or high-load use. Treat the system as one airflow package, not separate parts.
When to Add Remote/Auxiliary Radiators
Add a remote or auxiliary radiator only after the basic system is healthy. It can help when the car sees track use, high boost, very hot climates, long uphill pulls, or packaging that limits the main radiator. But extra radiators add hose length, coolant volume, pressure drop, bleeding points, and leak points.
Consider auxiliary cooling when the primary radiator, fans, cap, thermostat, pump, coolant mix, ducting, and bleeding procedure have already been verified. Put the auxiliary heat exchanger where it gets reliable airflow, mount it firmly, protect the hoses, and include proper bleed points.
Weak Points and Upgrade Options (Core, Tanks, Fans)
Upgrades work best when they solve the real weak point. A thicker aluminum radiator can improve capacity, but it will not fix a failed cap, trapped air, poor fan wiring, blocked condenser, missing shroud, or wrong coolant mix. Start by finding whether the problem is pressure, flow, airflow, heat load, or control.
- Radiator core: Upgrade when the stock core is clogged, damaged, too small for the build, or heat-soaked under sustained load.
- End tanks: Replace aging plastic tanks or leaking seams with quality replacements or TIG-welded aluminum where appropriate.
- Fans: Use properly sized fans, relays, fuses, wiring, shrouding, and temperature control. Poor electric-fan conversions often perform worse than a healthy stock setup.
- Hoses and clamps: Replace swollen hoses, soft hoses, cracked heater hoses, weak clamps, and mismatched silicone-hose hardware.
- Ducting: Seal air gaps so incoming air goes through the radiator instead of around it.
- Coolant mix: Use the coolant type and water mix specified for your model and climate. For A80/MK4 service information, Toyota specifies ethylene-glycol-based coolant mixed with demineralized or distilled water and warns against alcohol-type coolant.
Troubleshooting Checklist: Quick Fixes and Diagnostics
Start with simple checks before replacing major parts. Overheating often comes from low coolant, trapped air, a weak cap, blocked airflow, a fan problem, a thermostat fault, a leak, or a pump issue.
Quick Visual Inspections
Inspect the cooling system visually and by touch only when it is safe to do so. Look for dried coolant, white or pink crust, green or red staining, wet hose ends, cracked plastic, damaged fins, loose clamps, and missing undertray panels.
- Verify coolant level at the reservoir or reservoirs when the engine is cool.
- Check the radiator, tank seams, hose necks, heater hoses, drain plugs, and water pump area for leaks.
- Look for collapsed lower radiator hoses or soft hoses that balloon under pressure.
- Inspect the radiator cap or pressure cap seal and confirm the correct rating.
- Check the radiator and condenser fins for dirt, bugs, bent fins, leaves, or track debris.
Basic Fluid Checks
Coolant should be clean and free from oil, heavy rust, scale, or sludge. Milky coolant can point to oil contamination. Brown, gritty coolant suggests corrosion or neglected service. Constant bubbling in the tank after warm-up can indicate trapped air, combustion gas intrusion, or a pressure-control problem.
If coolant is low, top it off only with the correct coolant type and water mixture for your Supra. Then pressure-test the system and find the leak. Toyota’s GR Supra owner information also warns that incorrect additives can damage the engine, so avoid universal “fix-in-a-bottle” products unless they are approved for your vehicle and situation.
Fan and Thermostat Tests
Fan and thermostat testing helps separate airflow problems from flow problems. Watch coolant temperature with a scan tool or accurate temperature reader instead of relying only on the dash gauge.
- Let the engine warm up and watch for a steady temperature rise.
- Confirm the thermostat opens in the correct range for your model.
- Check that the upper and lower radiator hoses change temperature as coolant begins moving through the radiator.
- Verify fan engagement at idle, with A/C demand, and under high-temperature conditions.
- Check fan voltage, grounds, relays, fuses, control modules, and connectors under load.
- Pressure-test the system if coolant is disappearing or temperature rises after shutdown.
Symptom-to-Cause Guide
| Symptom | Likely Causes | First Check |
|---|---|---|
| Overheats at idle | Fan, shroud, relay, low coolant, air pocket | Fan operation and coolant level |
| Overheats at highway speed | Blocked radiator, weak pump, thermostat, airflow ducting | Radiator airflow and thermostat behavior |
| Coolant pushed into overflow | Weak cap, overfill, air pocket, combustion gas, overheating | Cap pressure test |
| Slow warm-up | Thermostat stuck open, wrong thermostat, fan control issue | Thermostat temperature test |
| Temperature spikes after hard driving | Heat soak, airflow blockage, low coolant, inadequate radiator/fan | Cooling stack and pressure test |
Coolant Bleeding and Air Pockets
Air pockets reduce coolant contact with hot metal and can cause sudden temperature spikes. Any time you drain coolant, replace a hose, change a thermostat, install a radiator, or open the system, bleed it according to the procedure for your specific Supra generation.
Common signs of trapped air include gurgling, heater temperature changes, unstable coolant level, sudden gauge movement, and coolant overflow after shutdown. Use the proper bleed screws or vacuum-fill method where applicable, keep the nose of the car positioned as the service procedure requires, and recheck level after the first full heat cycle.
Maintenance Schedule and Safe Service Habits
Check coolant level regularly, especially before track days, summer road trips, dyno sessions, or long high-load driving. Inspect hoses and clamps at every oil change. Pressure-test the cap and system if you see repeated coolant loss, dried residue, or unexplained temperature changes.
Use Toyota owner information or factory repair data for the correct coolant type, fill procedure, torque specs, and model-specific warnings. If you are working on a modern GR Supra, remember that Toyota owner information identifies separate coolant reservoirs for engine and auxiliary cooling, so checking only one tank can miss a low-coolant condition in the other circuit.
Frequently Asked Questions
How does a Toyota Supra cooling system work?
It circulates coolant through the engine to absorb heat, sends hot coolant through the radiator when the thermostat opens, uses airflow and fans to remove heat, and relies on a pressure cap plus expansion or recovery tank to control boiling and coolant volume.
What temperature does the MK4 Supra thermostat open?
A80/MK4 Supra factory service data lists the thermostat valve opening temperature at 80–84°C (176–183°F). Some aftermarket thermostats use lower opening temperatures, but they should be matched to the full cooling setup and driving use.
What are common Supra cooling problems?
Common problems include low coolant, leaking hoses, weak caps, clogged radiator cores, cracked plastic tanks, trapped air, thermostat failure, poor fan operation, damaged ducting, water-pump leaks, and heat-soak from modified intercooler or oil-cooler layouts.
Should I upgrade the Supra radiator first?
Not always. First confirm coolant level, cap pressure, thermostat operation, pump condition, fan performance, bleeding, and airflow ducting. Upgrade the radiator when the stock unit is damaged, clogged, undersized for the build, or unable to control temperature after the rest of the system is healthy.
Can I open the coolant cap when the engine is warm?
No. Wait until the engine and cooling system are cool. Hot coolant is pressurized and can spray out as steam or liquid, causing burns. Toyota owner and repair information warns against opening the system while hot.
Conclusion
The Supra cooling system is a chain: radiator, cap, tank, thermostat, pump, hoses, fans, airflow panels, and auxiliary heat exchangers all have to work together. A single weak cap, missing shroud, air pocket, dirty core, or tired hose can make the whole system look undersized.
Start with model-specific specs, inspect the simple parts first, pressure-test when needed, and upgrade only after you know whether the problem is flow, pressure, airflow, or heat load. That approach keeps the Supra reliable whether it is a stock street car, a restored MK4, or a modified high-power build.
Sources
- Toyota Owners Manuals and Warranties: Supra — official Toyota owner-manual access and model-specific maintenance references.
- Toyota Supra Owner’s Manual — coolant safety, coolant reservoir checks, engine-compartment warnings, and suitable coolant-additive guidance.
- MK4 Supra Factory Service Manual: Cooling System — A80/MK4 cooling-system pages, component inspections, and service procedures.
- MK4 Supra Cooling System Service Specifications — thermostat opening temperature, radiator-cap pressure, fan amperage, and torque data.
- MK4 Supra Coolant Check Procedure — coolant-level, coolant-quality, and hot-cap safety checks.
- Summit Racing: Cooling System Pressure — explanation of how cooling-system pressure raises coolant boiling point.