You rely on the Camry’s wheel bearing to support vehicle load, center the wheel, and let it rotate with minimal friction while sealed races and balls keep contaminants and moisture out. A damaged seal or distorted race raises friction, causes noise, vibration, uneven tire wear, and can trigger ABS faults. You can detect play, listen for humming at speed, or scan sensors for faults. Keep inspecting early — the next section covers diagnostics, inspection steps, and replacement options.
What a Wheel Bearing Does in a Toyota Camry
A wheel bearing in your Toyota Camry is a precision assembly of steel balls and races inside the hub that lets the wheel rotate smoothly around the axle while sealing out water and road debris. You rely on that compact unit to reduce friction between the wheel and axle shaft, directly affecting handling, alignment stability, and tire wear. Each wheel houses one sealed bearing that’s designed to exclude contaminants; when the seal’s compromised, abrasion and corrosion start a failure process. You’ll monitor bearings during routine inspections, because improper installation, road abuse, or harsh environments accelerate degradation. Prioritize wheel bearing maintenance: check for play, noise, and uneven tire wear patterns that signal impending failure. Don’t ignore seal integrity or delayed bearing lubrication where applicable; some service procedures require re-greasing or replacement rather than quick fixes. By diagnosing issues early and applying disciplined maintenance, you preserve steering precision, extend tire life, and keep mobility—and freedom—unrestricted.
Camry Wheel Bearing Design and Where It Sits
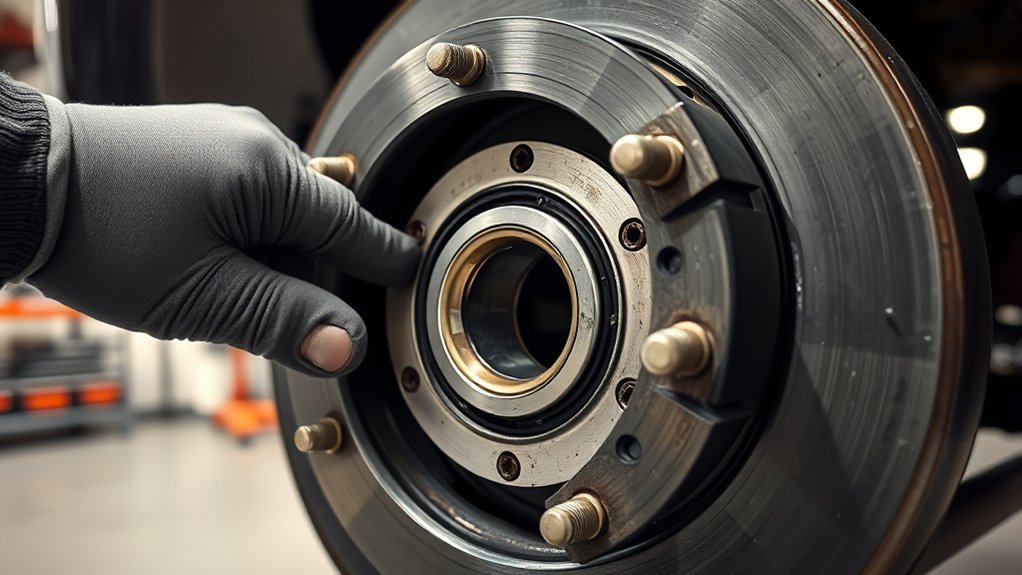
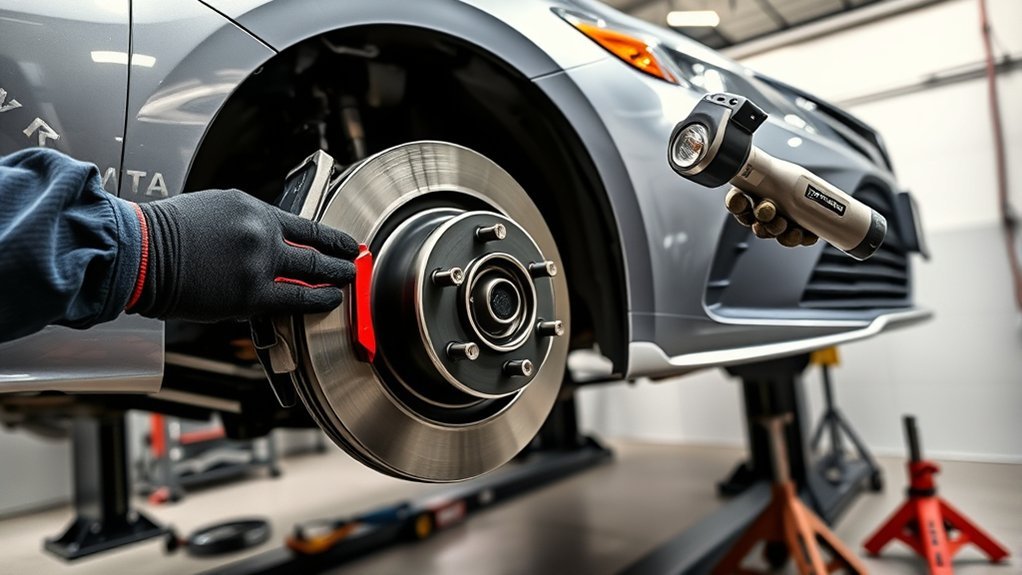
One compact bearing assembly sits at each Camry wheel inside the hub, using hardened steel balls running in precision races to carry radial and axial loads while minimizing friction. You’ll find that front and rear layouts differ: front bearings and hubs are separate components, while rear bearings are typically a sealed unit integral to the hub. The bearing fits tightly on the axle shaft and is sealed to block water, dust, and debris, preserving wheel bearing materials and sustaining bearing performance over time.
When you inspect or replace them, treat fitment and sealing as primary diagnostics. Incorrect installation or damaged seals compromises preload and alignment, degrading bearing performance and freedom of movement. You should verify seating, seal integrity, and absence of contamination before reassembly. Use authorized replacement units with proper wheel bearing materials to retain factory tolerances. That approach frees you from repetitive repairs and keeps rotational resistance low, so you can reclaim control of vehicle behavior and longevity.
Common Causes of Camry Wheel Bearing Failure
When you drive over potholes or strike curbs, sealed bearings can deform or the seals can tear, letting grit and moisture enter and rapidly abrading races and balls. You need to recognize the mechanical roots of failure so you can act and reclaim control of your vehicle’s safety and cost.
- Physical trauma: pothole impact and curb strikes distort bearing geometry, compromise seals, and introduce contaminants that grind surfaces.
- Excessive load stress: heavy cargo or battery weight in hybrid models increases axial and radial forces, accelerating metal fatigue and lubricant breakdown.
- Environmental and setup factors: road salt, sand, and misalignment cause corrosion and uneven loading; poor alignment shifts stress onto bearings, shortening service life.
Inspect seals, check for play, and monitor alignment regularly. Prioritize preventative maintenance to avoid cascading failures and costly replacements. Take decisive maintenance steps to free yourself from avoidable breakdowns.
9 Signs Your Camry Wheel Bearing Is Failing
If you hear humming, squeaking, or a grinding noise that changes with vehicle speed, it’s a strong sign a Camry wheel bearing is degrading and needs inspection. Listen for wheel bearing symptoms like clicking or popping during turns — that often signifies advanced wear. You may also feel vibrations in the steering wheel or a persistent pull to one side; those tactile cues indicate compromised bearing integrity affecting vehicle stability.
Check for uneven or accelerated tire wear, which reflects wheel bearing influence on alignment and load distribution. Monitor ABS or traction control warning lights, since bearing failure can disrupt wheel-speed sensors and braking systems. Prioritize driving safety: these symptoms reduce control and can escalate to wheel lock or separation if ignored. You want freedom on the road, so treat these warning signs as constraints to remove. Get professional assessment promptly when multiple symptoms appear, and avoid extended driving until the bearing condition is verified.
Step‑by‑Step Camry Wheel Bearing Inspection (Quick Checks)
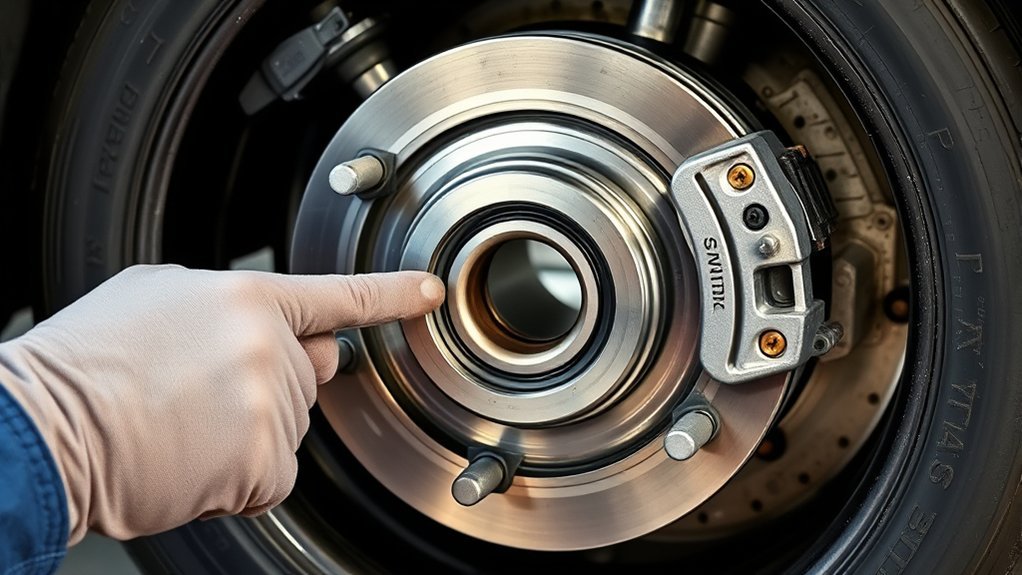
Start by safely lifting the Camry and performing a lift-and-wiggle test: grab the tire at 12 and 6 o’clock and check for lateral or vertical play. Rotate the wheel slowly and listen for humming, grinding, or clicking that indicates bearing wear. Finish with a visual seal inspection—look for grease leakage, rust, or damage to the hub area and consult a technician if you find symptoms.
Lift And Wiggle Test
Although it’s a quick check, you’ll need to lift the Camry and securely support it on jack stands before you inspect the wheel for play. You grasp the tire at 12 and 6 o’clock and wiggle; excessive fore-aft motion points to worn bearings. Then check 3 and 9 o’clock for lateral play — any looseness is diagnostic for bearing wear or hub issues. Listen for grinding or clunking during the wiggle; that confirms internal damage. Perform this regularly as part of bearing maintenance tips and monitor humming or uneven tire wear. Remember wheel alignment importance — misalignment masks symptoms and accelerates wear. Act decisively: replace a failed bearing to restore control and reclaim freedom on the road.
- 12/6 o’clock fore-aft check
- 3/9 o’clock lateral check
- Noise confirmation and follow-up
Spin Wheel Listening
With the wheel off and the Camry safely supported, spin the hub by hand and listen closely for humming, grinding, or clicking that indicate bearing wear. You’ll use deliberate, controlled spins and focus on consistent pitch or rhythmic irregularities; note whether noise changes with direction or speed. Combine this with bearing maintenance tips: clean contact surfaces before testing and keep hands clear of sharp edges. If you hear persistent noise or roughness, document location and quality for later reference. Avoid assuming minor sounds are harmless—noise diagnosis techniques demand repeatable observations. After spinning, perform the lift-and-wiggle confirmation; excessive lateral play plus audible defects signals likely bearing failure. If in doubt, get a professional evaluation and prompt replacement.
Visual Seal Inspection
Begin by visually examining the wheel bearing seal for cracks, tears, or missing sections that could let dirt or moisture in; any grease weeping from the seal or visible corrosion on the hub face is a strong indicator the seal’s failed and the bearing may be compromised. You’ll confirm seal integrity and assess contamination prevention at once. Look for grease on the backing plate, rust at the hub lip, and any uneven residue patterns. Rotate the wheel while listening for grinding; a quiet seal can hide internal damage. Lift the vehicle and check lateral play; movement with a seemingly intact seal suggests internal wear. Act decisively—replace a suspect seal or bearing to reclaim control over reliability.
- Inspect for grease leakage and hub corrosion
- Rotate wheel to detect noise
- Check hub lateral play
Mechanic Diagnostic Tests and How to Read Results
Start by lifting the Camry and checking wheel play for side-to-side or up-and-down movement to quantify bearing looseness. Then perform road and stethoscope noise tests at varying speeds to distinguish humming, grinding, or clicking that indicate inner or outer race wear. Finish with ABS sensor and tone-ring inspection—fault codes or intermittent sensor signals often correlate with bearing play or damaged reluctor rings.
Lift And Wheel Play
One quick way to assess bearing condition is to lift the Camry so the wheel is off the ground, then check for lateral (side-to-side) and vertical (up-and-down) play by grasping the tire at 3 and 9 o’clock and 12 and 6 o’clock positions and applying firm force; any measurable movement beyond manufacturer specs or a loose, clunking feel indicates potential bearing wear or hub fitment issues that warrant further measurement and likely replacement. You’ll also integrate wheel alignment and tire inspection data to correlate play with steering drift or uneven wear. Use a pry bar at the hub for leverage, note any endplay, and record millimeter values. Regular checks free you from unexpected failure and keep control predictable.
- Inspect for lateral play with firm hand pressure.
- Pry-test hub for abnormal looseness.
- Measure and compare to specs; replace if exceeded.
Bearing Noise Tests
How can you use sound and vibration to pinpoint a failing Camry wheel bearing? Start with a humming noise check: drive at varying speeds and note a steady hum that rises with speed—this often flags a worn bearing. Perform a turning test: steer left and right; if noise changes, the opposite-side bearing warrants inspection. Use vibration assessment simultaneously—feel for steering-wheel or seat vibrations at specific speeds; consistent vibration tied to the hum points to bearing damage rather than tire imbalance. Run load variation tests: observe noise changes during acceleration and deceleration; a reduction under load can indicate internal bearing issues. If tests suggest failure, get a professional inspection with equipment to quantify play and frequency for definitive diagnosis and liberated repair choices.
ABS Sensor Checks
Begin by checking the ABS sensor’s electrical and signal integrity: hook an OBD-II scanner to read ABS codes, then probe the sensor wiring and connector for corrosion, breaks, or poor pin contact before spinning the wheel to measure voltage or AC signal output—consistent, regular waveform and stable voltage indicate a good sensor; erratic, intermittent, or no signal points to sensor damage, wiring faults, or tone ring issues.
You’ll perform ABS sensor maintenance focused on root causes: clear codes, inspect harness routing, clean connectors, and replace damaged sensors or tone rings. For ABS signal interpretation, use an oscilloscope or multimeter: clean sine-like or pulsed waveform equals valid speed data; noisy, missing, or fluctuating traces demand repair. Act decisively to regain control and mobility.
- Scan and record codes
- Visual wiring and connector check
- Signal measurement and interpretation
Immediate Steps If You Suspect a Bad Camry Wheel Bearing
If you hear a persistent humming, grinding, or clicking from a wheel, stop driving and perform a quick diagnosis: secure the Camry, engage the parking brake, and chock the opposite wheels. Begin with a focused noise diagnosis and wheel bearing maintenance mindset. Lift the suspect corner with a jack and support it on a stand. Grasp the tire at 12 and 6 o’clock and rock—any axial or radial play beyond minimal free play indicates bearing wear. Spin the wheel by hand; roughness or rubbing points to failure. Check the hub area and ABS sensor wiring for damage; illuminated ABS/traction lights may confirm a bearing-related fault. Don’t delay: if you detect play, unusual sound, or warning lights, remove the vehicle from service and arrange a professional evaluation. Prompt action protects you from catastrophic outcomes like wheel separation and preserves your freedom to drive safely.
Camry: OEM vs Aftermarket Bearings and Hub Options
After you’ve confirmed bearing play or noise, the next decision is whether to replace with OEM bearings or choose an aftermarket unit or complete hub assembly. You’ll weigh OEM Benefits—precise fit, factory tolerances, predictable longevity—against Aftermarket Risks like inconsistent quality, compatibility gaps, and premature wear. Consider Performance Comparisons: OEM often wins for NVH control and load handling, while some high-end aftermarket parts can match or exceed specs but require careful selection. Factor Installation Challenges: OEM parts reduce alignment variance; aftermarket may need adaptation and can introduce fitment headaches.
- Assess driving conditions and maintenance history to judge longevity needs.
- Compare part specs and vendor reputation; cheap savings can cost more in labor and replacements.
- Choose a complete hub assembly if you want a quicker, more fail-safe install under demanding use.
You control the outcome—pick reliability for freedom from repeat repairs.
Typical Camry Wheel Bearing Replacement Process and Parts
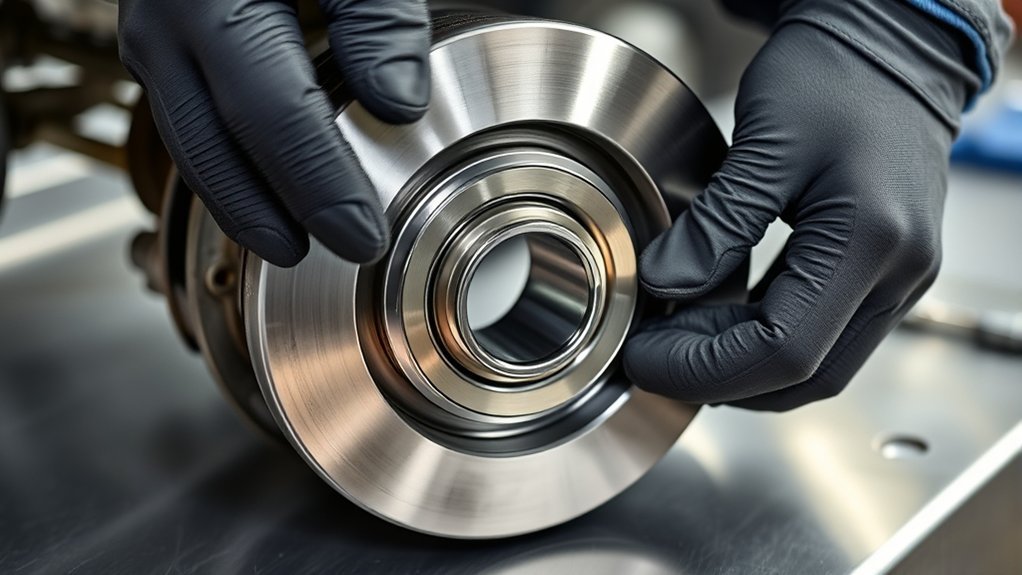
You’ll start by removing the hub assembly and, if needed, press out the old bearing using the correct puller or hydraulic press to avoid damage. When reassembling, fit the new bearing or hub unit cleanly, torque the spindle nut and mounting bolts to Toyota’s specified values, and verify wheel-end preload and ABS tone ring alignment. Finish with a road test and inspection for noise, play, or alignment drift to confirm proper installation.
Hub And Bearing Removal
Begin by lifting the Camry and removing the wheel, caliper, rotor, and parking-brake components to expose the hub assembly; you’ll then unthread the axle nut, disconnect the tie rod and lower ball joint, and unbolt the knuckle from the strut to free the hub for extraction. Use penetrating oil on rusted fasteners, then employ hub extraction techniques like a slide hammer or controlled pry to remove the hub without warping the knuckle. Inspect mating surfaces and clean thoroughly; apply never-seize to bolts to facilitate future service. When pressing the new bearing, follow bearing installation tips: guarantee perfect alignment, use a press or correct drivers, and tighten in a staggered pattern for even seating. Test brakes and components before driving.
- Safe separation procedure
- Extraction tools and prep
- Bearing press and align steps
Reassembly And Torque Specifications
With the hub seated and the new bearing pressed in, reconnect the knuckle to the strut and reattach the lower ball joint and tie rod, then align the bearing so the sensor hole matches the ABS/speed sensor before you start torquing fasteners. Use proper reassembly techniques: apply never-seize to bolt threads, position the self-adjuster correctly, and verify the brake drum fits snugly. Tighten wheel bearing bolts in a staggered sequence to distribute load and avoid distortion. Follow Toyota torque values for each fastener—use a calibrated torque wrench and incremental passes to reach spec. After assembly, bleed the brake system to purge air, confirm emergency brake engagement, and road-test at low speed to validate function. You’re reclaiming control—precise, durable reassembly prevents repeat work.
Cost Estimates, Service Choices, and When to Get a Second Opinion
How much should you expect to pay for a Camry wheel bearing replacement? Expect roughly $350 per wheel on average; luxury or EV Camrys can exceed $700. For cost comparison and repair timing, plan to replace both bearings together to maintain balanced wear and avoid repeat labor.
- Dealership vs independent shop: dealerships may quote up to $2,000 for complete front assembly replacement; independents usually offer lower, targeted bearing service.
- Inspection and maintenance: early diagnostics save money by catching wear before hub or suspension damage increases scope.
- Seek a second opinion when estimates differ greatly or when a shop recommends assembly replacement without clear diagnostic proof.
You control outcomes: demand itemized estimates, ask about parts origin, and verify test data (play, noise, torque specs). Get a second assessment if pricing or scope seems excessive; that preserves both budget freedom and vehicle safety.
Frequently Asked Questions
What Are the Three Main Functions of a Bearing?
They distribute load, reduce friction, and prevent wear: you’ll diagnose uneven loads, friction reduction needs, and wear prevention measures to restore liberated, reliable wheel performance using technical inspection, seals, lubrication, and alignment corrections.
Conclusion
You now know what a wheel bearing does, where it sits, why it fails, and how to spot symptoms. You can inspect quickly, act promptly, and choose parts wisely. You can decide between OEM or aftermarket, weigh hub-versus-bearing assemblies, and estimate costs accurately. You can perform preventive checks, schedule timely replacement, and seek a second opinion when unsure. Stay observant, act decisively, and drive safely with confidence.