If your Camry has unseen water intrusion, you’ll spot damp carpets, trunk pooling, musty odors, or fogged windows and should log occurrences with dates and photos; common entry points are trunk seals, tail light gaskets, and clogged drainage channels that let water reach the spare-tire well, electronics, and HVAC evaporator, causing mold, corrosion, and warranty complications; perform controlled water tests, inspect seals, clear drains, and document findings methodically — continue below to learn step-by-step diagnostics and fixes.
How to Tell If Your Camry Has a Water Leak
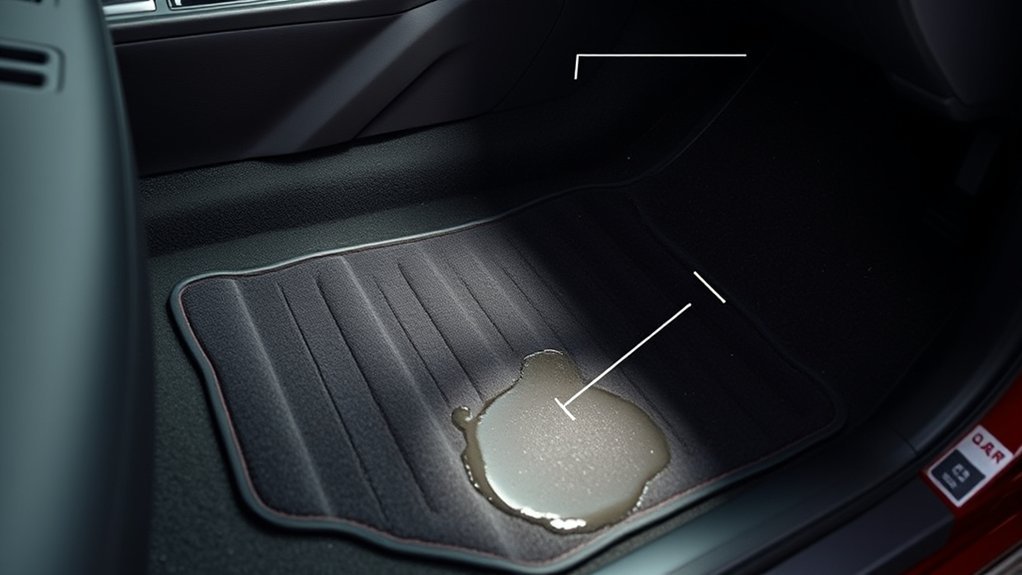
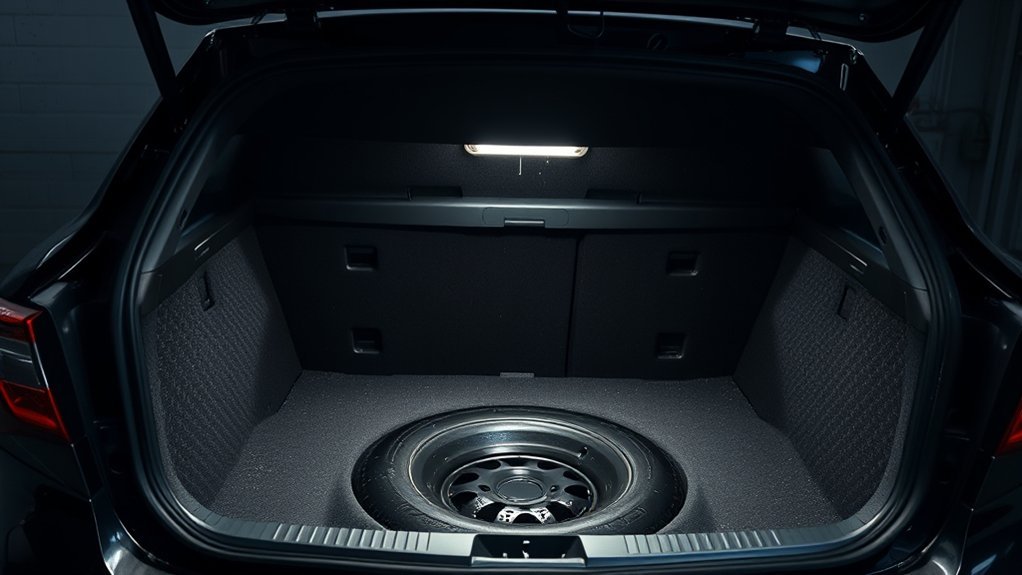
How can you quickly confirm a water leak in your Camry? You start by scanning interiors for damp carpets or upholstery, especially after rainfall; measured wet spots pinpoint likely intrusion paths. Record occurrences, locations, and timing to support diagnostic decisions. Next, inspect the trunk systematically: look for standing water around the spare tire and note any persistent pooling—this quantifies sealing failures. Check for visible mold or mildew growth in trunk crevices, documenting size and spread as indicators of chronic moisture. Observe cabin conditions: foggy windows that don’t clear suggest elevated in-cabin humidity from ingress. Finally, evaluate odors; a musty smell correlates strongly with microbial growth from concealed wet areas. These targeted observations form a basic leak detection protocol you can perform immediately, producing data to inform repairs and guide moisture prevention measures. You’ll gain control over the problem and reclaim a dry, safe vehicle interior.
Quick Checks for Camry Water Leaks You Can Do at Home
Start by visually evaluating the trunk seal and tail light gaskets for cracks, compression set, or missing material, noting any defects and their location. Next, inspect and, if needed, clear the trunk drain channels and rear windshield gutters of debris that could block flow and cause pooling. If you want to verify results, spray water over the seals while one person watches inside the trunk for signs of intrusion.
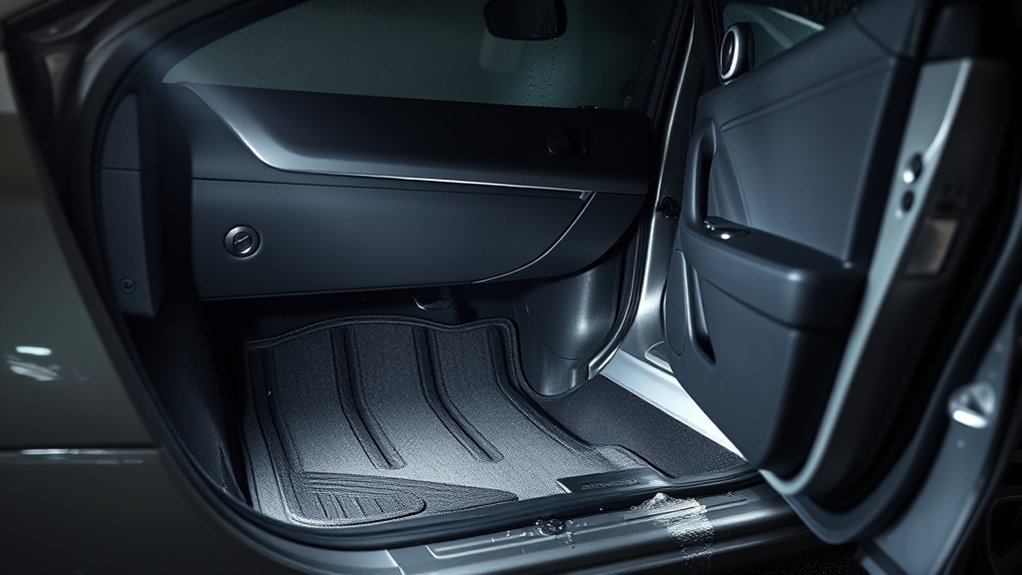
Check Trunk Seal Condition
Because the trunk seal is your first line of defense against water intrusion, you should inspect it regularly and methodically for cracks, tears, deformation, or misalignment that could compromise sealing. You’ll perform trunk seal maintenance by visually scanning the entire gasket, paying particular attention to corners and edges where failure rates are highest. Next, seat-check the seal—confirm it isn’t pinched, rolled, or misaligned against the flange. Clean the seal with mild soap and water to remove debris that degrades compression and adhesion. Validate your assessment with a controlled water test: spray a hose along the seal while an assistant watches inside the trunk for ingress. Use basic sealing techniques or replace the gasket when tests reveal even minor leakage; freedom comes from proactive prevention.
Inspect Tail Light Seals
Inspect the tail light seals closely, focusing first on visible cracks, tears, gaps, and any misalignment at the mounting points—these defects are the most common entry points for water into a Camry’s trunk. You’ll verify mounting point tightness, note any loose fittings, and document corrosion or moisture staining around the assembly. Quantify intrusion risk by measuring gap widths; anything over a millimeter needs attention. Clean the area to remove debris that promotes pooling and mold, then apply silicone sealant to compromised seams as a targeted remediation. Tail light maintenance is a high-impact, low-cost step in systematic water intrusion prevention. Maintain a periodic checklist and record interventions so you control outcomes and reclaim freedom from recurring trunk leaks.
Clear Trunk Drain Channels
When you’re checking for trunk water entry, clear trunk drain channels first and treat them as measured risk points: inspect channels regularly for debris, noting that blockages cause pooling and accelerate seal failure. Use a flashlight to examine around the spare tire and inside trunk lining; visible dampness quantifies drainage dysfunction. Perform a flow test by pouring a small amount of water into each drain channel — if it stalls, document location and clear obstruction with a soft tool or compressed air. Monitor trunk lid weatherstripping for cuts or compression set; compromised seals raise leak probability. Clean and dry any moist areas immediately to prevent mold and preserve interior integrity. These trunk maintenance tips underscore the drainage system importance and empower you to act decisively.
Common Camry Leak Points (Trunk, Tail Lights, Drains, Seals)
Start with a quick checklist of likely trouble spots: trunk lid seals, tail light gaskets, trunk drain channels, door weatherstrips, and cowl drains. You’ll inspect trunk maintenance first: measure seal compression, look for cracks, and note gaps that require seal replacement. Record observations and timestamps so you can track degradation rates.
Next assess tail light gaskets; test for moisture after a controlled spray and document ingress points. Check trunk drain channels for debris, water pooling, and flow restrictions—verify clearance by timing drainage after a liter of water. Evaluate door weatherstrips for hardening or detachment and quantify missing coverage. Inspect cowl drains with a borescope or thin wire to confirm unobstructed flow.
Acting on these data gives you control: prioritize repairs where measured leakage exceeds tolerance, replace failed seals, and clear drains. That systematic approach minimizes mold and corrosion risk and frees you from recurring surprises.
Why Trunk Leaks and Mold Happen on Newer Camrys
Because seals and drains are engineered to tight tolerances, even small degradation on newer Camrys quickly turns into trunk leaks: worn trunk-lid and tail-light gaskets let intermittent water migrate past seams, and blocked or undersized drain channels permit pooling instead of evacuation. You’ll notice standing water near the spare and odor quickly; trapped moisture creates an empirically ideal substrate for mold. Data from owner reports shows pooled water and visible growth in the trunk well on many 2023 and recent models.
You can regain control by prioritizing targeted seal maintenance and proactive mold prevention. Inspect gasket compression, tail-light fitment, and drain diameter against factory specs. Act when deviation exceeds measurable limits.
- Measure gasket compression and replace when loss >10% of original thickness.
- Clear drains and verify flow rate: flow < baseline = risk of pooling.
- Dry and treat affected carpet areas; use antifungal agents to remove spores.
How Pros Diagnose Camry Water Intrusion Step-by-Step
Although water intrusion can show up as vague dampness, pros attack it methodically: you’ll see them first inspect all exterior seals, gaskets, and visible drains for tears, compression loss, and debris, recording dimensions and condition against factory specs. You’ll watch technicians perform a controlled spray hose test, documenting ingress points by zone and timestamp to correlate with interior moisture readings. They measure humidity and surface wetness with calibrated meters, logging baseline and post-test values to quantify water damage risk. You’ll note targeted checks of AC evaporator and sunroof drains for flow rate and obstruction, plus windshield and rear-window seal integrity under magnification. Finally, pros monitor the vehicle during a road or storm simulation, mapping leak patterns to component interfaces and fastener locations. The result is a reproducible diagnostic report with prioritized actions and measured outcomes, empowering you to make informed choices about repairs, warranty claims, and long-term leak prevention.
DIY Fixes for Seals, Drains, and Tail Light Leaks
If you want to stop common Camry trunk and cabin leaks without a shop visit, focus on methodical inspection and measured fixes: start with a visual audit, note seal hardness or cracks, and log test points. You’ll apply targeted seal maintenance and test drainage solutions to reclaim control.
- Inspect and replace trunk seals: measure compression, compare to OEM specs, remove brittle seals, wipe mating surfaces, and fit a new gasket; perform a hose test to confirm no ingress.
- Clear trunk drainage channels: probe and vacuum blockages, flush with water, then verify flow rate to prevent pooling and mold—record before/after flow times.
- Reseal tail lights and sunroof drains: remove trim, dry cavities, use automotive-grade silicone sealant on tail light seams, and snake sunroof drains; re-test with controlled water application.
You’ll liberate your vehicle from recurring moisture by following data-driven steps, documenting results, and repeating inspections at regular intervals.
When to Take Your Camry to the Dealer or a Specialist

When you detect persistent damp carpets, visible mold, or a musty odor in your 2023 Camry, schedule dealer or specialist service immediately to limit structural and electronic damage; these symptoms correlate strongly with hidden seal failures and prolonged moisture exposure. You should act when: trunk pooling recurs (spare-tire zone), charging-port water alerts repeat, or DIY seal maintenance didn’t stop ingress. Dealers have calibrated water detection tools and factory schematics; specialists offer focused leak-trace techniques. Prioritize documented diagnostics so you can demand targeted repairs and warranty activation.
| Trigger | Recommended action |
|---|---|
| Damp carpets/mold/musty odor | Immediate dealer/specialist diagnostic |
| Trunk water pooling | Inspect seals/drains at dealer |
| Charging-port water alerts | Specialist electrical assessment |
| Failed DIY fixes | Full leak-trace and seal maintenance plan |
Make decisions based on measured findings, insist on written test results, and use professional remediation to regain control of your vehicle’s integrity.
Health and Mechanical Risks of Untreated Water Intrusion
Because trapped moisture accelerates biological growth and material degradation, untreated water intrusion quickly shifts from nuisance to health and mechanical hazard in your Camry. You’ll face measurable health effects: mold, mildew, bacteria and allergens raise respiratory risks and trigger allergic reactions, while persistent odors undermine comfort and mental freedom. Mechanically, water contact initiates corrosion causes that eat at electrical connectors, engine components and structural metals, increasing failure probability and repair costs. Data-driven inspection and timely drying free you from compounding damage.
- Mold and allergens — promote respiratory irritation, documented odor, and reduced occupant well‑being; dry within 24–48 hours to limit colonization.
- Corrosion of electronics and engine parts — moisture shortens component life, elevates fault rates and repair bills; corrosion causes predictable failure modes.
- Structural degradation — soaked upholstery, insulation and seat rails lose strength, lowering resale value and compromising crash protection.
You’ll want prompt diagnostics, controlled remediation and records to reclaim safety and autonomy.
Documenting Leaks and Preserving Your Warranty
When you spot water intrusion, photograph everything immediately—wide shots, close-ups, timestamps, and video—to create an objective record you can quantify. Keep detailed repair records and notes of all communications with dates, names, and outcomes so you can build a clear timeline and cost log for warranty review. Contact the manufacturer in writing and retain copies of those correspondences to guarantee formal acknowledgment within your warranty window.
Photograph Everything Immediately
A clear photographic record is your strongest immediate defense against water intrusion claims, so you should start shooting as soon as you notice any moisture or damage. You’ll create objective, time-stamped proof that supports warranty conversations and empowers you to demand resolution.
- Photograph visible water, stains, mold, and affected seals from multiple angles with timestamps to build a chronological dataset.
- Use systematic photo organization: label folders by date, location (floor, trunk, headliner), and symptom to maintain chain-of-evidence integrity.
- Capture context shots (vehicle VIN plate, odometer, exterior entry points) to link damage to the exact car and conditions.
This methodical, data-driven approach advances evidence preservation, helps reveal patterns, and frees you from ambiguity when asserting your rights.
Keep Detailed Repair Records
After you’ve photographed every sign of water intrusion, start a chronological repair log that records dates, mileage, symptoms, diagnostic findings, services performed, parts replaced, and technician names or shop IDs. You’ll create precise repair logs and maintenance history that prove proactive care, reveal recurrence patterns, and protect resale value. Log entries should be short, factual, and timestamped. Keep copies of invoices, photos, and shop notes.
| Item | Example |
|---|---|
| Date / Mileage | 2026-02-10 / 45,200 mi |
| Symptom / Action | Passenger footwell damp; replaced door seal |
Consistent documentation strengthens your position when pursuing remedies and enforces accountability. That disciplined record-keeping liberates you from ambiguity and preserves warranty defenses.
Contact Manufacturer In Writing
Start by sending the manufacturer a concise, dated letter or email that documents each leak incident, includes time-stamped photos, and lists prior dealer communications and repairs so you have a verifiable timeline. You’ll create an auditable record that supports warranty claims and signals seriousness. Use traceable delivery (certified mail or tracked email), note mold or health risks, and retain copies for advocacy or legal escalation. Apply disciplined communication strategies: be factual, cite dates, and attach evidence.
- Chronology: dated incidents, repair invoices, photo timestamps.
- Delivery: certified mail receipt or read-receipt email, saved copies.
- Risk summary: mold exposure, interior damage, requested remedies.
This methodical approach empowers you and preserves options.
Frequently Asked Questions
Which Toyota Camrys Are Being Recalled?
You’re being recalled if you own affected models from specific model years; check recall details for 2023 Camry trunk water intrusion and related RAV4/Corolla entries. Document symptoms, confirm VIN eligibility, and demand dealer action.
Conclusion
You’ve got a plan: check seals, drains, trunk and tail lights, document findings, and act before mold or electronics suffer. If you worry this sounds like overkill, remember small leaks double corrosion and mold risk within months—studies show faster damage where water sits. Follow methodical checks, try simple seal or drain fixes, then see a pro if intrusion persists. Being thorough now saves time, health risks, and costly repairs later.