You should replace your Toyota Camry’s cabin air filter every 15,000–30,000 miles or at least once a year, shortening intervals to about 10,000–15,000 miles if you drive in urban, dusty, or high‑pollution areas. Inspect the filter during HVAC service and when you notice reduced airflow, odors, increased interior dust, or allergy symptoms. Access varies by model year (behind the glove box or under the dash). Keep a log of changes and check the guide below for procedures and troubleshooting.
How Often Should a Toyota Camry Cabin Air Filter Be Replaced?

How often should you replace the cabin air filter in a Toyota Camry? You’ll typically replace it every 15,000 to 30,000 miles or at least once a year, but you’ll adjust that interval for conditions. If you drive in urban traffic or areas with poor air quality, shorten the interval to protect cabin filter longevity and occupant health. Inspect the filter when you service HVAC components; reduced vent airflow or persistent odors indicate replacement is due. Consult your owner’s manual for model-year specifics and follow prescribed removal and installation steps to avoid installation errors. For liberation-seeking drivers, regular attention to this small system reclaims control over in-cabin air and comfort. Use these maintenance tips: schedule inspections at every oil change, document filter changes, and carry a replacement if you know you’ll enter dusty or polluted zones. Replace the filter immediately when signs appear rather than waiting for mileage alone.
Factory Schedule vs. Real Driving : When to Change Sooner
Although the factory schedule lists 15,000–30,000 miles for cabin filter changes, real-world driving often demands earlier service; if you spend most of your time in stop-and-go city traffic, near construction, or in dusty regions, plan on inspecting and likely replacing the filter around 10,000–15,000 miles. You’ll follow factory recommendations as a baseline, but adjust for driving conditions. Inspect at regular intervals, document mileage, and replace sooner when exposure is elevated.
| Scenario | Typical Interval | Action |
|---|---|---|
| Light suburban driving | 20,000–30,000 mi | Inspect annually |
| Urban/construction exposure | 10,000–15,000 mi | Replace proactively |
| High pollution/dust | 10,000 mi | Replace and inspect more often |
Procedure: record trip types, set inspection reminders, and swap the filter when mileage threshold or environmental risk rises. This frees you from blind adherence to the manual and keeps cabin air performance efficient.
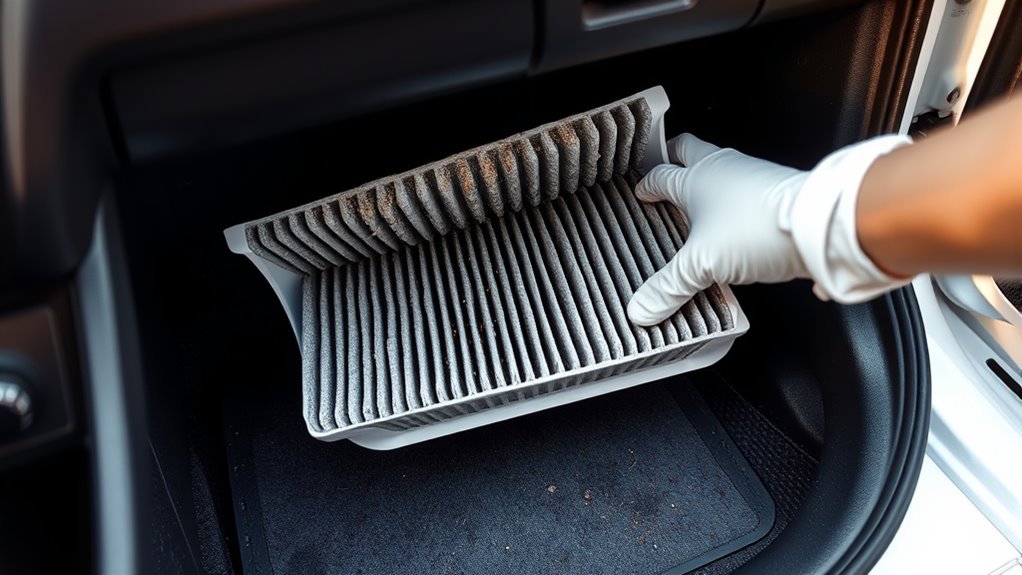
Signs Your Camry Cabin Filter Needs Immediate Replacement
Now that you’ve adjusted inspection intervals for real driving conditions, watch for clear, actionable signs that the cabin filter needs immediate replacement. You’ll detect reduced airflow from vents during HVAC operation — a primary indicator that the filter’s clogged and restricting volume. Smell is diagnostic: persistent, unpleasant odors from the vents mean trapped contaminants are decomposing and you must swap the filter. Increased interior dust deposition signals the filter’s lost capture efficiency, undermining cabin filter importance and your control over airborne particulates. If you suffer frequent allergy symptoms while driving, the filter isn’t blocking pollen and allergens; replace it to restore clean-breathing conditions. Inspect the filter physically: visible debris like leaves, dirt, or compacted sediment demands immediate replacement. Take action promptly to realize replacement benefits — restored airflow, odor elimination, reduced dust, and fewer allergy triggers. Follow a procedure: confirm symptoms, perform a visual check, then remove and replace the filter without delay to maintain freedom from contaminated air.
Where the Cabin Filter Is Located on Camry Model Years (Quick Reference)
Most Camry cabin filters sit behind the glove box, but the exact access method depends on the year: on pre-2018 models you’ll typically remove the glove box and its support arms, while 2018-and-newer Camrys place the filter under the dash and require removing a lower panel. You’ll identify filter location quickly by checking your owner’s manual and noting model differences before starting any inspection. For pre-2018 vehicles, the filter housing sits immediately behind the glove compartment; detach the glove box stops and lower the bin to expose the rectangular cover. For 2018+ models, lean under the passenger dash and locate the service cover beneath the instrument panel; removal gives direct access to the element. These distinctions reflect deliberate engineering changes—knowing them frees you to plan parts, tools, and time efficiently. Check the filter at least annually or every 15,000 miles, more often in polluted areas, and always confirm procedures for your specific model year.
DIY: Replace the Camry Cabin Air Filter (Step‑By‑Step)
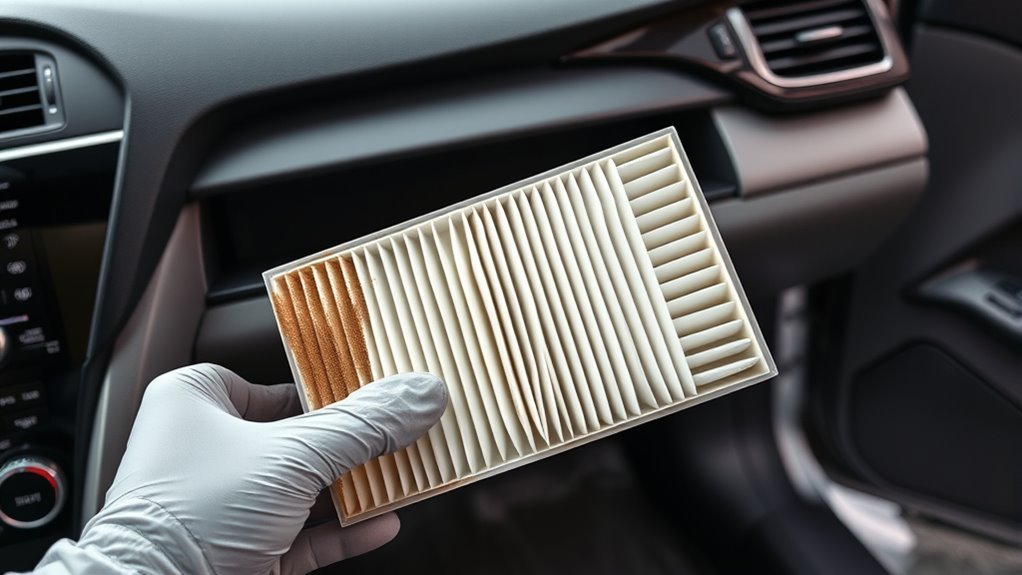
Start by opening the glove box, checking your owner’s manual for model-specific clips, then remove the glove box stops or lower panel to access the rectangular filter cover; inspect the old filter in place so you note its orientation before pulling it out. You’ll then unclip the filter cover, grip the filter carefully, and withdraw it straight back to avoid scattering debris. Note the arrow indicating airflow; cabin filter benefits depend on correct orientation. Insert the replacement with the arrow pointing toward the HVAC unit, seating it fully in the tray. Reinstall the cover until it snaps, restoring the seal to prevent air leaks. Close the glove box, reinstall stops or the lower panel, and confirm secure fitment. Follow these installation tips: wear gloves, check for debris in the housing, and replace annually or when performance drops. This controlled, procedural approach frees you from repeat shop visits and keeps cabin air clean and under your control.
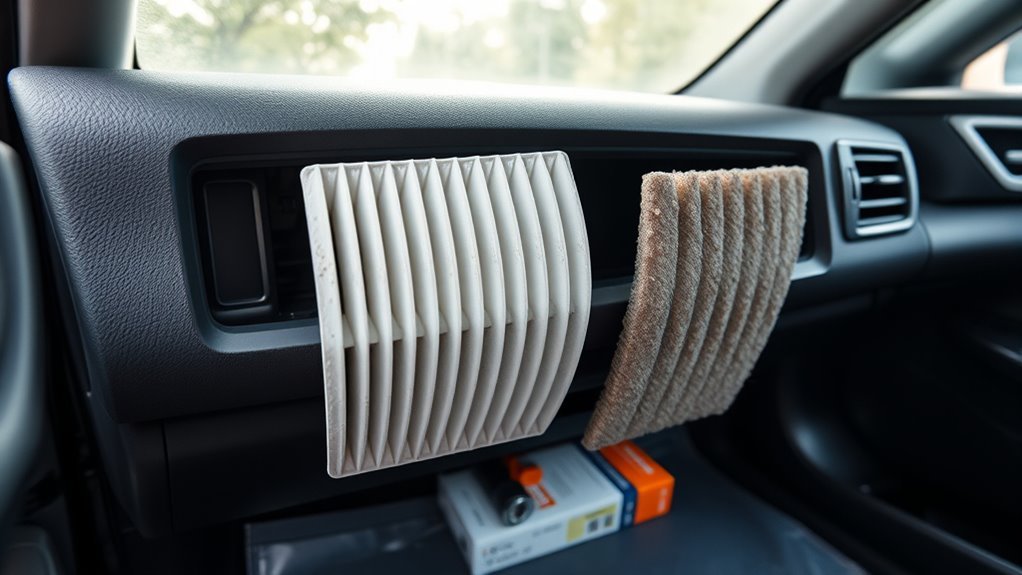
How to Choose: OEM vs. Aftermarket Camry Cabin Filters
When choosing between OEM and aftermarket cabin filters, you’ll weigh fit, filtration performance, and warranty impact against upfront cost. OEM parts guarantee precise fit and consistent filtration that preserves warranty coverage, while aftermarket options can save you $15–$40 but may use lower‑grade media and risk fit issues. Inspect specifications and warranty terms before you buy to verify the filter meets your performance and coverage requirements.
OEM Part Advantages
Although aftermarket options can look similar, choosing an OEM cabin air filter for your Toyota Camry guarantees a precise fit and consistent filtration performance engineered to Toyota’s specifications. You get clear OEM benefits: verified Filter quality, exact dimensions, and media calibrated for the Camry’s HVAC flow rates. Install the OEM element to maintain designed airflow, particulate capture, and odor control while preserving warranty compliance. You’ll follow a predictable replacement cadence, reduce variability in system load, and limit contamination risks that can accelerate blower wear. Choose OEM when you prioritize system integrity and cabin air purity; it’s a controlled, accountable choice. Fit, filtration efficiency, and component compatibility keep your vehicle operating as Toyota intended.
Aftermarket Cost Savings
You’ve seen why OEM filters preserve fit and system integrity, but cost often drives the purchase decision—aftermarket options can cut your outlay roughly in half. Assess aftermarket benefits by comparing specs: particle efficiency, MERV rating equivalents, and material construction. Target reputable brands that state OEM-equivalent performance; this preserves filter longevity and system health. Prioritize units with activated charcoal if odor control matters. Read consumer reviews and check return policies to validate real-world performance and avoid low-quality batches. Verify warranty terms; some aftermarket parts lack OEM-level guarantees. Install per Toyota procedures and log replacements to monitor lifespan. If a chosen aftermarket part meets documented specs and support, you free recurring cost without compromising air quality or component reliability.
Fit, Filtration, Warranty
If you want a trouble-free fit and predictable filtration, choose an OEM Camry cabin filter or a vetted aftermarket equivalent that explicitly matches Toyota’s dimensions, pleat count, and sealing flange; this guarantees proper airflow, full surface engagement, and avoids bypass that degrades particle capture. You’ll protect filtration efficiency, preserve warranty coverage, and keep allergens out of the cabin. When selecting, verify filter compatibility against your model year and part number. Follow concise installation tips: orient the flow arrow, seat the gasket, and torque the cover fasteners to spec. Choose quality over marginal savings to maintain HVAC performance and vehicle rights.
- Close-fit gasket compressing evenly along the frame
- Pleat structure resisting collapse under airflow
- Latch-to-cover alignment for positive seal
Camry Cabin Filter Cost: Parts, Labor, and Where to Save
When you need to replace the cabin air filter in a Toyota Camry, expect parts to cost roughly $30–$70 depending on OEM versus aftermarket choices and labor to add about $20–$50 if you use a service center. Perform a cost comparison: OEM parts offer matched specifications and warranty alignment; aftermarket units can lower upfront expense but vary in filter quality. Decide by matching part specs to your priority—longer life, particulate removal, or price.
If you choose DIY, follow a concise procedure: locate glovebox access, depress stops, remove cabin filter cover, extract old filter, inspect housing for debris, insert new filter oriented to airflow markings, reassemble. DIY saves the labor fee and gives control over parts chosen.
To save, monitor auto-parts promotions and dealership service specials, buy during seasonal sales, and document purchases. This tactical approach maximizes savings while preserving cabin air performance and personal autonomy.
Camry Maintenance Schedule: When to Check and Log Replacements
Although Camry cabin filters don’t need constant attention, check them at least once a year or every 15,000 miles and log each inspection or replacement so you can track service intervals precisely. You’ll follow a simple schedule: inspect visually, note mileage/date in a maintenance log, and replace sooner if you drive in polluted environments. This procedural approach preserves your cabin air quality and gives you control over vehicle care.
- A clogged filter showing dirt, reduced airflow, or odor prompts immediate replacement.
- Urban or construction driving shortens service intervals; record extra checks.
- Use genuine OEM filters to maintain system integrity and predictable performance.
When you log entries, include date, odometer, filter part number, and reason for replacement. Keep records digital or in the glove box for easy access. Regular filter maintenance frees you from unexpected degradation in air quality and keeps your Camry’s ventilation performing to spec.
Post‑Replacement Issues: Camry Cabin Filter Troubleshooting
Because you just replaced the cabin filter, first verify the installation and inspect the new filter for visible debris or incorrect seating that can cause reduced airflow, odors, or noise. Start by checking filter seating and confirming the arrow orientation. If you see airflow issues, remove the filter and test the blower briefly; restored flow implicates misseat or restriction.
| Symptom | Likely Cause | Action |
|---|---|---|
| Low airflow | Improper filter seating | Reseat filter; clear debris |
| Odor | Mold in HVAC or misaligned filter | Clean evaporator; replace filter |
| Noise | Debris in fan or misfit | Inspect fan; adjust filter clips |
Check for air leaks around the cover and tighten fasteners to prevent contamination. If a new filter clogs quickly, reassess your environment and shorten service intervals. Document findings and liberate yourself from repeated failures by adopting a proactive replacement cadence.
Frequently Asked Questions
How Often Should I Replace the Cabin Air Filter on My Toyota Camry?
Replace it every 15,000–30,000 miles; check annually. You’ll follow filter maintenance tips: inspect for reduced airflow, odors, visible dirt—those signs replacement needed. You’ll act decisively to keep cabin air clean and liberating.
Should You Change the Air Filter Every 10000 Miles?
Like a clean sail catching wind, you should change it every 10,000 miles if you want peak filter benefits and clearer air; follow maintenance tips, inspect more often in dust, and replace sooner for allergy relief.
Conclusion
You’ve learned the key cadence for cabin care: check, change, and corroborate. Stay strict with the factory schedule but swap sooner if you see smells, soggy media, or strained airflow. Locate the filter, follow the step‑by‑step replacement, and select OEM or a vetted aftermarket match. Track dates and mileage in your maintenance log, save on parts or DIY labor, and troubleshoot post‑swap issues promptly to preserve performance, purity, and peace.