Your Camry uses acoustic metal tabs (older models) or electronic sensors (newer 2018+ models) to warn you when pad friction is down to about 2–3 mm; the tab scrapes and squeals, while the sensor lights the dash. You can often inspect through wheel openings for remaining pad thickness, listen for squeal or grinding, and note pedal feel or vibration. Replace pads at ~2–3 mm or earlier with heavy use. Keep going to learn model specifics, inspection tricks, and replacement tips.
Quick: How to Tell If Your Toyota Camry Needs New Brake Pads
Wondering whether your Camry needs new brake pads? You’ll detect wear quickly if you listen for squeaking or grinding during braking—those noises point to thinning friction material and imminent brake replacement. Check the dashboard for warning lights driven by electronic sensors; any illuminated brake indicator mandates prompt inspection. During routine maintenance checks, peer through the wheels: pads should measure about 1/4-inch thick; anything less requires replacement. Note pedal feel—soft or spongy resistance signals significant wear or fluid/line issues tied to braking performance and should accelerate your service schedule. If you sense vibrations or pulsations in the pedal while stopping, treat them as urgent: they can mean worn pads or warped rotors and demand immediate attention. Act decisively—document symptoms, prioritize safety, and schedule brake replacement when indicators align. You’re reclaiming control by using precise checks to keep the Camry’s brakes reliable and free.
What Camry Brake Wear Indicators Are and How They Work
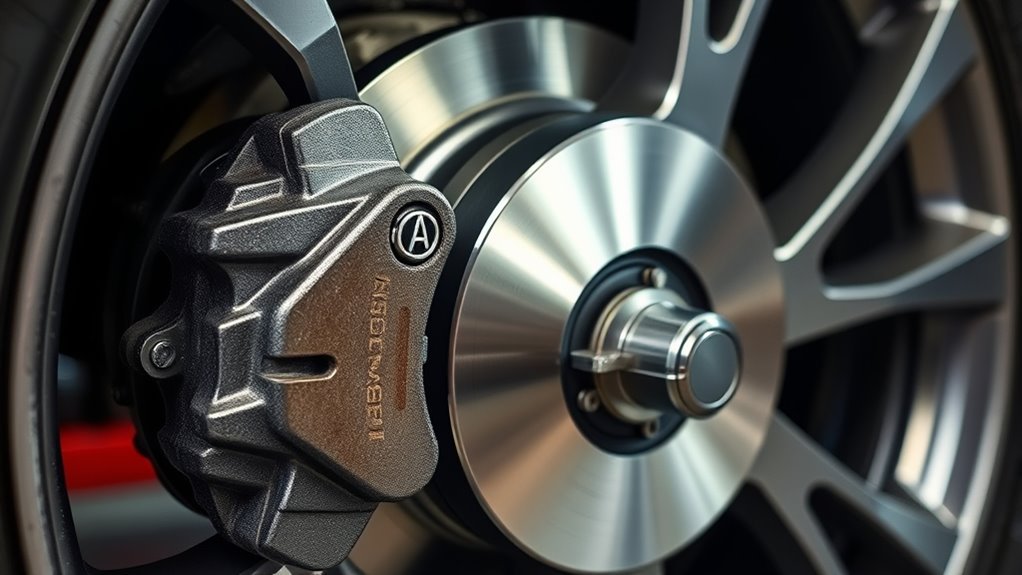
Brake wear indicators on your Toyota Camry are built-in alert systems that tell you when pad material has worn down to roughly 2–3 mm and needs attention. They support Brake safety by giving timely Warning signals so you can act before braking performance degrades. You’ll encounter straightforward Indicator technology that’s passive and reliable; it won’t be poetic, but it will liberate you from guesswork.
- Acoustic tab: a metal clip on the pad contacts the rotor, producing a high-pitched alert when pads reach the wear threshold.
- Electronic sensor: a circuit or switch signals the dashboard light, giving a visual Warning signal to prompt inspection.
- Function: both systems mark remaining friction material; they’re diagnostic cues, not full-condition reports.
- Maintenance importance: use indicators as prompts—inspect calipers, rotors, and fluid; don’t defer service based solely on a single signal.
Acoustic vs. Electronic Indicators : Which Camry Models Use Which?
Which Camry models use acoustic tabs versus electronic sensors? You’ll find acoustic brake wear indicators on older Camry generations: metal tabs that scrape and emit a high-pitched squeal when pad material reaches about 2–3 mm. They’re simple, mechanical, and easy to understand—no electronics to fail—so they suit drivers who value direct, low-tech feedback in pursuit of autonomy.
By contrast, 2018-and-later Camrys and most Camry Hybrids adopt electronic brake wear sensors that trigger a dashboard warning light at critical wear levels. This aligns with broader brake technology trends toward proactive, digital maintenance notifications that reduce guesswork and service delay.
You should still perform regular inspections regardless of indicator type. Remember electronic systems can mask sensor reliability issues if you rely solely on the dash; mechanical tabs can mask late warnings in heavy-use scenarios. Choose the system that fits your needs for clarity, control, and freedom from unexpected failures.
Immediate Signs: Squeal, Grinding, Pedal Feel, and Dashboard Lights
When you hear a high-pitched squeal or a harsh grinding from the brakes, that’s your Camry’s acoustic or failing-pad metal contacting the rotor and it needs immediate attention. If the pedal feels soft, spongy, or pulsates under braking, expect reduced pad effectiveness or warped rotors and schedule an inspection. Also watch the dashboard — electronic wear sensors will illuminate a warning before pads reach a critical state.
Audible Squeal Or Grind
If you hear a high-pitched squeal or grinding under braking, don’t ignore it—those noises usually mean the pads are at or past their minimum thickness (around 2 mm) and need immediate inspection or replacement.
- You’ll learn the brake pad lifespan by tracking noise correlation: a persistent high-pitched squeal comes from built-in acoustic indicators contacting the rotor as pads thin.
- If you hear grinding, the pad material is gone and the backing plate is scoring the rotor; that maximizes repair cost and reduces safety.
- Act immediately: stop driving when safe, visually inspect pads and rotors, and replace components before catastrophic failure undermines your freedom to move.
- Use these auditory cues as a liberation tool—don’t tolerate ambiguous noises; address them to maintain control and independence.
Pedal Feel And Lights
Although you might first notice a squeal or grinding, pedal feel and dashboard lights give immediate, actionable clues about brake pad condition and system health. You’ll feel a spongy or soft pedal when pads are considerably worn or air enters the lines; that compromised feel reduces stopping power and demands prompt attention. Grinding means backing plates may be contacting rotors — don’t drive on it. Dashboard brake-wear warnings light up when electronic sensors detect low material thickness, signaling you to stop for inspection. Monitor pedal feedback and noises regularly as part of brake maintenance to avoid rotor damage and loss of control. Treat illuminated warnings and altered pedal feel as urgent prompts for safety inspections and corrective service.
How to Check Camry Brake Wear Indicators Without Removing the Wheel
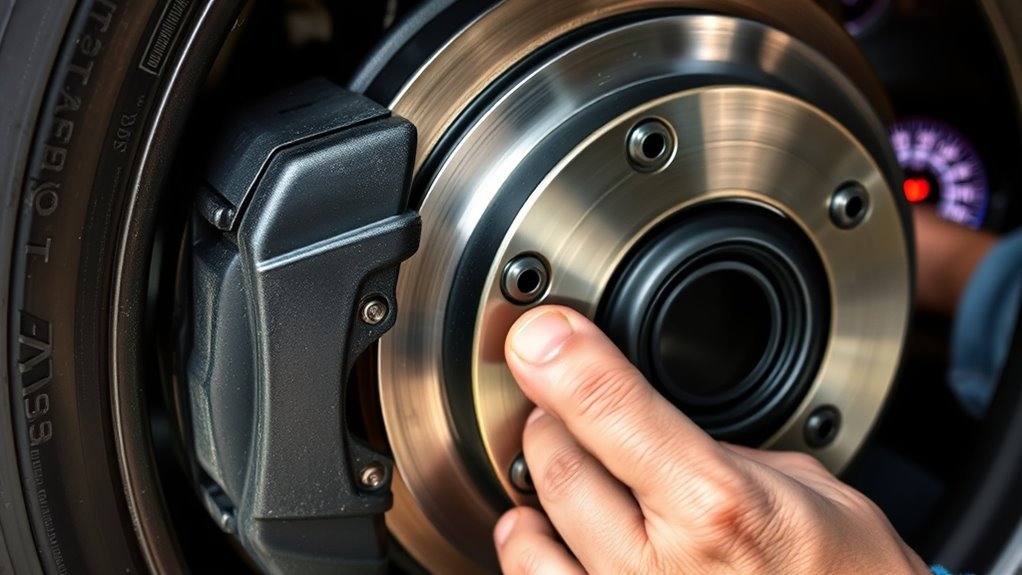
You can assess pad condition without removing the wheel by visually checking pad thickness through the wheel openings—pads should be at least 1/4 inch. While doing this, listen for acoustic indicators like persistent squeal or grinding that signal metal-on-metal contact or low friction material. Combine the visual and audible checks to decide if a detailed inspection or pad replacement is required.
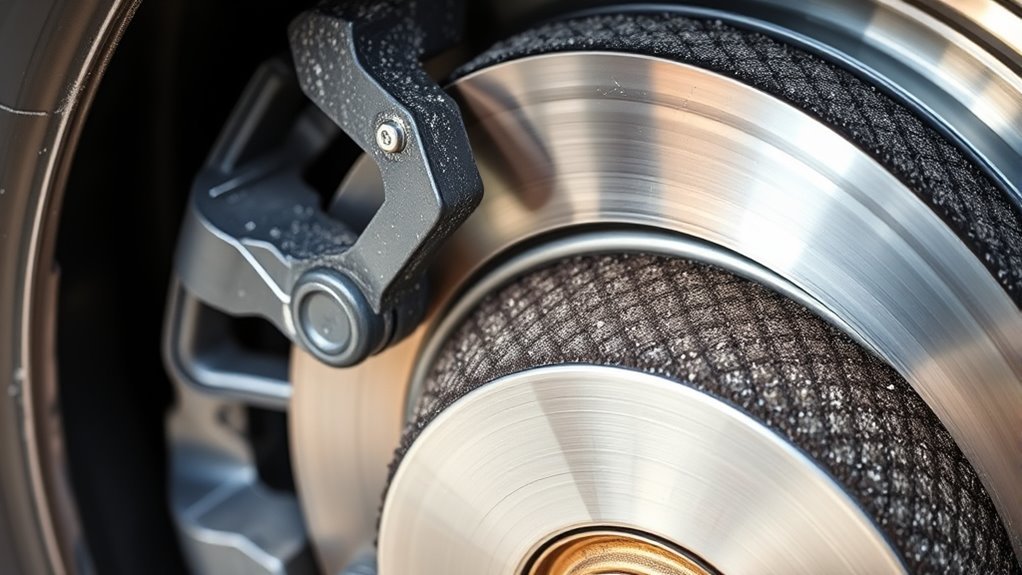
Visual Pad Thickness Check
When inspecting your Camry without removing the wheel, angle yourself so you can peer through the spokes and assess pad thickness visually. You’ll perform a focused brake pad inspection and wear pattern analysis: look for at least 1/4″ of friction material, a disappearing central slot, metal wear indicators contacting the rotor, and unexpected wheel dust changes. Use this checklist:
- Confirm pad thickness visually—minimum 1/4″ across the surface.
- Scan for a diminishing groove or slot that signals advancing wear.
- Check for metal tabs touching the rotor; that demands immediate service.
- Note brake dust reduction on the wheel as a cue that pads may be thin.
Act decisively when indicators appear; liberation comes from proactive, technical maintenance.
Listen For Acoustic Indicators
If you hear a high‑pitched squeal while applying the brakes, it’s usually the acoustic wear indicator contacting the rotor and signaling that pad material has been reduced to roughly 2–3 mm. Roll down the windows and drive at low speed, then apply the brakes several times to isolate brake noise sources. A consistent high, metallic squeal points to pads that need prompt replacement to avoid rotor damage. Without removing the wheel, peer through the spokes and assess pad thickness: you want around a quarter inch or more. Use these maintenance tips as part of your liberation from unexpected failures — schedule service immediately if you detect persistent squealing. Regular listening protects safety and limits costly repairs.
Common False Alarms and Other Noises That Mimic Worn Pads
Although worn pads are a common cause of brake noise, several benign factors can mimic their symptoms and trigger false alarms. When you perform brake noise troubleshooting, consider moisture effects first: morning condensation or light rain can leave a thin film on rotors that causes transient squeak without pad wear. You should assess context before replacing parts.
- Dust and debris — Particles trapped between pad and rotor produce grinding or squeal that resembles wear; cleaning often restores silence.
- New-pad break-in — Fresh pads can squeak during bedding; this is normal if noise fades after modest use.
- Improper installation — Misaligned shims, loose hardware, or missing clips create vibration and noise similar to wear indicators.
- Environmental moisture — Persistent wet conditions amplify surface noise but don’t imply material loss.
You’ll liberate yourself from unnecessary repairs by combining visual inspection, simple cleaning, and professional assessment when installation faults are suspected.
When to Replace Camry Brake Pads: Mileage, Thickness, and Habits
Check your Camry’s brake pads every 6 months or at each tire rotation, and plan replacements based on thickness, mileage, and driving habits. You’ll track brake pad lifespan not by calendar alone but by measurable wear: replace pads when friction material reaches about 2–3 mm, or sooner if wear indicators trigger. Typical mileage guidance varies with driving conditions — conservative drivers may see pads last 40k–70k miles, while aggressive braking or frequent short trips shorten that considerably. Listen for persistent squeal or grinding; those sounds often mean immediate replacement is needed to avoid rotor damage. Adopt a proactive maintenance mindset: inspect visually, note mileage since last change, and factor in your route types and braking intensity. Prioritize timely replacement to maintain stopping power and prevent costlier repairs. You’re reclaiming safety and autonomy by basing decisions on thickness, usage patterns, and evidence, not guesswork.
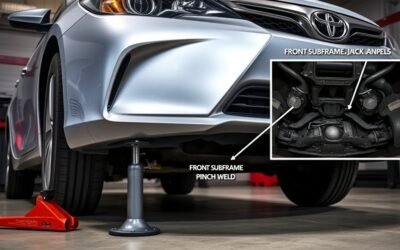
DIY Pad Replacement Tips for Camrys (Tools, Safety, Pitfalls)
Start by gathering the right tools: a jack and jack stands, lug wrench, socket set, C‑clamp or dedicated brake caliper tool, and basic hand tools so you won’t be stopping mid-job. Use a tools checklist and follow safety precautions: secure the car on stands, chock wheels, wear gloves and eye protection, and don’t rely on the jack alone.
Gather essentials—jack, stands, lug wrench, caliper tool—and follow safety: chock wheels, wear gloves and eye protection.
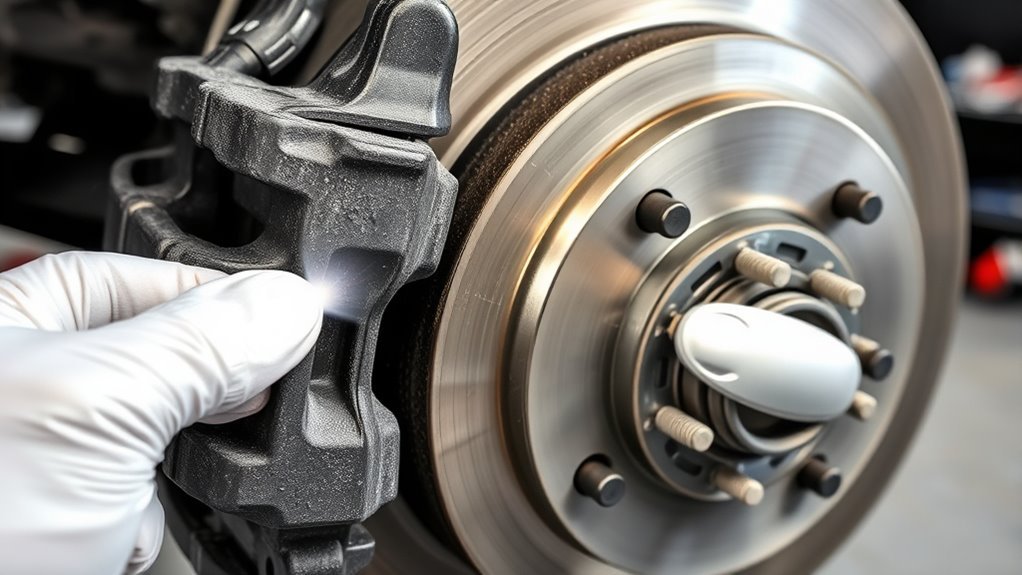
- Inspect and remove: lift the wheel, loosen caliper bolts, slide out pads, and check wear indicators for damage or absence — replace them if needed.
- Compress piston: open the brake fluid cap to avoid overflow, then use a C‑clamp or caliper tool to retract the piston evenly.
- Clean and lube: clean caliper slides and hardware; apply high‑temp brake grease to slides and contact points to prevent uneven wear.
- Reassemble and check: torque lug nuts, bleed or check fluid level, bed in pads with progressive stops, and verify braking performance before driving.
These steps free you to maintain your Camry safely and confidently.
When to Call a Pro: Diagnostics and Complex Repairs for Camrys
After you’ve done routine pad swaps and the basic checks, there are clear signs that you should bring your Camry to a professional for diagnostics and more complex brake repairs. If warning lights persist or you hear persistent squeal or grinding, stop driving and schedule service: grinding means pads are gone and rotors risk catastrophic damage. A spongy pedal or increased stopping distance signals possible fluid or hydraulic issues that need bleeding and pressure testing.
You’ll want a certified shop that uses proper diagnostic tools — scan tools, brake pressure gauges, and rotor measurement equipment — so you get definitive fault codes and component tolerance readings. Technicians apply advanced repair techniques: resurfacing or replacing rotors, caliper overhaul, line replacement, and hydraulic system flushes. Choosing pro service protects your freedom to drive without compromise; it resolves hidden faults safely and restores braking performance to factory specifications so you can move on with confidence.
Maintenance Schedule: How Often to Inspect and Keep Indicators Reliable
You should inspect your Camry’s brake pads every six months or with each tire rotation and run a quick indicator function test by listening for wear clips or checking sensor continuity. Replace pads at or below 1/4 inch (indicators usually trigger around 2–3 mm) and verify indicators are correctly installed to avoid missed wear. Schedule at least one professional brake inspection per year and follow your owner’s manual for adjustments based on city versus highway driving.
Inspection Frequency Guidelines
Inspect brake pads every 2–4 times a year—at minimum once annually—and definitely during every tire rotation (about every six months) to verify wear indicators are working and pad thickness stays above the roughly 2 mm minimum. You’ll use precise inspection techniques: visual thickness checks, listening for audible alerts, and scanning for dashboard warnings. Factor seasonal considerations; salt and humidity accelerate wear, so increase frequency in harsh climates. Stay proactive to keep braking autonomy and freedom from preventable failures.
- Check pad thickness and caliper condition every tire rotation.
- Note any dashboard or audible warnings and act immediately.
- Increase inspections after winter or heavy salt exposure.
- Keep records of inspections to track wear rate and schedule replacements.
Indicator Function Tests
Following regular inspections and tire rotations, it’s time to verify that each wear indicator actually performs under real conditions. You should run function tests every six months or with each tire rotation: listen for mechanical squealers at roughly 2–3 mm pad thickness and confirm electronic sensors trigger the dashboard warning as pads approach end-of-life. Check indicator calibration by comparing measured pad thickness to the trigger points; adjust or replace improperly calibrated parts. Inspect sensor placement visually and during a controlled stop to guarantee contact and signal integrity. Clean mounting areas to prevent false negatives. These routine checks keep indicators reliable so you retain control over maintenance timing and avoid unseen wear that could erode your freedom to drive safely and on your terms.
Preventive Maintenance Steps
When you stick to a simple schedule—check brake pads every six months or at each tire rotation—you’ll catch wear before it compromises indicator function or braking performance; this disciplined cadence anchors preventive inspections and frees you from unexpected failures. Follow these maintenance tips to keep indicators reliable and pads above the 2–3 mm replacement threshold.
- Inspect pad thickness and indicator contact at each rotation; note if material nears 2–3 mm.
- Schedule a professional check when you hear squeal, grinding, or feel braking changes; don’t defer diagnosis.
- Clean and lubricate caliper slides and sensor contacts during routine service to preserve indicator function.
- Adhere to Toyota’s maintenance intervals and record inspections to maintain control and safety.
Frequently Asked Questions
Do Toyota Brake Pads Have Wear Indicators?
Yes — you get both acoustic and electronic wear indicators on Toyota brake pads, so you can monitor brake pad maintenance and trust indicator accuracy; inspect regularly, replace indicators with pads, and keep control of your safety.
How to Read Brake Pad Wear Indicator?
About 75% of drivers ignore squeal warnings; you’ll visually inspect through the wheel: if pads are ≤3mm or you hear persistent brake noise signs, follow brake maintenance tips, replace pads promptly to reclaim safe control.
What Are Some Different Brake Pad Wear Indicator Systems?
You’ll encounter acoustic signals from metal tabs, visual wear marks, one‑ and two‑stage wire sensors, and digital sensors feeding dash alerts; these practical, technical options let you reclaim control over timely, liberated brake maintenance decisions.
Conclusion
You’ve learned how Camry brake wear indicators work and when to act; don’t ignore them. Nearly 70% of drivers replace pads too late, increasing rotor and caliper costs — so inspect pads every 10,000–12,000 miles or when indicators trigger. If you hear a high-pitched squeal, feel pedal vibration, or see a warning light, schedule replacement. Use proper tools, follow torque specs, and wear eye protection; call a pro for ABS, electronic sensors, or uneven wear.