A weak Toyota 4Runner door lock actuator usually shows up as one door that locks slowly, unlocks only sometimes, makes a tired buzz, or stops responding to the key fob and interior switch. Before replacing parts, confirm the mechanical key, latch rods, cables, fuses, connectors, and door-position fitment. On many 5th-gen 4Runner front doors, Toyota service information refers to the part as a door lock assembly with motor, so a full assembly replacement is often cleaner than a motor-only repair.
Quick Answer
To replace a 4Runner door lock actuator, diagnose the failed door first, buy the correct door-specific lock assembly or motor, remove the interior door panel, peel back the moisture barrier, disconnect the rods/cables and wiring, install the replacement, torque the fasteners to the service-manual spec, then test the key, fob, switch, and handle before reinstalling the panel.
Key Takeaways
- One dead or slow door usually points to that door’s actuator or lock assembly, but test the fob battery, fuse, wiring, and latch movement before buying parts.
- For a full replacement, match the part by VIN, model year, and door position; for a motor-only repair, measure the original motor shaft before ordering.
- Do not rely on the common 8 N·m claim for the lock assembly screws. Many 5th-gen front door lock procedures list 5.0 N·m, but you should verify the exact spec in Toyota service information for your year and door.
- Test the lock with the door panel off so you can catch a loose cable, misrouted rod, or connector problem before final reassembly.
At a Glance
| Time Required | 1–3 hours for one door, depending on experience and door position |
| Difficulty | Moderate DIY: trim removal, small clips, rods/cables, and electrical connectors |
| Tools Needed | Trim removal tool, Phillips screwdriver, 10 mm socket, T30 Torx bit, small pick, tape, torque wrench, gloves, flashlight |
| Cost | About $40–$320 DIY depending on motor-only, aftermarket assembly, or OEM assembly; shop repair commonly costs more because of labor |
Diagnose the Door Lock Actuator Before Replacing It
Start with a simple check so you do not replace a good actuator. Press lock and unlock on the key fob and interior switch while standing beside the suspect door. A weak actuator often makes a slow buzz, moves only halfway, works after several tries, or fails more often in heat, cold, or after sitting overnight.
Next, use the mechanical key and the inside lock knob. If the key and lock knob move smoothly but the power lock does not, the latch rods are probably not jammed. If the key feels tight, the handle feels loose, or the lock knob binds, inspect the rods, cables, latch, and clips before blaming the motor.
| Symptom | Likely Area to Check | Next Step |
|---|---|---|
| Only one door fails | Door lock actuator, lock assembly, local wiring, rod, or cable | Remove that door panel and test for power at the connector |
| All doors fail from the fob | Key fob battery, vehicle battery, receiver, fuse, or settings | Try the interior switch and spare fob before opening the door |
| Door buzzes but does not lock | Weak actuator motor, worn gears, binding latch | Check latch movement and replace the assembly if the motor is weak |
| Rear door will not open from inside | Child safety lock or inside cable | Check the child lock switch before replacing parts |
| Manual key is stiff | Lock cylinder, rod alignment, latch contamination | Inspect and clean mechanical parts before ordering an actuator |
Note: Toyota owner information explains normal lock and unlock operation, but repair procedures and torque values come from Toyota service information. For year-specific service data, Toyota points owners and technicians to its subscription-based Technical Information System.
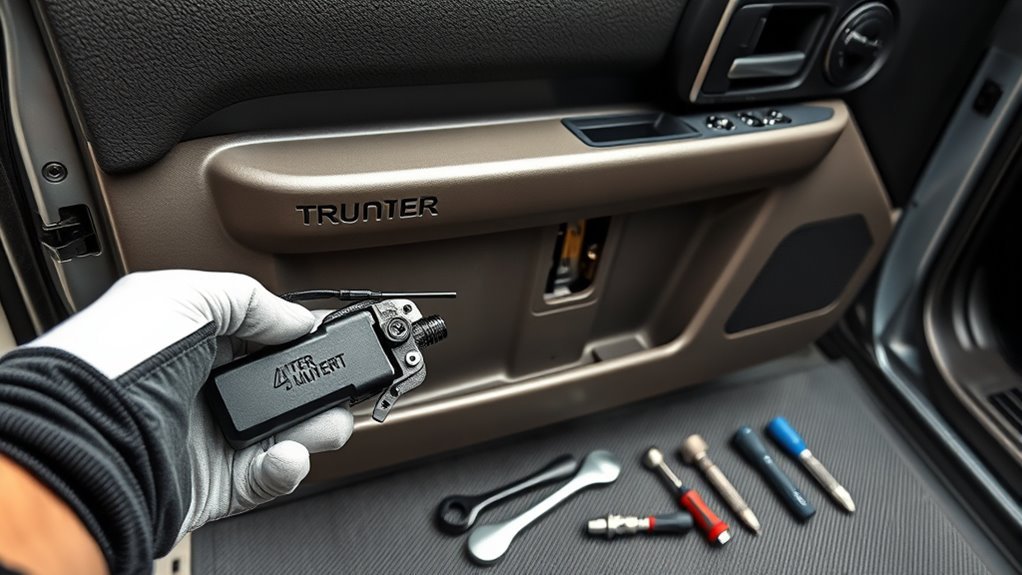
Door Lock Actuator Parts and Tools: Compatibility, 10 mm Shaft, and Cost
When buying parts for a 4Runner door lock actuator repair, match the part by VIN, model year, trim, and door position. Driver front, passenger front, rear left, rear right, and liftgate parts are not interchangeable. The 5th-gen 4Runner covers model years 2010–2024; 2025 and newer 4Runners are a different generation, so do not assume the same parts fit.
Toyota often describes the front door part as a lock assembly with motor. A current Toyota parts listing such as Toyota part 69030-0C050 shows the type of assembly you are looking for, but the final fitment still needs to be checked against your VIN and exact door. Part numbers that appear in marketplace listings, including 69030-06200 or 69030-0C050, should be treated as examples only until the seller or Toyota catalog confirms fit.
The 10 mm flat shaft detail matters mainly if you are replacing only the small internal motor inside the actuator. Many motor-only kits are sold by shaft size and shape. Before choosing that route, remove the old motor or compare against a trusted teardown guide, then confirm the shaft length, flat side, gear fit, polarity, and connector style. If you are installing the full lock assembly, the shaft size is less important than VIN and door-position fitment.
- Basic tools: trim removal tool, Phillips screwdriver, 10 mm socket, ratchet, T30 Torx bit, small pick, needle-nose pliers, and flashlight.
- Helpful supplies: painter’s tape, zip bags for fasteners, butyl tape for the moisture barrier, electrical contact cleaner, silicone-safe or multipurpose grease for sliding latch surfaces, and replacement panel clips.
- Testing tools: multimeter or test light for checking power and ground at the actuator connector.
- Parts choices: OEM full assembly for best fit, quality aftermarket full assembly for lower cost, or motor-only repair if you are comfortable opening the latch housing.
Warning: Disconnect the negative battery cable before unplugging door wiring if the service procedure for your year calls for it. Toyota service procedures also warn to wait at least 90 seconds after disconnecting the battery before working near SRS-related components. Reconnect the battery only when needed for testing, and keep fingers clear of moving latch parts.
Remove the Door Panel and Access the Actuator Step by Step
Raise the window fully, park on a flat surface, turn the ignition off, and keep the key away from the vehicle. Take a photo before each connector, cable, and rod comes off. Those photos are your best insurance against a loose handle, backwards cable, or misaligned key rod during reassembly.
- Remove trim covers and screws. Use a trim tool or taped screwdriver to lift the small covers around the inside handle and armrest, then remove the visible screws.
- Release the door panel clips. Start at the lower edge and pry at the clip points, not the middle of the panel. Once the clips release, lift the panel upward off the window ledge.
- Disconnect connectors and cables. Unplug the switch connector, courtesy light connector if equipped, and door handle/lock cables. Do not yank the panel away while cables are still attached.
- Peel back the moisture barrier. Pull the butyl seal slowly and fold the barrier back only as far as needed. Keep dirt off the adhesive so it reseals.
- Move the harness and access cover as needed. Some procedures require moving the door wire or service hole cover to create enough room to reach the lock assembly.
- Detach rods and cables. Release the plastic retainers carefully and note each rod’s angle. A bent rod can make the new actuator look defective.
- Remove the lock assembly fasteners. Many front door lock assemblies use T30 Torx screws at the rear edge of the door. Support the assembly as the last fastener comes out.
- Remove the actuator or lock assembly. Guide it out through the service opening without forcing the rods, harness, or window track.
Pro Tip: Put each screw group in a labeled bag: panel screws, switch screws, lock screws, handle hardware, and clips. A 30-second labeling habit can save an hour of guessing during reassembly.
Motor vs Full Actuator Replacement: Torque and Reassembly Tips
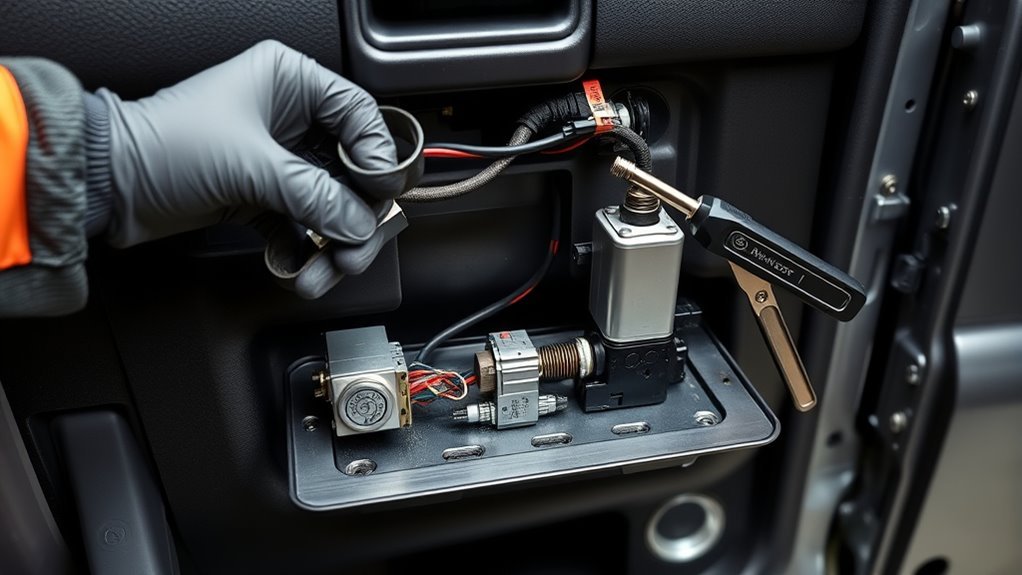
With the panel off and the actuator exposed, decide whether you are replacing the full assembly or only the small motor inside it. The full actuator or lock assembly is the better choice for most DIY owners because it replaces the motor, gears, latch mechanism, connector, and housing as one unit. It also avoids reusing worn plastic gears or a tired internal switch.
A motor-only repair can be cheaper, but it is more delicate. You must open the housing, preserve the gear timing, match the shaft size, and reseal the unit. If the latch is sticky, the cable is stretched, or the connector seal is damaged, a new motor alone may not solve the problem.
Do not torque the door lock assembly screws to a random online number. For many 5th-gen 4Runner front door lock procedures, service data lists 5.0 N·m, or 44 in-lb, for the three T30 lock assembly screws. Always confirm the exact value for your year, door, and fastener in Toyota service information.
Before tightening anything, insert the lock open rod into the new lock assembly, confirm it is fully seated, and reconnect the cables in their original positions. Apply a small amount of appropriate multipurpose grease only to sliding latch surfaces if the service procedure calls for it. Keep grease and dirt away from connector sealing surfaces because a poor seal can let water into the connection and cause another failure.
Tighten the fasteners evenly with a small torque wrench. If your door uses T30 lock assembly screws and your year-specific service data lists 5.0 N·m, torque them to 5.0 N·m (44 in-lb). Do not overtighten; stripped screws or distorted latch mounting points can create alignment problems.
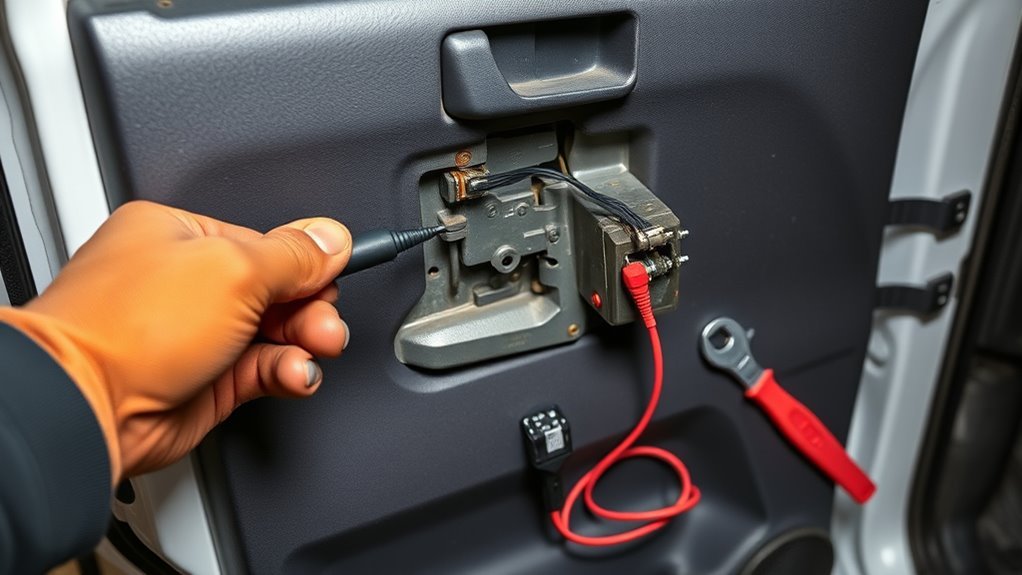
Test, Troubleshoot Reassembly Issues, and Avoid Repeat Work
Test the repair before the panel goes back on. Reconnect the electrical plug, reconnect the battery if you disconnected it, and cycle the lock from the key fob, interior switch, mechanical key, inside lock knob, and outside handle. Watch the rods and cables move. You want full travel, a clean click, and no binding.
Warning: Do not slam the door while the latch, rods, or cables are disconnected. If you must test latch movement with the door open, use a screwdriver to simulate the striker and then release the latch with the handle before closing the door.
- Visualize the rods: They should be straight, seated in clips, and free of slack or sharp bends.
- Hear the latch: A healthy actuator makes a crisp lock/unlock sound, not a grinding buzz.
- Feel the handle: The handle should return firmly without rattle or loose play.
- Check the moisture barrier: Reseal the butyl all the way around to prevent water leaks into the cabin.
- Confirm the panel fit: Align the top lip first, then press clips straight into their holes.
| Problem After Replacement | Most Likely Cause | Fix |
|---|---|---|
| Lock clicks but knob barely moves | Rod or cable not fully seated | Compare to your photos and reseat the rod clip |
| Outside handle feels loose | Handle cable or rod misrouted | Reposition the cable and confirm full handle return |
| Actuator does nothing | Connector unplugged, no power, blown fuse, or wrong part | Check connector lock, fuse, and voltage while pressing lock/unlock |
| Door rattles after reassembly | Loose screw, broken clip, or panel not hooked over top ledge | Replace broken clips and reinstall the panel from the top down |
| Water appears inside the door panel | Moisture barrier not sealed | Warm and press the butyl seal back into place or add fresh butyl tape |
DIY parts can save a meaningful amount compared with dealer or shop labor, but the best savings come from avoiding a second teardown. If the lock still fails after replacement and you have confirmed power at the connector, recheck part fitment, cable routing, and latch alignment before ordering another part.
Frequently Asked Questions
How much does it cost to replace a door lock actuator on a 4Runner?
DIY cost depends on the part. A motor-only repair can be under $50, many aftermarket assemblies cost more, and OEM assemblies can run several hundred dollars. A shop or dealership repair adds labor, so the total is often several hundred dollars higher. Always price the exact door position by VIN before comparing quotes.
What is the Toyota door actuator lawsuit?
The current door lock actuator case commonly cited is Mixon et al. v. Toyota Motor Corporation et al., filed in the Eastern District of Texas. The plaintiffs allege certain Toyota door lock actuators are defective. A 2026 court opinion is available through Justia. Lawsuit allegations are not the same as a recall, warranty extension, or final court ruling. Check your VIN on Toyota’s recall lookup or NHTSA’s recall lookup for official recall status.
How do you replace a 4Runner door lock actuator?
Remove the interior door panel, disconnect the switch connectors and handle cables, peel back the moisture barrier, detach the lock rods and cables, remove the lock assembly fasteners, install the new assembly, reconnect everything, torque the screws to the year-specific service spec, and test the fob, switch, key, and handles before reinstalling the panel.
Can WD-40 fix a door lock actuator?
WD-40 may temporarily loosen a sticky mechanical latch, but it will not repair a weak electric motor, worn gear, bad connector, or failed internal switch. Use the lubricant type recommended for latch sliding surfaces, keep grease away from connector seals, and replace the actuator or lock assembly if the motor is weak.
Is 8 N·m the correct torque for a 4Runner door lock actuator?
Do not use 8 N·m unless your exact service manual says so. Many 5th-gen 4Runner front door lock assembly procedures list 5.0 N·m, or 44 in-lb, for the three T30 lock assembly screws. Torque can vary by year, door, and fastener, so verify the specification in Toyota service information before tightening.
Should I replace only the actuator motor or the full assembly?
Replace the full assembly if you want the most reliable DIY repair or if the latch, gears, connector, or cable mounts show wear. A motor-only repair is cheaper, but it requires opening the actuator housing and matching the motor shaft, gear, and polarity. If you do not want to repeat the job, the full assembly is usually the safer choice.
Conclusion
A 4Runner door lock actuator replacement is manageable if you diagnose first, buy the correct door-specific part, protect the moisture barrier, and test everything before the panel goes back on. The biggest fixes in this job are accuracy and patience: verify the VIN fitment, do not assume a universal 8 N·m torque value, keep rods and cables in their original paths, and reseal the door carefully so the repair lasts.
Sources
- Toyota Support: Repair Information and Publications — backs the recommendation to use Toyota Technical Information System for official repair procedures.
- Toyota Technical Information System — official Toyota service information source for torque values, removal steps, and year-specific procedures.
- Toyota Owners: Manuals and Warranties — backs owner-manual reference for door lock operation and vehicle-specific owner information.
- Toyota Genuine Parts: Front Door Lock Assembly With Motor — backs OEM terminology and the need to verify part fitment by vehicle and door position.
- Toyota Recall Lookup and NHTSA Recalls — official VIN-based recall checks.
- Justia: Mixon et al. v. Toyota Motor Corporation et al. — backs the FAQ discussion of the Toyota door lock actuator lawsuit.