If your RAV4 backup camera isn’t working, start by cleaning the lens, checking relevant fuses, and power-cycling the vehicle. Inspect the camera housing, hinge harness, and connector pins for corrosion, frays, or loose contacts, and test voltage at the camera in reverse gear. Look for transmission/reverse signal faults and software updates or recalls from the dealer. If the feed stays black or flickers, prioritize wiring repairs or camera replacement. Continue below for step‑by‑step diagnostics and cost guidance.
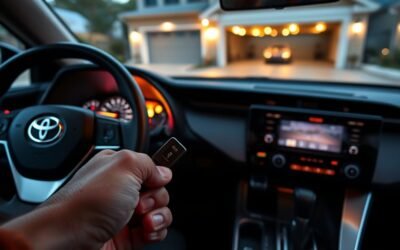
Quick Fixes: RAV4 Backup Camera Won’t Turn On
If your RAV4’s backup camera won’t turn on, start with quick, practical checks you can do yourself: Clean the lens—dirt or moisture can cause a black or blurry image—and verify camera settings in the infotainment menu so the system isn’t muted or disabled. Power-cycle the vehicle by turning it off, waiting a minute, and restarting; that often clears temporary glitches. Use targeted troubleshooting tips: inspect wiring and connectors, especially around the trunk hinge where movement stresses cables; look for frays, pinches, or corrosion. Check related fuses and swap any blown ones with the correct rating to restore power. Don’t waste time on guesswork—document what you test and change so you can undo actions or report precise symptoms. If these steps don’t bring the camera back, seek professional diagnostics from a dealer or trusted shop, especially if you want a thorough fix and you’re pushing for freedom from repeat failures.
Is It the Camera, the Display, or the Reverse Signal?
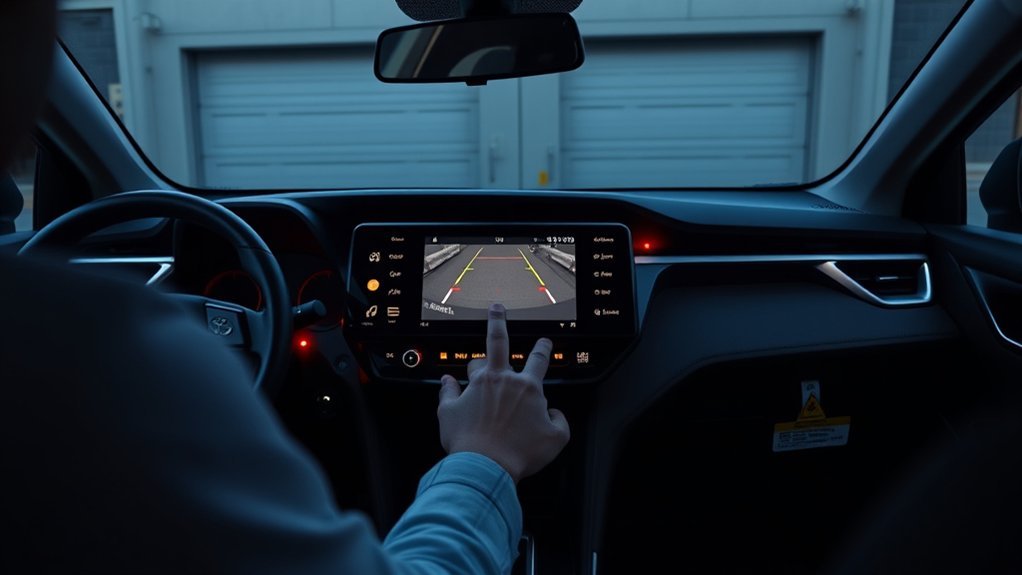
First, check whether the issue is the camera or the display by looking for signs: a black or distorted image points to the camera, while static or “no signal” suggests the display. Then verify the reverse signal and transmission switch—if the system never registers reverse, the camera won’t activate even if both camera and screen are fine. Finally, inspect wiring for frays/shorts and try a battery disconnect reset to clear temporary glitches before replacing parts.
Camera Vs. Display
A quick way to narrow down whether the problem is the camera, the display, or the reverse signal is to observe what the screen shows when you shift into reverse. Use camera maintenance and display troubleshooting steps to free yourself from guesswork: clean the lens, check for recalls and software updates, and inspect visible wiring. If the screen is blank or shows “No signal,” the issue often lies with the display power or input. Grainy images or static point to weak connections or interference, meaning both camera and display deserve inspection.
- Blank/”No signal”: suspect display power/input, loose connector
- Grainy/static: inspect camera wiring, grounds, interference
- Intermittent image: check frayed wires, connectors, and software updates
Reverse Signal Check
When you shift into reverse, check whether the reverse lights come on—no lights usually mean the reverse signal isn’t reaching the camera system, so you’ll want to trace that circuit before blaming the camera or display. If the lights work but the screen stays black, isolate whether the camera or display fails by testing each with a known-good input or swapping displays if possible. For intermittent operation, log when failures occur to reveal patterns tied to vibration, temperature, or wiring movement. Perform reverse sensor troubleshooting by inspecting connectors, fuses, and the reverse switch at the transmission. Do a wiring harness inspection for frays, corrosion, or loose pins; repair or replace damaged sections. Update vehicle software and check recalls before replacing components to reclaim control.
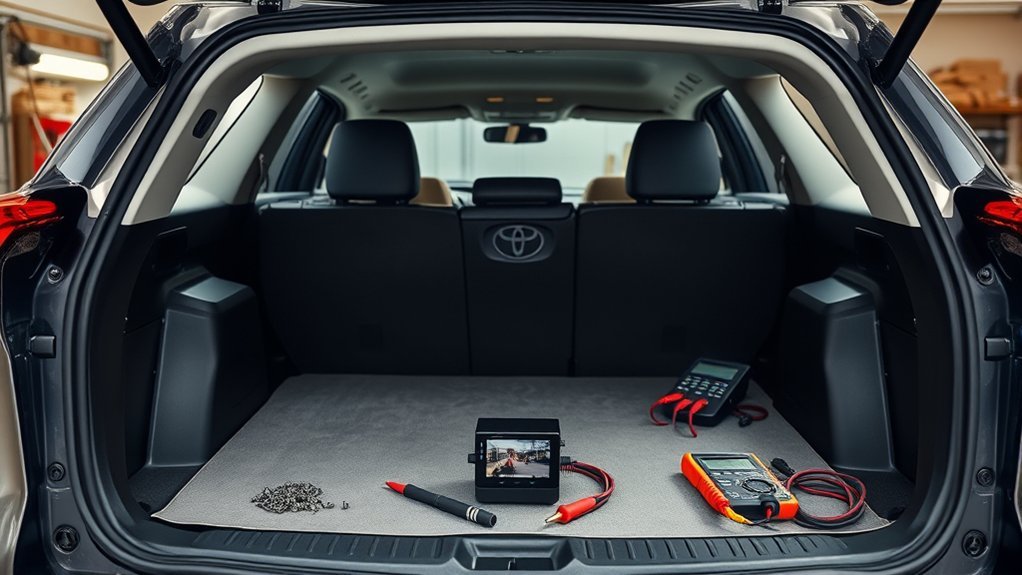
Inspect the Camera Lens, Mount, and Connectors (Step‑by‑Step)
Start by cleaning the lens with a soft cloth and mild cleaner to remove dirt that can blur the image. Then check the mount for misalignment or damage and make sure it’s firmly secured and aimed correctly. Finally, inspect the wiring and connectors for frays, corrosion, or loose pins and test the connector voltage to confirm the camera’s getting power.
Clean The Lens
Check the lens for dirt, smudges, or obstructions that can blur the image, and clean it gently with a microfiber cloth and mild cleaner to avoid scratches. You’ll free the view quickly with proper lens maintenance and simple cleaning techniques. Be methodical and calm; this small act restores clarity and control.
- Use a soft microfiber cloth and a mild, alcohol-free cleaner. Wipe in gentle, circular motions.
- Remove stubborn grime by wetting the cloth slightly, not the camera, and dry immediately to prevent streaks or moisture ingress.
- After cleaning, inspect connectors and visible wiring for obvious corrosion or fray; if image issues persist, the problem may be electrical, not optical.
These steps keep you empowered and moving toward resolution.
Check The Mount
1 quick inspection can reveal whether the backup camera’s mounting, lens, or wiring is causing the issue, so approach the area with purpose and a clear checklist: You’ll inspect lens cleanliness, mount stability, and visible connector condition without digging into wiring details. Clean debris from the lens, then press gently on the camera to test for play. Look for cracks, loose fasteners, or alignment issues that skew the view. Note any vibration signs or missing hardware. Record findings before seeking help.
| Check | Action |
|---|---|
| Lens | Wipe, inspect for scratches |
| Mount stability | Push/pull for movement |
| Alignment issues | Verify camera angle |
| Fasteners | Tighten or replace |
| Notes | Document and photograph |
Inspect Wiring Connectors
Begin by giving the camera area a close visual sweep: clean the lens and confirm the mount is secure, then focus on the wiring connectors for wear, corrosion, or loosened pins. You want clear sight and solid attachment before probing electricals. Inspect connector types (snap, bullet, or sealed) and note seals or broken tabs. Verify wiring integrity along the harness for frays or crushed insulation. If you see corrosion, clean contacts or replace the connector.
- Look for green/white corrosion, bent pins, or loose housings.
- Use a multimeter to confirm voltage at the camera connector; no voltage means upstream issue.
- Reseat or replace damaged connectors to restore reliable power and reclaim control over your system.
Check Fuses, Power, and Ground for the Backup Camera
Before you tear into the camera itself, verify the ECU-DCC and backup fuses and confirm the camera connector has the correct voltage; blown fuses or low voltage usually point to wiring or power issues. Begin with fuse testing: pull the ECU-DCC and backup fuses, inspect them visually, and use a multimeter on continuity to be sure. If a fuse is blown, replace it and retest the camera—don’t assume the job’s done until the system powers up.
Next perform voltage measurement at the camera connector with the car in reverse (parking brake on). Compare readings to the spec; anything below expected suggests a supply issue. Check ground straps and the camera’s chassis ground for tight, clean contact; a high-resistance ground will kill the signal. While you’re here, scan the harness for corrosion or crushed wires and do a quick visual inspection of the camera housing for damage or misalignment before moving on to wiring diagnostics.
Diagnose Wiring Faults: Hinge Harnesses, Diodes, and Intermittent Shorts
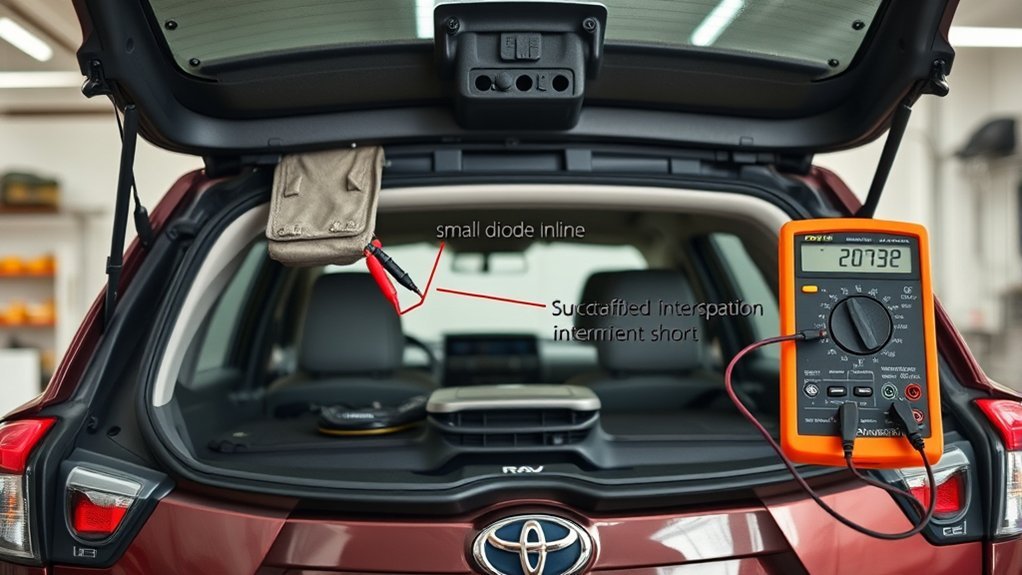
When you’re diagnosing wiring faults, focus first on the hinge harnesses and moving sections where flexing causes intermittent breaks—open and close the hatch while probing for continuity and watching for signal dropouts. You’ll perform a wiring inspection visually and electrically: look for frayed wires, melted tape near diodes, and loose connectors. Use a multimeter for a continuity check while flexing harnesses to reveal intermittent shorts. Test diodes near the ECU—diode testing will show failed components that can sap camera power.
- Inspect hinge harness routing and strain relief; plan harness replacement if you see cracks or exposed conductors.
- Perform diode testing and replace any heat-damaged diodes or rewrap melted insulation.
- Do a continuity check across connector pins while moving the hatch to find intermittent shorts or corrosion.
Secure all connections, clean contacts, and liberate yourself from repeat failures by fixing the root cause rather than masking symptoms.
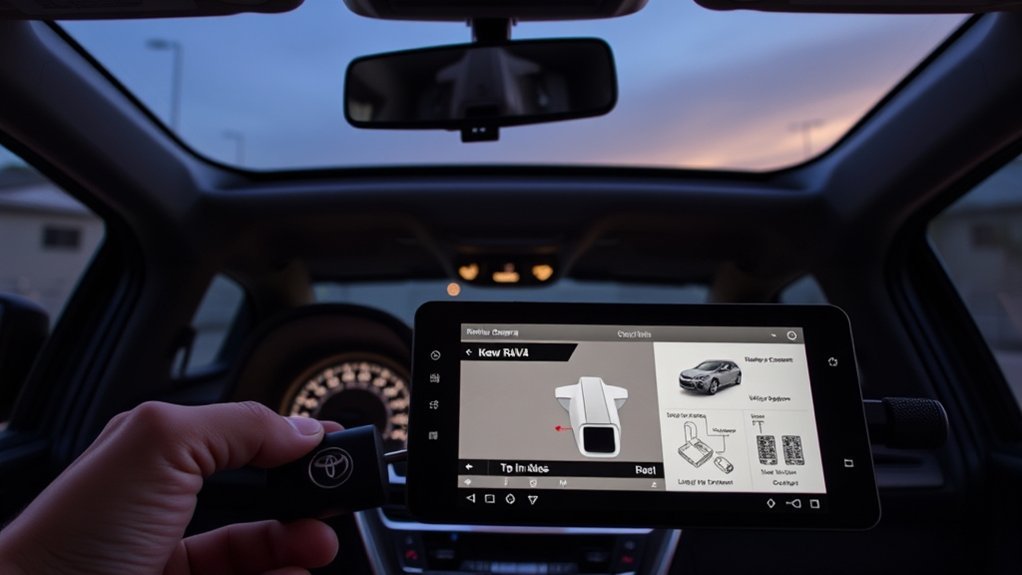
Software, Recalls, and Dealership Diagnostics for RAV4 Cameras
If your RAV4’s backup camera acts up after you’ve checked the wiring, contact the dealership to verify recalls and request any available software updates, since many models (including the 2023 XSE Hybrid) have had camera-related software fixes pushed by Toyota. You should ask the service advisor to check open dealership recalls and confirm the software version on your multimedia unit and camera module. A recall often involves a targeted software update that corrects intermittent black screens or signal loss; getting it applied can restore reliable function without invasive repairs.
Have the dealer run diagnostics: they’ll test camera feed, error codes, and related harness continuity. If diagnostics expose faulty wiring or hardware, insist on documented findings and repair options. If problems persist after software updates and recalls, escalate: request a service manager review, seek a second dealership, or consider an independent certified technician. Stay persistent—your safety and autonomy depend on a functioning camera and clear accountability from the dealer.
Temporary Safety and Driving Tips if the Camera Fails
Because technology can fail at any moment, you should rely on mirrors and physical checks to back up a nonfunctional camera: scan your blind spots, use both side mirrors, and turn your head to get a clear view before and during every reverse maneuver. You’ll want clear, actionable safety tips and driving precautions to stay free and mobile while you handle repairs. Move slowly, keep control, and trust human senses over screens.
When cameras fail, rely on mirrors, head checks, and slow, cautious reversing to stay safe and mobile.
- Use slow, cautious reversing and maintain extra distance from obstacles to buy reaction time.
- Engage rear park-assist alerts if available and add clip-on side or wide-angle mirrors to widen your field of view.
- Regularly inspect and clean the camera lens and housing so the system returns to service when fixed.
Treat these steps as temporary protocols: they preserve safety, reduce dependency on a single system, and empower you to drive confidently until you restore full camera function.
Cost & Parts: Replace the Camera vs. Repair Wiring (Typical Prices)
After you’ve adopted safe backup habits, you’ll want to decide whether to repair wiring or replace the camera—each option has different costs and trade-offs. Replacing a backup camera typically runs $200–$600, influenced by camera types (OEM costs more than aftermarket) and dealer vs. independent labor. Repairing wiring usually costs $100–$300 unless damage is extensive or hard to reach. Diagnosis fees at dealerships can tack on $100–$150 to pinpoint the fault before work begins.
If your camera is under warranty, warranty coverage can eliminate or reduce expense; check terms before authorizing repairs. Out-of-warranty, prioritize repairing wiring if the image is intermittent—it’s often the cheaper, freer choice. Choose replacement when the lens, sensor, or integrated unit fails or when aftermarket camera types offer better features you want. Make decisions based on clear diagnosis, cost-benefit, and your desire for independence from high dealer bills.
When to Get Professional Help and How to Document Issues for Escalation
When your backup camera acts up despite basic checks, start documenting every failure—note the date, time, exact symptom (black screen, flicker, static, delayed image), and what you were doing when it happened so technicians can see patterns. Record any resets, wiring inspections, or tests you ran and whether they changed the behavior. Use clear documentation strategies so you control the narrative and speed up the escalation process.
- Log: date/time, symptom, driving condition, and repeatability.
- Actions: list troubleshooting steps, photos of connectors, and error messages.
- Support: gather forum threads, VIN-specific recalls, and notes from other owners.
When problems persist after these steps, escalate to a dealer or specialist with your file. If out of warranty, ask for cost estimates and written diagnostics. Cite recalls and community evidence to strengthen your case. You’ll move from frustrated to empowered by showing facts, not opinions, during the escalation process.
Frequently Asked Questions
Can a Dirty Backup Camera Cause Intermittent Image Glitches?
Yes — a dirty camera can cause intermittent image glitches. You should clean lenses regularly, follow camera maintenance tips for secure mounts and connections, and apply image clarity solutions like gentle wipes and contact checks to regain reliable, liberated vision.
Will Aftermarket Stereo Upgrades Affect the Factory Camera?
Yes — aftermarket stereo installation can affect the factory camera; like a plug suddenly gone dark, you’ll check aftermarket compatibility, wiring harnesses, and video adapters, troubleshoot grounding, and insist on proper integration for freedom from issues.
How Does Cold Weather Impact Camera Performance?
Cold weather reduces visibility and responsiveness: you’ll see camera lens condensation, slower startup, and possible temperature sensor malfunction causing erratic behavior. Check seals, warm the lens, and test sensors to restore reliable, autonomous use.
Are There Model-Year RAV4S With Known Camera Hardware Issues?
Yes — some older RAV4s quietly develop camera faults; you’ll want camera replacement options and troubleshooting techniques. Start diagnostic checks, update software, inspect connectors, then replace faulty modules to regain control and freedom on the road.
Can a Blown Brake Light Bulb Disable the Backup Camera?
Yes — a blown brake light can affect camera functionality if they share circuits; check the brake light, wiring issues and connectors first. You’ll reclaim control by fixing bulbs or addressing electrical problems, freeing your system.
Conclusion
When your RAV4 backup camera fails, start simple: check the lens, connectors, fuses, and reverse signal before assuming the worst. If wiring, hinge harnesses, or display issues look suspect, document what you find and weigh repair versus replacement costs. Use dealer diagnostics for software faults or recalls. Drive cautiously without the camera—rely on mirrors and a spotter—like a flashlight in fog, guiding you until the system’s fixed. Seek pros for complex electrical faults.