You should plan to replace your Camry’s engine air filter about every 30,000 miles or 36 months, and inspect it every 5,000 miles for debris, tears, saturation, or collapsed pleats. Shorten intervals to about 15,000–20,000 miles in dusty, sandy, or frequent short‑trip conditions, and check more often when towing or hauling heavy loads. Replace immediately if you see dark clogging, poor acceleration, rough idle, or higher fuel use. Continue for inspection tips, DIY steps, and parts comparisons.
Quick Answer: Camry Air‑Filter Interval
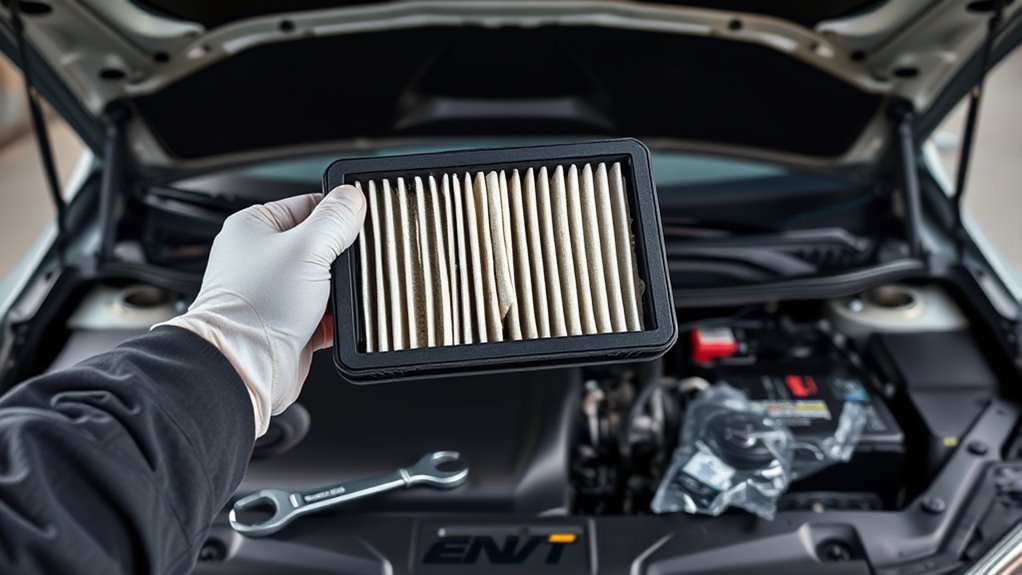
Most Toyota Camry owners should plan to replace the engine air filter at about 30,000 miles or every 36 months as recommended in the owner’s manual. You’ll inspect the filter every 5,000 miles to verify that baseline, comparing the old element to a new one to judge contamination. If you drive in dusty conditions or take frequent short trips, shorten the interval; if roads are clean and the element looks almost new, you can delay replacement but document inspections.
Select the correct air filter types approved for your Camry; OEM or equivalent paper pleat filters are standard for balance of flow and trapping. Reject maintenance myths that claim lifetime filters or universal intervals; they ignore environment and duty cycle. You’ll follow a simple decision flow: inspect, compare, replace if visibly dirty or if driving conditions are harsh. That procedure frees you from guesswork and protects engine efficiency and longevity.
Camry Engine Air Filter: The 30,000‑Mile Baseline
You’ve already got the inspection rhythm—now set the baseline: replace the Camry’s engine air filter at about 30,000 miles (or per your owner’s manual) and inspect it every 5,000 miles to verify that interval.
When you follow the 30,000‑mile baseline, you standardize maintenance and reclaim control over engine performance. Remove the filter, examine the filter material for saturation and visible debris, and note any tears or collapse. If the material appears compromised, replace it immediately; otherwise, log the condition and continue inspections at 5,000‑mile steps. Clean filters preserve designed filtration efficiency; accumulated dirt can briefly increase filtration but reduces airflow, hurting combustion and fuel economy. In non‑dusty environments, annual replacement may suffice, but don’t assume cleanliness replaces procedure—stick to the schedule. This methodical approach minimizes unexpected power loss, protects the intake system, and keeps your Camry operating freely. Follow the owner’s manual as the final authority.
When to Change Sooner: Driving Conditions That Matter
If you drive frequently in dusty or sandy areas, inspect and consider replacing the air filter around 15,000 miles to prevent rapid debris buildup. For frequent short trips and stop-and-go traffic, check the filter more often since contaminants accumulate faster. When you regularly carry heavy loads or tow, shorten the replacement interval because increased engine strain accelerates filter clogging.
Driving In Dusty Areas
When you regularly drive on dusty roads, change your Camry’s engine air filter sooner—aim for every 15,000 to 20,000 miles and inspect it every 5,000 miles to confirm condition. You’ll limit dust accumulation and protect filter lifespan by following a strict inspection-replacement routine. Check visually and by airflow feel; act promptly when restriction appears.
- Inspect filter every 5,000 miles in dusty environments.
- Replace at 15,000–20,000 miles or sooner if clogged.
- In extreme dust, swap with every oil change.
- Monitor visibility and particulate buildup on the element.
- Prioritize clean intake to preserve engine efficiency.
You’ll regain control over performance and emissions by enforcing these procedural checks and timely replacements.
Frequent Short Trips
Because short trips often keep the engine below ideal temperature, your Camry’s air filter can collect extra moisture and contaminants and need changing sooner than the maintenance schedule suggests. You’ll inspect the filter every 5,000 miles if short trip impact is routine. Look for moisture buildup, visible debris, and restricted pleats. In dusty or high-pollen areas, expect replacement around 15,000–20,000 miles; otherwise, prioritize inspections.
| Condition | Risk | Action |
|---|---|---|
| Frequent cold starts | Moisture buildup | Inspect 5k mi |
| Urban short hops | Contaminant load | Replace sooner |
| High pollen | Clogging | Replace 15–20k |
| Visible dirt | Reduced flow | Swap filter |
| Restricted pleats | Power loss | Immediate replace |
Perform checks, document mileage, and act decisively to regain control of performance.
Heavy Load & Towing
Although towing heavy loads or carrying significant weight puts extra strain on your Camry’s intake system, you should inspect the air filter every 5,000 miles and plan on replacing it sooner than the standard 30,000-mile interval. You’ll protect airflow and combustion efficiency by adopting disciplined towing techniques and proactive load management. Check and act when you notice reduced power, higher idle, or fuel economy loss.
- Inspect filter every 5,000 miles under heavy load conditions.
- Replace between 15,000–20,000 miles if you tow frequently or drive mountains.
- After repeated short trips while towing, shorten intervals further.
- Prioritize visual inspection for dust caking, tears, or compression.
- Log towing weight, terrain, and replacement dates for trend analysis.
Follow this regimen to maintain freedom on the road and engine resilience.
Inspect Your Camry Air Filter (5‑Minute Check)
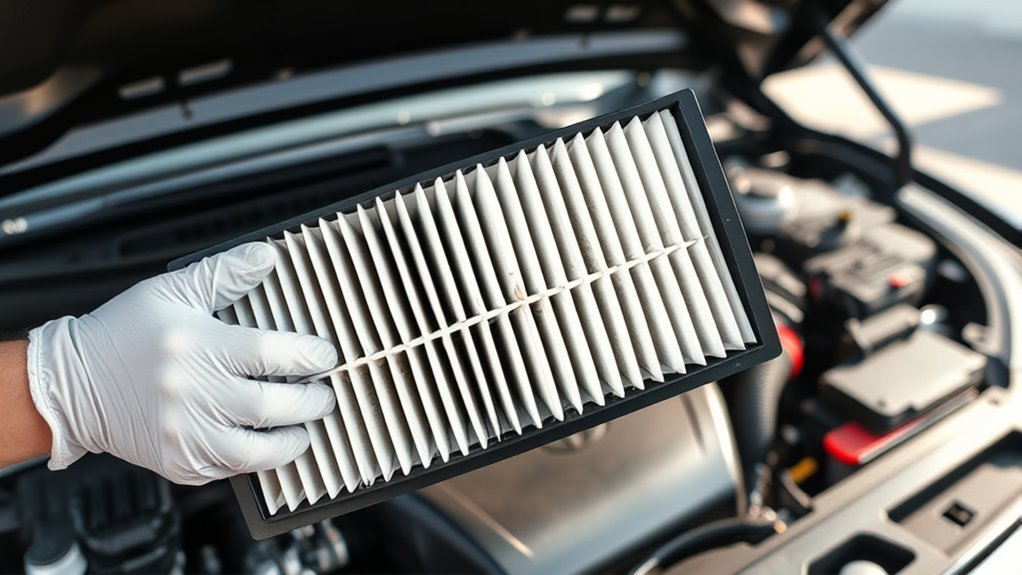
Pop the airbox and hold the filter up to a light — you should see light through the media if it’s clean. Inspect the pleats for trapped debris and use a few firm taps or a vacuum to remove loose dust. If light penetration is poor or pleats show heavy buildup, plan a replacement.
Visual Light Test
Shining a flashlight through the Camry’s air filter lets you quickly judge its condition: hold the light behind the filter and note how much illumination passes through the pleats. Perform a filter visibility check and a debris accumulation inspection to decide whether to clean, compare, or replace. You’ll act; you won’t guess.
- Position light behind filter at engine bay access point.
- Note light transmission: bright = serviceable; dim = suspect.
- Tap or gently vacuum only if light shows partial passage.
- Compare side-by-side with a new filter for objective judgment.
- Repeat every 5,000 miles or sooner under dusty conditions.
This procedural check frees you from uncertainty, keeps intake airflow efficient, and limits performance loss without unnecessary replacement.
Pleat Debris Check
When you lift the airbox cover, inspect each pleat edge-by-edge for clogs, discoloration, or compacted debris that could restrict flow; a quick light check plus a side-by-side with a new filter makes judgment straightforward. Conduct pleat inspection every 5,000 miles or sooner if you drive dusty roads. Hold the filter to a light source; if light fails to pass uniformly through pleats, suspect airflow obstruction and reduced engine efficiency. Probe visually for dark bands, packed grit, or oil residue along pleat folds. Document affected areas and compare against your spare new filter to decide replacement. If pleats show heavy soiling rather than fine dust, replace the filter—don’t defer. This procedure preserves performance and frees you from needless dependence on service shops.
Quick Tap/Clean
After you’ve inspected the pleats for heavy soiling, perform a quick tap/clean to remove light dust and confirm whether replacement is needed. You’ll do a 5-minute check that supports your freedom to maintain the vehicle yourself while protecting air quality and engine performance. Use steady techniques, compare to a new filter, and decide if full replacement is warranted.
- Remove the filter, shine a light through it, and check visibility against a new unit.
- Tap the filter gently on a hard surface to dislodge loose dust; don’t flex the frame.
- Use a vacuum with a soft nozzle for stubborn particles, keeping suction moderate.
- Inspect for discoloration, debris buildup, or damaged pleats.
- Reinstall securely; note mileage and next 5,000-mile inspection for filter maintenance.
Signs Your Air Filter Needs Replacing Now
If you see the filter element darkened or clogged with debris, replace it immediately to restore proper airflow and engine performance. Inspect visually every 5,000 miles as part of routine air filter maintenance. Remove the housing, pull the element, and look for heavy discoloration, compacted dirt, or visible blockage; these are definitive signs you need to swap it out.
Operational symptoms demand action: if acceleration feels sluggish or overall engine power drops, a restricted filter is likely starving the intake. Note unusual engine sounds—rough idle, sputtering, or irregular rev behavior—as indicators the filter isn’t supplying steady airflow. Track fuel consumption; a measurable increase often correlates to inefficient combustion caused by contaminated intake air.
When any of these signs appear, replace the filter immediately. Document mileage and condition after service to free yourself from guesswork and keep the intake system resilient. Regular, disciplined checks preserve engine performance and your freedom to drive without avoidable failures.
Which Filter Should You Buy? (OEM vs. FRAM, WIX, K&N, Washable)
Which filter should you buy depends on your priorities: fit, filtration efficiency, maintenance, and cost. You’ll choose between OEM, FRAM CA12377, WIX WA10859, K&N, or washable options by weighing filter performance against lifecycle cost and upkeep. OEM delivers engineered fit and consistent filtration, often extending change intervals. FRAM and WIX offer lower upfront prices (FRAM ~22 CAD, WIX ~13.05 USD) but may lag OEM reliability. K&N improves airflow yet risks higher contamination and MAF sensor exposure. Washable filters cut waste but demand scheduled cleaning, raising maintenance costs.
- OEM: optimized fit, top filtration performance, longer intervals
- FRAM CA12377: affordable aftermarket alternative, variable reliability
- WIX WA10859: budget option, acceptable for short-term savings
- K&N: airflow gain, potential dirt ingress, sensor risk
- Washable: reusable, needs regular servicing, increases upkeep
Stock up during dealer sales and perform DIY installation to lower overall cost via efficient maintenance.
Air Filter vs. Oil Filter: Replacement Timing and Why It Differs

Because they protect different systems and face different contaminant loads, air and oil filters follow distinct replacement schedules: you replace the air filter roughly every 30,000 miles under normal conditions, while you change the oil filter with every oil change. The air filter guards intake airflow from dirt and debris; its replacement depends on driving conditions and visual inspection. The oil filter removes particulates from lubricating oil; you must replace it every service interval to prevent oil contamination that threatens bearings and seals.
Procedurally, inspect the air filter for reduced filter efficiency and visible fouling—replace sooner in dusty environments. For oil filters, follow the oil change interval without exception; a clogged oil filter compromises oil flow and can cause rapid engine wear. Prioritize maintenance importance: schedule consistent oil filter swaps and condition-based air filter replacements. This approach protects engine longevity, maintains performance, and supports your autonomy to control service timing based on measured evidence.
Camry Air Filter DIY: Step‑by‑Step Replacement Checklist
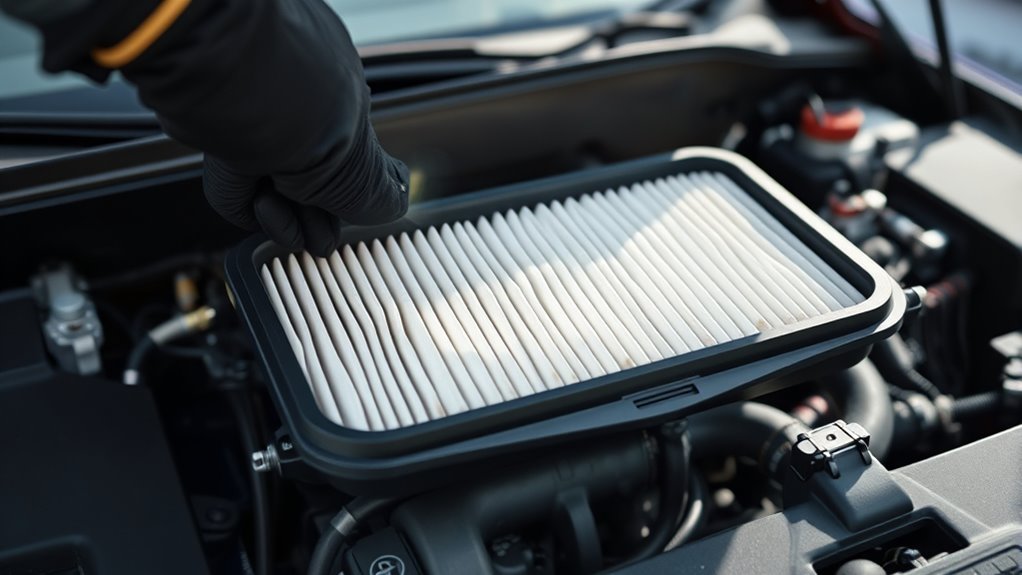
Gather basic tools and a replacement filter—screwdriver or socket set, gloves, and a clean rag—so you’re prepared before you open the engine bay. Locate the airbox near the engine, turn the car off and cool, then unclip or unscrew the cover to access the filter. Remove the old filter, inspect it against a light, seat the new filter snugly, secure the cover, and start the engine to confirm normal intake noise and fit.
Tools And Supplies
You’ll need a few basic tools and supplies: a compatible replacement air filter, a screwdriver or appropriate driver for the housing fasteners, a clean lint‑free cloth, and gloves to prevent oil and dirt transfer to the new filter. Focus on filter maintenance and tool selection up front so you work efficiently and confidently.
- Compatible Camry air filter (match year/model)
- Screwdriver or driver set for clips/screws
- Clean lint‑free cloth for sealing surfaces
- Disposable or nitrile gloves to avoid contamination
- Flashlight or inspection mirror for visual checks
Select quality parts and the correct driver to avoid stripped fasteners. Wear gloves, keep the work area clean, and use the cloth to wipe the housing mating surface before installing the new filter.
Locate The Airbox
Start by opening the hood and locating the airbox on the front side of the engine bay—it’s the rectangular plastic housing with a removable cover and an intake duct leading toward the grille. Identify the airbox location visually; it sits forward for direct airflow. Inspect fasteners securing the cover—clips or screws—and note their types so you can release them without damage. Position yourself for clear filter access, moving loose items away and using a flashlight if needed. When you unclip or unscrew the cover, lift it straight up to avoid disturbing hoses or sensors. With the cover off, you’ll have direct filter access and can inspect the cavity for debris. Clean the airbox before proceeding to maintain engine freedom.
Replace And Test Filter
Remove the old filter and inspect it closely for heavy dirt, tears, or compressed media—if any of these are present, replace it. You’ll liberate engine performance by restoring airflow and reducing air quality impact. Fit the new filter snugly, align the flange, and secure the cover to prevent leaks. Follow these filter maintenance tips to verify success:
- Confirm light passes through a clean filter; compare with your spare.
- Seat the filter fully in the housing groove; no gaps allowed.
- Refasten clips or screws to factory torque; avoid over-tightening.
- Start the engine and listen for abnormal intake noise indicating leaks.
- Recheck after a short drive for secure fit and normal idle.
Inspect every 5,000 miles or annually; replace sooner in dusty environments.
When to Book Service at a Toyota Dealer in Houston
When should you schedule service at a Toyota dealer in Houston? Follow a clear Toyota Maintenance rhythm: book Service Scheduling every 30,000 miles for air filter replacement to preserve engine efficiency and emissions control. Use the dealer’s interval as your baseline; consult your owner’s manual to adjust for city driving or heavy loads.
If you operate in dusty, coastal, or extreme-weather environments, increase inspection frequency and book earlier when visual or performance indicators appear—reduced acceleration, unusual engine sounds, or degraded fuel economy. Contact Community Toyota to schedule a routine appointment; they’ll confirm Toyota Genuine Air Filter compatibility and document the service for warranty and resale records.
When you book, state mileage, driving conditions, and any symptoms so technicians follow a targeted diagnostic and replacement procedure. Keep appointment confirmations and service history centralized to maintain mechanical autonomy and guarantee timely, professional upkeep without surrendering control of your vehicle’s care.
Maintenance Plans and Cost Templates for Low/Avg/High Mileage
After you’ve decided on dealer scheduling and inspection triggers, set up a clear maintenance cadence and cost template based on your annual mileage. You’ll create three plans (low, average, high) that reflect mileage impact and preferred filter types, letting you control costs and keep the engine breathing clean.
- Low mileage: <10,000/yr — inspect every 5,000 miles; replace every 36 months or as-needed; paper filters $10–$25.
- Average mileage: 10,000–20,000/yr — inspect at oil changes; replace ~30,000 miles; balance parts/labor in annual budget.
- High mileage: >20,000/yr — inspect every 5,000 miles; replace every 15,000–20,000 miles; increase inspection cadence in dusty areas.
- Washable vs paper: upfront cost higher for washable (e.g., K&N) but lower lifecycle cost if you perform scheduled cleaning.
- Budget template: forecast parts, labor, and inspection frequency; log replacements to adjust intervals based on real-world degradation.
Follow this procedural template to liberate your maintenance decisions and optimize cost per mile.
Frequently Asked Questions
Should You Change the Air Filter Every 10000 Miles?
No, you shouldn’t change it every 10,000 miles unless conditions demand; assess air filter lifespan by inspecting debris at 5,000-mile checks, preserving engine performance, and adjust intervals based on dusty driving to maximize autonomy.
What Is the 10K Maintenance on a 2025 Camry?
The 10K maintenance checks oil and filter change, tire rotation, and inspects the air filter to sustain engine performance; you’ll replace it if clogged, enjoying air filter benefits that free your driving and optimize efficiency.
What Maintenance Do I Have to Do When My 2018 Toyota Camry Hits 90,000 Miles?
Remember when your bike’s chain stuck until you lubed it? At 90,000 miles you’ll replace the air and oil filters, inspect spark plugs, rotate tires, check fluid levels—preserving engine performance and filter efficiency so you stay free.
Conclusion
Keep your Camry’s airflow efficient: check the air filter every 6 months or 7–10K miles and replace it at the 30K‑mile baseline sooner if you drive dusty, tow, idle in traffic, or do lots of stop‑and‑go. Inspect visually—hold up to light—for dirt, oil, or damage; swap using a quick, tool‑light procedure or book Toyota service in Houston for warranty or complex cases. Consistent, careful care cuts costs, protects performance, and prolongs powertrain life.