To diagnose a vacuum leak in your Hyundai Sonata, start by checking for hissing sounds and rough idling. Inspect hoses for cracks and listen for unusual noises while the engine runs. A smoke test can help identify small leaks, while an OBD-II scanner reveals fuel trim issues. If you notice decreased fuel efficiency or check engine light activation, these may indicate a vacuum leak. Discovering how to fix these issues will enhance your Sonata’s performance.
What Is a Vacuum Leak in Your Hyundai Sonata?
A vacuum leak in your Hyundai Sonata occurs when unintentional gaps allow outside air to enter the intake system, disrupting the essential air-fuel mixture needed for effective combustion. This imbalance can severely affect vacuum dynamics, leading to poor engine performance. Key components responsible for these leaks include worn or cracked vacuum hoses, faulty intake manifold gaskets, and malfunctioning EGR valves.
When outside air infiltrates the system, it alters the air-fuel balance critical for peak combustion, resulting in rough idling, decreased fuel efficiency, and increased emissions. Diagnosing these leaks requires a keen ear for hissing sounds and visual inspections of the intake system. Utilizing diagnostic tools like smoke tests or OBD-II scanners can also aid in identifying the source of the leak. Addressing vacuum leaks promptly is vital to prevent costly repairs and guarantee your Sonata runs smoothly.
Common Signs of a Vacuum Leak
Identifying common signs of a vacuum leak is crucial for maintaining your Hyundai Sonata’s performance. If you notice any of the following symptoms, it’s time to investigate further:
- Hissing sounds from under the hood, indicating unmetered air entering the engine.
- Rough idling, which can lead to stalling or misfiring during acceleration.
- A noticeable drop in fuel efficiency, reflected in lower miles per gallon (MPG).
- An illuminated check engine light that prompts diagnostic checks.
- Significant negative Long Term Fuel Trim (LTFT) readings, indicating engine performance issues.
These signs can disrupt your Sonata’s air-fuel mixture, negatively impacting its efficiency and overall functionality. Addressing a vacuum leak promptly guarantees smoother operation and helps you avoid more extensive repairs down the line. Stay vigilant and keep your vehicle running at its best!
How to Detect Vacuum Leaks Effectively
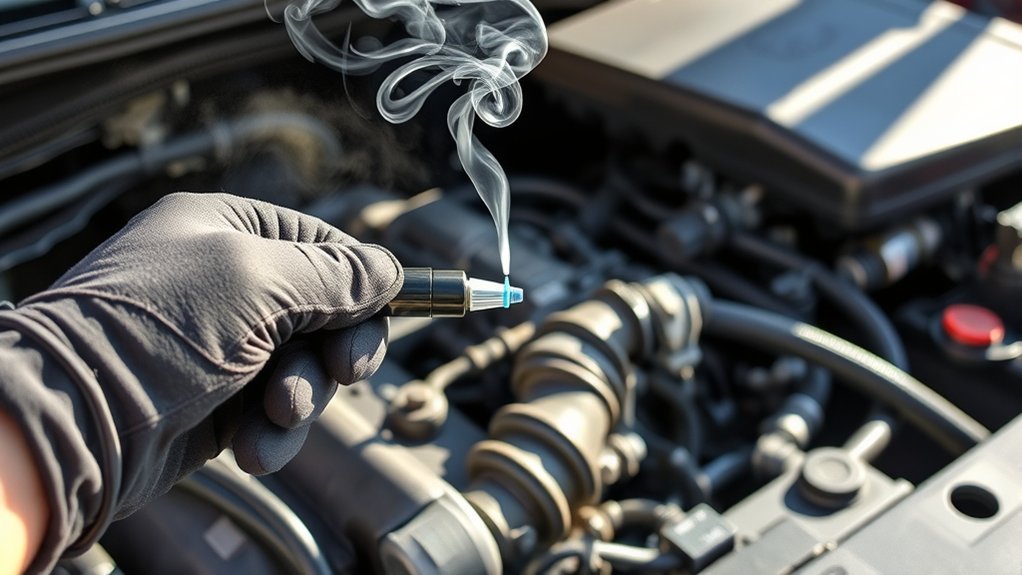
Detecting a vacuum leak effectively requires a systematic approach to pinpoint the source of the issue. Start with a thorough visual inspection of all vacuum lines, hoses, and connections, looking for cracks, wear, or disconnections. Next, utilize sound detection; listen for any hissing or suction noises while the engine runs, as these often indicate a leak. For more precision, consider performing a smoke test. Introduce smoke into the vacuum system to visibly reveal even small leaks. You can also conduct a spray test by applying soapy water to suspected areas; if air escapes, bubbles will form at the leak site. Finally, using an OBD-II scanner can be beneficial. Monitoring fuel trim readings helps identify significant deviations that suggest a vacuum leak affecting engine performance. Each method enhances your ability to detect and address potential leaks effectively.
Fixing a Vacuum Leak: A Step-by-Step Guide

To fix a vacuum leak effectively, start with a meticulous visual inspection of all vacuum hoses and connections in the engine bay. Look for cracks, wear, or disconnections, as these are common sources of leaks. If you suspect hidden leaks, utilize a smoke test; the escaping smoke will reveal gaps accurately.
Follow these steps for effective vacuum repair techniques:
- Inspect the intake manifold gasket for wear or damage.
- Replace any damaged hoses using reliable hose replacement tips.
- Conduct a smoke test to pinpoint elusive leaks.
- After repairs, reset the vehicle’s adaptive learning values.
- Regularly maintain vacuum components like the brake booster and EGR valve.
When Should You Call a Mechanic for Vacuum Problems?
If you notice severe symptoms like a rough idle or hissing sounds from under the hood, it’s essential to call a mechanic. Persistent performance issues, especially after DIY attempts, indicate that professional diagnostics are necessary. Don’t ignore an illuminated check engine light; it could signal deeper vacuum problems that require expert attention.
Signs of Severe Issues
When you notice hissing sounds from under the hood or experience irregular engine behavior like stalling or misfiring, it’s essential to recognize these as potential indicators of a severe vacuum leak. Addressing these issues promptly can save you from costly repairs down the line. Here are some signs to watch for:
- An illuminated check engine light with a negative long-term fuel trim (LTFT) reading
- A significant drop in fuel efficiency, such as from 26 mpg city to 15 mpg
- Low vacuum levels at idle, particularly below 40-50 kPa
- Persistent symptoms despite basic leak tests showing no results
- Difficulty accelerating or reduced engine power
If you encounter any of these, it’s wise to consult a mechanic immediately.
Persistent Performance Problems
Persistent performance problems can signal underlying vacuum leak issues that shouldn’t be ignored. If you’re experiencing idle fluctuations, decreased fuel efficiency, or strange hissing sounds from your engine, it’s time to take action. A significant negative long-term fuel trim (LTFT), like -19.53%, indicates an air-fuel mixture imbalance often linked to vacuum issues. If your engine stalls or misfires despite replacing common components, consulting a mechanic is essential. Low vacuum levels at idle, such as 18 inHg (61 kPa), that don’t improve with adjustments also warrant professional evaluation. Additionally, continuous diagnostic readings that stray from expected norms, like O2 sensor voltage fluctuations, suggest it’s time to seek expert help to address potential leaks or faulty components effectively.
Preventing Future Vacuum Leaks in Your Vehicle
To prevent future vacuum leaks in your vehicle, regularly inspect vacuum hoses and connections for signs of wear or cracking, especially in high-heat areas. Using high-quality replacement parts, like intake manifold gaskets and vacuum hoses, is essential for ensuring long-term reliability. Additionally, scheduling routine maintenance according to the manufacturer’s guidelines helps catch potential issues before they escalate.
Regular Inspections Needed
Regular inspections of your vehicle’s vacuum systems are essential for maintaining peak engine performance and efficiency. Incorporating these checks into your preventive maintenance routine can help you catch issues before they escalate. Use an inspection checklist to guarantee you cover all bases:
- Examine vacuum hoses for wear and tear, especially in high-heat areas.
- Check the intake manifold for cracks or leaks.
- Schedule periodic checks of the brake booster diaphragm and EGR valve.
- Utilize smoke tests to identify hard-to-detect leaks.
- Perform visual inspections regularly to maintain peak performance.
High-Quality Parts Essential
While using high-quality parts may seem like an added expense, it’s an essential investment in preventing future vacuum leaks in your vehicle. High-quality materials, such as intake manifold gaskets and vacuum hoses, considerably reduce the risk of premature wear and leaks. These components often offer better resistance to extreme engine heat, minimizing damage that can lead to issues down the line. When you choose OEM parts, you guarantee compatibility and reliability, which are critical for maintaining peak vacuum system performance. Regularly adhering to the manufacturer’s maintenance schedule, including inspections and timely replacements, enhances your Hyundai Sonata’s longevity and efficiency. Investing in quality now saves you from costly repairs later. Prioritize high-quality parts for a reliable, leak-free vehicle.
Frequently Asked Questions
How to Test if Your Car Has a Vacuum Leak?
To test for a vacuum leak, inspect hoses for wear, listen for hissing sounds, and perform vacuum testing. Look for leak symptoms like fluctuating idle or poor fuel trim to confirm any issues.
What Is the Vacuum Leak on a 2006 Hyundai Sonata?
A vacuum leak on your 2006 Hyundai Sonata disrupts the air-fuel mixture. You’ll notice symptoms like rough idling. Identifying these symptoms early allows for effective repair options, ensuring your engine runs smoothly and efficiently.
How Expensive Is It to Fix a Vacuum Leak in a Car?
Repairing a vacuum leak typically costs between $150 and $1,000, depending on cost factors like leak location and complexity. Choosing the right repair options early can save you from expensive future engine damage.
Conclusion
In summary, tackling a vacuum leak in your Hyundai Sonata isn’t as intimidating as it seems—unless, of course, your idea of mechanics is watching a YouTube video while sipping coffee. By recognizing the signs, detecting leaks, and following the guide, you can reclaim your vehicle’s performance. So, roll up your sleeves and channel your inner mechanic. After all, the only thing that should be leaking is your neighbor’s secret recipe, not your car’s vacuum system!