When your Toyota 4Runner’s Check Engine Light comes on, do not start by replacing parts. Start with the simple checks, read the stored diagnostic codes, and match those codes with real symptoms. A steady light usually gives you time to diagnose the problem soon. A flashing light, severe shaking, smoke, overheating, or loss of power means you should stop driving and arrange a tow.
Quick Answer
For a 4Runner Check Engine Light, first tighten the gas cap, check battery terminals, inspect visible wiring, and scan the OBD-II port for codes. A steady light usually means diagnose soon; a flashing light or drivability problem means pull over, shut the engine off, and get professional help.
Key Takeaways
- A loose or cracked gas cap can trigger EVAP-related codes, but it is only one possible cause.
- Read the OBD-II codes before replacing sensors, coils, or catalytic converters.
- A flashing Check Engine Light usually points to an active misfire or serious fault; do not keep driving.
- Toyota 4Runners often show VSC, TRAC, or ABS lights along with the Check Engine Light; scan all modules when possible.
- After clearing codes or disconnecting the battery, emissions readiness monitors may need drive cycles before inspection.
At a Glance
| Time Required | 10–30 minutes for basic checks; longer if testing sensors, wiring, or fuel trims |
| Difficulty | Beginner for code reading and visual checks; intermediate for live-data diagnosis |
| Tools Needed | OBD-II scanner, flashlight, gloves, basic hand tools, battery terminal brush, multimeter if testing wiring |
| Cost | Free to about $50 for basic checks; diagnostic fees and repairs vary by fault |
Quick Checks for a 4Runner Check Engine Light

Start with the checks that cost little or nothing. Tighten the fuel cap until it clicks, then look for cracks, a damaged seal, or dirt around the filler neck. A leaking cap can trigger EVAP system codes such as P0440, P0441, P0455, or P0456.
Next, check the battery. A weak battery, loose terminal, or corroded ground can cause low-voltage faults and confusing sensor readings. Make sure both terminals are tight and clean. If the battery is old or recently went dead, test it before chasing sensor codes.
Then inspect the engine bay. Look near the battery, air intake, mass airflow sensor, ignition coils, oxygen sensor wiring, fuse box, and under-splash areas. Rodent damage, loose connectors, broken clips, and chafed wires can all trigger intermittent Check Engine Light problems.
Pro Tip: Do not clear the code before writing it down. Record the code, freeze-frame data, mileage, recent fuel-up, weather, and symptoms. That information helps separate a loose gas cap from a real sensor, wiring, or engine problem.
How Urgent Is It? Steady vs. Blinking and Performance Clues
A steady Check Engine Light usually means the engine computer has detected a fault that needs diagnosis soon. You may be able to drive a short distance if the 4Runner runs normally, the temperature gauge is normal, and there are no other serious warning lights.
A blinking Check Engine Light is different. Treat it as urgent. It often means an active misfire that can overheat and damage the catalytic converter. Safely pull over, reduce engine load, and shut the vehicle off if it is shaking, losing power, or running roughly.
Warning: Stop driving and arrange a tow if the Check Engine Light flashes, the oil pressure light comes on, the temperature gauge rises, you smell fuel or burning, you see smoke, or the 4Runner loses power suddenly.
Steady Light Meaning
With a steady light and normal drivability, scan the vehicle as soon as practical. Codes give you a starting point, not a final repair. For example, a P0171 lean code may come from an intake leak, dirty MAF sensor, low fuel pressure, exhaust leak, or sensor issue. Replacing the first part mentioned by a code reader often wastes money.
Watch for added clues. Poor fuel economy, hard starting, rough idle, hesitation, fuel smell, or rattling exhaust noise can change the priority of the repair. If symptoms are getting worse, schedule service sooner.
Blinking Light Danger
A flashing light usually means the engine is misfiring badly enough to risk damage. A misfire can be caused by spark plugs, ignition coils, fuel injectors, vacuum leaks, compression loss, or a wiring fault. Continuing to drive can turn a repairable ignition problem into a damaged catalytic converter.
If you must move the vehicle for safety, drive only far enough to get out of traffic. Avoid towing a trailer, climbing hills, high rpm, or hard acceleration. After that, use a tow truck or professional roadside help.
Performance Symptoms Guide
| Symptom | Likely Urgency | What to Do |
|---|---|---|
| Steady light, runs normally | Low to moderate | Scan soon and avoid delaying repairs. |
| Rough idle, hesitation, poor acceleration | Moderate to high | Scan immediately and limit driving. |
| Flashing light or severe shaking | High | Pull over and tow. |
| Smoke, overheating, fuel smell, oil pressure warning | Critical | Shut down and do not restart until inspected. |
Read OBD-II Codes: What to Expect
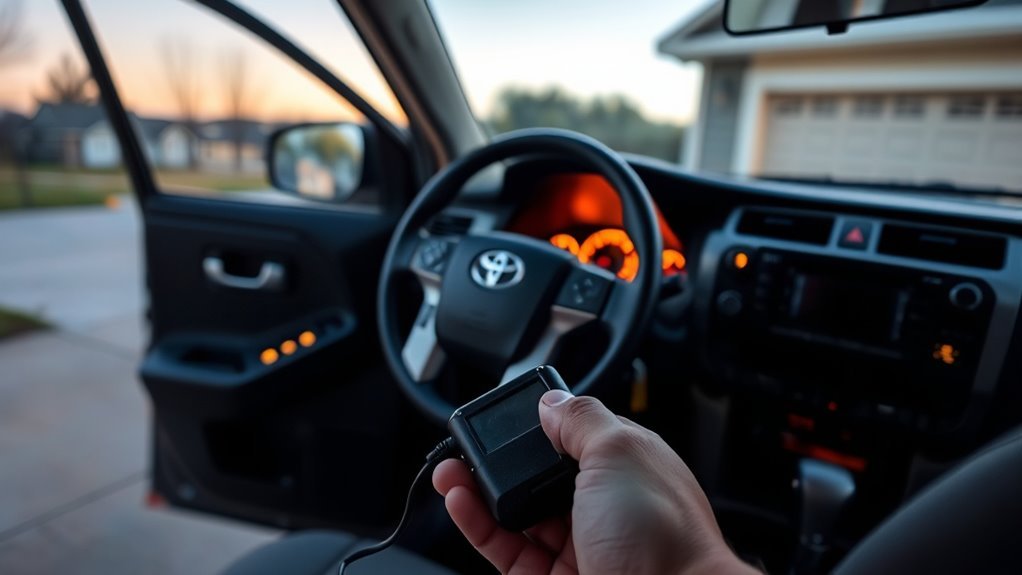
Your 4Runner has an OBD-II diagnostic connector under the driver-side dashboard. Plug in a scanner, turn the ignition on, and read stored, pending, and permanent codes. OBD-II is the standardized system used on 1996-and-newer gasoline vehicles in the U.S., and it monitors emissions-related engine controls, stores diagnostic trouble codes, and turns on the malfunction indicator light when it detects a fault, according to the California Bureau of Automotive Repair.
A code such as P0301 does not mean “replace the spark plug” automatically. It means the computer detected a cylinder 1 misfire. The cause could be spark, fuel, air, compression, wiring, or a sensor input. Good diagnosis means reading the code, checking freeze-frame data, looking at live data, and testing the likely causes in order.
How to Scan Without Making the Problem Harder
- Turn the ignition on and connect the scanner.
- Write down all stored, pending, and permanent codes.
- Save freeze-frame data, especially rpm, coolant temperature, speed, load, and fuel trims.
- Check whether the code returns after a short drive only if the vehicle is safe to drive.
- Do not clear codes until the fault is documented and repairs are complete.
Note: Disconnecting the battery or clearing codes can reset emissions readiness monitors. Your 4Runner may need normal driving or a specific drive cycle before it can pass an OBD-based emissions inspection.
Common 4Runner Codes and Likely Causes

Common 4Runner Check Engine Light codes often fall into a few groups: misfire, lean mixture, EVAP leaks, oxygen sensor faults, mass airflow faults, and catalyst-efficiency faults. The table below gives likely causes, but the correct fix still depends on testing.
| Code | What It Points To | Common Checks |
|---|---|---|
| P0300, P0301–P0306 | Random or cylinder-specific misfire | Spark plugs, coils, injectors, vacuum leaks, compression, wiring. Four-cylinder 4Runners use fewer cylinder-specific codes than V6 models. |
| P0171, P0174 | Lean air-fuel mixture | Vacuum leaks, intake boot cracks, dirty MAF sensor, exhaust leaks, low fuel pressure, fuel trims. |
| P0440, P0441, P0455, P0456 | EVAP system leak or flow issue | Gas cap, filler neck, purge valve, vent valve, EVAP hoses, smoke test. |
| P0131, P0135, P0155 | Oxygen or air-fuel ratio sensor signal/heater issue | Sensor wiring, heater circuit, exhaust leaks, live sensor data, power and ground. |
| P0101, P0102, P0103 | Mass airflow sensor range or signal issue | Air filter box seal, intake duct, MAF contamination, connector pins, live grams-per-second data. |
| P0420, P0430 | Catalyst efficiency below threshold | Exhaust leaks, upstream/downstream sensor data, misfire history, converter condition. Do not replace the catalytic converter until root causes are checked. |
| C1201 with engine codes | Toyota traction/engine control communication-related warning | Fix the engine code first, then rescan ABS/VSC modules with a capable scanner. |
Misfire and Ignition
If your 4Runner shows P0300 or a cylinder-specific misfire code, start with basics. Check whether the engine is shaking, whether the code follows a coil when swapped to another cylinder, and whether the spark plugs are worn, oil-fouled, cracked, or incorrectly gapped.
On older V6 4Runners, cylinder codes may run P0301 through P0306. On newer four-cylinder 4Runners, cylinder-specific misfire coverage is different because there are fewer cylinders. Always match the code to your exact model year and engine.
Emission System Failures
EVAP and emissions codes are common because the system is designed to detect leaks and flow problems. A loose gas cap can be the simple answer, but a purge valve, vent valve, cracked hose, or fuel filler issue can cause the same family of codes. If the gas cap is good and the code returns, a smoke test is usually faster than guessing.
Oxygen sensor and catalyst codes also need careful diagnosis. A bad sensor can cause poor fuel economy and emissions problems, but an exhaust leak, wiring problem, misfire, or fuel-trim issue can make a good sensor look bad. Read live data before replacing parts.
Fast Fixes: Gas Cap, Battery, Sensors, and Connectors
Use this simple order before buying parts:
| Component | Action | Why It Matters |
|---|---|---|
| Gas cap | Tighten, inspect seal, replace if cracked or loose. | A poor seal can trigger EVAP leak codes. |
| Battery and grounds | Clean terminals, tighten clamps, test battery health. | Low voltage can create false or intermittent faults. |
| Air intake | Check air box, filter seating, intake tube cracks, MAF connector. | Unmetered air can cause lean codes and hesitation. |
| Visible wiring | Look for rubbing, rodent damage, loose plugs, corrosion. | Intermittent wiring faults often return after bumps or vibration. |
| Sensors | Compare live data before replacing. | Codes identify a circuit or system, not always the failed part. |
If the light came on right after refueling, the gas cap and EVAP system are high on the list. If it appeared after a battery replacement, jump-start, stereo install, off-road trip, or engine-bay work, inspect connectors and grounds first.
VSC, TRAC, ABS, and Limp Mode After a Bump
On many Toyota vehicles, the Check Engine Light can appear with VSC, TRAC, or stability-control warnings. That does not always mean the ABS system failed. Sometimes the engine-control fault disables traction-related systems until the root engine code is fixed.
If the warning appears after hitting a bump, driving off-road, or washing the undercarriage, inspect wiring and wheel-speed sensor connectors. A basic OBD-II reader may only show powertrain codes. For ABS, VSC, and brake-related codes, use a scanner that can read Toyota chassis modules.
If limp mode starts after a bump, do not assume the transmission failed. Scan all modules and inspect wiring, grounds, ABS sensor leads, and engine harness connectors before replacing major parts.
- Check wheel-speed sensor connectors and wiring near each hub.
- Inspect engine harnesses near the intake, battery, alternator, and fuse box.
- Look under the vehicle for damaged skid plates, loose clips, or pulled wiring.
- Check for water intrusion or mud packed around connectors after off-road use.
- Clear codes only after repairs, then road-test and rescan.
When to Stop Driving and Arrange a Tow

Arrange a tow when the risk of engine, catalytic converter, electrical, or safety-system damage is higher than the inconvenience of stopping. A tow is the right choice if the Check Engine Light flashes, the engine shakes hard, the vehicle will not accelerate normally, or the 4Runner enters limp mode and cannot safely keep up with traffic.
Also stop immediately if the temperature gauge climbs, the oil pressure light comes on, the battery/charging light appears with steering or electrical problems, you smell raw fuel, or you see smoke. Those symptoms can become expensive or dangerous quickly.
For hybrid 4Runner models, do not touch orange high-voltage cables or high-voltage components. If warning lights appear with hybrid-system messages, have the vehicle inspected by a qualified technician.
What a Shop Will Test: Live Data, Smoke, and Component Checks
A good repair shop should not simply read the code and sell the named part. The technician should confirm the fault with live data and targeted tests. Ask for the codes, test results, and repair recommendation in writing.
Common diagnostic steps include:
- Reading engine, transmission, ABS, and body-control codes when related warning lights are present.
- Checking freeze-frame data to see when the fault happened.
- Reviewing short-term and long-term fuel trims for lean or rich conditions.
- Smoke-testing the intake or EVAP system for leaks.
- Testing battery voltage, charging voltage, grounds, and sensor reference voltage.
- Inspecting spark plugs, ignition coils, injectors, and compression for misfire codes.
- Comparing upstream and downstream oxygen sensor data before condemning a catalytic converter.
- Checking technical service information and open recalls using the VIN through Toyota’s recall lookup or the NHTSA recall database.
Preventive Maintenance to Avoid Future Check Engine Lights
You cannot prevent every Check Engine Light, but good maintenance reduces the common causes. Follow the Toyota Warranty & Maintenance Guide for your exact model year because service intervals changed across generations. Toyota’s guides explain that regular maintenance and ongoing general maintenance, such as fluid checks and visual inspections, help support reliability and warranty coverage.
For recent 4Runner models, Toyota’s maintenance schedules include regular inspections, tire rotations, oil and filter service based on time, mileage, and operating conditions, and spark plug replacement at specified intervals. Severe use, dusty roads, towing, frequent short trips, and off-road driving can require more frequent checks. Use the official Toyota 4Runner manuals and warranties page or the correct printed guide for your vehicle.
- Replace the engine air filter on schedule, and inspect it sooner after dusty roads.
- Keep the fuel cap seal clean and replace a damaged cap with a quality part.
- Change oil and filter at the interval required for your model year and driving conditions.
- Replace spark plugs at the factory interval for your engine.
- Inspect ignition coils, wiring, and connectors during tune-ups.
- Do not ignore small exhaust leaks, intake cracks, or weak batteries.
- Scan pending codes before long trips, especially before towing or off-road travel.
How to Clear the Check Engine Light the Right Way
The right way to clear the Check Engine Light is to fix the cause first, then clear the code with a scanner. If the repair worked, the code should not return after the required self-tests run.
Disconnecting the negative battery cable may turn the light off temporarily on some vehicles, but it can also erase learned settings and reset readiness monitors. That can make emissions inspection harder because the computer must complete its self-checks again. Use a scanner whenever possible.
Frequently Asked Questions
How do you clear the Check Engine Light on a Toyota 4Runner?
Fix the problem first, then use an OBD-II scanner to clear the stored codes. Disconnecting the battery may turn the light off temporarily, but it can reset readiness monitors and the light will return if the fault is still present.
Can a Toyota Check Engine Light reset itself?
Yes. If the fault is repaired or no longer detected, the light may turn off after the vehicle completes the required self-tests and drive cycles. The code history may still be stored, so scanning the vehicle is still useful.
Is it safe to drive a 4Runner with the Check Engine Light on?
It may be safe for a short trip if the light is steady and the 4Runner drives normally. Do not keep driving if the light is flashing, the engine runs rough, the vehicle loses power, the temperature rises, or other serious warning lights appear.
Why did the Check Engine Light come on after getting gas?
A loose, dirty, or damaged fuel cap is a common reason. Tighten the cap until it clicks and inspect the seal. If the code returns, the EVAP system may need a smoke test for leaks or a purge/vent valve problem.
Why are the VSC or TRAC lights on with the Check Engine Light?
Toyota vehicles may disable traction or stability-control functions when an engine-control fault is active. Scan the engine codes first, then scan ABS/VSC modules if the lights remain after the engine issue is repaired.
Conclusion
A 4Runner Check Engine Light is a warning, not a diagnosis. Start with the gas cap, battery, visible wiring, and OBD-II codes. Treat a steady light as a prompt to diagnose soon, and treat a flashing light or major drivability problem as a reason to stop and tow. The fastest, cheapest repair is usually the one backed by codes, live data, and a careful inspection instead of guesswork.
Sources
- Toyota 4Runner Owner’s Manuals and Warranty Information — official model-specific manuals and maintenance information.
- 2026 Toyota 4Runner Warranty & Maintenance Guide — factory maintenance chart, service intervals, and inspection items.
- 2024 Toyota 4Runner Warranty & Maintenance Guide — official maintenance log and scheduled service references for older V6 4Runner models.
- California Bureau of Automotive Repair: OBD II Readiness Monitors — OBD-II system purpose, DTC storage, MIL behavior, and readiness monitor explanation.
- U.S. EPA: On-Board Diagnostic Regulations and Requirements — background on OBD and emissions-related diagnostic systems.
- NHTSA Recall Lookup — official VIN-based recall checks for safety-related defects.


[…] Can a Bad CV Axle Cause a check engine light? […]