You’ll quickly identify a Tacoma exhaust leak by listening for hissing or tapping at idle and under load, smelling strong fuel or exhaust in the cabin, and visually checking for rust, soot, cracks, or loose hangers. Safely lift and stabilize the truck, use soapy water or smoke to pinpoint bubbles or emissions, then replace gaskets, bolts, clamps, or damaged sections; use epoxy or tape only as temporary fixes. Continue for step‑by‑step diagnostics and repair options.
Quick How-To: Diagnose a Tacoma Exhaust Leak
Wondering where that hissing or tapping is coming from? You start by listening carefully—engine cold, then briefly at idle and under load—to locate an exhaust leak. Next, jack the Tacoma and perform a visual inspection beneath the vehicle: scan manifold flanges, joints, hangers, and piping for rust, soot, or cracks. Apply soapy water to suspected areas; bubbles pinpoint escaping air so you don’t chase phantom faults. Avoid common repair mistakes like tightening parts that need replacement or using improper sealants; mark damaged sections instead. If you detect strong exhaust smells inside the cabin, treat that as urgent—carbon monoxide risk demands immediate action. Track fuel economy and engine performance; measurable drops can indicate system failure beyond a simple patch. Use these exhaust maintenance tips to prioritize repairs, decide what you can safely handle, and when to schedule a professional inspection. Act methodically, and reclaim control of your vehicle’s safety and efficiency.
Spot the Signs: Smells, Noises, and Performance Clues
You should note any strong gasoline odor inside the cabin immediately, as it often signals a major exhaust leak and a carbon monoxide hazard. Listen for hissing, tapping, or louder-than-normal exhaust sounds that point to leaks at the manifold gasket or other joints. Also watch for performance drops—poor acceleration, reduced fuel economy, or visible soot/cracks—that confirm a compromised exhaust system.
Recognizing Fuel Odors
A strong gasoline smell inside the cabin or around the vehicle is a clear indicator of a serious exhaust leak and demands immediate action to avoid carbon monoxide exposure. You should cut engine operation, exit, and ventilate the area. Identify fuel odor sources by inspecting manifold gaskets, pipe joints, and catalytic converter seals; leaks disrupt the air-fuel mix and raise consumption. Confirm cabin ventilation paths—blocked or recirculating airflow can concentrate fumes.
- Check underhood manifold and gasket seams for soot or wetness.
- Smell around tailpipe, joints, and undercarriage while stationary.
- Monitor fuel economy; rising consumption suggests compromised exhaust flow.
- If odors persist, refrain from driving and seek repair to protect health and regain freedom of movement.
Hearing Tell-Tale Noises
Smells can point you to trouble, but sounds often tell you exactly where it’s coming from. Listen for hissing, tapping, or rasping; those exhaust sound characteristics map to manifold gasket failures, cracked pipes, or loose clamps. If noise increases under acceleration, isolate whether it’s upstream or downstream of the catalytic converter—louder at higher RPMs often signals a pre-cat leak needing immediate repair.
Use diagnosing engine vibrations as a diagnostic adjunct: feel for rhythmic shakes tied to RPM, which can indicate exhaust misalignment or a leaking flange. Check for black soot, visible cracks, and fuel-odor ingress into the cabin. Act decisively: leaks reduce performance and economy and risk CO exposure. You deserve safe, unfettered mobility—repair promptly.
Safety First: Prepare Your Tacoma and Work Area
Before you start, park your Tacoma on level ground and let the engine cool so you won’t risk burns or accidental movement. You’ll set the foundation for safe, effective work by organizing the work environment and donning proper safety gear. Stabilize the truck with jack stands or ramps—never rely on a jack alone—and confirm stability before going underneath. Ventilate the area if you run the engine for diagnostics to avoid fume buildup. Keep a spray bottle of soapy water at hand to detect escaping gases.
- Use jack stands or ramps rated for your Tacoma and verify solid contact points.
- Wear safety gloves and glasses; treat all edges and hot components as hazards.
- Guarantee cross-ventilation or mechanical extraction if you’ll run the engine.
- Place tools, lights, and your soapy-water tester within reach; maintain a clutter-free space.
Work methodically, control risk, and free yourself from avoidable danger through disciplined preparation.
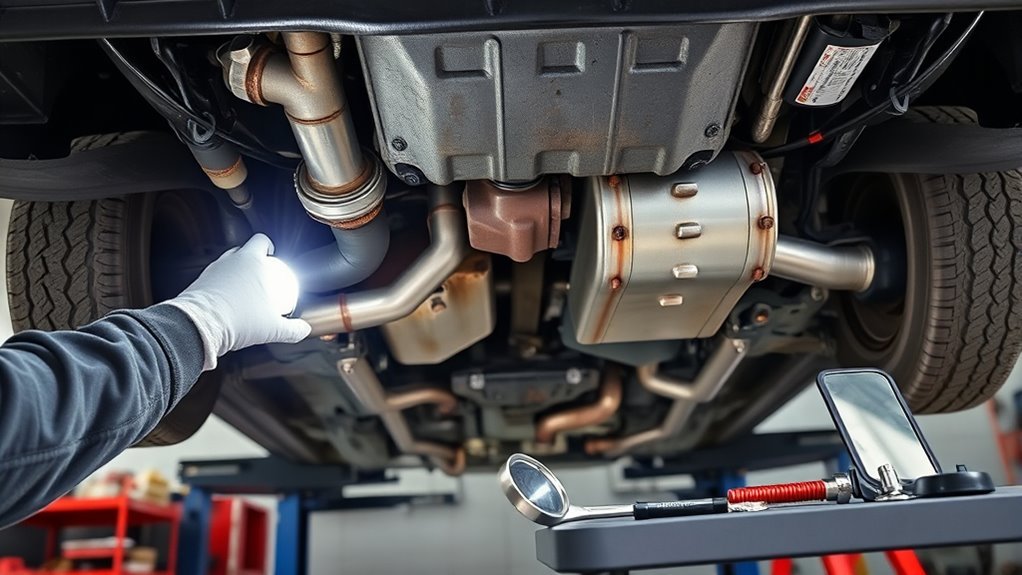
Inspect Under the Truck: Visual Checklist for the Exhaust System
Start by crawling underneath and scanning the entire exhaust path from the manifold back to the tailpipe, inspecting welds, flanges, and pipe lengths for cracks, perforation, or concentrated rust. You’ll perform a systematic visual inspection of the exhaust system: examine the manifold, catalytic converter, mid‑pipe and tail section for surface breaches or black soot deposits that mark escaping gases. Focus on connection points, welded seams and flange faces—these stress points corrode and crack first. Verify bolts and gaskets are present and tight; note any missing hardware or compressed, degraded gaskets. Inspect hanger brackets and rubber isolators for wear or failure; a sagging tailpipe signals compromised support that accelerates damage. Mark all suspect areas for repair or replacement, prioritizing structural breaks and leaking joints. You’ll document locations and severity, then plan parts and tools. This methodical, evidence‑driven visual inspection protects performance and frees you to act decisively.
Locate the Leak: Soapy‑Water, Smoke, and Listening Tests
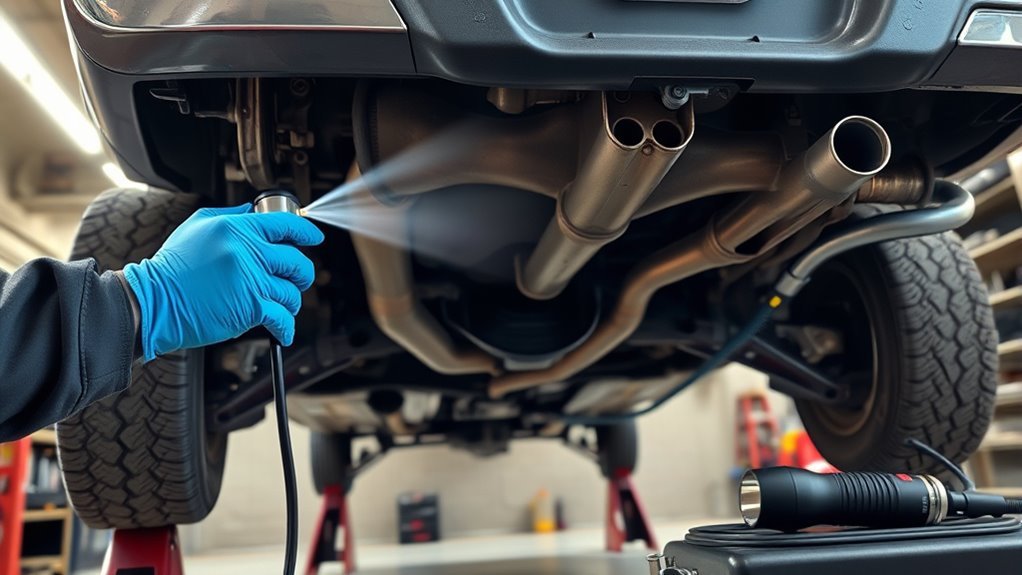
Start by spraying soapy water along the exhaust and watching for bubbles at joints, welds, and suspected cracks to reveal escaping air. If bubbles aren’t obvious, introduce smoke into the system and trace any visible smoke egress to the leak location. Finally, run the engine and listen carefully for hissing or tapping—changes under acceleration often pinpoint leaks you can then recheck with a flashlight.
Soapy Water Inspection
One simple, reliable way to find an exhaust leak is to spray a soap-and-water solution along the system while the engine idles and watch for bubbles where exhaust gases escape. You’ll mix detergent to a soapy consistency, apply with a spray bottle, and observe bubble formation at joints, clamps, and damaged sections. This non-intrusive method gives quick confirmation without special tools. Keep the engine at idle for steady flow and safer detection.
- Inspect visually first; clean heavy grime for reliable adhesion.
- Apply soapy mix along seams, welds, and hangers methodically.
- Watch for sustained bubbles; mark exact spots for repair.
- Combine with listening for hisses to prioritize fixes and reclaim control.
Smoke And Sound Tests
After you’ve confirmed suspicious spots with the soapy-water check, use smoke and focused listening to pinpoint leaks you might miss visually. You’ll seal openings, introduce controlled smoke into the exhaust, and watch for escaping plumes — smoke detection makes even hairline breaches obvious. With the engine off, force smoke from the tailpipe or use a dedicated smoke machine; trace any visible emissions to joints, flanges, or perforations.
Next, start the engine and perform sound identification: listen close for hissing, ticking, or tapping under different throttle loads. Combine auditory cues with visual soot, rust, and the earlier bubble map from soapy water. This combination approach narrows targets for repair, freeing you to act decisively and reclaim control of the system.
Simple Home Fixes: Bolts, Gaskets, Epoxy, Tape, and Clamps
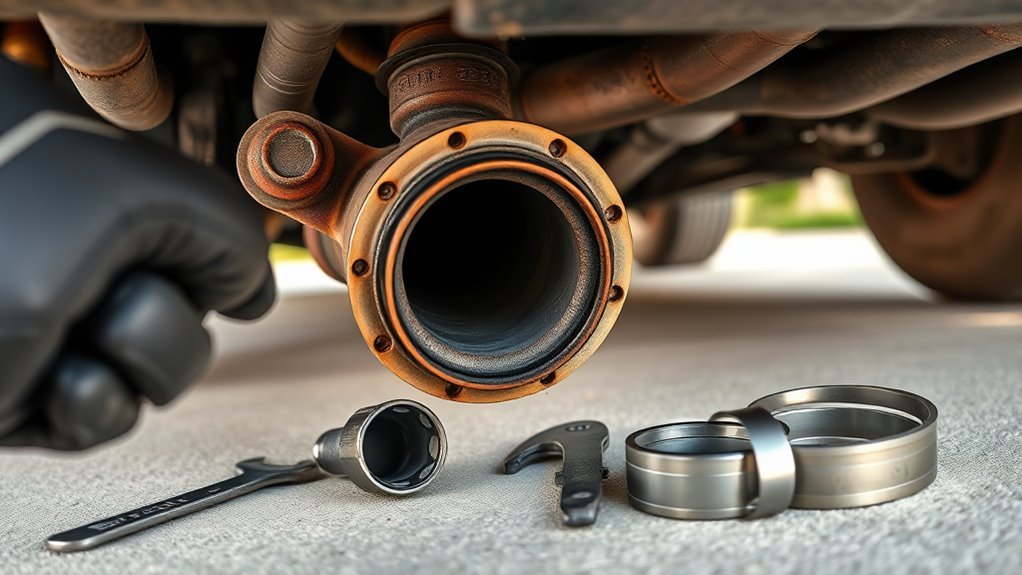
When you notice an exhaust leak, address the obvious fasteners and seals first: inspect and replace rusted bolts and compressed gaskets to restore a tight seal at joints, then use stainless steel clamps to re-secure loose sections. You’ll begin with basic exhaust system maintenance: clean mating surfaces, follow gasket replacement tips, and torque new bolts to spec. Wear gloves and goggles.
- Inspect fasteners: remove rusted bolts, apply anti-seize, install new grade-matched hardware.
- Gasket work: scrape residue, check flange faces, install correct gasket type and tighten in sequence.
- Epoxy/tape: for pinholes or small separations, use high-temp exhaust epoxy on a clean, dry area; use exhaust tape only as a temporary hold and monitor often.
- Clamps: fit stainless steel clamps over joints or patch areas, tighten to manufacturer torque, recheck after heat cycles.
You’ll act deliberately, favoring durable fixes and safe practices that free you from repeated failures.
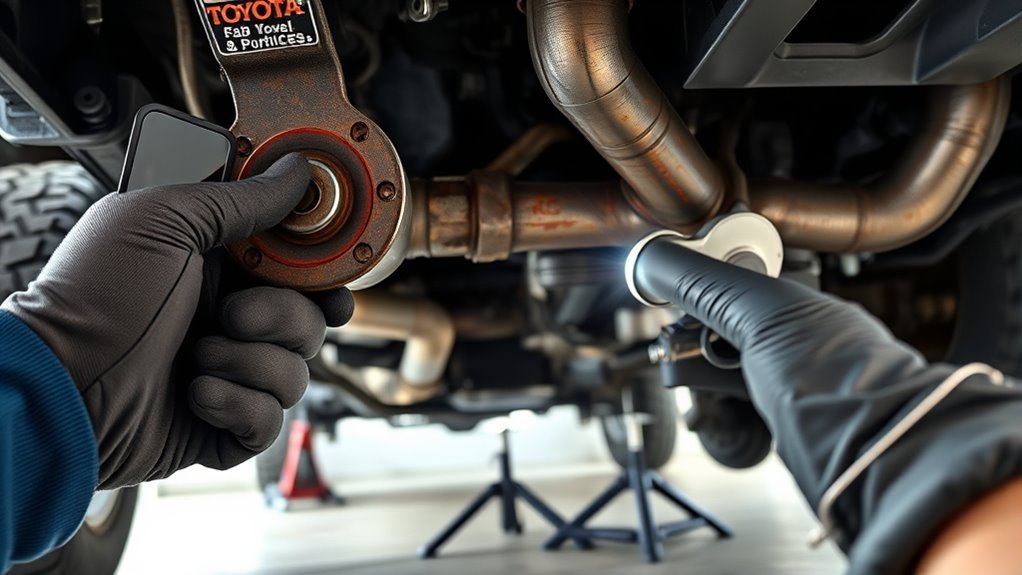
When to Replace Parts: Manifold, Flange, Cat, Muffler, Tailpipe
Start by triaging affected components to decide whether repair or replacement is required. You inspect manifold symptoms first: persistent hissing or visible cracks mean replacement — leaks compromise performance and freedom from breakdown. Next check flange issues; cold-weather leaks or warped joints demand flange replacement or new gaskets to restore a sealed connection. Evaluate the catalytic converter: obvious damage or reduced acceleration indicates the catalytic converter must be replaced to meet emissions and regain efficiency. Assess muffler signs — severe rust, holes, or excessive noise reduce flow and require replacement to recover quiet and power. Finally, examine tailpipe problems: hanging, cracked, or corroded sections should be repaired or replaced to prevent debris hazards and maintain safe operation. You prioritize parts that threaten safety, emissions compliance, or drivability. Replace rather than patch when damage is structural, recurring, or impairs performance so your Tacoma stays reliable and sovereign on the road.
Repair Cost & Options: DIY, Muffler-Shop, OEM vs Aftermarket
Although you can save money by tackling minor exhaust leaks yourself, choosing between DIY, a muffler shop, OEM, and aftermarket parts comes down to scope, tools, and long-term goals. You’ll weigh Repair Budget against time, skill, and desired reliability. DIY Tools — wrenches, jack stands, penetrating oil, exhaust tape or epoxy — let you fix simple flange or tailpipe leaks for about $100. Shops add expertise: muffler-shop labor runs $100–$200; expect faster diagnosis and safer lifts. Parts drive cost: OEM components cost more but promise fit and longevity (cats often >$300). Aftermarket options start near $125 and can deliver lifetime durability if you confirm Tacoma compatibility to avoid modifications.
- DIY: low cost, requires DIY Tools, higher personal risk.
- Muffler-shop: moderate labor, reliable install, predictable timeline.
- OEM parts: higher upfront, best fit/reliability, suits long-term ownership.
- Aftermarket: cost-effective, validate compatibility, balances price and performance.
Post-Repair Checks and Prevention: Testing and Maintenance Tips
After a repair—whether DIY or shop-performed—you should verify the fix before driving: run the engine and listen for any persistent hissing or tapping that indicates remaining leaks, then apply soapy water to welds, flanges, and joints; visible bubbling pinpoints escaping gases. After confirming the repair, perform a visual sweep of the exhaust system for cracks, rust, or loose hangers and connections. Track fuel efficiency; a sudden drop can be an early indicator of a recurring leak. Log inspections and interventions in a simple maintenance schedule so you can spot patterns tied to temperature shifts or mileage. Schedule periodic checks before seasonal extremes; cold contracts metal and can reveal weak seals. If you detect issues, act immediately: tighten, re-weld, or replace components rather than defer. These disciplined steps reduce risk, extend component life, and free you from repeated failures. You’ll preserve performance, safety, and autonomy by combining testing with routine maintenance.
Frequently Asked Questions
How to Diagnose and Fix an Exhaust Leak?
Listen for hissing during acceleration, then perform leak detection visually and with soapy water on the exhaust system while it runs. Tighten bolts, replace gaskets, or use high-temp tape/epoxy; recheck to confirm freedom.
What Is the Most Common Cause of an Exhaust Leak?
Corrosion in the exhaust system is the most common cause of an exhaust leak; you’ll notice performance loss and reduced noise reduction. Inspect rusted pipes, joints, gaskets, then replace compromised sections to reclaim freedom and reliability.
How to Diagnose Clogged Exhaust?
You diagnose a clogged exhaust by inspecting exhaust flow and engine performance: visually check for soot, rust, or damage, measure back-pressure with a gauge, note sluggish acceleration and decreased fuel economy, and watch for unusual noises.
Conclusion
You’ve traced the hiss, swapped the worn piece, and tightened every flange like a surgeon closing an incision; your Tacoma’s breath is steady again. Keep inspecting the exhaust as you’d monitor a pulse—regular, methodical checks and prompt repairs prevent small leaks from becoming ruptures. Treat each bolt and gasket as essential organs: maintain them, use the right parts, and your truck will repay you with dependable performance and quieter miles.