Changing the oil on a Toyota Tundra is a realistic DIY job if you work safely, verify your truck’s exact year and engine, and avoid guessing on oil capacity or torque specs. The basic process is simple: warm the engine, lift and support the truck, drain the oil, replace the filter and seals, refill carefully, check for leaks, and reset the maintenance reminder.
Quick Answer
To change Toyota Tundra oil, park on level ground, warm the engine briefly, support the truck with jack stands, remove the under cover, drain the oil, replace the drain-plug washer, install a new oil filter and O-rings, refill with the oil specified in your owner’s manual, run the engine, check for leaks, and verify the dipstick level.
Key Takeaways
- Do not treat one Tundra oil capacity or torque spec as universal. Confirm your model year, engine, and service data before refilling or tightening parts.
- Many Tundras use SAE 0W-20, but the correct oil standard and amount depend on the truck. Check the owner’s manual before buying oil.
- Never work under a truck supported only by a jack. Use jack stands on solid, level ground.
- Replace the drain-plug washer and oil-filter O-rings every oil change to reduce the chance of leaks.
- Recycle used oil and the old filter properly. Do not pour oil into drains, soil, or trash.
At a Glance
| Time Required | 30–60 minutes for most DIYers |
| Difficulty | Moderate because the truck may need to be lifted and supported |
| Tools Needed | Socket set, oil filter wrench, torque wrench, drain pan, funnel, gloves, eye protection, jack, and jack stands |
| Parts Needed | Correct engine oil, correct oil filter or filter cartridge, new O-rings, and a new drain-plug crush washer |
| Estimated DIY Cost | Usually $50–$120 depending on oil brand, filter type, and capacity |
Before You Start: Confirm Your Tundra’s Year, Engine, and Oil Spec
Before you loosen a single bolt, confirm your truck’s model year, engine, oil viscosity, oil capacity, filter type, and service interval. A 2007–2021 V8 Tundra with a cartridge-style oil filter is not the same job as a 2022 or newer Tundra with the V35A twin-turbo V6. The splash shield, filter access, oil capacity, and torque values can differ.
Use your owner’s manual, the under-hood label, or Toyota’s official manual lookup before buying supplies. Toyota’s current guidance for many vehicles that require 0W-20 synthetic oil is a normal oil-change interval of 10,000 miles or 12 months, whichever comes first. However, vehicles where 0W-20 is only an option, and trucks used in severe conditions, may require shorter intervals. Severe use can include dusty roads, frequent short trips in freezing temperatures, heavy loads, towing, long idling, or off-road use.
Note: If you own a 2022–2024 gas-powered Tundra, check your VIN for open recalls before doing routine service. Toyota has announced safety recalls involving certain V35A-equipped Tundras, and recall status is VIN-specific.
[Products Worth Considering]

The Pigenius windshield sunshade protects your Tundra's interior from heat and UV damage while keeping the cabin cool. Its accordion design folds easily for storage and quick setup, and the triple‑laminate construction provides durable, reflective protection. Ideal for long trips and daily commutes, it guards dashboards, seats, and steering wheels from sun‑related wear.

These TPE door anti‑kick pads provide durable, water‑resistant protection for Toyota Tundra doors from 2022 to 2026. They fit precisely, are easy to install with double‑sided tape, and can be cleaned simply with water. The pads guard against scuffs and impacts while preserving the door's appearance and smooth operation.

Upgrade your Toyota's front bumper with this premium license plate bracket that fits US and Canada plates perfectly. Made from heavy‑duty, rust‑proof plastic, it protects your paint and stays street legal. The kit includes six unique screws and a wrench for quick, tool‑free installation, ensuring a secure mount without scratches.
Toyota Tundra Oil Change: Tools, Time, and Skill Level
Plan on 30–60 minutes if you have the right tools ready. The job is straightforward, but it requires care because you may be working under a heavy truck and handling hot oil.
Gather these tools and supplies before you start:
- Correct engine oil for your model year and engine
- Correct oil filter or filter cartridge kit
- New drain-plug crush washer
- New oil-filter O-rings if your filter kit uses them
- 14 mm socket for many Tundra drain plugs, plus other sockets for the under cover
- Ratchet and torque wrench
- Oil filter wrench that matches your filter housing or spin-on filter
- Drain pan large enough for the full oil capacity
- Funnel, shop towels, nitrile gloves, and eye protection
- Jack, jack stands, and wheel chocks if extra clearance is needed
- Seal-able container for used oil
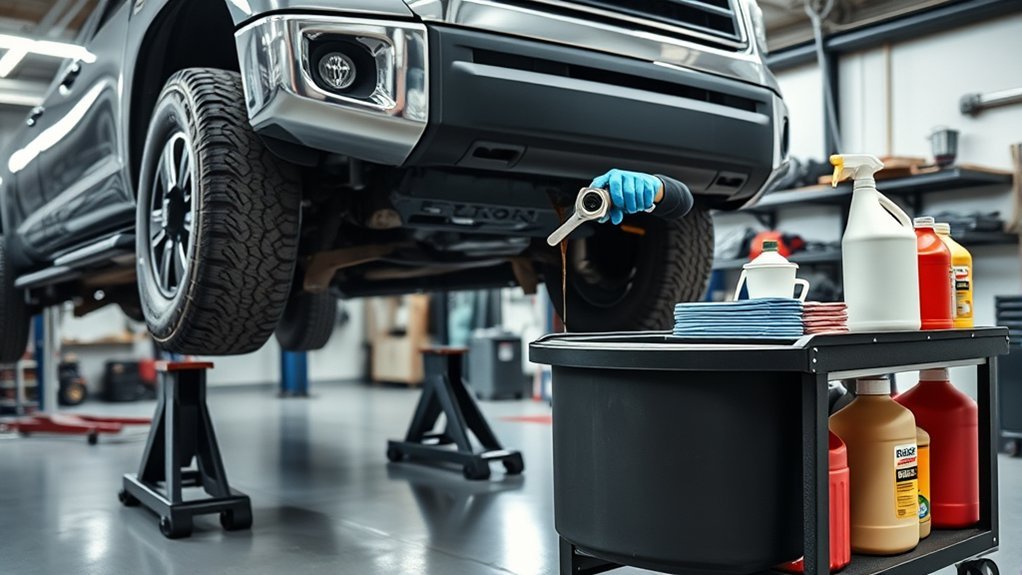
Warning: Never crawl under a Tundra supported only by a hydraulic jack. Park on a solid, level surface, chock the wheels, set the parking brake, and support the truck with properly rated jack stands.
Prepare the Truck: Warm Engine, Safety, and Open Filler Cap
Start the engine and let it run for a few minutes. Warm oil drains faster than cold oil, but it should not be scalding hot. Shut the engine off, park on level ground, set the parking brake, and let the truck sit briefly so the exhaust and oil are safer to work around.
Open the hood and remove the oil filler cap. This helps the crankcase vent and can make the oil drain more smoothly. Pull the dipstick slightly or keep it ready for later, but do not rely on the dipstick reading until the oil change is complete and the truck is back on level ground.
Put on gloves and eye protection. Position your drain pan, filter wrench, new washer, new filter, O-rings, and rags within reach before you remove any fasteners.
Pro Tip: Write down the mileage before you begin. It makes your maintenance log and next oil-change reminder easier to track.
[Products Worth Considering]

Upgrade your vehicle's interior with this universal console cover that combines comfort and organization. The high‑quality microfiber leather resists spills and scratches while the thick memory foam core provides ergonomic support, reducing elbow fatigue on long drives. Dual side pockets keep essentials within reach, and elastic straps with non‑slip dots ensure a secure, tool‑free installation for any sedan.

Ensure accurate engine cooling with Toyota's genuine water temperature sensor, designed for precise coolant monitoring and reliable performance. This OEM part fits seamlessly into your vehicle, offering durability and consistent temperature readings for optimal engine health.
Remove Splash Tray and Expose the Drain Bolt
Many Tundras use an engine under cover or splash tray that must be removed for access. On some 2007–2021 V8 models, you may find five 12 mm bolts and three screws holding the tray. Your fastener count may differ, so remove only the fasteners needed for safe access and keep them organized.
Set the tray aside in the same orientation it came off. This makes reinstallation easier and reduces the chance of missing a bolt or cross-threading a screw later.
Locate the oil drain bolt on the oil pan. On many Tundras, the drain plug uses a 14 mm socket, but verify fit before applying force. Make sure your drain pan is centered under the plug and has enough capacity for the full oil volume.
Drain the Oil and Replace the Crush Washer
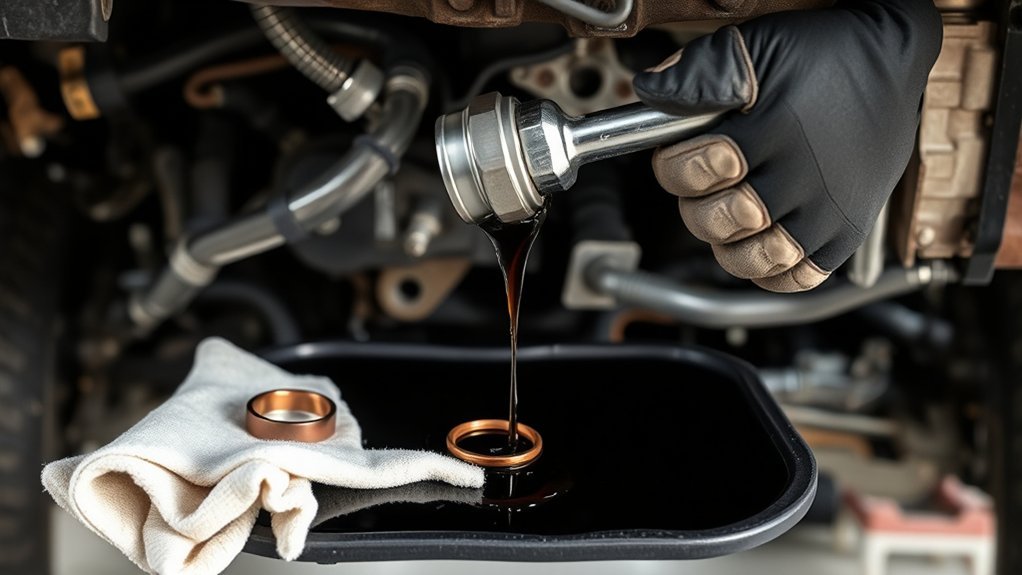
Use the correct socket to loosen the drain plug. Keep inward pressure on the plug as you turn it so oil does not escape until you are ready. Then remove the plug by hand and move your hand away quickly as the oil begins to flow.
Let the oil drain until the stream slows to a drip. This can take several minutes. Wipe the drain plug clean and inspect the threads and head. If the plug is rounded, stripped, or damaged, replace it before reinstalling.
Remove the old crush washer from the drain plug and install a new washer. Do not reuse a flattened or damaged washer; it may seep after the oil change.
Prepare the Drain Area
Clean the oil pan surface around the drain hole. Dirt, old oil, or metal debris on the sealing surface can keep the new washer from sealing properly.
Hand-start the drain plug first. If it does not thread in smoothly by hand, stop and inspect the threads. Cross-threading an oil pan can turn a simple oil change into an expensive repair.
Replace the Crush Washer
| Item | Action |
|---|---|
| Drain plug | Clean and inspect threads |
| Old washer | Remove and discard |
| New washer | Install flat against the plug |
| Oil pan surface | Wipe clean before tightening |
| Final tightening | Use the correct torque spec for your truck |
For many older Tundra applications, the engine oil drain plug torque is commonly listed around 30 ft-lb, but you should verify the specification for your exact model year and engine. Do not guess and do not overtighten; an oil pan thread repair is far more expensive than a torque wrench.
Inspect the Drain Bolt
Before reinstalling the plug, check for rounded edges, damaged threads, crushed washer fragments, or unusual metal debris. A light gray film on a magnetic plug can be normal, but chunks, flakes, or heavy metal glitter are not normal. If you see concerning debris, stop and have the truck inspected before driving.
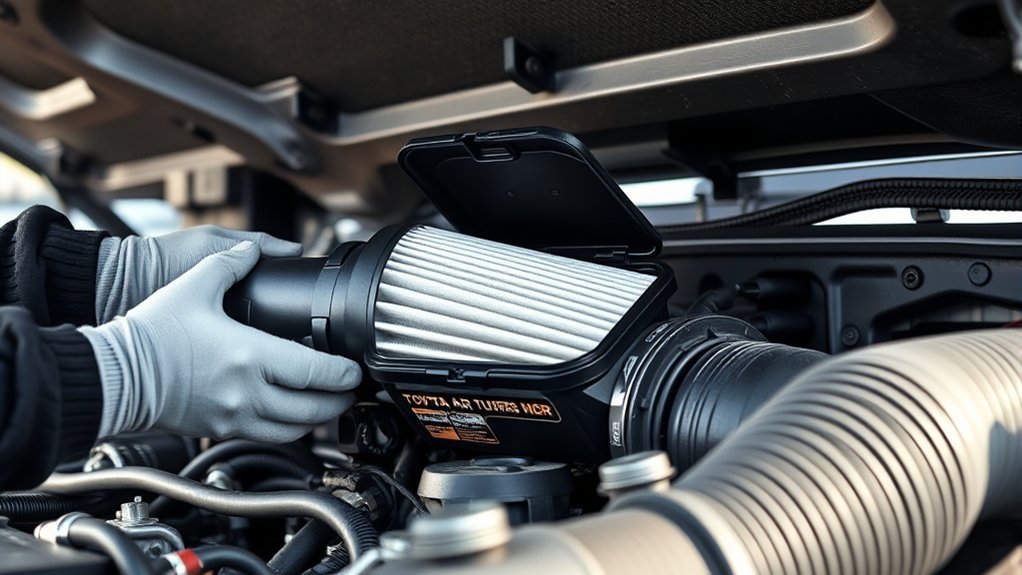
Replace the Oil Filter and O-Ring Correctly
The oil filter process depends on your Tundra’s engine and filter design. Some Tundras use a cartridge-style filter housing with O-rings. Others may use a different layout. Match the steps to your truck, not to a generic video or forum post.
For cartridge-style filter housings, loosen the filter cap with the correct oil filter wrench. If the housing has a small drain plug, drain the housing first according to the filter kit instructions. Remove the old filter element and O-rings. Wipe the housing clean, install the new filter, and seat the new O-rings in the correct grooves.
| Step | Action |
|---|---|
| 1 | Remove the oil filter cap or old filter |
| 2 | Remove old O-rings if equipped |
| 3 | Clean the sealing surfaces |
| 4 | Lightly oil the new O-rings |
| 5 | Install the new filter and tighten to the correct spec |
Lightly coat the new O-rings with fresh engine oil before installation. This helps them seat without twisting or pinching. Do not place an O-ring in the wrong groove, and do not overtighten the filter housing.
Note: On some older Toyota cartridge systems, the larger oil filter cap torque and the small filter drain-plug torque are different. Do not use a small drain-plug spec for the main filter cap.
Refill, Run Engine, Check Dipstick, and Inspect for Leaks
Reinstall the drain plug and oil filter before adding new oil. Place a funnel in the oil fill neck and pour in less than the full listed capacity at first. For example, if your manual lists about 8 quarts, add around 7 quarts first, then check and top off gradually. This prevents accidental overfill.
Use only the oil viscosity and performance standard listed for your truck. Many Tundras specify SAE 0W-20, and newer gasoline-engine oils may list API SP and ILSAC GF-6A, but the owner’s manual is the final authority.
Refill Engine Oil
After the initial fill, reinstall the oil filler cap. Start the engine and let it idle for 30–60 seconds while watching the oil pressure warning light. Shut the engine off immediately if the warning light stays on, if you hear abnormal knocking, or if oil pours from the drain plug or filter area.
If the engine sounds normal, let it run briefly to fill the new filter. Shut it off, wait a few minutes, and check underneath for leaks.
Run the Engine Briefly
After the first leak check, let the truck sit on level ground for a few minutes so the oil can drain back into the pan. Pull the dipstick, wipe it clean, reinsert it fully, then pull it again to read the level.
Add oil in small amounts until the level reaches the safe range. Do not overfill. Too much oil can foam, increase crankcase pressure, and cause drivability or seal problems.
Check for Leaks
| Area | What to Check | Fix |
|---|---|---|
| Drain plug | Drips around washer | Verify washer and torque |
| Oil filter housing | Oil around cap or O-ring | Check O-ring placement and cap torque |
| Under cover | Oil trapped on tray | Clean before reinstalling |
| Dipstick | Low or high reading | Top off or drain excess carefully |
Once the oil level is correct and there are no leaks, reinstall the splash tray with its original fasteners. Tighten the tray bolts and screws snugly, but do not strip plastic clips or small screws.
Reset the Maintenance Reminder
After the oil change is complete, reset the maintenance reminder using the steps for your model year. The exact menu names vary, but many newer Tundras use the multi-information display or center screen settings menu. Look for a path such as Settings, Vehicle Settings, Scheduled Maintenance, or Oil Maintenance Reset.
If your truck has both a maintenance reminder and an oil maintenance reminder, reset the correct one according to the owner’s manual. Record the mileage, date, oil brand, viscosity, filter part number, and any issues you found.
Used Oil and Filter Disposal
Pour the used oil into a clean, leak-proof container with a secure cap. Keep it separate from coolant, brake fluid, gasoline, solvents, and other chemicals. Drain the old filter according to local rules, bag it if needed, and take both the oil and filter to a recycling center, auto parts store, service facility, or municipal hazardous-waste site that accepts used motor oil.
Warning: Do not dump used motor oil on the ground, into a storm drain, into a sink, or into household trash. Used oil can contaminate soil and water and should be recycled through an approved collection point.
Troubleshooting After a Tundra Oil Change
If something feels wrong after the oil change, do not ignore it. Use this quick troubleshooting guide before driving far.
| Problem | Likely Cause | What to Do |
|---|---|---|
| Oil leak at drain plug | Old washer, loose plug, damaged threads | Replace washer, verify torque, inspect threads |
| Oil leak at filter | Pinched O-ring, loose cap, double gasket | Remove, inspect, reseat, and retighten correctly |
| Oil light stays on | Low oil, wrong filter, no oil pressure | Shut engine off immediately and inspect |
| Dipstick reads high | Overfilled oil | Drain small amounts until level is correct |
| Burning oil smell | Spilled oil on exhaust or skid plate | Clean residue and recheck for active leaks |
| Stuck filter cap | Overtightened or wrong tool | Use the correct cap wrench; avoid cracking the housing |
Frequently Asked Questions
Can I recycle used oil, and where should I take it?
Yes. Put used oil in a clean, leak-proof container and take it to a used-oil collection point, auto parts store, service shop, recycling center, or municipal hazardous-waste facility. Call first because accepted amounts and filter rules vary by location.
How often should I change oil if I tow with my Tundra?
Follow the severe-service schedule in your owner’s manual if you tow often, haul heavy loads, idle for long periods, drive off-road, or operate in dusty or extreme temperatures. Many Toyota schedules still include 5,000-mile or 6-month inspections, even when normal oil replacement is longer.
Is synthetic oil required for newer Toyota Tundra engines?
Use the oil listed in your owner’s manual. Many newer Tundras call for 0W-20 oil that meets modern gasoline-engine oil standards such as API SP and ILSAC GF-6A. Toyota Genuine Motor Oil or an equivalent oil meeting the required specification is the safest choice.
Can I change Tundra oil without a lift or ramps?
Yes, if you can safely reach the drain plug and filter. If you need more room, use a proper jack and jack stands on level ground. Never work under the truck with only a jack holding it up.
What torque spec should I use for the drain plug and oil filter cap?
Use the torque spec for your exact model year, engine, and filter design. Many older Tundra drain plugs are commonly listed around 30 ft-lb, and some cartridge-style filter caps are listed differently from the small filter drain plug. Verify with the factory service information before tightening.
How much oil does a Toyota Tundra take?
It depends on the year, engine, and whether the filter is changed. Do not rely on a single number from a generic guide. Check the owner’s manual, add slightly less than the listed capacity at first, run the engine, let it settle, and finish by the dipstick.
Conclusion
A clean Toyota Tundra oil change comes down to preparation, safety, and accuracy. Confirm the correct oil and capacity, support the truck properly, replace the washer and O-rings, tighten fasteners to the right spec, refill gradually, and check carefully for leaks. Once the dipstick reads correctly and the maintenance reminder is reset, record the service and recycle the used oil properly.
Sources
- Toyota Owners Manuals & Warranties — official owner’s manual lookup for model-specific oil and maintenance data.
- Toyota Support: Synthetic Oil Change Intervals — Toyota guidance on 0W-20 synthetic oil intervals.
- NHTSA Recall Lookup — VIN-specific safety recall checks.
- Toyota USA Newsroom: Tundra Recall Notice — recall information for certain Toyota and Lexus V35A-equipped vehicles.
- U.S. EPA: Managing, Reusing, and Recycling Used Oil — proper used-oil handling and recycling guidance.
- American Petroleum Institute: Latest Oil Categories — API SP and ILSAC GF-6 oil-category background.